When I first decided to build a DIY horizontal fence, I had no idea how much it would transform the look of my property. Unlike the typical vertical fences you see in most backyards, a horizontal fence adds a unique, modern touch that really stands out. Plus, if done correctly, it's both affordable and durable. Throughout this journey, I've learned a lot about what works and what doesn't.
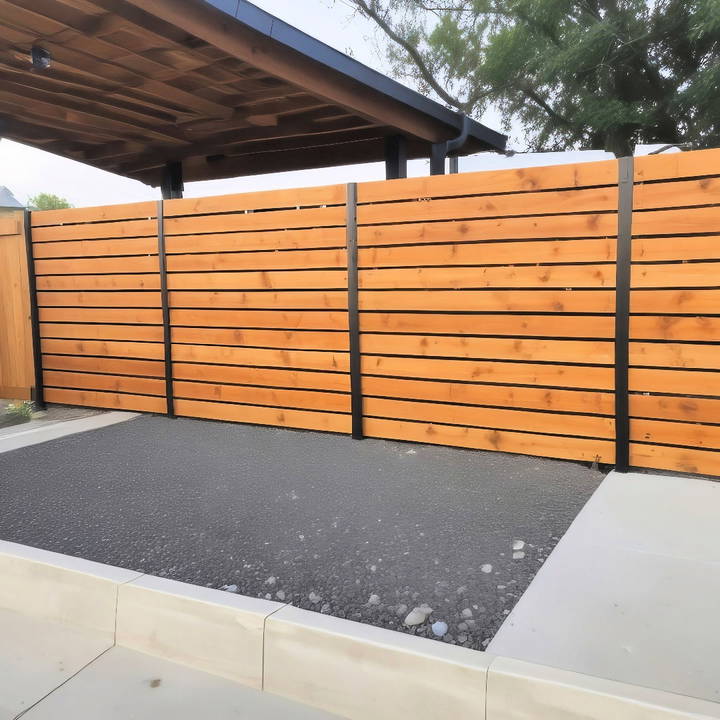
Today, I'll walk you through every step of the process, sharing my experiences and insights to help you build a beautiful and long-lasting DIY horizontal fence.
Understanding the Basics of Horizontal Fencing
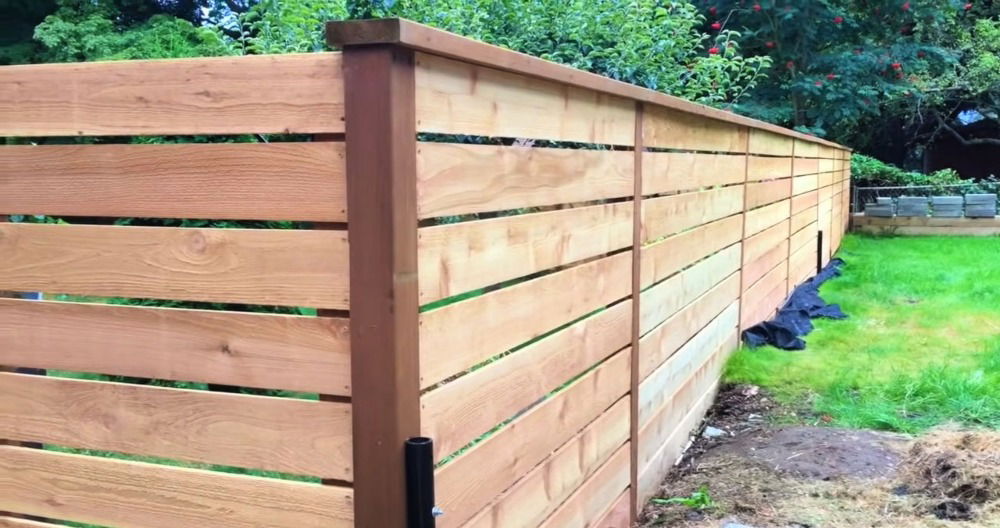
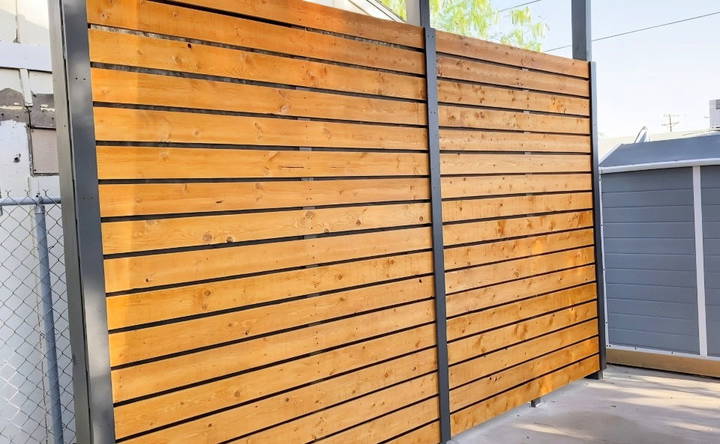
Before diving into the construction, let's lay some groundwork. A horizontal fence, as the name suggests, uses boards placed horizontally rather than vertically. This approach not only provides a fresh aesthetic but also has practical benefits. By adjusting the spacing between boards, you can control privacy and airflow. For my project, I wanted a modern look that was also budget-friendly, so I opted for pine boards, which are much cheaper than cedar but still offer a great appearance.
Materials You'll Need
When preparing to build your horizontal fence, having the right materials is key. Here's what I used, and why I chose them:
- 4x4 Posts: These are the backbone of your fence. I went with Douglas fir instead of pressure-treated wood because it was cheaper, and the Arizona climate I live in doesn't demand the extra treatment. Depending on your soil type, you'll want to dig your post holes 2 to 3 feet deep.
- 1x6 Boards (Common Pine): For the horizontal slats, I chose pine boards. They're about half the price of cedar, which is a popular choice for its durability. Pine boards also have a rough edge that holds more stain or paint, which was a bonus.
- Cement: This is crucial for securing your posts. If you don't have a cement mixer, a wheelbarrow works just fine. It takes a bit more effort, but unless you're setting dozens of posts, it's manageable.
- GRK Fasteners (1-5/8 inches): These screws are designed not to crack your wood, which means you don't have to pre-drill holes—a huge time saver.
- Gravel: A shovel full of gravel at the bottom of each post hole helps with drainage and extends the life of your posts.
- Kilz Primer: To add extra protection against mold and rot, I coated the bottom of each post with Kilz primer. I'm not entirely sure how much of a difference it makes, but it definitely doesn't hurt.
Step by Step Instructions
Learn how to build a DIY horizontal fence with our step-by-step instructions. It is the perfect guide for setting posts, installing boards, and adding finishing touches.
Step 1: Setting Up Your Fence Posts
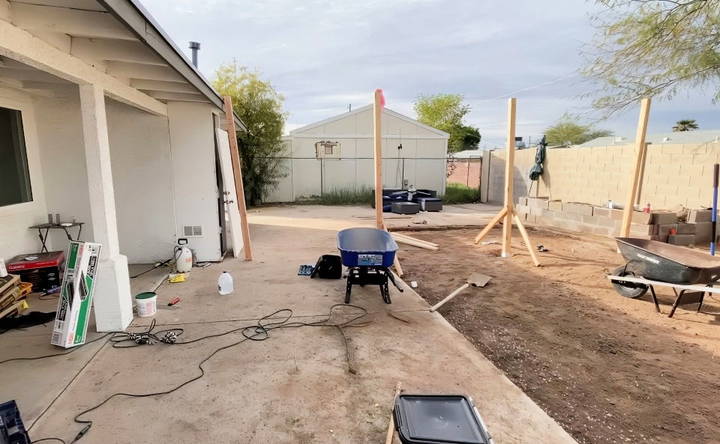
The placement of your fence posts is critical for both stability and aesthetics. For my fence, I had to deal with two different property lines, so I anchored one side to a block wall and the other side to a house. Each setup will be unique, but here's a universal tip: make sure the spacing between each post is consistent, typically between 6 to 8 feet apart, depending on the length of your boards.
- Marking Your Post Locations: I used a string line to ensure my fence was straight. It doesn't have to be perfect, but the closer to straight, the better. After marking the spots, I dug the holes 2-3 feet deep.
- Securing the Posts with Cement: Once the holes were ready, I placed the posts, leveled them with a post level, and filled them with cement. It's important to keep adjusting the post while the cement is wet to make sure it stays level. Allow 24 hours for the cement to cure fully.
Step 2: Installing the Horizontal Boards
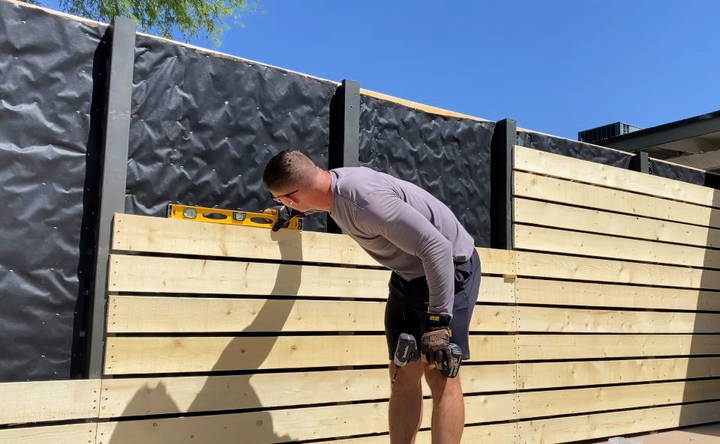
After the posts were set and the cement cured, I was excited to start installing the boards. I began at the bottom and worked my way up, making sure each board was perfectly level.
- Start from the Bottom: The bottom board is crucial. It sets the foundation for the rest of the fence. One important tip I learned is not to let the bottom board touch the ground—it will rot much faster. Instead, find the highest point on the ground, measure about half an inch up from there, and that's where your bottom board should start.
- Spacing the Boards Evenly: I cut a small piece of a 1x6 board to use as a spacer between each horizontal board. This ensured that the gaps were uniform. I found that working in sections of about four rows at a time helped me keep everything aligned.
Step 3: Adding Finishing Touches
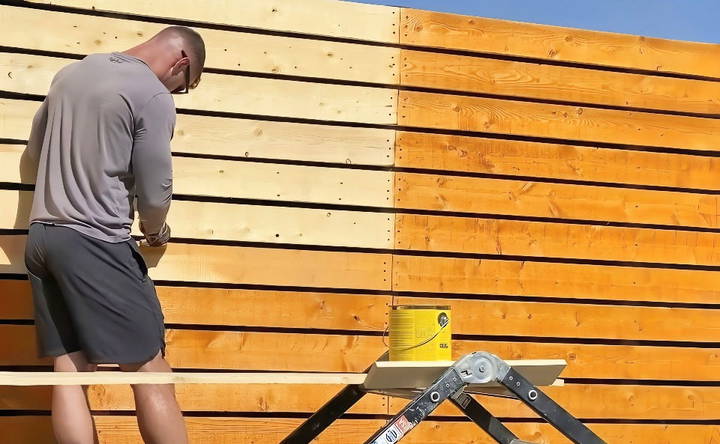
For a professional look, adding trim and staining the fence can make a world of difference. I painted the 4x4 posts black for contrast and used Australian Timber Oil in a teak color for the boards. On the other side, I went with a natural finish.
- Choosing the Right Stain or Paint: Different finishes can build entirely different vibes. I experimented with a few colors and eventually settled on the ones that best complemented my surroundings. My favorite black for the trim was Iron Ore—it has a rich depth that stands out beautifully in sunny climates.
- Applying Wood Filler and Paint: On one side of the fence, I tried using wood filler over the screws before painting, but this was more hassle than it was worth. In retrospect, I would simply apply an extra coat of paint over the screws.
Step 4: Preventing Future Issues
One challenge I faced after some time was the natural warping of the boards. Wood, especially pine, can warp as it dries. To counteract this, I added a 2x4 support between the 4x4 posts midway up the fence. This simple step can significantly reduce warping over time and keep the boards straight.
- Using Landscaping Fabric for a Sleek Look: For a seamless appearance, I used landscaping fabric stapled behind the boards. This provided a clean backdrop that was also breathable, allowing wind to pass through without causing damage.
Creative Ideas and Enhancements
Enhancing your DIY horizontal fence can make it not only functional but also a beautiful addition to your outdoor space. Here are some creative ideas to consider:
Lighting
- Incorporate Lighting: Adding lighting to your fence can build a warm and inviting atmosphere. Consider using solar-powered lights, which are energy-efficient and easy to install. You can place these lights along the top of the fence or attach them to the posts. String lights are another great option, providing a cozy, festive look.
Landscaping
- Enhance with Landscaping: Landscaping around your fence can significantly improve its appearance. Planting shrubs, flowers, or climbing plants like ivy or jasmine can add color and texture. You can also build a garden bed along the base of the fence. This not only beautifies the area but also helps to integrate the fence into your garden seamlessly.
Decorative Elements
- Add Decorative Elements: Personalize your fence with decorative elements. Hanging planters can add a touch of greenery and are perfect for small spaces. You can also attach trellises to the fence for climbing plants. Another idea is to add outdoor artwork or decorative panels, which can serve as focal points and add visual interest.
Functional Enhancements
- Functional Enhancements: Consider adding functional elements to your fence. For example, you can install shelves or hooks for garden tools, building a practical storage solution. If you have children, you might add a chalkboard section for them to draw on. These enhancements can make your fence more than just a boundary, turning it into a useful part of your outdoor space.
Privacy and Wind Protection
- Increase Privacy and Wind Protection: If privacy is a concern, you can add additional slats or panels to reduce gaps. For wind protection, consider installing windbreaks or planting tall, dense shrubs along the fence line. These additions can make your outdoor space more comfortable and private.
Seasonal Decorations
- Seasonal Decorations: Change the look of your fence with the seasons. For example, you can hang wreaths or garlands during holidays, or add seasonal flowers and decorations. This keeps your outdoor space looking fresh and festive throughout the year.
Enhance your DIY horizontal fence with creative ideas to boost its appeal and function, adding a unique and personal touch to your outdoor space.
Maintenance Tips
Proper maintenance of your DIY horizontal fence ensures it remains attractive and functional for years. Here are some practical tips to help you keep your fence in top condition:
Routine Cleaning
- Regular Cleaning: Clean your fence regularly to prevent dirt and grime buildup. Use a garden hose to rinse off dust and debris. For a deeper clean, mix mild soap with water and scrub the fence with a soft brush. Rinse thoroughly to remove any soap residue.
Inspect for Damage
- Regular Inspections: Periodically inspect your fence for any signs of damage. Look for loose or broken slats, rust on metal parts, and any signs of rot or insect damage on wooden fences. Early detection of issues can prevent more significant problems later.
Repair and Replace
- Timely Repairs: Address any damage promptly. Replace broken or damaged slats and tighten any loose screws or nails. For wooden fences, replace any rotting sections to maintain structural integrity. If you notice rust on metal parts, sand it off and apply a rust-resistant paint.
Protect from Weather
- Weather Protection: Protect your fence from the elements. For wooden fences, apply a weatherproof sealant or stain every few years to prevent water damage and UV fading. Metal fences can benefit from a coat of rust-resistant paint. This helps extend the life of your fence and keeps it looking new.
Prevent Plant Overgrowth
- Control Vegetation: Keep plants and vines from overgrowing on your fence. While some climbing plants can enhance the look of your fence, they can also cause damage if left unchecked. Trim back any overgrowth regularly to prevent it from weakening the structure.
Seasonal Maintenance
- Seasonal Care: Adjust your maintenance routine based on the season. In the fall, clear away leaves and debris that can trap moisture against the fence. In winter, check for any damage caused by snow or ice. Spring is a good time for a thorough inspection and any necessary repairs.
Pest Control
- Pest Prevention: Protect your fence from pests. For wooden fences, consider using a pest-resistant wood or applying a pest control treatment. Regularly check for signs of termites or other insects and take action if needed.
Keep It Painted
- Maintain Paint and Finish: If your fence is painted, keep the paint in good condition. Touch up any chipped or peeling areas to prevent moisture from seeping in. A fresh coat of paint every few years can keep your fence looking vibrant and new.
Maintain your DIY horizontal fence to keep it beautiful and durable for years. Regular care and repairs ensure long-lasting enjoyment.
FAQs About DIY Horizontal Fences
Find answers to FAQs about DIY horizontal fences, covering installation, materials, cost, and design tips to help you build the perfect fence.
Planning the layout involves several steps:
Measure your yard: Determine the length and height of the fence.
Mark the post locations: Use stakes and string to outline where the posts will go.
Check for underground utilities: Call your local utility company to avoid hitting any lines.
Decide on the spacing: Typically, posts are spaced 6-8 feet apart.
To ensure your fence is level and straight:
Use a string line: Stretch a string between the posts at the desired height.
Check with a level: Use a carpenter’s level to ensure each board is straight.
Adjust as needed: Make small adjustments to keep the boards aligned.
Maintaining your horizontal fence involves:
Regular inspections: Check for damage or wear.
Cleaning: Wash the fence with a mild detergent and water.
Staining or painting: Reapply stain or paint every few years to protect the wood.
Repairing damage: Replace any damaged boards or posts promptly.
Horizontal fences offer several advantages:
Modern aesthetic: They provide a sleek, contemporary look that can enhance your property's curb appeal.
Privacy: Horizontal boards can be spaced closely together, offering better privacy.
Durability: The horizontal design can be more resistant to wind damage as it allows wind to pass through more easily.
Versatility: You can use various materials and finishes to match your home's style.
Yes, you can build a horizontal fence on a slope by using the stepped method or the racked method:
Stepped method: This involves building the fence in sections that step down the slope, building a stair-like appearance.
Racked method: This involves angling the fence panels to follow the slope, building a smooth, continuous line. Both methods require careful planning and measurement to ensure the fence remains level and secure.
Lessons Learned and Final Thoughts
Building a DIY horizontal fence was a rewarding project that transformed the look of my property. It's not without its challenges, but I encourage anyone considering it to take the plunge. Even if things don't go perfectly, you'll gain valuable experience and have a story to tell.
One final tip: if you're installing a fence that has to look good on both sides (like mine, which separates two properties), think ahead about maintenance and repairs. It can be a hassle to access the back of a fence if issues arise, so plan accordingly. And remember, the best part of any DIY project is the satisfaction of knowing you built something with your own hands.


