Building a cheap DIY lattice fence can be a fun and simple project. I remember the day I decided to add a little charm to my backyard. I wanted something that looked nice but wouldn't cost a fortune. Choosing a lattice was an easy decision because it's affordable and allows sunlight to reach my plants. I gathered my tools and made a plan to build a beautiful, welcoming space.
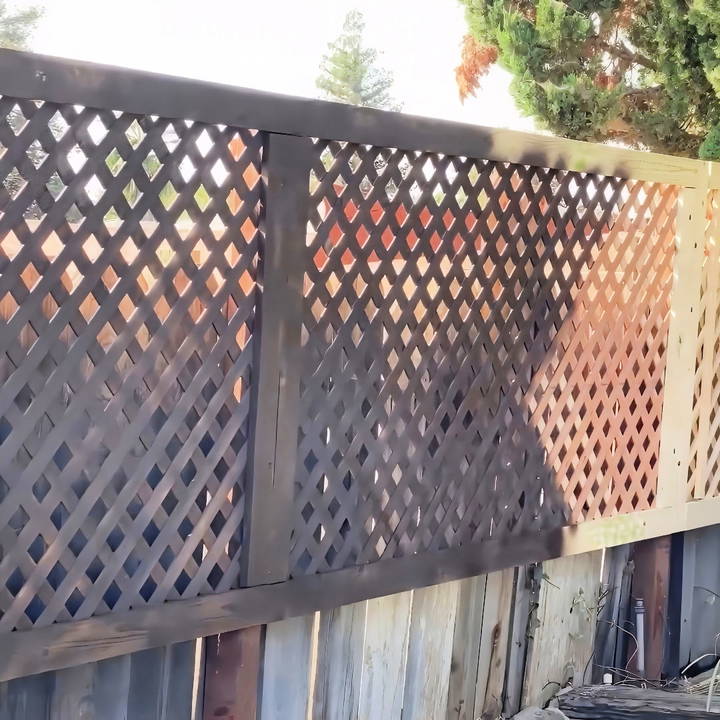
Starting this project felt exciting. I bought wooden slats and some nails from the local store. I measured my yard carefully to know how much I needed. With some help from friends, we cut the wood and put the pieces together. I added some paint to give it a fresh look. Seeing the fence stand tall made me proud. If I can build a lattice fence, I know you can, too. I'm sharing this to help you get started with your own project.
Materials Needed
- 4x4 Pressure-Treated Wood: These posts serve as sturdy anchors for the lattice panels. They're designed to withstand adverse weather conditions, ensuring longevity.
- 4x8 Sheet of Lattice: The core material that will provide privacy once installed.
- 1x4 Wood Slats: Used for framing the lattice, adding stability and a polished look.
- Craftsman V20 Circular Saw & Impact Driver: For cutting and fastening. Battery-operated tools are convenient and powerful.
- Craftsman V20 Cordless 18 Gauge Brad Nailer: A hassle-free tool for connecting the framing slats.
- Spax's Power Lag Wood Screws: These ensure a secure attachment to the fence, featuring a low-profile head that blends well.
- Rust-Oleum's Painters Touch Ultra Spray Paint: I chose an espresso color to match existing yard features. This paint also acts as a primer, saving time.
Step by Step Instructions
Learn to build a DIY lattice fence with our step-by-step guide. From preparing and installing posts to painting the panels, follow our easy instructions.
Step 1: Preparing the Posts
I started by clamping down a 4x4 pressure-treated post to a pair of sawhorses. Measuring and marking at seven feet, I aimed for this height for my overall fence line. Using the Craftsman V20 circular saw made cutting through the wood a breeze. The choice of pressure-treated wood is crucial for its resilience against rot and pests, ensuring my privacy screen endures through seasons.
Step 2: Installing the Posts
After cutting, I positioned the posts along my existing fence, marking where each would be anchored. Drilling through the post for the screws, I opted for a countersink bit so that the fastener bolt sits flush against the wood, resulting in a cleaner look. Securing each post with the V20 impact driver confirmed their stability. The entire span of my project was about 30 feet, requiring a few posts to be set up at strategic intervals.
Step 3: Assembling the Lattice Panels
With the 4x8 lattice sheets at hand, I framed them using 1x4 slats. The Craftsman V20 cordless brad nailer made assembling the frames remarkably smooth. For simplicity, I made straight cuts on the wood, though I've considered experimenting with 45-degree angles in the future for a more sophisticated finish.
Step 4: Preparing the Panels for Mounting
Drilling pilot holes and then countersinking them into the frames, I readied the panels to be mounted onto the posts with Spax's power lag wood screws. These screws are especially great for outdoor projects due to their durability and the subtle appearance of their washer head.
Step 5: Painting the Panels
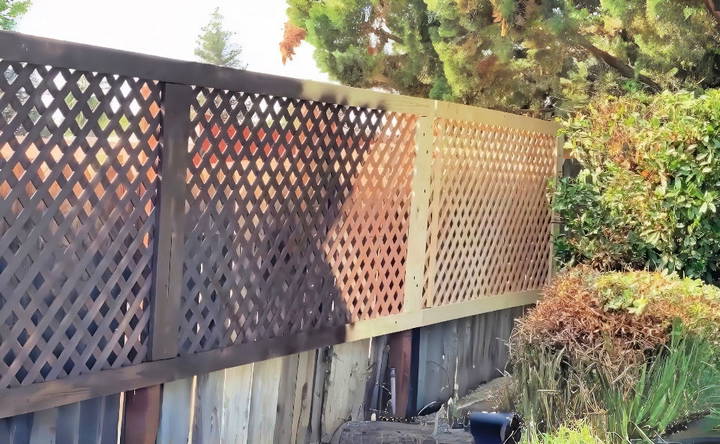
Opting for Rust-Oleum's Painter's Touch Ultra in espresso, I matched the new lattice to my existing raised flower bed. This paint also doubled as a primer, which is a time-saver. Fastened the spray can to a comfort grip for an even application, working my way systematically across the panels. The satisfaction of transforming the wood into a beautifully painted component of my backyard privacy fence was immense.
Design Customization Ideas for Your Lattice Fence
A lattice fence adds a personal touch to your garden or yard. It's more than a boundary; it's a creative canvas. Here are some design ideas to make it stand out:
- Choose the Right Material: Lattice fences can be made from various materials, including wood, vinyl, and metal. Each has its own aesthetic and maintenance requirements. For a classic look, wood is unbeatable, but if you're looking for something that requires less upkeep, vinyl might be the way to go.
- Paint and Color: A fresh coat of paint can transform your fence. Consider colors that complement your home's exterior or go bold with a contrasting shade. For a more natural look, stains can enhance the wood's grain.
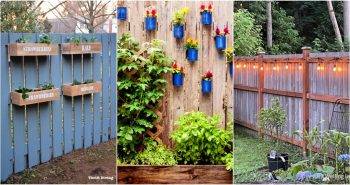
- Incorporate Plant Life: One of the most popular ways to customize a lattice fence is to intertwine plants through the slats. Climbing flowers like clematis or jasmine add a splash of color and fragrance. For a more structured look, ivy or climbing roses can build a lush green backdrop.
- Add Decorative Elements: Attach decorative pieces such as star-shaped cutouts or customized plaques to make your fence unique. These can reflect your interests or the character of your garden.
- Integrate Lighting: String lights or solar-powered lanterns can be woven through the lattice, providing a warm glow in the evenings. This not only adds to the ambiance but also allows you to enjoy your garden after dark.
- Mix and Match Patterns: Lattice comes in various patterns and sizes. Don't be afraid to mix different styles for a dynamic look. A tighter weave provides more privacy, while a larger pattern can be more decorative.
- Functional Add-Ons: Consider adding shelves or hooks to your lattice fence for practical purposes. They can hold garden tools, bird feeders, or decorative items.
- Seasonal Decorations: Your lattice fence can be a seasonal display. Hang wreaths, lights, or other decorations to celebrate holidays and change them throughout the year.
Design a lattice fence that is both functional and reflective of your personal style. Select options that complement your home and garden.
Troubleshooting Common Problems with Your Lattice Fence
Even the sturdiest lattice fences can encounter issues over time. Here are some common problems and practical solutions:
Sagging or Warping
If your lattice fence starts to sag or warp, it can compromise its appearance and functionality. Here's what you can do:
- Reinforce Posts: Check the fence posts for stability. If they're loose, reinforce them by adding concrete around the base or using metal post anchors.
- Replace Damaged Slats: If individual slats are sagging or warped, replace them with new ones. Properly secure them to prevent future issues.
Rotting Wood
Wood lattice fences are susceptible to rot, especially if they're exposed to moisture. To address this:
- Inspect Regularly: Regularly inspect your fence for signs of rot. Pay attention to areas near the ground or where water tends to accumulate.
- Treat with Wood Preservative: Apply a wood preservative or sealant to protect against moisture. Focus on the bottom portion of the fence where rot is most likely to occur.
Insect Damage
Termites and other insects can wreak havoc on wooden lattice fences. Here's how to tackle this problem:
- Professional Inspection: If you suspect insect damage, consult a professional. They can assess the extent of the issue and recommend treatment.
- Preventive Measures: Use pressure-treated wood or apply insect-repellent treatments during installation. Regularly inspect for signs of infestation.
Fading Paint or Stain
Over time, the paint or stain on your lattice fence may fade. To maintain its appearance:
- Repaint or Restain: Periodically refresh the paint or stain. Sand any rough spots before applying a new coat.
- Choose Quality Products: Invest in high-quality paint or stain that withstands outdoor conditions.
Lattice Damage
Sometimes lattice panels can break or become loose. Here's how to address it:
- Replace Damaged Panels: If a lattice panel is broken or damaged, replace it promptly. Secure it properly to prevent future issues.
- Check Nails and Screws: Inspect nails and screws holding the lattice in place. Tighten or replace any loose fasteners.
Weed Growth
Weeds and vines can grow through lattice openings. To prevent this:
- Regular Maintenance: Keep the area around your fence clear of weeds. Trim any vegetation that tries to grow through the lattice.
Discoloration
Whether due to weather or aging, lattice fences can lose their original color. Here's how to deal with it:
- Stain Refresh: If the color fades, consider restaining the lattice. Choose a shade that complements your overall outdoor design.
Proactive maintenance can extend the life of your lattice fence. Regular inspections and timely repairs will help you enjoy its beauty and functionality for years to come.
FAQs About DIY Lattice Fence
This concise FAQ guide provides answers to common questions about DIY lattice fences, from installation tips to maintenance.
A lattice fence is a decorative outdoor barrier made from wooden or vinyl panels with crisscrossed slats. These panels create a grid-like pattern, allowing air and light to pass through while providing privacy. Lattice fences are commonly used for garden enclosures, deck skirting, or as decorative accents around patios.
Installing a lattice fence involves several steps:
Measure and Plan: Determine the fence’s location and dimensions. Measure the area carefully and mark the posts’ positions.
Dig Post Holes: Dig holes for the fence posts using a post hole digger. Place the posts at regular intervals (usually 6-8 feet apart).
Set Posts: Insert the fence posts into the holes and secure them with concrete or gravel.
Attach Lattice Panels: Attach lattice panels to the posts using screws or nails. Make sure they are level and evenly spaced.
Trim and Finish: Trim any excess lattice material and add decorative caps to the posts.
You can personalize your lattice fence in various ways:
Paint or Stain: Choose a color that complements your outdoor space.
Plant Vines: Train climbing plants (such as jasmine or clematis) to grow on the lattice for added beauty.
Add Decorative Elements: Attach finials, trellises, or post caps for a unique touch.
To keep your lattice fence looking great:
Regular Cleaning: Remove dirt, leaves, and debris from the lattice using a soft brush or hose.
Repaint or Stain: Refresh the finish every few years to protect against weathering.
Inspect for Damage: Check for loose panels, rot, or insect damage and repair promptly.
Absolutely! While lattice fences are known for their decorative appeal, they can also provide privacy when used strategically. Here's how:
Lattice Toppers: If you already have an existing fence, consider adding lattice toppers. Attach lattice panels to the top of your fence to increase its height and build a privacy barrier without sacrificing aesthetics.
Partial Lattice Panels: Install lattice panels only in specific sections of your fence. For example, use lattice in the upper portion while keeping the lower part solid. This way, you maintain privacy where needed while allowing light and air circulation.
Plant Greenery: Train climbing plants (such as ivy, bougainvillea, or honeysuckle) to grow on the lattice. As the plants fill in the gaps, they build a natural privacy screen.
The Final Touches
In the end, building my DIY lattice fence was rewarding. I felt happy watching the transformation in my yard. It took time and effort, but the results were worth it. I encourage you to take the first step. Your outdoor space can be beautiful with just a little work. Let's get started on your DIY fence today!


