Growing your own grapes can be a rewarding endeavor, but to help your vines thrive, they need proper support. That's where a well-built grape trellis comes in. A trellis provides the structure necessary to guide your grapevines as they grow, ensuring better air circulation, sun exposure, and ultimately, an abundant harvest. In this guide, I'll take you through the process of building a sturdy and practical DIY grape trellis that you can set up in your backyard.
Whether you're a seasoned gardener or a beginner, this project is easy to follow and yields excellent results.
Materials and Tools Needed for the Grape Trellis
Before you begin building your trellis, gather the following materials and tools. This will ensure the project moves smoothly and without interruptions.
Materials
For this particular trellis, which is around 20 to 25 feet long and designed to support four grapevines, you'll need the following materials:
- 4 round fence posts (8 feet tall): These posts will act as the vertical supports for the trellis.
- 8 bags of concrete (60-pound each): The concrete secures the posts in place, preventing them from tilting under the weight of the vines.
- 2 eight-foot 2x4 pressure-treated boards: These will be installed horizontally to stabilize the trellis.
- 1 eight-foot 2x6 pressure-treated board: This larger board provides additional strength and rigidity at the top of the trellis.
- 200 feet of coated clothesline wire (2 rolls): The wires will support the grapevines as they grow, allowing them to climb and spread.
- 6 six-inch long carriage bolts: Used to fasten the wood to the posts, ensuring a stable connection.
- 2 eight-inch long carriage bolts: For extra support at the end posts, providing strength against the tension of the wires.
- Eye hooks (wood-threaded and threaded with nuts): These will secure the wires to the posts and allow you to tighten them as needed.
Tools
You'll also need some basic tools to complete this project:
- Post hole digger or auger
- Shovel
- Power drill and drill bits
- Speed square
- Chainsaw (optional but useful)
- Level
- Hacksaw or Sawzall (to cut excess bolts)
- Wrenches (for tightening bolts)
- Measuring tape
- Rebar (to stabilize posts)
- Hammer
Step by Step Instructions
Learn how to build a DIY grape trellis with our step-by-step guide, from preparing the area and setting posts to installing wire supports and training grapevines.
1. Preparing the Area and Digging Holes
Start by selecting a location for your grape trellis. Grapes need plenty of sunlight, so make sure the area receives at least 6-8 hours of direct sunlight daily. Once you've found the perfect spot, follow these steps:
- Mark out the area where you want to install the trellis. Measure a distance of around 20 to 25 feet in length to accommodate four grapevines.
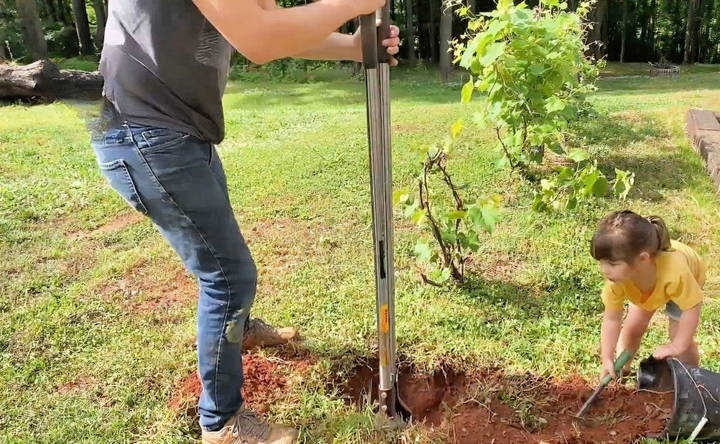
- Dig four holes for the fence posts. Use a post-hole digger or auger to dig down about two feet. This will leave six feet of the post above ground, providing enough height for the grapevines to grow.
- Prepare the concrete. Mix your 60-pound bags of concrete according to the manufacturer's instructions. You'll need two bags of concrete for each post.
2. Setting the Posts
With the holes dug and the concrete ready, it's time to secure the posts.
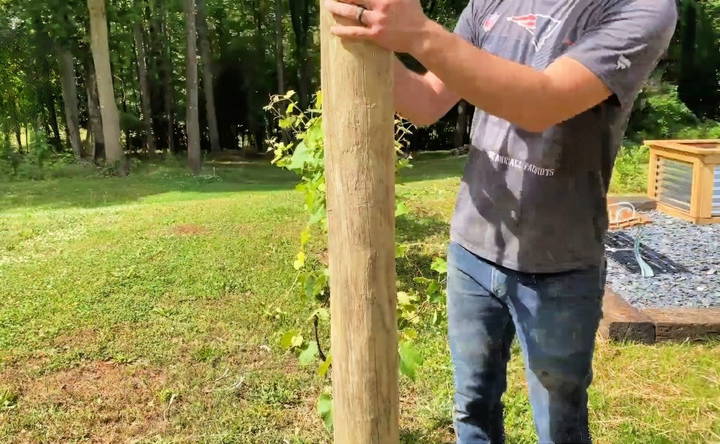
- Place each post into its respective hole. Use a level to ensure the posts are standing straight and adjust as necessary. It's important to get the posts as vertical as possible since any leaning could compromise the stability of the trellis.
- Fill the holes with concrete, almost up to the surface. This will anchor the posts in place and prevent them from shifting over time.
- Cover the top of the concrete with a layer of dirt while it's still wet. This helps keep the posts in place while the concrete sets.
- Allow the concrete to cure fully (typically around 24 to 48 hours), ensuring that your posts are firmly anchored in the ground before proceeding to the next steps.
3. Cutting and Attaching the Cross Beams
Once your posts are securely in place, it's time to attach the horizontal beams that will support the wires.
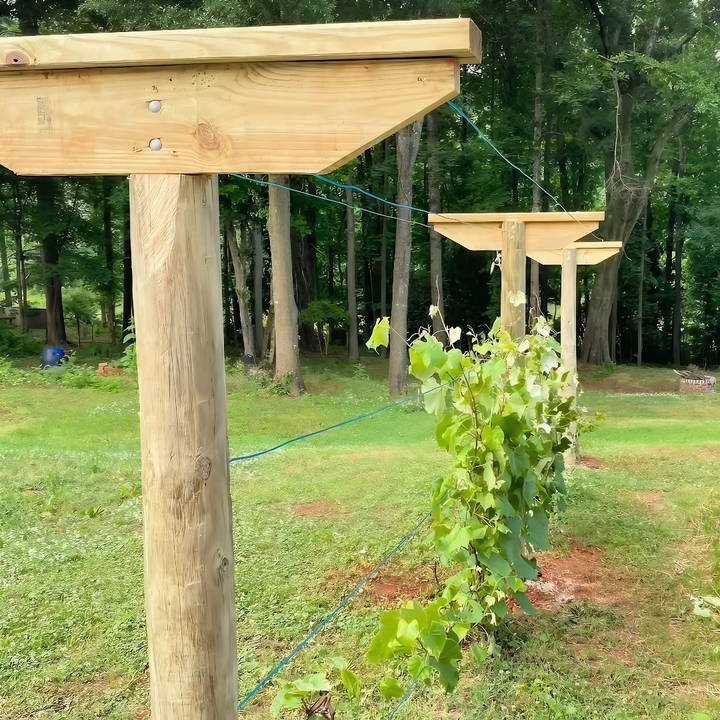
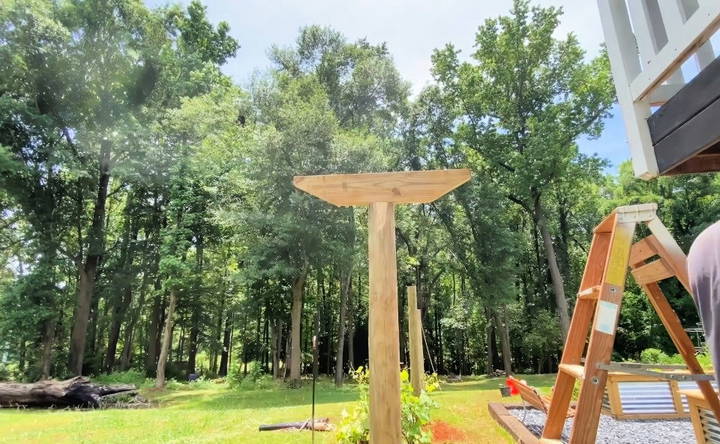
- Cut the 2x6 board into three equal pieces. This will form the horizontal supports that span the width of the trellis.
- Use a speed square to mark and cut a small angle on each end of the boards. This step is optional, but it gives the trellis a polished and professional appearance.
- Place each board on top of the posts, ensuring they're level and evenly spaced. Use a string as a guide to make sure all boards are at the same height.
- Notch out a flat section on each post with a chainsaw where the boards will rest. This builds a secure surface for the boards and keeps them from wobbling.
- Secure the boards temporarily with three-inch deck screws. These will hold the boards in place while you drill holes for the carriage bolts.
4. Drilling and Securing the Carriage Bolts
With the horizontal beams in place, it's time to make them permanent.
- Drill two holes per post, straight through the board and into the post.
- Insert carriage bolts (6-inch bolts for the top supports, 8-inch for the end posts) into the holes and tighten them with washers and nuts. This ensures the boards are securely fastened and won't shift over time.
- Trim any excess length from the carriage bolts with a hacksaw or Sawzall. This cleans up the appearance and prevents sharp edges from sticking out.
5. Reinforcing the End Posts
The end posts bear the most tension from the wires, so they require extra reinforcement.
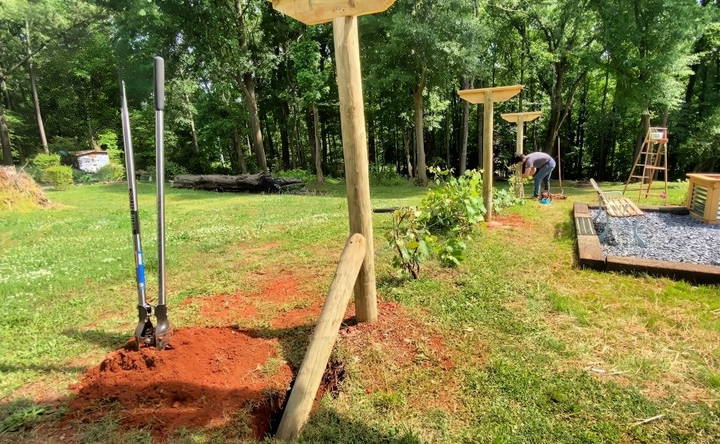
- Cut the end posts at a 45-degree angle and attach them to additional supports going into the ground.
- Drill through the end posts and secure them with an 8-inch long carriage bolt. This prevents the posts from being pulled inward as the wires tighten.
6. Installing the Wire Supports
Now that the frame of your trellis is complete, it's time to add the wires that will support your grapevines.
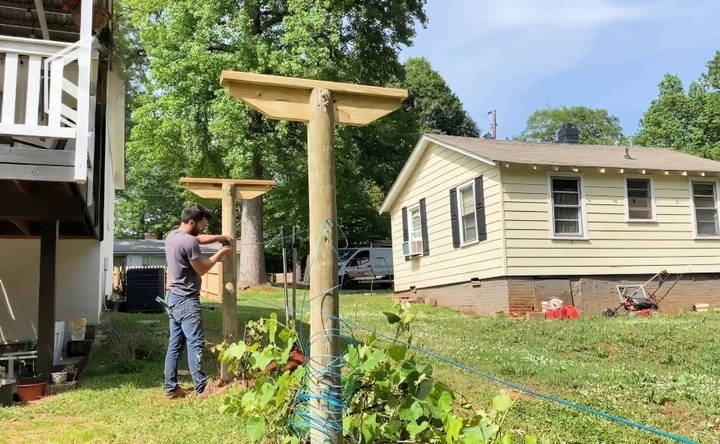
- Install the eye hooks. On one end of the trellis, use wood-threaded eye hooks that can be screwed directly into the post. On the opposite end, use threaded eye hooks with nuts to allow for future adjustments.
- Drill holes through the center posts. These holes will allow the wire to pass through, but won't bear any weight.
- Run the wire through the eye hooks, spacing them about 16 to 18 inches apart. This will provide ample room for your grapevines to grow vertically.
- Tighten the wire by twisting the ends around the hooks. Leave about six inches of excess wire to wrap around, making a spring-like shape. This prevents the wire from slipping out over time.
- Hand-tighten the nuts on the threaded eye hooks. Don't fully tighten the wires until the concrete is fully cured (about a week). Over-tightening could damage the posts or crack the concrete.
7. Final Touches
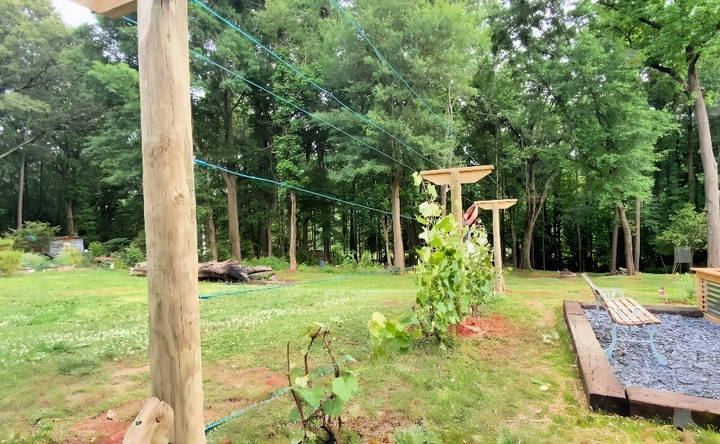
As a final step, add one last wire across the top of the trellis to build a T-shaped structure. This gives the grapevines more space to spread out horizontally as they reach the top of the trellis.
Once the concrete is fully cured, tighten the wires completely. Over time, you can make adjustments as the wires stretch or sag.
Training the Grapevines on the Trellis
With your grape trellis built, it's time to start training your vines. As your grapevines grow, carefully weave them through the wires of the trellis. Avoid handling any areas that have flowers or young grapes on them, as these are delicate and can easily be damaged.
By regularly guiding the vines through the trellis, you'll ensure that they grow in a structured manner, which not only improves their health but also makes for a beautiful display in your garden.
Conclusion
Building a DIY grape trellis is a fulfilling project that will enhance both the appearance and productivity of your grapevines. The structure you've built not only provides necessary support but also gives your grapevines room to grow tall and strong. By following this guide and taking the time to properly construct your trellis, you'll enjoy the fruits of your labor for many seasons to come.
FAQs About DIY Grape Trellis
Discover answers to the top FAQs about DIY grape trellis. Learn tips, tools, and techniques for building your own grape support structure.
Yes, you can use crusher run gravel as an alternative to concrete. This provides solid support and is easier to adjust if needed later.
The support posts are on the outside to avoid disturbing the grapevine's root base. While inside placement could provide more direct bracing, this method keeps roots undisturbed.
The rod was rebar used to anchor the posts more securely into the ground, preventing them from tipping under the weight of the vines.
Yes, turnbuckles are an excellent option for tightening the wires more easily. They allow you to adjust the tension over time as the vines grow and increase in weight.
Yes, there are simpler and more budget-friendly designs available. Searching for alternative methods used by commercial growers can provide useful ideas for a more efficient setup.
Yes, it's important to wear safety glasses when using power tools like chainsaws to protect your eyes from debris.
While it might be more expensive upfront, many enjoy the process and satisfaction of growing their own grapes. Additionally, home-growing offers freshness and self-sufficiency.


