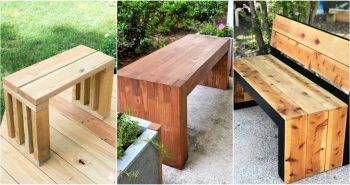
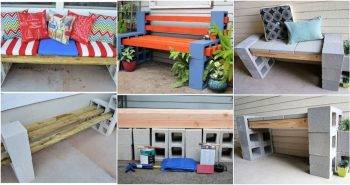
Building my own DIY garden bench was one of the most satisfying projects I have ever undertaken. I started by gathering all the necessary materials, including wood, screws, and paint. The garden bench plans I followed were straightforward, making the entire process enjoyable. I measured and cut the wood pieces, drilled holes, and assembled the parts.
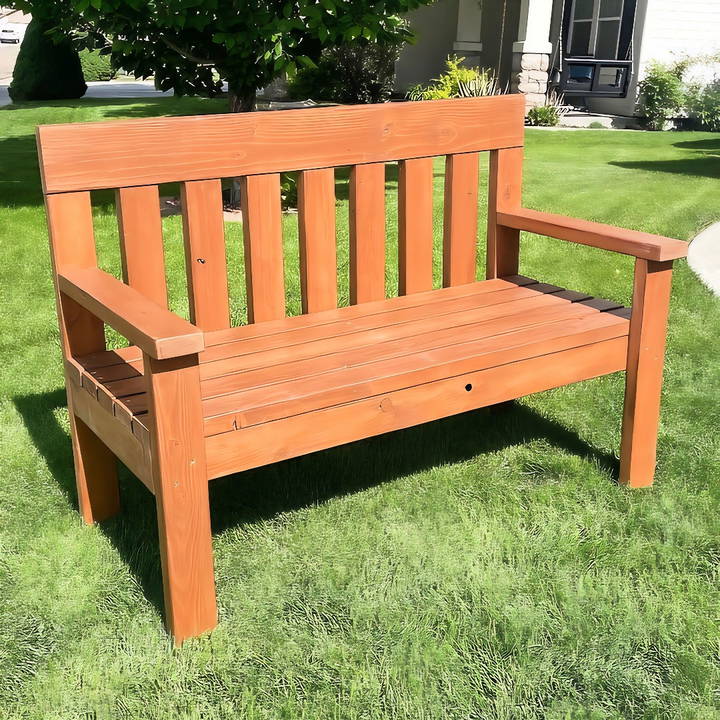
Painting the bench was the most fun part. I chose a color that matched my garden's vibe. When I finally placed the bench in my garden, I felt proud of my accomplishment. This project inspired me to start more DIY endeavors.
If you're looking for a fulfilling project, this DIY garden bench will help you build a beautiful addition to your outdoor space.
Gathering Materials
First off, materials. You'll need eight 8-foot 2x4s and one 8-foot 2x6. The rationale behind choosing these dimensions was to ensure minimal waste and to keep the costs low. At my local hardware store, all the lumber cost me just $38. Remember, the price may vary based on your location and the wood prices at the time of purchase. If you need to buy stain and screws, factor those into your budget as well. Thankfully, I had both on hand, which kept my costs down.
Step by Step Instructions
Learn how to build a DIY garden bench step by step with our guide. From cutting lumber to final touches, build the perfect bench for your garden.
Cutting the Lumber
Armed with a cut list and a sense of purpose, I started by measuring and cutting the 2x4s and 2x6 according to my plan. Precision here is key. Each piece of wood has its place in the bench, and accuracy in cutting ensures a smooth assembly later on. I used an app to plan this out, minimizing waste and ensuring I had all the right pieces.
Sanding for Smoothness
After cutting, it was time to smooth out the wood using 80 grit sandpaper. This step is crucial for two reasons: it reduces the chance of splinters and it helps the stain apply more evenly. Pay special attention to the pieces that will become the armrests; these should feel comfortable to the touch since they'll be in direct contact with skin.
Staining the Wood
I chose a waterproof stain in a chocolate color to match my mom's outdoor cushion. Staining before assembly might seem like an added step, but it ensures that every nook and cranny gets sealed, prolonging the life of the bench. Apply two coats for best results, allowing ample drying time between each.
The Assembly Process
Assembling the bench began with the seat frame. I drilled pocket holes in the necessary pieces, then pieced them together using screws. A tip I learned was to use a clamp to hold the wood steady, making the process smoother.
For the seat, I used a simple spacer made from scrap wood to keep my gaps even. It's a small detail that makes a big difference in the final look. Attaching the front legs and armrests came next, ensuring each piece was at the right height for a comfortable seating position.
The backrest required a bit of finesse, as I had to mark and attach each slat evenly across the 2x6 that served as the top. The key here is patience and precision; take your time to get it right.
Final Touches
After assembling, I made sure to stain any exposed cuts or holes to protect against moisture. Skipping this step could lead to premature wear or rot, especially in an outdoor setting.
The bench came out beautifully, and the total cost remained under $50 as planned. This project was a testament to the value of DIY: not just in savings, but in the satisfaction of making something with your own hands.
Building a garden bench from scratch required some careful planning and elbow grease, but the result was well worth it. Not only did I manage to build a sturdy, attractive piece of outdoor furniture, but I also learned new skills and gained confidence in my woodworking abilities.
Design Customization Ideas
When it comes to adding a personal touch to your DIY garden bench, the possibilities are endless. Customizing your bench not only adds character to your garden but also allows you to build a space that truly reflects your personal style. Here are some ideas to inspire your creativity:
- Choose a Theme: Start by deciding on a theme that resonates with you. It could be as simple as a color scheme that complements your garden or as intricate as a motif inspired by your favorite art movement. Whether it's rustic charm, modern minimalism, or a whimsical fairy-tale vibe, let your theme guide your customization choices.
- Paint and Color: A fresh coat of paint can transform your bench from bland to brilliant. Use weather-resistant paint suitable for outdoor furniture. Consider bright colors to add a pop of joy, or go for muted tones for a more subtle, natural look. If you're feeling artistic, why not add patterns or a mural?
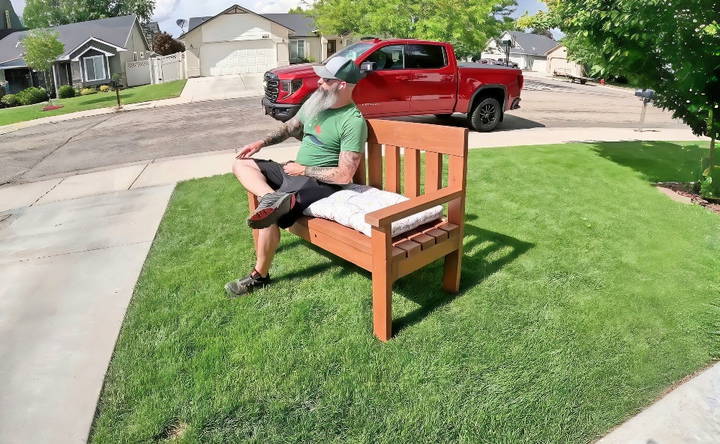
- Cushions and Fabric: For added comfort and style, sew or purchase cushions for your bench. Choose fabrics that are durable and fade-resistant. Patterns and textures can add depth to the design, and they can be easily changed with the seasons or your mood.
- Add Functional Elements: Think about how you can make your bench more than just a place to sit. Incorporate hidden storage under the seat for garden tools or toys. Add side tables or shelves to hold your coffee cup or favorite book.
- Incorporate Nature: Integrate elements from your garden into the bench design. Attach planters to the sides of the bench or use the bench as a trellis for climbing plants. This can build a living piece of furniture that changes with the seasons.
- Personalize with Accessories: Personal touches like engraved plaques, decorative hardware, or mosaic tiles can make your bench one-of-a-kind. These details can commemorate special dates, display your family name, or simply add visual interest.
- Lighting: Consider installing solar-powered lights around your bench. They can highlight the bench at night, provide safety, and build a cozy atmosphere for evening relaxation.
The key to a successful DIY project is to have fun and let your imagination run wild. Your garden bench is not just a seating area; it's a canvas for your creativity.
Landscaping Integration
Integrating a DIY garden bench into your landscaping is not just about finding the right spot; it's about making harmony between the bench and the surrounding environment. Here's how you can achieve a seamless blend:
- Select the Perfect Location: The location of your bench should offer both beauty and function. Place it where you can enjoy the best view of your garden, or where it can serve as a focal point. Ensure it's accessible and complements the flow of your outdoor space.
- Consider the Surroundings: Your bench should feel like a natural part of the landscape. Pay attention to the existing colors and textures in your garden. Position your bench near elements that echo its design, like a bed of flowers that match its color or a stone path that mirrors its lines.
- Use Natural Materials: To help your bench blend in, choose materials that are already present in your garden. If you have a stone wall, for example, incorporating stone elements into your bench design can build a sense of continuity.
- Build a Living Backdrop: Plant a backdrop of shrubs, tall grasses, or flowers behind your bench. This not only enhances privacy but also integrates the bench into the living part of your garden, making it a cozy nook.
- Add Ground Cover: Soften the space around your bench with ground cover plants. They can provide a lush, green carpet that invites you to step off the path and take a seat.
- Incorporate Lighting: Soft landscape lighting can highlight your bench and make it inviting at night. Solar lights or low-voltage landscape lights can add a warm glow without overpowering the natural moonlight.
- Think Seasonally: Choose plants that will provide year-round interest around your bench. Evergreens can offer structure in winter, while seasonal blooms add color and fragrance throughout the year.
- Mind the Scale: Make sure your bench is in proportion to its surroundings. A large bench can overwhelm a small garden, while a too-small bench might get lost in a vast landscape.
By thoughtfully integrating your garden bench into the landscape, you build a space that invites relaxation and reflection, enhancing both the beauty and functionality of your garden.
Seasonal Care and Maintenance
Taking care of your garden bench throughout the changing seasons is crucial to ensure its longevity and beauty. Here's a straightforward guide to seasonal care and maintenance for your DIY garden bench:
Spring Preparation:
- Inspect and Clean: Begin with a thorough inspection of your bench for any winter damage. Clean off any debris, mildew, or dirt using a soft brush and a mild soapy solution.
- Repair and Restore: Fix any loose screws or splintered wood. If the finish looks faded, apply a fresh coat of weather-resistant sealant or paint.
Summer Upkeep:
- Sun Protection: Just like skin, wood can suffer from too much sun. Consider applying a UV-protective finish to keep the color from fading.
- Moisture Control: Summer storms bring moisture that can harm your bench. Ensure it's properly sealed and consider adding a water-repellent treatment.
Autumn Care:
- Leaf Removal: Falling leaves can trap moisture and cause rot. Regularly brush off leaves and debris.
- Weatherproofing: Before the wet and cold season sets in, apply another layer of sealant to protect against rain and early frosts.
Winterizing:
- Cover or Store: If possible, store your bench in a shed or garage. If it must stay outside, cover it with a waterproof tarp to protect it from snow and ice.
- Check Stability: Freezing and thawing ground can shift your bench. Make sure it remains stable and level.
General Tips:
- Regular Checks: Every few weeks, give your bench a quick check-up and tighten any loose parts.
- Gentle Cleaning: Avoid harsh chemicals or pressure washers that can damage the wood. Stick to gentle cleaning methods.
- Mind the Environment: Be mindful of where your bench is placed. Avoid areas where it's constantly damp or exposed to harsh weather.
By following these simple care steps, you can enjoy your garden bench for many seasons to come. Recall a little bit of regular maintenance goes a long way in preserving your outdoor furniture.
FAQs About DIY Garden Bench
Discover the answers to your FAQs about DIY garden bench projects, including materials, tools, and step-by-step tips for making your perfect outdoor seat.
Consider the following when determining the size:
Space: Measure the area where you plan to place the bench.
Seating capacity: Decide how many people you want to accommodate.
Comfort: Ensure there is enough room for seating depth and back support.
Yes, there are many beginner-friendly plans available. Look for plans labeled as “easy” or “for beginners,” which often require minimal tools and simple construction techniques.
To increase comfort, you can:
Add cushions: Weather-resistant cushions provide extra comfort.
Adjust the angle: A slight recline in the backrest can make a big difference.
Round the edges: Smooth edges and corners to prevent discomfort.
Absolutely! Personalize your bench by:
Painting: Use outdoor paints to add color or patterns.
Carving: If you're skilled, you can carve designs into the wood.
Adding details: Incorporate elements like armrests or decorative hardware for a unique touch.
To make sure your DIY garden bench withstands various weather conditions, consider the following tips:
Choose the right materials: Opt for woods known for their durability in outdoor conditions, such as teak, cedar, or pressure-treated lumber.
Use protective finishes: Apply a sealant, stain, or paint that is formulated for outdoor use to protect the wood from moisture and UV rays.
Regular maintenance: Clean your bench periodically and reapply finish as needed to maintain its resistance to weather.
Conclusion:
Building your own DIY garden bench gives you both a functional and aesthetic piece for your garden. Try it; you might discover a new hobby and a sense of pride in making something with your own hands.


