Back in 2017, I embarked on a modest but transformative home improvement project: building a DIY garage screen door. The goal was simple but functional—quick-release, hinged doors that would guard my garage while providing easy access for larger items like our canoe. I didn't use an elaborate sewing process, which made the task more feasible for someone like me, who doesn't have sewing expertise.
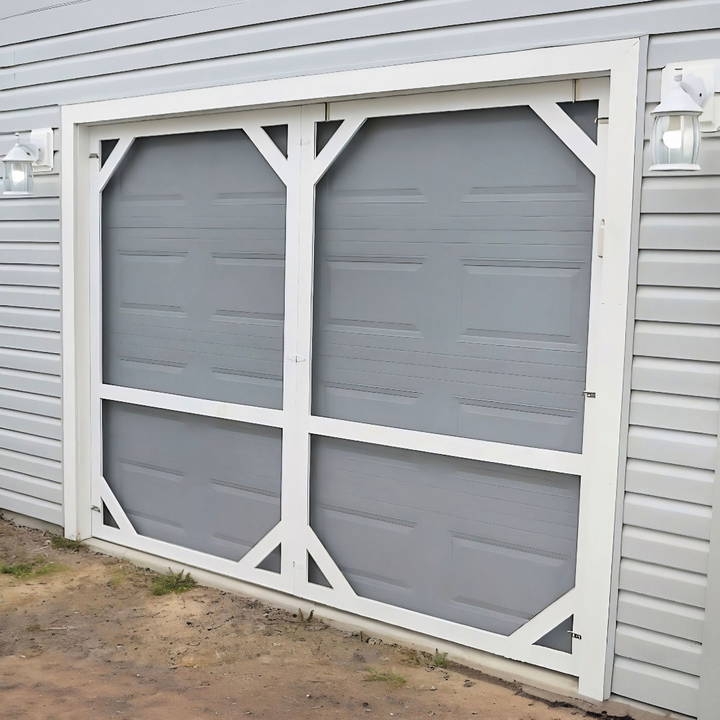
Here's a step-by-step guide to building these garage doors, imbued with the practical knowledge and insights I gained from the process.
Understanding the Purpose of Garage Screen Doors
Before diving into the construction process, it's essential to grasp why garage screen doors are such a valuable addition:
- Air Circulation: They enhance airflow, keeping your garage ventilated.
- Insect Barrier: Screen doors can prevent pesky insects from entering your workspace.
- Functional Access: With a hinged design, they allow for easy access to move bigger objects in and out.
Preparing for the Project
Discover essential materials and their uses in this guide for preparing for the project. Learn how to efficiently gather what you need.
Essential Materials and Their Uses
Gathering the right materials is the first step. Each one serves a specific purpose in ensuring the screen door is durable and effective:
- Lightweight Wood: This forms the frame of the door. Lightweight materials make it easy to handle yet robust enough to withstand everyday use.
- Spring-loaded Barrel Bolts: These are crucial for making the doors quick-release. They hold the frame securely but allow it to be removed or adjusted without difficulty.
- Deck Screws: Used for initial assembly and temporary holding; these screws are easy to handle and provide a good grip.
- Black Bolts: These bolts are excellent for permanent fixtures. They're particularly useful as they can be adjusted with a wrench, allowing for easy height alterations.
- 45-Degree Braces: Adding stability to the corners, these braces prevent the frame from tilting or becoming misaligned.
- Screen Material and Staples: The screen keeps insects out while allowing air to circulate. Staples are employed to securely attach the screen to the door frame.
- Drill and Drill Bits: For making precise holes for the bolts and screws, ensuring everything aligns perfectly.
- Sandpaper or Sander: To smooth the edges and surfaces of the wooden frame before painting.
- Paint: Protects the wood and bolts, adding an aesthetic finishing touch to your project.
Now that we understand why each material is crucial, let's dive into the construction process.
Step by Step Instructions
Learn how to build your DIY garage screen door with our step-by-step instructions. From building the frame to final testing, master every step with expert tips.
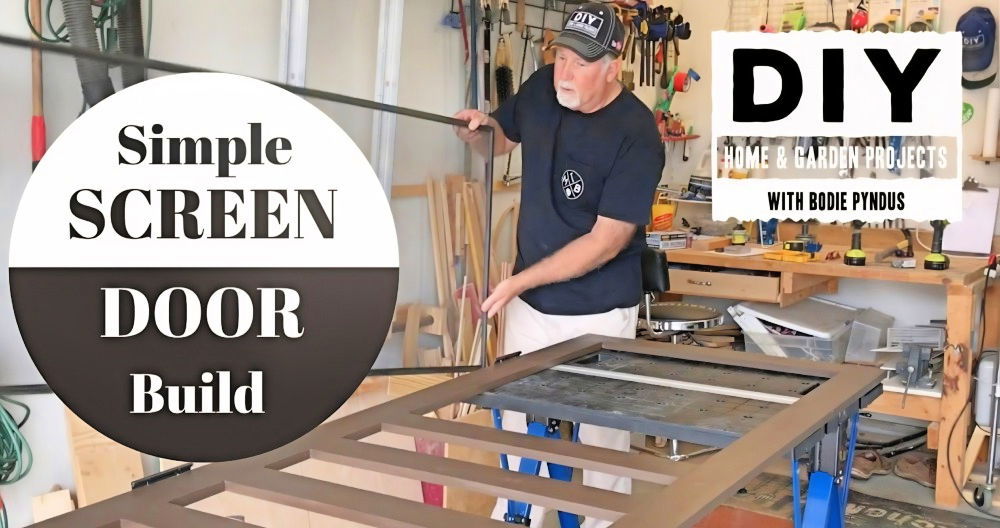
Step 1: Building the Frame
Learn how to build a sturdy frame by measuring and cutting wood precisely and assembling all parts together with ease. Perfect tutorial for DIY enthusiasts!
Measuring and Cutting Wood
- Measurement: With a standard garage size in mind, I opted for doors that were 83 inches high. This height was calculated to leave minimal gaps and provide the necessary clearance at the bottom.
- Cutting the Boards: I doubled the boards at the edges to match the exact width of the door. This step ensures that even when a cut is made down the center, the balance is maintained.
Assembling the Frame
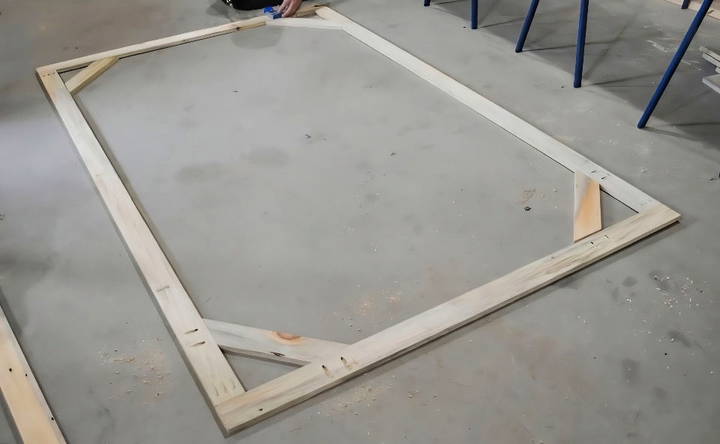
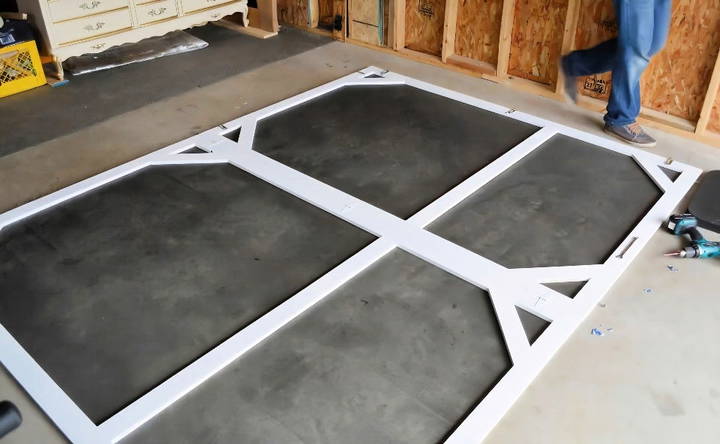
- Using Pocket Holes: Drill pocket holes along the edges of the frame pieces. This technique allows for a seamless connection that is both sturdy and easy to set up.
- Emphasizing Stability: After attaching the main structure, I noticed that without additional support, the frame was somewhat flimsy. To rectify this, I added 45-degree braces to each corner, dramatically improving stability.
Step 2: Installing Hardware
Learn how to install hardware and add quick-release mechanisms efficiently. Follow these steps for a seamless and secure installation.
Adding Quick-Release Mechanisms
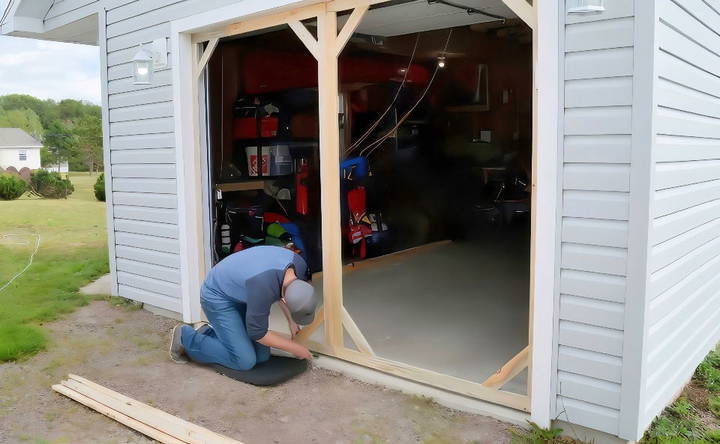
- Spring-loaded Barrel Bolts: Install these on the sides of the frame. They are designed to fit into pre-drilled holes in the garage walls, making it easy to secure and release the doors whenever necessary.
- Adjusting with Black Bolts: At the bottom, black bolts provide the ability to adjust door height. This feature is especially useful if the garage floor isn't perfectly even.
Step 3: Sanding and Priming
Smooth edges aren't just about aesthetics—they also prevent splinters and ensure paint adherence:
- Sanding the Surface: Use sandpaper or a sander to finish the wood's surface. Pay special attention to edges and corners.
- Applying Primer and Paint: Once sanded, cover the frame in a protective coat of primer followed by paint. This will not only enhance durability but ensure the screen doors fit aesthetically with the rest of the home's design.
Step 4: Attaching the Screen
Learn the stapling technique for attaching the screen. Follow our step-by-step guide for a secure, durable screen attachment. Efficient & easy!
Stapling Technique
- Securing the Screen: Lay the screen material over the frame and use staples to secure it firmly. Start in the middle of one side and work outwards to avoid tension-induced wrinkles.
- Finishing Touches: Ensure the screen is taut but not overly stretched, as too much tension can cause tearing with seasonal changes.
Step 5: Final Assembly and Testing
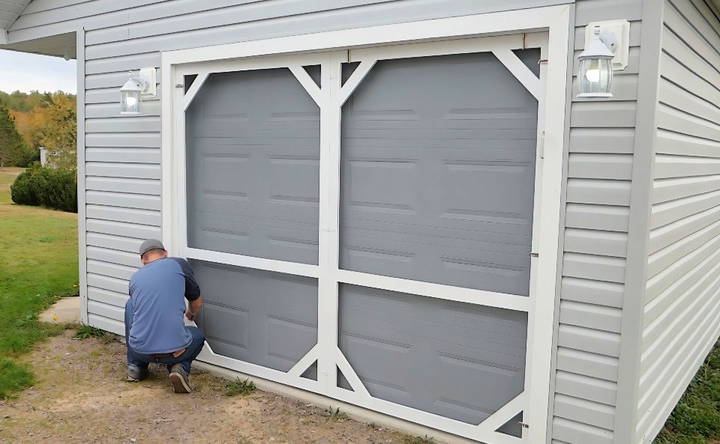
Once painted and dried, insert the completed doors into their respective positions, adjust as necessary using the bottom bolts, and ensure everything functions smoothly:
- Testing Quick-Release: Try removing and re-securing the doors using the barrel bolts to ensure functionality.
- Fit Assessment: Check for any gaps or misalignments and rectify these by making minor adjustments with the black bolts.
Insights from My Experience
Unlock insights from my experience with tips for success and avoid common pitfalls. Perfect guide for personal and professional growth.
Avoiding Common Pitfalls
When embarking on DIY projects, learning from mistakes is crucial. Two common issues I encountered were:
- Misaligned Cuts: Initially, my cuts weren't always precise, which led to slight gaps. Re-checking measurements before cutting is a good habit to have.
- Underestimating Weather Impact: Over time, the wood can warp due to humidity. Choosing treated or seasoned wood can mitigate this.
Tips for Success
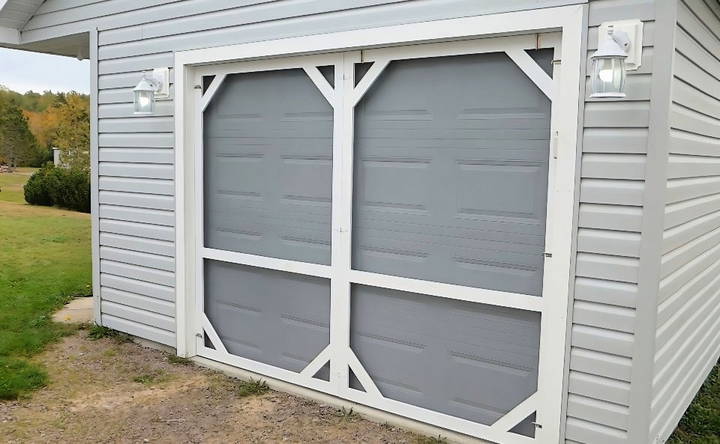
- Stay Patient: Each step may require revisiting and patience, especially when things don't align perfectly the first time.
- Adapt to Your Space: Measurement and fitting depend heavily on the specific dimensions of your garage, so adjustments are often necessary.
Customization Ideas
Customizing your DIY garage screen door can add a personal touch and enhance its functionality. Here are some easy and creative ideas to get you started:
Design Variations
- Decorative Elements: Stencils and paint: use stencils to add patterns or designs to the screen door frame. Choose weather-resistant paint to ensure durability. Vinyl decals: apply vinyl decals to the screen for a unique look. These are easy to apply and remove, allowing for seasonal changes.
- Screen Materials: Pet-resistant screens: if you have pets, consider using a pet-resistant screen. These are more durable and can withstand scratches. Solar screens: opt for solar screens to reduce heat and glare inside your garage. They also provide added privacy.
Color and Finish Options
- Frame Colors: Matching exterior: paint the frame to match your garage or home exterior. This builds a cohesive look. Contrasting colors: use contrasting colors for a bold statement. For example, a black frame against a white garage door can look striking.
- Finishes: Matte finish: a matte finish can give a modern and sleek appearance. Glossy finish: a glossy finish adds a touch of elegance and is easier to clean.
Functional Additions
- Handles and Locks: Stylish handles: replace standard handles with decorative ones. Choose from various styles like vintage, modern, or rustic. Secure locks: add a lock to your screen door for added security. This is especially useful if you plan to use the garage as a living space.
- Magnetic closures: Easy access: install magnetic closures for easy access. These are great for families with kids or pets, as they close automatically.
Lighting and Accessories
- LED Lights: Ambient lighting: Add LED strip lights around the frame for ambient lighting. This can make your garage more inviting in the evening. Motion sensors: install motion sensor lights for added convenience and security.
- Weatherstripping: Seal gaps: use weather stripping to seal any gaps around the screen door. This helps keep out bugs and improves energy efficiency.
Seasonal Decorations
- Holiday Themes: Festive decor: decorate your screen door with holiday-themed items. For example, hang wreaths or garlands during christmas. Seasonal colors: change the color scheme of your screen door frame to match the season. Use pastel colors for spring and bold colors for fall.
- Plant hangers: Greenery: attach plant hangers to the frame and add potted plants. This can build a refreshing and natural look.
Use these customization ideas to build a functional and stylish DIY garage screen door. Select materials and designs that match your style and needs.
Troubleshooting Common Problems
Even with the best instructions, you might encounter some issues while installing or using your DIY garage screen door. Here are some common problems and how to solve them:
Screen Door Doesn't Fit Properly
- Problem: The screen door is too big or too small for the garage opening.
- Solution: Measure again: double-check your measurements. Ensure you measure the width and height of the garage opening accurately. Adjust the frame: if the door is too big, you might need to trim the frame. If it's too small, consider adding weather stripping or additional framing to fill the gaps.
Screen is Sagging or Loose
- Problem: The screen material is sagging or not taut.
- Solution: Tighten the screen: use a spline roller to push the screen into the frame groove more firmly. This will tighten the screen. Replace the spline: if the spline (the rubber strip holding the screen) is worn out, replace it with a new one.
Difficulty in Opening or Closing
- Problem: The screen door is hard to open or close.
- Solution: Check the tracks: ensure the tracks are clean and free of debris. Dirt and grime can cause the door to stick. Lubricate the tracks: apply a silicone-based lubricant to the tracks to help the door slide smoothly. Adjust the rollers: if the door has rollers, check if they are aligned properly. Adjust them if necessary.
Screen Tears or Holes
- Problem: The screen has tears or holes.
- Solution: Patch small holes: use a screen repair kit to patch small holes. These kits usually include adhesive patches that are easy to apply. Replace the screen: for larger tears, it might be best to replace the entire screen. Remove the old screen and spline, then install a new screen with a new spline.
Frame is Warped or Bent
- Problem: The frame of the screen door is warped or bent.
- Solution: Straighten the frame: if the frame is slightly bent, you can try to straighten it using gentle pressure. Be careful not to break it. replace the frame: if the frame is severely warped, it might need to be replaced. Consider using a more durable material for the new frame.
Screen Door Doesn't Stay Closed
- Problem: The screen door doesn't stay closed and keeps swinging open.
- Solution: Check the magnets: if your screen door uses magnets to stay closed, ensure they are aligned properly. Clean any dirt that might be affecting their grip. Install a latch: adding a simple latch or hook can help keep the door closed securely.
Gaps Around the Screen Door
- Problem: There are gaps around the screen door, allowing bugs to enter.
- Solution: Add weather stripping: use weather stripping to seal any gaps around the door. This will also help with insulation. Check the installation: ensure the screen door is installed correctly and fits snugly within the frame.
Fixing common issues ensures your DIY garage screen door works well. Maintain it regularly for long-lasting performance.
FAQs About DIY Garage Screen Doors
Find answers to common questions about DIY garage screen doors. Learn installation tips, benefits, and maintenance in our comprehensive FAQs guide.
Installing a DIY garage screen door can transform your garage into a versatile space. It allows fresh air to circulate while keeping bugs and debris out. This can make your garage a more comfortable place for activities like working out, hosting gatherings, or simply relaxing. Additionally, it can help reduce energy costs by improving ventilation.
Accurate measurements are crucial for a proper fit. Follow these steps:
Measure the width of the garage opening at the top, middle, and bottom.
Measure the height from the floor to the top of the opening on both sides.
Use the smallest width and height measurements to ensure the screen door fits within the opening.
Double-check your measurements before purchasing materials
Yes, installing a garage screen door is a manageable DIY project. Basic carpentry skills and common tools are usually sufficient. Follow step-by-step guides or video tutorials to ensure proper installation. If you’re unsure, consider asking a friend for help or consulting a professional.
Maintaining your garage screen door is simple:
Regularly inspect the screen for tears or damage and repair as needed.
Clean the screen with a soft brush or vacuum to remove dust and debris.
Wipe down the frame with a damp cloth to keep it looking fresh.
Proper main tenance will extend the life of your screen door and keep it functioning well.
Yes, you can easily remove your garage screen door during the winter months. Most DIY garage screen doors are designed to be temporary and can be taken down when not in use. Simply detach the screen from its frame or remove the frame entirely, depending on your setup. Store the screen in a dry place to prevent damage and ensure it's ready for use when warmer weather returns.
Conclusion: Final Thoughts on the Project
Building a DIY garage screen door is a rewarding project that enhances your home both functionally and aesthetically. Over the course of this endeavor, what was most valuable to me was not just following the steps, but also experimenting and learning along the way. Whether you're inspired to build something entirely new or innovate on my design, remember that each project is an opportunity to improve your skills and enhance your living space. The tips and insights shared here offer a foundation, but your touch is what will make the project truly unique.


