When you're working on your car's brakes, one of the more frustrating experiences is dealing with a seized screw on the brake disc. It can halt your progress and test your patience, especially when standard solutions like WD-40 or even drilling don’t work. I’ve been there myself, and after a lot of trial and error and some valuable advice from fellow DIY enthusiasts, I’ve compiled a detailed guide on different techniques to tackle this stubborn problem. Here’s how you can handle a seized screw on a brake disc effectively.
Understanding the Problem: Why Screws Seize on Brake Discs
Brake disc screws can seize for several reasons. Commonly, it's due to rust, corrosion, or thread locking compounds used in the initial installation. Over time, exposure to heat, moisture, and road salt can cause screws to become extremely difficult to remove. This is especially common in older vehicles or those that haven't had their brake discs replaced in a while.
Tools You Might Need
Before diving into the methods, gather the necessary tools. You may not need all of them, but having a range of options can save you a trip to the store:
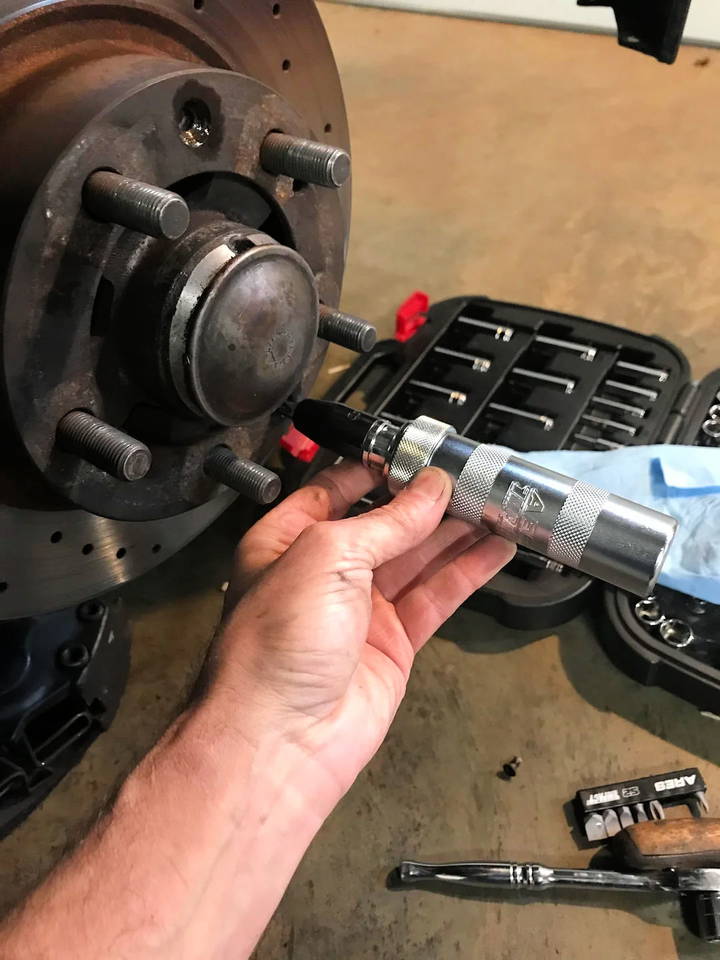
- Impact Driver: A manual or electric tool that delivers a strong, sudden rotational force to loosen screws.
- Drill and High-Quality Drill Bits: For drilling out the screw head if necessary.
- Chisel and Mini Sledgehammer: For creating a notch in the screw head and using rotational force.
- Penetrating Oil (e.g., PB Blaster, Kroil): Far more effective than WD-40 in penetrating rust and loosening screws.
- Heat Source (Propane Torch): To expand the metal and break the rust bond.
- Vice Grips or Pliers: To twist out the remaining screw shank after removing the head.
- Left-Hand Drill Bits: Designed to unscrew while drilling.
- Screw Extractor Set: Useful if the screw head is damaged but still accessible.
- Angle Grinder: For cutting a new slot in the screw head.
Step-by-Step Methods to Remove the Seized Screw
1. Using an Impact Driver
An impact driver is often the first line of defense. This tool delivers a strong force directly to the screw, which can help to break the corrosion that’s holding it in place.
- Fit the appropriate bit to the impact driver.
- Place the bit into the screw head and apply firm pressure.
- Strike the end of the impact driver with a hammer. This should generate enough force to loosen the screw.
- Repeat as necessary, gradually increasing the force of the strikes.
Impact drivers are particularly effective if the screw head is still intact and not stripped.
2. Applying Heat to the Screw
Heating the screw can help to break the bond caused by rust or thread-locking compounds. Here’s how to use heat effectively:
- Use a propane torch to heat the screw directly. Aim for a red-hot temperature, which will expand the metal.
- Immediately after heating, apply penetrating oil like PB Blaster. The sudden cooling effect can help the oil seep into the threads.
- Use a flathead screwdriver or an impact driver to attempt removal.
Be cautious when using a torch. Make sure there’s nothing flammable nearby, and avoid overheating, which could damage surrounding parts.
3. Drilling Out the Screw Head
If the screw still doesn’t budge, drilling out the screw head might be the next step:
- Start with a small drill bit to create a guide hole in the center of the screw head.
- Gradually increase the size of the drill bit until the head of the screw is removed.
- Once the head is off, remove the brake rotor. You should now have access to the remaining shank of the screw.
- Use vice grips or pliers to twist out the screw shank.
This method is straightforward but requires precision. Make sure to use high-quality drill bits to avoid damaging the surrounding components.
4. Using a Chisel and Mini Sledgehammer
This approach is for when the screw head is stripped or when other methods have failed:
- Take a sharp chisel and create a notch at the 12 o’clock position on the screw head.
- Position the chisel in the notch and tilt it slightly to the right.
- Use a mini sledgehammer to strike the chisel, forcing the screw to rotate counterclockwise.
- Repeat until the screw loosens and can be removed by hand.
This method requires a bit of finesse but can be very effective when done correctly.
5. Left-Handed Drill Bits and Screw Extractors
A left-handed drill bit rotates in the opposite direction to standard bits and can sometimes back out a screw while drilling:
- Select a left-hand bit slightly smaller than the screw head.
- Drill slowly and steadily into the screw head. With some luck, the bit will catch and unscrew the bolt.
- If this doesn’t work, switch to a screw extractor set to attempt removal.
This method is often a last resort but can be a lifesaver when all else fails.
6. Cutting a New Slot with an Angle Grinder
If the screw head is severely damaged, you can use an angle grinder to cut a new slot for a flathead screwdriver:
- Carefully cut a slot across the screw head.
- Use a large flathead screwdriver or impact driver to turn the screw.
This method should be used carefully to avoid damaging the rotor or hub.
Tips for Future Prevention
- Use Anti-Seize Compound: When reinstalling screws, apply a high-temperature anti-seize compound. This will prevent future seizing.
- Regular Maintenance: Periodically check and replace brake components as needed to avoid rust buildup.
- Proper Tools Matter: Invest in high-quality tools. Cheaper drill bits, extractors, or impact drivers might fail and make the problem worse.
- Patience and Finesse: Sometimes, a little patience goes a long way. Allow penetrating oil time to work, and avoid using excessive force that could cause more damage.
Conclusion
Removing a seized screw from a brake disc is certainly a challenging task, but with the right tools and methods, it's definitely manageable. By carefully following the steps outlined above, you can tackle this problem head-on and avoid an expensive trip to the mechanic. Remember, every DIY project comes with its learning curve, but persistence and the right approach will help you succeed. If you have additional tips or tricks that worked for you, feel free to share them – every bit of advice can help someone facing the same challenge!
FAQs on Removing a Seized Screw from a Brake Disc
Discover quick solutions for removing a seized screw from a brake disc. Expert FAQs provide step-by-step guidance and prevent further damage.
Screws on brake discs often seize due to exposure to rust, corrosion, and heat over time. When metal components are exposed to moisture, road salt, and high temperatures, they can bond together, making the screws difficult to remove. In some cases, thread-locking compounds used during installation can also contribute to a screw seizing.
There is no one-size-fits-all solution; the most effective method depends on the situation. Commonly used methods include:
Impact Driver: Best for screws with intact heads.
Heat Application: Useful for loosening rust bonds by expanding the metal.
Drilling Out the Screw: Effective if the screw head is stripped or damaged.
Chisel and Hammer Method: For creating a notch to apply force rotationally.
Each method can be effective depending on the specific conditions of the seized screw.
While WD-40 can sometimes help, it's not the best option for loosening seized screws. WD-40 is primarily a water displacer and not a true penetrating oil. Penetrating oils like PB Blaster or Kroil are far more effective at penetrating rust and loosening seized screws. For better results, use these specialized oils and let them soak into the threads for a few hours or even overnight.
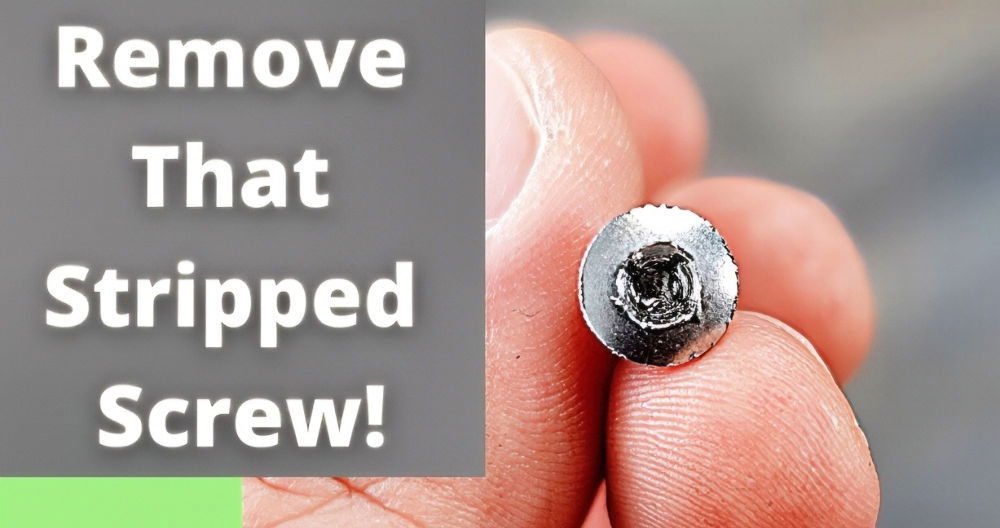
If the screw head is stripped, there are several options:
Use a Screw Extractor Set: These tools are designed to grip and remove stripped screws.
Drill Out the Screw Head: Gradually increase the drill bit size until the head is removed.
Cut a New Slot: Use an angle grinder to create a new slot for a flathead screwdriver or impact driver.
These methods allow you to either remove the screw head or create a new means of gripping and turning the screw.
Heating a screw can be dangerous if not done carefully. Ensure there are no flammable materials nearby, and use controlled, moderate heat to avoid damaging surrounding components. Heating expands the metal and can help loosen the bond formed by rust or thread-locking compounds, but it requires careful handling to prevent accidents.
Left-hand drill bits are designed to rotate counterclockwise, the opposite direction of standard drill bits. When drilling into a seized screw, the reverse rotation can sometimes cause the screw to unscrew itself. This method is particularly useful when dealing with a stuck or stripped screw where other methods have failed.
If you've exhausted all DIY options and the screw remains stuck, it might be time to consult a professional mechanic. They have access to specialized tools and techniques, like welding a nut onto the screw for more leverage or using an air chisel, which can handle even the most stubborn screws.
To prevent screws from seizing:
Apply Anti-Seize Compound: When reinstalling screws, apply a high-temperature anti-seize compound to the threads.
Regular Maintenance: Regularly check and clean brake components to prevent rust buildup.
Proper Torque Settings: Ensure screws are tightened to the correct torque specifications to avoid over-tightening and potential future seizing.
Yes, you can. Many DIY enthusiasts and even some mechanics choose to omit the small retaining screw during reassembly, as its primary function is to hold the rotor in place temporarily while the wheel is off. The wheel's lug nuts will securely hold the rotor in place once installed. However, if you do reinstall it, apply anti-seize compound to avoid future issues.
Using a grinder to remove a screw head carries some risks, including the potential to damage the rotor or hub if not handled carefully. Always use a steady hand and ensure you're cutting in a controlled manner to avoid slipping. Eye protection is also essential to protect against flying metal debris.


