Learn how to remove popcorn ceilings easily with our step-by-step guide. I remember when I faced this challenge in my home. I wanted a smooth ceiling for a fresh look. To start, I gathered my tools like a spray bottle, a putty knife, and a ladder. It helped me to learn the process step by step. I felt nervous, but I was excited to see the change.
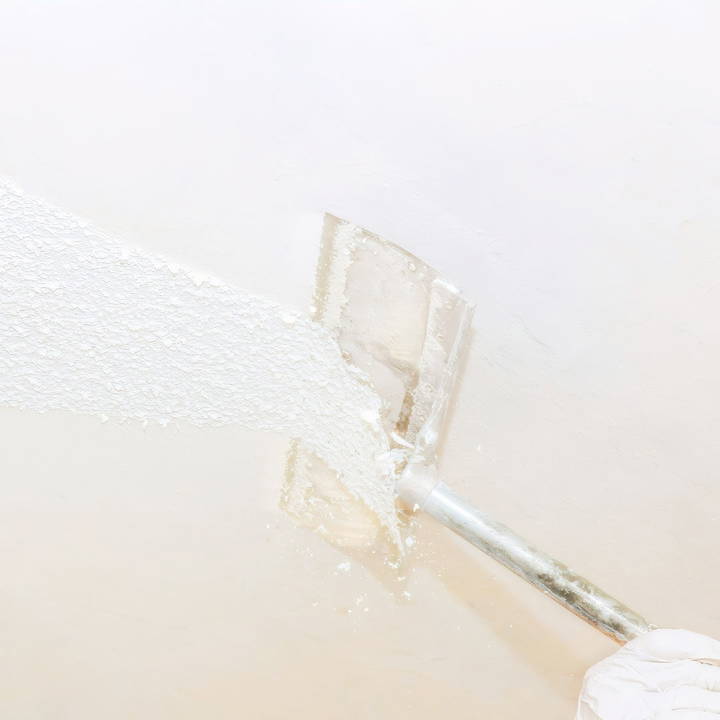
Once ready, I sprayed water on the popcorn ceiling, letting it soak for a few minutes. This made it easier to scrape off. I took my time, working carefully to avoid any damage. I learned a lot about patience during this process. By the end, my ceiling looked clean and new. It's satisfying to see your hard work pay off!
I'm sharing these tips so you can start your own project. Knowing how to remove popcorn ceiling correctly can really help you. If I can do it, so can you! Let's get started on making your ceiling beautiful!
Materials Needed and Why
- Plastic Grocery Bags: These will catch the falling debris, making clean-up a breeze.
- Folder Clips or Binder Clips: Essential for securing the bags to the scraper, and trust me, colorful ones are easier to find in your toolkit.
- Popcorn Ceiling Scraper: This tool is specifically designed for the job, featuring a bag attachment and a built-in scraper to efficiently remove the texture.
- Water Sprayer: A simple spray bottle or garden sprayer to dampen the ceiling, making the popcorn texture easier to remove.
- 3M Plastic Drop Cloths: Protect your walls and furniture from water and debris.
- Asbestos Test Kit: Safety first! Older popcorn ceilings may contain asbestos, and it's crucial to know what you're dealing with before you start.
Step by Step Instructions
Get expert guidance with our step-by-step instructions on how to remove popcorn ceiling safely and efficiently. Follow our 7-step process for best results.
Step 1: Prep Your Room
Clear out the furniture or cover everything with drop cloths. The last thing you want is for your bed or couch to get a shower of popcorn ceiling!
Step 2: Safety Check for Asbestos
If your home was built in the early 80s or before, use an asbestos test kit to ensure your ceiling's material is safe to work with. This was a crucial step for me, as health safety is paramount.
Step 3: Setup Your Cleaning Station
Attach a plastic grocery bag to your scraper using the binder clips. I found cutting one corner of the bag off made it easier to attach. This setup will catch most of the debris, significantly reducing clean-up time.
Step 4: Dampen the Ceiling
Using your water sprayer, lightly wet the popcorn ceiling. This softens the texture, making it easier to scrape off. Be patient and give it a few minutes to soak in. If it absorbs quickly, apply a bit more water.
Step 5: Start Scraping
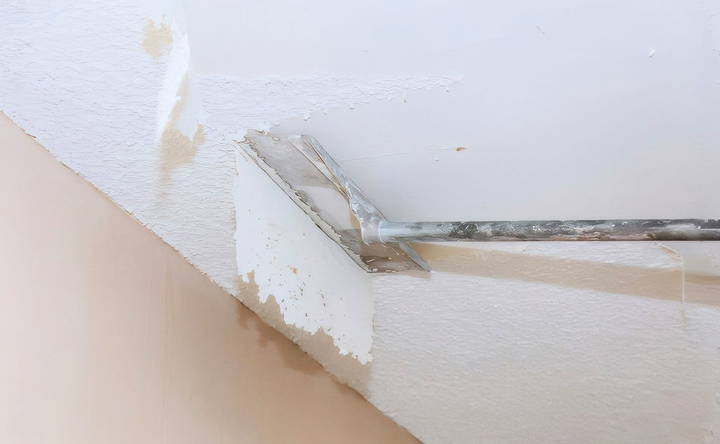
With your bag-equipped scraper, gently start removing the popcorn texture. The trick here is to keep the scraper flat against the ceiling to avoid gouging. When the bag gets full, carefully detach it and dispose of the waste. Then, attach a new bag and continue.
Step 6: The Finishing Touch
After scraping, there might be some residue left. Lightly spray those areas and give them a final scrape. This step ensures a smooth, clean finish, ready for whatever new look you envision.
Step 7: Clean Up
Once you're done, remove any plastic coverings and tidy up the room. You'll be amazed at how much those plastic bags caught, leaving you with minimal mess.
Personal Insights and Tips
Throughout this process, I discovered a few tricks that made the job even easier:
- Test a Small Area First: This will give you an idea of how easily the texture will come off and if your ceiling was painted with a glossier paint that might make scraping harder.
- Patience is Key: The first ceiling I tackled, I rushed, and it showed in the quality of the work. Take your time, and the results will be worth it.
- Decorate Your Newly Smooth Ceilings: Once you've achieved that smooth canvas, consider adding crown molding or a fresh coat of paint to really make the room pop.
Common Mistakes to Avoid When Removing Popcorn Ceilings
Removing popcorn ceilings can be a daunting task, but avoiding common mistakes can make the process smoother and more successful. Here are some pitfalls to watch out for:
1. Skipping Safety Precautions
- Mistake: Neglecting safety precautions can lead to accidents or health issues. Popcorn ceilings may contain asbestos, which poses serious health risks if disturbed.
- Solution: Always wear protective gear, including a mask, goggles, and gloves. Test for asbestos before starting the removal process.
2. Not Moistening the Ceiling
- Mistake: Trying to scrape dry popcorn texture can make a mess and damage the ceiling.
- Solution: Lightly mist the ceiling with water using a spray bottle. This softens the texture, making it easier to scrape off.
3. Using Excessive Force
- Mistake: Applying too much pressure while scraping can harm the underlying drywall or plaster.
- Solution: Use gentle, controlled movements. Let the scraper do the work, and avoid aggressive scraping.
4. Ignoring Proper Ventilation
- Mistake: Dust and debris from popcorn ceiling removal can affect indoor air quality.
- Solution: Open windows and use fans to improve ventilation. Consider using an air purifier during and after the process.
5. Not Covering Furniture and Floors
- Mistake: Falling debris can damage furniture and flooring.
- Solution: Cover furniture with plastic sheets and lay drop cloths on the floor. Vacuum or sweep thoroughly afterward.
6. Failing to Repair Imperfections
- Mistake: After removing the popcorn texture, you may notice imperfections like dents or cracks.
- Solution: Fill any holes or cracks with joint compound. Sand the repaired areas and apply a primer before painting.
7. Not Testing Paint Adhesion
- Mistake: Applying paint directly to the scraped ceiling without testing adhesion can lead to peeling or flaking.
- Solution: Apply a small amount of paint to a test area. If it adheres well, proceed with painting the entire ceiling.
Patience and attention to detail are key. Avoid these mistakes, and your popcorn ceiling removal project will yield better results!
FAQs About How to Remove Popcorn Ceiling
Here are some FAQs about how to remove popcorn ceilings: Get expert answers, tips, and step-by-step guidance for a smooth removal process.
A popcorn ceiling, also known as an acoustic ceiling, has a textured surface that resembles popcorn or cottage cheese. While it was popular in the past for its ability to hide imperfections and reduce echo, there are several reasons to remove it:
Dated Appearance: Popcorn ceilings can make a room look outdated.
Dust and Cobwebs: The rough texture attracts dust and cobwebs, making maintenance challenging.
Difficult Repairs: Patching cracks or holes in a popcorn ceiling is cumbersome due to the texture.
The national average cost for popcorn ceiling removal is approximately $1,707. However, this process can be labor-intensive and may involve safety risks. It’s advisable to consult a licensed professional, especially if there’s a possibility of asbestos in the ceiling material.
Before starting, follow these steps:
Scrape Test: Test a small area to determine if water is needed. Wetting the texture makes removal easier.
Asbestos Check: If your ceiling was installed before 1980, it may contain asbestos. Get a sample tested before proceeding.
Protect Floors and Walls: Cover them with plastic drop cloths to catch debris.
Remove Furniture: Clear the room or cluster furniture and cover it with drop cloths.
Turn Off Power: Shut off the breaker to ceiling fixtures and fans.
While DIY removal is possible, consider safety risks and the complexity of the task. If you’re unsure, consult a professional. Remember to follow safety precautions and protect yourself during the process.
Yes, you can paint over a popcorn ceiling if you prefer not to remove it. Here are some tips:
Clean the Surface: Dust and clean the ceiling thoroughly before painting.
Use a Roller: Use a thick-nap roller to apply the paint evenly over the texture.
Choose the Right Paint: Opt for flat or matte paint to minimize the texture's appearance.
Test a Small Area: Test the paint on a small section to ensure it adheres well.
Consider Aesthetics: Keep in mind that painting won't completely hide the texture, but it can freshen up the look of the room.
Conclusion
In conclusion, learning how to remove the popcorn ceiling can enhance your home's appeal and value. By following the right techniques and safety precautions, you can achieve a smooth finish. Remember to take your time and enjoy the process while transforming your space!


