Learn how to flush transmission fluid for smoother vehicle performance and longer transmission life with these simple steps. Flushing an automatic transmission fluid might sound like a job that requires a professional mechanic or specialized tools. But in reality, with the right steps and basic tools, it's a task you can confidently do yourself.
Over time, transmission fluid loses its effectiveness, leading to rough shifts and even potential damage. I'll walk you through the process I used, based on my own experience, to flush the fluid without a pump or expensive equipment, all in under ten minutes.
Why Is Flushing Transmission Fluid Important?
Transmission fluid plays a vital role in the smooth operation of your vehicle's gearbox. It lubricates, cools, and ensures smooth gear shifts. However, like engine oil, transmission fluid degrades over time due to friction, heat, and contaminants. If not replaced, this can lead to transmission wear or failure.
From my experience, you can notice shifts becoming rough or delayed. That's when you know it's time for a transmission fluid flush.
Materials You'll Need
Before starting, here are the materials I gathered:
- Oil drain pan: To collect the old fluid as it drains.
- 8 liters of ATF4 transmission fluid: Your car may require a different type, so always check your vehicle's owner's manual to ensure compatibility.
- Transparent measuring container: This helps in measuring the drained fluid, ensuring you add back the exact amount.
- A hose: I used a standard rubber hose to connect to the transmission cooler and drain the fluid.
- Rag and gloves: To clean up any mess and protect your hands from the hot fluid.
Now, let's jump into the process.
Step by Step Instructions
Learn how to flush transmission fluid with our easy step-by-step guide. Follow each step to ensure your vehicle runs smoothly and efficiently.
Step 1: Prepare Your Vehicle
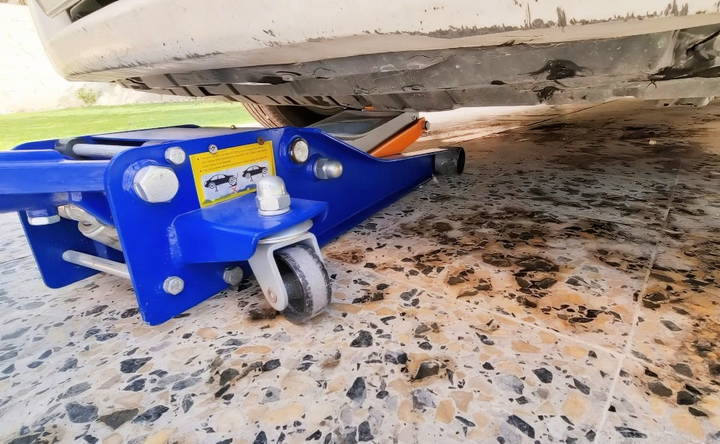
The first thing I did was to raise my car with a jack and secure it on jack stands. Although it's possible to do the job without raising the car, jacking it up made the entire process easier for me, providing a better view and more room to work.
Before you begin, make sure your car is securely lifted and placed on jack stands for safety. Always ensure your vehicle is level so that you get an accurate fluid reading later.
Step 2: Draining the Fluid
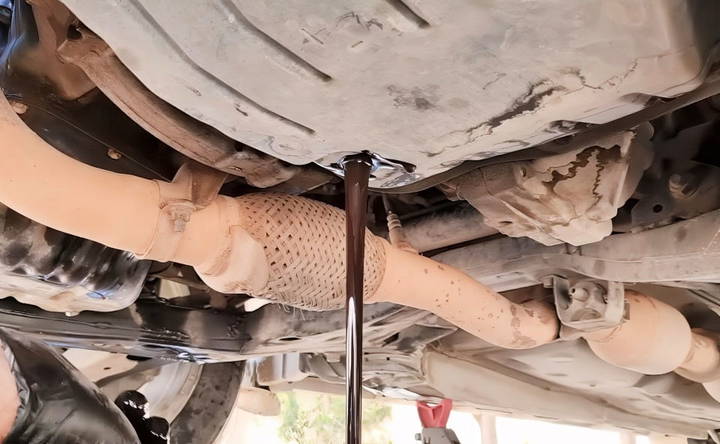
Next, I located the transmission drain plug. Most automatic transmissions have a drain plug that's relatively easy to access. Using a socket wrench, I removed the plug, letting the old fluid flow into the drain pan.
- Pro Tip: While waiting for the fluid to drain, clean the drain plug and the surrounding area. I always do this step to detect any potential leaks in the future. After the fluid finished draining, I tightened the plug back on.
Step 3: Measuring the Drained Fluid
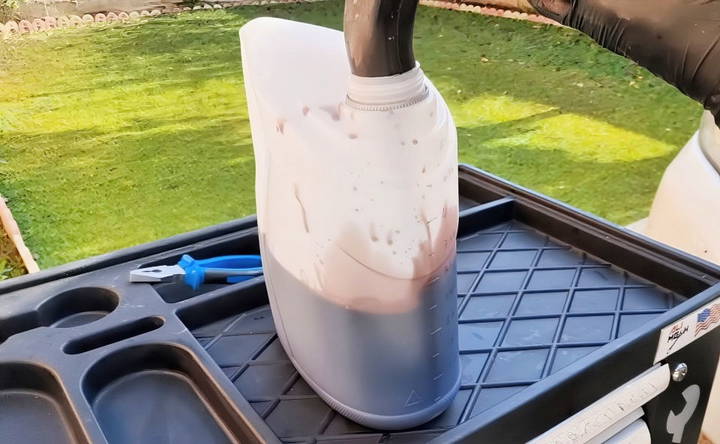
Once the old fluid was drained, I measured how much came out. In my case, it was around 3.5 liters. This is important because you need to replace the exact amount of fluid that was removed. If you don't, it could lead to overfilling or underfilling your transmission, both of which could cause issues down the road.
I poured the old fluid into the marked measuring container and took note of the amount. To speed things up, you can use a scale to weigh the fluid, but volume measurement works just as well.
Step 4: Refilling with Fresh Fluid
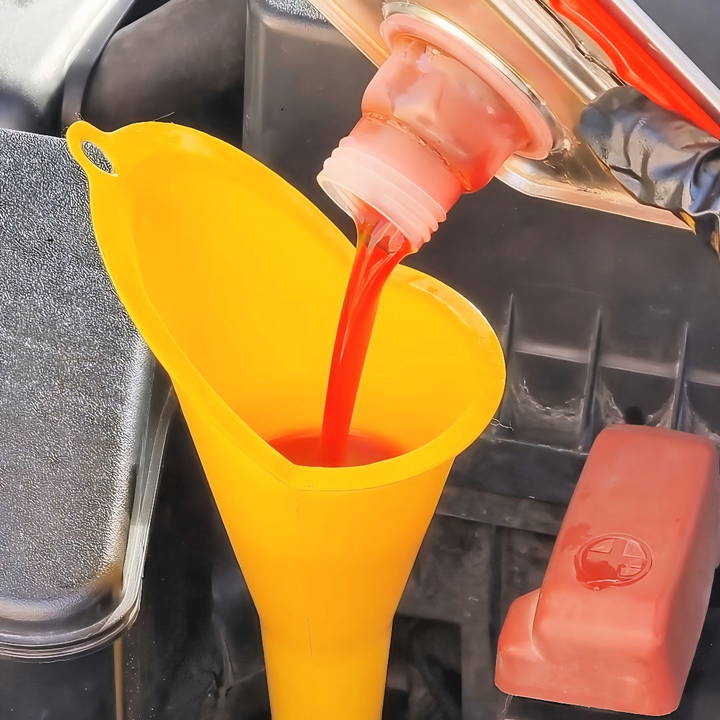
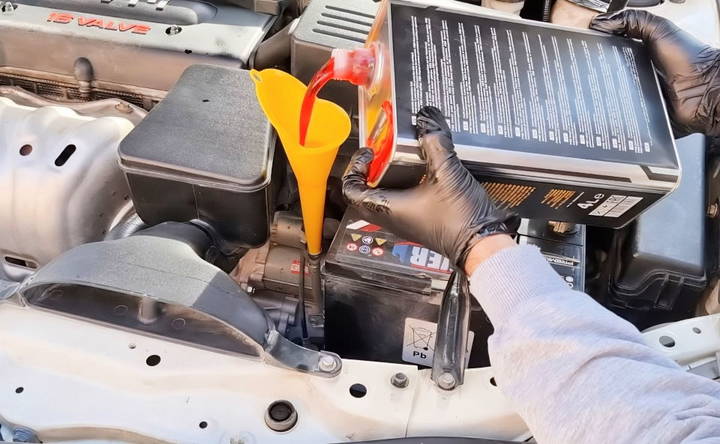
I added 3.5 liters of fresh ATF4 fluid into the transmission. It's critical to add the same amount that you drained earlier to keep things balanced. Pouring in more or less fluid could cause performance issues.
You can use a funnel to ensure that you pour it smoothly into the dipstick tube. The trick here is to take your time and avoid spilling.
Step 5: Flushing the Old Fluid
Now, it's time to flush the remaining old fluid from the transmission system. For this, I located the oil cooler hose connected to the transmission. This is where the magic happens.
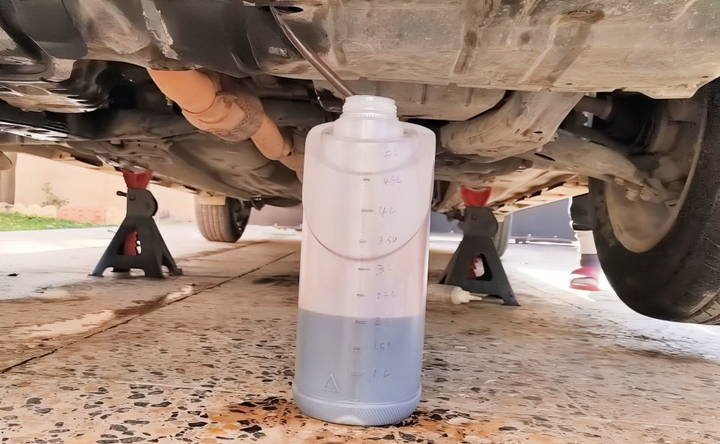
I disconnected the hose, attached the piece of rubber tubing, and placed the other end of the tubing into the transparent container I prepared earlier. This would allow me to see exactly how much fluid was being flushed out.
Step 6: Starting the Engine
With everything set, I started the engine. The engine's operation causes the new fluid to cycle through the transmission system, pushing the old fluid out through the cooler hose. I let the engine run until about 2.5 liters of old fluid had drained into the container.
- Tip: Be sure to monitor the amount being flushed out closely. In my experience, if you let it run too long, you risk draining too much, which could complicate things when adding the final amount of fluid later.
Step 7: Repeating the Process
Once 2.5 liters of old fluid had been flushed out, I stopped the engine and added 2.5 liters of fresh transmission fluid back into the system. Then, I repeated the flushing process, draining and adding 2 liters this time, for a total of 8 liters of new fluid.
Step 8: Finishing Up and Checking Fluid Levels
With the final flush completed, I reconnected the oil cooler hose and tightened it securely. The next step was to start the engine again, allowing it to reach idling temperature. Once the engine was warm, I checked the transmission fluid level using the dipstick.
The fluid should be at the “HOT” mark when the engine is idling and fully warmed up. If it's slightly low, you can top it up, but be cautious not to overfill.
The Results
When I checked the fluid coming out of the cooler hose after the flush, I could see a huge difference. The old fluid was dark and cloudy, while the new fluid was bright and clean. This is exactly what you want to see after a successful flush – fresh fluid that can help your transmission run smoothly again.
Common Mistakes to Avoid
Flushing transmission fluid is an important maintenance task, but it's easy to make mistakes. Here are some common errors to avoid:
Using the Wrong Fluid
Using the incorrect type of transmission fluid can cause serious damage to your vehicle. Always check your vehicle's manual to find the right type of fluid. Different vehicles require different fluids, and using the wrong one can lead to poor performance or even transmission failure.
Not Following Manufacturer's Guidelines
Every vehicle has specific guidelines for maintenance. Ignoring these can result in improper flushing and potential damage. Follow the steps outlined in your vehicle's manual. This ensures you are doing the job correctly and safely.
Skipping Safety Precautions
Safety should always come first. Make sure your vehicle is securely lifted and supported before you start. Wear protective gear like gloves and safety glasses. This helps prevent injuries and ensures a safe working environment.
Overfilling or Underfilling the Transmission
It's crucial to fill the transmission with the correct amount of fluid. Overfilling can cause the fluid to foam, leading to erratic shifting and potential damage. Underfilling can result in poor lubrication and overheating. Use a dipstick to check the fluid level and ensure it's within the recommended range.
Not Flushing the System Properly
A partial flush can leave old, dirty fluid in the system, which can contaminate the new fluid. Make sure to flush the entire system thoroughly. This ensures that all the old fluid is removed and replaced with fresh fluid.
Ignoring Signs of Transmission Problems
If your vehicle shows signs of transmission issues, such as slipping gears or unusual noises, don't ignore them. Address these problems before flushing the fluid. Flushing won't fix underlying issues and may even make them worse.
Improper Disposal of Old Fluid
Transmission fluid is hazardous waste and should be disposed of properly. Don't pour it down the drain or throw it in the trash. Take it to a recycling center or an auto shop that accepts used fluids. This helps protect the environment and complies with local regulations.
By avoiding these common mistakes, you can ensure a successful transmission fluid flush and keep your vehicle running smoothly.
FAQs About How to Flush Transmission Fluid
Discover answers to common questions about how to flush transmission fluid to keep your vehicle running smoothly. Learn step-by-step tips and expert advice.
A transmission fluid flush is a process where all the old transmission fluid is removed from your vehicle’s transmission and replaced with new fluid. This helps to remove contaminants and ensure the transmission operates smoothly.
Flushing the transmission fluid helps to remove dirt, debris, and old fluid that can cause wear and tear on the transmission. It ensures the transmission runs efficiently and can extend its lifespan.
Most manufacturers recommend flushing the transmission fluid every 30,000 to 60,000 miles. However, it’s best to check your vehicle’s owner's manual for specific recommendations.
Flushing transmission fluid can sometimes dislodge debris that can clog the transmission. It’s generally safe if done correctly, but high-mileage vehicles that haven’t been maintained might face issues.
A transmission fluid flush can help with minor issues caused by dirty fluid, but it won't fix major mechanical problems. If your transmission has significant issues, it's best to consult a mechanic.
Final Thoughts
Flushing your automatic transmission fluid without a pump is a simple task that you can do in less than 10 minutes once you're familiar with the process. It not only saves you the cost of going to a mechanic but also gives you peace of mind, knowing the job was done thoroughly.
In my experience, this process is an excellent way to maintain your vehicle's performance and prolong the life of your transmission. Plus, the satisfaction of doing it yourself is always a great feeling!


