I never thought I’d be the type of person to make my own deodorant. Yet, here I am, a homemade DIY deodorant advocate, sharing my journey and guide to making an all-natural solution that combats body odor effectively. If you’re tired of store-bought deodorants with their long lists of unknown chemicals, or if you’re just looking for a more eco-friendly and skin-friendly option, let me walk you through how I make my go-to DIY deodorant.
The Inspiration Behind the Switch
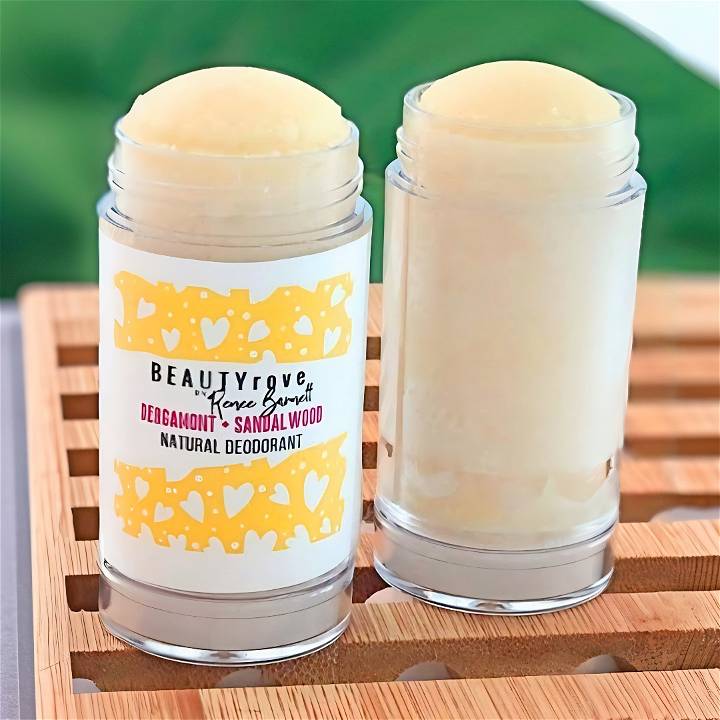
The switch to homemade DIY deodorant wasn’t sudden. I battled underarm irritation and was never quite satisfied with the effectiveness of store-bought options. Upon discovering a video by Renee Barnett that promised an all-natural deodorant recipe, I was intrigued. Not only did it claim to stop underarm odor but also to keep the underarms feeling fresh and moisturized. I was sold and decided to give it a try.
Gathering the Materials
Why Each Ingredient Matters
- Shea Butter: The base of our deodorant. It’s moisturizing but doesn’t clog pores, making it perfect for sensitive underarm skin.
- Cocoa Butter: Adds a more solid consistency to the deodorant and brings a pleasant, subtle scent.
- Coconut Oil: Its antimicrobial properties help to combat the bacteria that cause odor.
- Candelilla Wax: A vegan alternative to beeswax, it helps solidify the deodorant without harming any bees.
- Baking Soda: Neutralizes odor effectively. A game-changer for those looking to combat underarm smell.
- Cornstarch: Absorbs excess moisture, keeping you dry.
- Essential Oils (Bergamot and Sandalwood): These were my choices for fragrance. Bergamot adds freshness, whereas Sandalwood brings a warm, woodsy note.
Step-by-Step Guide to Making Your DIY Deodorant
Learn how to make your own natural deodorant at home with our easy step-by-step guide. Say goodbye to harsh chemicals and hello to a healthier alternative!
Melting the Base
- In a double boiler, I began by melting the shea butter, cocoa butter, candelilla wax, and coconut oil together. Stir occasionally to ensure they meld together smoothly.
Incorporating the Powders
- Once the base blend melted into a liquid, I slowly mixed in baking soda and cornstarch, ensuring no lumps formed. This step is crucial for achieving a smooth texture in the final product.
Adding Essential Oils
- After achieving a consistent mixture, I removed the blend from heat to stir in my essential oils. Bergamot and sandalwood were my picks for a refreshing yet grounding scent. Mixing well at this stage ensures the fragrance evenly distributes throughout the deodorant.
Setting the Deodorant
- I poured the liquid deodorant into empty deodorant tubes I had prepared. If you don’t have these, you can also use small jars or any container with a tight lid.
- Letting the deodorant set and solidify was the final step. I placed mine in the refrigerator to speed up the process, but leaving it out at room temperature works just fine.
The Final Product
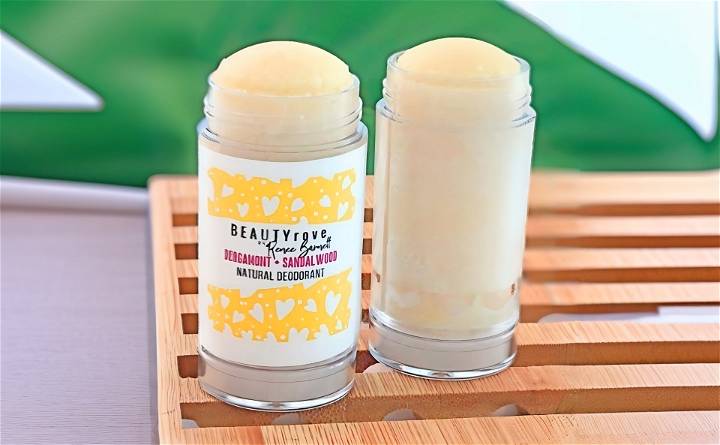
I was elated with the outcome. Not only had I maked a natural deodorant that effectively prevented odor, but it also felt great on my skin. There was no irritation, just smooth, lightly fragranced underarms. Plus, the satisfaction of knowing exactly what went into making it added to its appeal.
Why Make Your Own?
Making my Homemade DIY deodorant wasn’t just about stopping underarm odor. It was about taking control of what I put on my body, reducing my ecological footprint, and embracing a more sustainable lifestyle. Each batch I make reflects these values, and the process is now a cherished part of my self-care routine.
Tips for Success
- Weigh Your Ingredients: Precision is key for the perfect balance between dryness and moisture.
- Customize Your Scent: Feel free to experiment with different essential oils. Lavender, tea tree, and lemon are great options, too.
- Be Patient: If your first batch isn’t perfect, try again. It took me a couple of tries to find the consistency and scent that worked best for me.
Don’t Forget to Share
I hope my story and guide inspire you to try making your natural deodorant. It’s a simple step towards a healthier lifestyle and a fun DIY project that benefits your body and the planet. If you’ve found this guide helpful, don’t hesitate to share it and help spread the word about the benefits of homemade personal care products. Remember, every small change counts towards a bigger impact.
Choosing Quality Ingredients for Your Homemade DIY Deodorant
When it comes to making your own deodorant, selecting the right ingredients is essential for an effective and skin-friendly product. Let’s explore how to choose quality components that will keep you feeling fresh and confident throughout the day.
1. Baking Soda: Friend or Foe?
- The Good: Baking soda (sodium bicarbonate) is a popular ingredient in homemade deodorants due to its natural odor-neutralizing properties. It helps absorb moisture and combat unpleasant smells.
- The Caveat: However, some individuals with sensitive skin may experience irritation from baking soda. If you’re prone to redness or itching, consider using an alternative like arrowroot powder or cornstarch.
- Tip: Patch test a small area of your skin before applying the deodorant to your underarms. This simple step can help you avoid any adverse reactions.
2. Coconut Oil: A Moisturizing Hero
- Why Coconut Oil?: Coconut oil is a versatile ingredient that not only fights odor but also moisturizes the skin. Its antimicrobial properties help keep bacteria at bay.
- Quality Matters: Opt for virgin or extra-virgin coconut oil to ensure you’re getting the purest form. Refined coconut oil may lack some of the beneficial compounds.
- Texture Tip: Coconut oil tends to solidify at cooler temperatures. If your climate is chilly, warm it slightly before mixing it with other ingredients.
3. Essential Oils: Fragrance and Functionality
- Aromatic Bliss: Essential oils provide delightful scents and additional benefits. Some popular choices include:
- Lavender: Calming and soothing.
- Tea Tree: Antimicrobial and refreshing.
- Citrus (Orange, Lemon): Energizing and uplifting.
- Dilution: Essential oils are potent, so always dilute them in a carrier oil (like coconut oil) before adding them to your deodorant recipe.
4. Cornstarch or Arrowroot Powder: Natural Thickeners
- Absorbency Boost: Both cornstarch and arrowroot powder help absorb excess moisture, keeping your underarms dry.
- Cornstarch: Widely available and budget-friendly.
- Arrowroot Powder: A great alternative for those who prefer a more natural option.
5. Beeswax: Solidifying Agent
- Stability: Beeswax gives your deodorant a solid texture, preventing it from becoming too runny.
- Sourcing: Look for pure, unbleached beeswax. It’s a sustainable choice and adds a subtle honey-like scent.
6. Avoid Synthetic Fragrances and Harsh Chemicals
- No-No List: Steer clear of synthetic fragrances, parabens, and aluminum compounds. These can irritate the skin and have potential health risks.
- Natural Scents: Stick to essential oils for fragrance. They not only smell wonderful but also offer therapeutic benefits.
Remember, crafting your own deodorant allows you to tailor it to your preferences. Experiment, adjust ratios, and find what works best for you. By choosing quality ingredients, you’ll make a deodorant that’s both effective and gentle on your skin.
FAQs About DIY Deodorant
Discover all the answers to your burning questions about DIY deodorant in this comprehensive FAQ guide. Save money and make your own natural deodorant at home!
1. Is Homemade Deodorant Effective?
Answer: Yes, homemade deodorant can be effective if you choose the right ingredients and follow proper guidelines. Many people find that it works well in controlling odor and keeping underarms fresh. However, individual results may vary.
2. Can I Customize the Fragrance?
Answer: Absolutely! Experiment with different essential oils to make a personalized scent. Lavender, tea tree, and citrus oils are popular choices.
3. What About Sensitive Skin?
- Patch Test: Always do a patch test before applying the deodorant to your underarms.
- Gentler Alternatives: If baking soda irritates your skin, try arrowroot powder or cornstarch.
6. How Should I Store Homemade Deodorant?
- Cool Place: Store your deodorant in a cool area.
- Refrigerate if Needed: If it melts due to warm weather, pop it in the fridge to solidify.
Remember, DIY deodorant allows you to control what goes on your skin while being eco-friendly. Enjoy the freshness!
Conclusion:
In conclusion, making your homemade DIY deodorant is a fun and rewarding project that allows you to customize your beauty routine with natural ingredients. Give it a try and enjoy the benefits of a personalized deodorant.


