Making your own homemade disinfectant wipes is a simple and cost-effective way to keep your home clean. These wipes are made from common household items and can be just as effective as store-bought options. Making your own allows you to control the ingredients, ensuring they are safe for your family and the environment. Plus, it's a great way to save money and reduce waste.
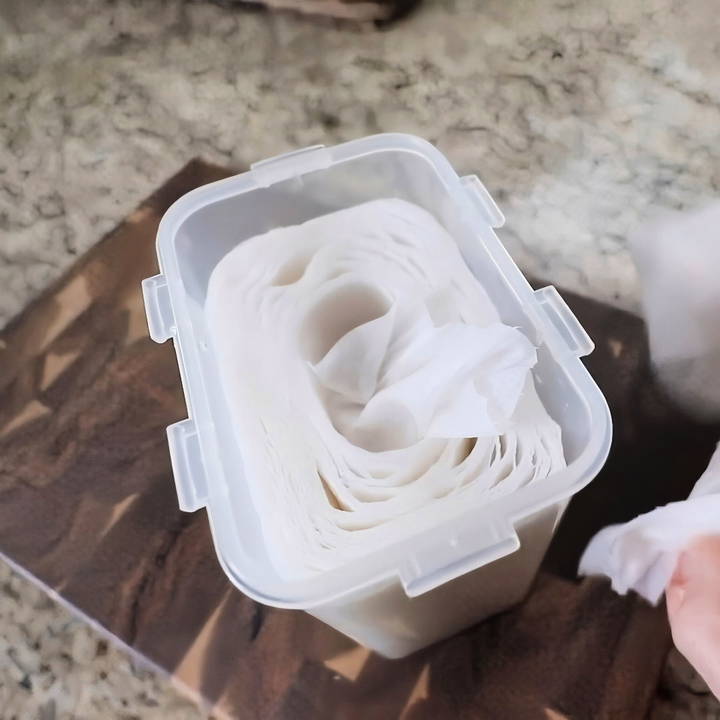
The process for making DIY Clorox wipes is straightforward and can be done in a few easy steps. You'll need minimal supplies, including paper towels, disinfectant solution, and a container to store the wipes.
Following this guide, you'll have effective disinfectant wipes ready in no time. Ready to get started? Let's explore the next section for detailed instructions.
Materials You Will Need
- Paper Towel Roll: I recommend a high-quality brand like Viva because it withstands the disinfectant solution without falling apart.
- Kitchen Knife: You'll need this to cut the paper towel roll in half.
- Airtight Container: This will store the wipes and keep them from drying out.
- Clorox Bleach: We'll use this for the disinfecting solution. Make sure it is standard Clorox bleach, not a specialized cleaner.
- Water: Essential for diluting the bleach.
- Measuring Cup: For accurate measurements of water and bleach.
- Measuring Spoon: Needed for measuring the bleach correctly.
- 70% Rubbing Alcohol (Optional): Handy for additional surface disinfection.
Step by Step Instructions
Learn how to make homemade disinfectant wipes with our step-by-step guide. Easy instructions for effective, DIY disinfecting wipes.
Step 1: Prepare the Paper Towel Roll
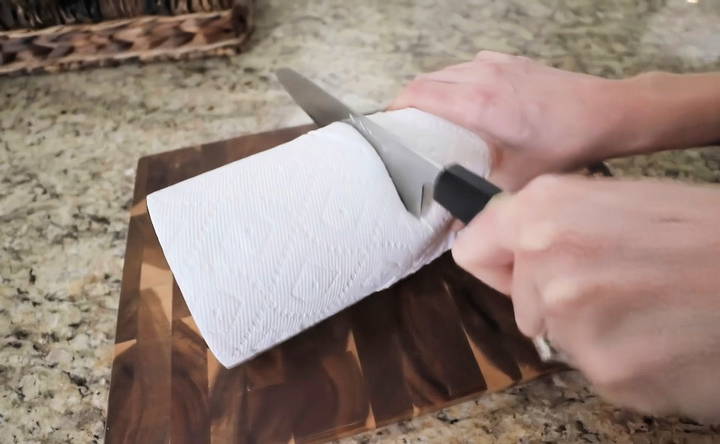
- Cutting the Roll: Place the paper towel roll on a sturdy cutting board and use a sharp kitchen knife to cut the roll in half. Cutting it while it's still in the wrapper can help reduce mess and maintain its shape.
- Why this is necessary: Cutting the roll down makes it easier to manage and fit into your airtight container.
Step 2: Mix the Disinfecting Solution
- Preparing the Solution: In a measuring cup, mix together 1 cup of water with about half a tablespoon of Clorox bleach. The CDC guidelines indicate that this ratio is effective for disinfecting surfaces.
- Why this is necessary: This dilution of bleach will ensure your wipes are safe and effective for household use.
Step 3: Setting Up the Wipes
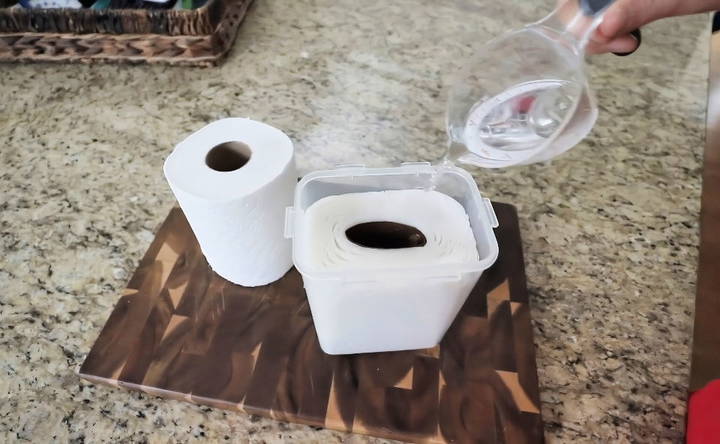
- Soaking the Paper Towels: Place one half of the paper towel roll into your airtight container. Slowly pour the disinfecting solution over it. You'll need about 1 to 1.5 cups of the solution to adequately soak the roll.
- Why this is necessary: Fully soaked paper towels ensure that you have enough solution to clean surfaces effectively without them drying out quickly.
Step 4: Remove Center Cardboard Tube
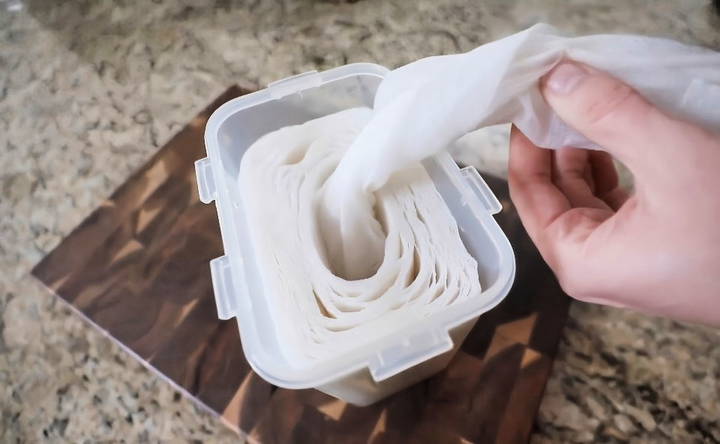
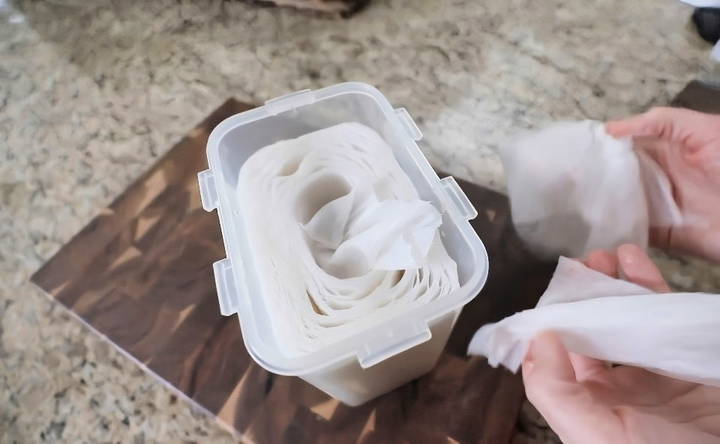
- Making the Wipes Ready to Use: After the paper towels are fully soaked, gently pull out the center cardboard tube. This will allow you to easily pull the wipes from the center, much like a commercial wipe dispenser.
- Why this is necessary: Removing the tube makes it easier to dispense the wipes, making your homemade version user-friendly.
Step 5: Using the Wipes
- Disinfecting Surfaces: Pull a paper towel from the center and use it to wipe down surfaces. Ensure you leave a visible layer of wetness on the surface and let it sit for five minutes to completely disinfect. These wipes work great on non-porous surfaces like countertops, bathroom sinks, and door handles.
- Why this is necessary: Allowing the surface to remain visibly wet ensures that the disinfectant has enough contact time to kill germs effectively.
Optional Step: Rubbing Alcohol Spray
- Alternative Method: If you have 70% rubbing alcohol, you can screw a spray nozzle onto the bottle. This can be used to spray surfaces directly, making for an even faster disinfection process.
- Why this is necessary: Rubbing alcohol is a quick-drying disinfectant that's effective against many pathogens, providing an additional layer of protection.
Additional Tips
- Storing the Wipes: Keep your container sealed when not in use to prevent your wipes from drying out. If they do dry out, simply add more of the bleach-water mixture.
- Proper Disposal: Dispose of used wipes responsibly. Do not flush them down the toilet as they can cause clogs.
- Safety Notes: Always use gloves when handling bleach and ensure the area is well-ventilated. Keep the disinfectant solution out of reach of children and pets.
Customization Tips for Homemade Disinfectant Wipes
Making your own disinfectant wipes gives you the flexibility to tailor them to your specific needs and preferences. Here are some tips to customize your wipes effectively:
- Choose Your Fabric Wisely: The material of your wipes can make a big difference. For a reusable option, consider microfiber cloths or cotton squares. If you prefer disposable, paper towels or napkins work well.
- Select the Right Disinfectant: Depending on what you're cleaning, different disinfectants can be used. Isopropyl alcohol (70% concentration) is great for general use, while hydrogen peroxide (3% concentration) is suitable for surfaces that come into contact with food.
- Adjust the Scent: Essential oils can add a pleasant aroma to your wipes. Popular choices include lemon for its fresh scent and tea tree oil for its antimicrobial properties. Just a few drops will do—too much can irritate the skin.
- Control the Moisture Level: Some prefer their wipes to be more saturated, while others like them less so. Adjust the amount of disinfectant solution to achieve your desired wetness.
- Add Moisturizing Agents: If you're using alcohol-based disinfectants, they can dry out your hands. Consider adding aloe vera or vegetable glycerin to your solution to keep your skin moisturized.
- Consider the Environment: If you're eco-conscious, think about how you can make your wipes more sustainable. Use biodegradable materials and natural disinfectants like vinegar or lemon juice.
- Test for Compatibility: Before using your wipes on any surface, it's important to test them in an inconspicuous area to ensure they don't cause damage or discoloration.
Use these tips to make effective homemade disinfectant wipes suited to your needs. Label containers clearly and keep them away from children and pets.
FAQs About Homemade Disinfectant Wipes
Discover answers to common questions about homemade disinfectant wipes, including effectiveness, ingredients, and how to make them safely at home.
Mix isopropyl alcohol with a concentration of 60% to 90% with water in your container. The Centers for Disease Control and Prevention (CDC) recommends this range for effective disinfection. You can add a few drops of essential oils if you prefer scented wipes.
Choose strong, absorbent paper towels or napkins that won't easily break apart when wet. If you're environmentally conscious, opt for 100% recycled paper products to reduce waste.
Store your wipes in an air-tight container to prevent the alcohol from evaporating. If using a jar, a wide-mouth one is preferable for easy access. Make sure to close the container tightly after each use.
Always work in a well-ventilated area and consider wearing gloves when handling alcohol. Do not substitute hydrogen peroxide for alcohol, as it loses its disinfecting properties when exposed to light and can revert to water.
Homemade disinfectant wipes can be quite effective when made and used correctly. The key is to use isopropyl alcohol with a concentration of 60% to 90%, as recommended by the CDC, which is comparable to many commercial wipes. While store-bought wipes may contain additional chemicals that contribute to their disinfecting power, homemade wipes with the proper alcohol concentration will effectively kill most bacteria and viruses on hard surfaces.
Conclusion
Making your own homemade disinfectant wipes at home is not just cost-effective but also ensures you're well-prepared even when store supplies run low. Remember, hygiene and safety go hand-in-hand. Stay safe, stay healthy, and keep your home clean with these DIY disinfectant wipes!


