As someone deeply passionate about maintaining a toxin-free home, I recently embarked on making my own natural disinfecting spray. With the increasing concern about the harmful chemicals in many store-bought products, I decided it was high time to take matters into my own hands. I’m excited to share my journey and the recipe that has made my home cleaner and safer.
Why I Chose to Make My Own Disinfecting Spray
The primary motivation came from learning about the negative impacts of artificial fragrances and other chemicals found in commercial disinfectants. These can contribute to respiratory issues, allergies, and even asthma. I was particularly concerned with products that are speculated to contribute to antibiotic resistance. So, leveraging what I learned from various resources, including a profound book named “Detox Your Home,” I decided to make a solution that’s not only effective but also health and eco-friendly.
Materials Needed and Their Importance
To make this DIY disinfecting spray, you need a few simple ingredients, each playing a crucial role:
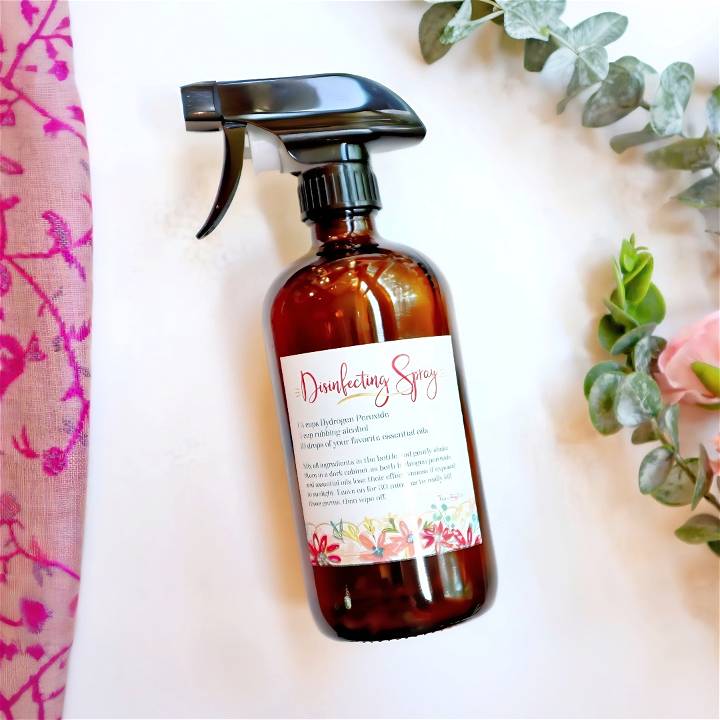
- Hydrogen Peroxide (1 1/2 cups): Acts as a natural bleach alternative, sanitizing and purifying surfaces without harmful residues.
- Rubbing Alcohol (1/2 cup): Chosen for its ability to kill viruses including the flu virus. It evaporates quickly, leaving surfaces ready to use.
- Essential Oils (10-15 drops): I opted for Citrus Fresh for its delightful smell and purifying properties, making the home smell fresh without toxic chemicals.
- A Spray Bottle: Preferably reused or recycled, to stay in line with the eco-friendly ethos of this DIY.
Steps to Make Your Disinfecting Spray
Learn how to make your own disinfecting spray at home with this simple guide. Follow these steps for an effective DIY cleaning solution.
Mixing the Ingredients
- Prepare your Materials: Gather all the ingredients and a funnel to avoid spills.
- Combine Hydrogen Peroxide and Rubbing Alcohol: Using the funnel, pour 1 1/2 cups of hydrogen peroxide and 1/2 cup of rubbing alcohol into the spray bottle. Hydrogen peroxide should be handled with care to maintain its effectiveness (keeping it out of direct sunlight).
- Add Essential Oils: Drip 10 to 15 drops of your chosen essential oils into the mixture. This not only adds a refreshing scent but also enhances the disinfecting properties of your spray.
- Seal and Shake: Secure the spray bottle’s lid and give it a good shake to ensure the ingredients are well combined.
Using Your Natural Disinfecting Spray
Spray on desired surfaces such as countertops, cutting boards, or toilet seats. Let it sit for a few moments to effectively kill germs before wiping off. If using on sensitive surfaces, do a patch test to ensure there’s no adverse reaction, particularly when incorporating rubbing alcohol.
Benefits of DIY Disinfecting Spray
- Cost-Effective: Making your own disinfectant is significantly cheaper compared to buying branded products, which mostly consist of water.
- Eco-Friendly: By reusing containers and purchasing ingredients in bulk, you reduce plastic waste significantly.
- Healthier Home Environment: You control what goes into your disinfectant, ensuring it’s free from harmful chemicals that could affect your family’s health.
Customization Options for Your DIY Disinfectant Spray
Making a disinfectant spray that meets your specific needs can be both rewarding and fun. Here’s how you can tailor your DIY disinfectant to suit your preferences:
Choose Your Scent
Essential oils are a great way to add a pleasant aroma to your disinfectant. Here are some popular options:
- Lavender for a calming effect
- Lemon for a refreshing and clean scent
- Eucalyptus for a crisp, medicinal aroma
- Tea Tree for its natural antiseptic properties
Remember, a little goes a long way! Start with a few drops and increase as needed.
Adjust the Strength
The potency of your disinfectant can be modified according to the surfaces you’re cleaning or the level of disinfection you desire. For general cleaning, a milder solution is sufficient, but for high-touch areas, you might want a stronger mix. Here’s a simple guide:
- Mild: Use a lower concentration of the main disinfecting agent (like alcohol or vinegar).
- Strong: Increase the concentration for more robust disinfection.
Add Moisturizing Agents
If you’re using your spray on surfaces that come into contact with skin (like a yoga mat), consider adding a moisturizer like aloe vera to prevent dryness.
Test and Adjust
Before you settle on your final recipe, test your spray on a small, inconspicuous area to ensure it doesn’t damage the surface or leave a residue.
By following these tips, you can make a disinfectant spray that’s just right for you. Remember to label your spray bottle with the ingredients and date made for future reference. Happy crafting!
FAQs About DIY Disinfectant Spray
Discover answers to common questions about making your own disinfectant spray at home. Learn tips, ingredients, and safety precautions in our FAQ guide.
What ingredients are commonly used in DIY disinfectant sprays?
Most DIY disinfectant sprays include isopropyl alcohol or ethanol (at least 70% concentration), hydrogen peroxide, or vinegar. Essential oils like tea tree, lavender, or lemon can be added for their natural antibacterial properties and to provide a pleasant scent.
How effective are homemade disinfectants compared to store-bought ones?
Homemade disinfectants can be quite effective when made correctly. Solutions containing at least 70% alcohol or 3% hydrogen peroxide are known to kill most bacteria and viruses on surfaces. However, it’s important to note that effectiveness can vary, and they may not be as rigorously tested as commercial products.
Can I use any type of alcohol for my disinfectant spray?
For disinfecting purposes, it’s best to use isopropyl alcohol (rubbing alcohol) or ethanol (grain alcohol), as long as they are at least 70% concentration. Avoid using alcohols that are not intended for disinfection, like methanol or butanol, which can be toxic.
Is it safe to mix different ingredients when making a disinfectant spray?
You should be cautious when mixing ingredients. Never mix bleach with vinegar, ammonia, or rubbing alcohol, as this can make dangerous fumes. Always research and follow safe recipes.
How long does homemade disinfectant spray last?
The shelf life of a homemade disinfectant spray can vary depending on the ingredients used. Alcohol-based sprays can last a long time if stored properly in a sealed container away from heat and light. Peroxide-based sprays should be used within a month, as hydrogen peroxide breaks down over time, especially when exposed to light.
What precautions should I take when using a DIY disinfectant spray?
Always label your spray bottle with the ingredients and the date it was made. Use gloves when handling strong disinfectants, and ensure good ventilation in the area you’re cleaning. Test the spray on a small area first to ensure it doesn’t damage the surface. Keep all DIY disinfectants out of reach of children and pets.
Final Thoughts
Transitioning to making my own natural disinfecting spray has been a rewarding experience. Not only do I have peace of mind about the safety of the products I use at home, but I’ve also seen improvements in the overall healthiness of my living environment. Embracing the DIY approach has, surprisingly, saved me money and reduced my ecological footprint.
If you’ve been considering making your own cleaning products, I encourage you to take the leap. The process is simpler than you might think, and the benefits are profound. Remember, striving for a healthier home doesn’t require compromising on effectiveness. With natural ingredients, we can make powerful solutions that are kind to our bodies and the planet.


