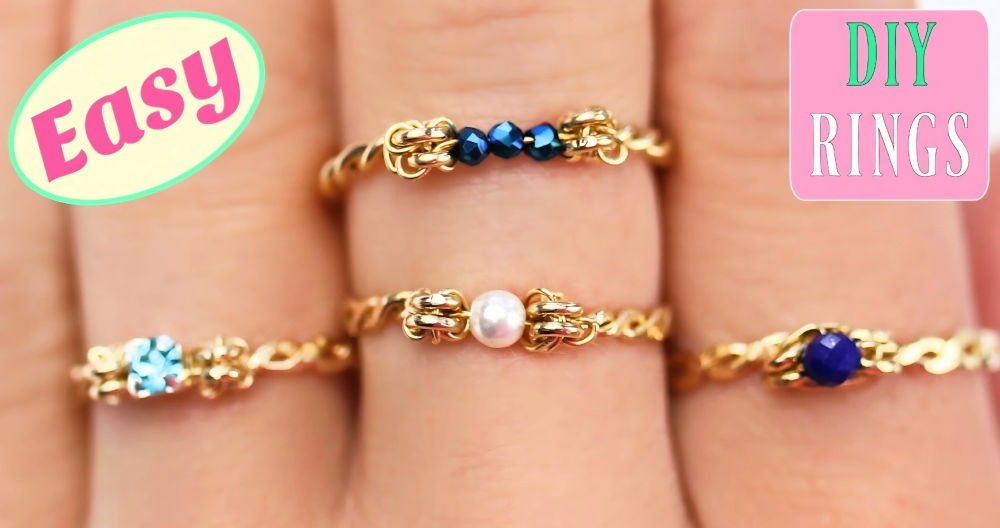
I'm a huge fan of jewelry, especially rings, which I believe can make even the simplest hands look beautiful. As someone who's tried many DIY jewelry projects, I can confidently say that wire rings are one of the most fun and creative projects to try. With just a few basic materials, you can make a custom ring that suits your personal style, whether it's for a casual summer day or a fancy evening event.
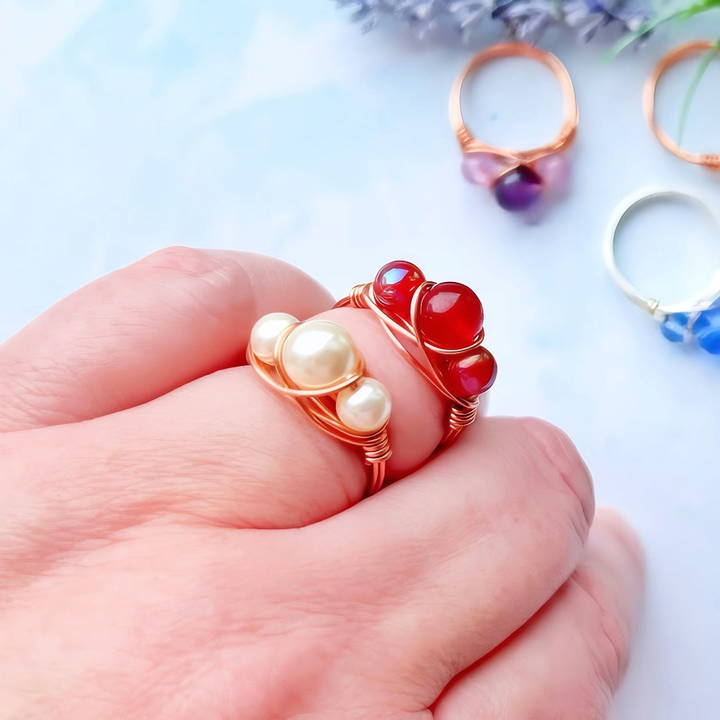
In this guide, I'm going to show you how I make DIY wire rings using beads. These little beauties are perfect for anyone new to jewelry-making or seasoned crafters who want a quick project. Trust me, by the end, you'll be hooked on making these charming wire rings.
Materials You'll Need
Before we dive into the process, it's important to gather all the materials you'll need. Each item plays a key role in making your ring, so make sure you have them all ready before starting.
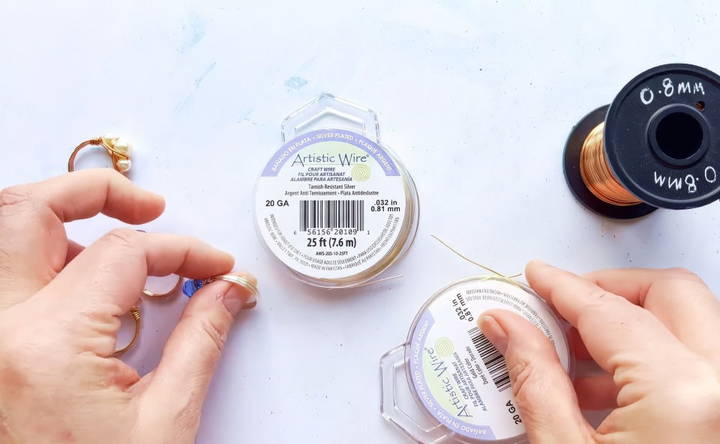
- 0.8mm (20 gauge) wire: This is the wire that forms the structure of your ring. You can choose any color, but I recommend using artistic wire because of its durability and variety of beautiful finishes.
- Beads: For this project, I used an 8mm central bead and two 6mm beads for the sides. You can get creative here—faux pearls, crystals, or any other beads that suit your taste will work great.
- Chain-nose pliers: These are used for shaping the wire and tucking in ends neatly.
- Flush cutters: You'll need these to trim the excess wire.
- Ring mandrel or cone: This helps you shape the wire into a ring. If you don't have one, you can improvise with a thick marker or the lid of a nail polish bottle.
- Optional: Jewelry file or emery board: To smooth any rough wire ends for added comfort.
Step by Step Instructions
Learn how to make beautiful DIY wire rings with our step-by-step instructions, from preparing the wire and beads to customizing your own design.
Step 1: Preparing the Wire and Beads
To start, cut a piece of your 0.8mm wire. For my ring size (T), I usually work with about 55 cm of wire. If you have smaller hands or prefer a tighter ring, you can adjust the length of the wire accordingly.
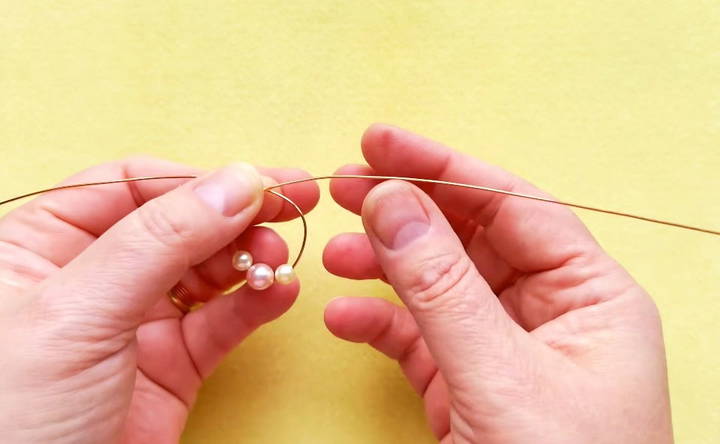
Once you have your wire, thread your beads onto the wire. Begin with a 6mm bead, then the larger 8mm bead, and finally another 6mm bead. Ensure that the wire passes through the bead holes easily, or you might need to adjust the size of the wire or choose different beads.
Step 2: Shaping the Wire
Now that your beads are on the wire, it's time to center them. Gently fold the wire in half so that the beads rest in the middle. You don't have to be exact, but getting the beads as close to the center as possible will help make the ring more balanced.
Once your beads are in place, cross the two ends of the wire over each other. At this point, you'll want to determine the size of your ring. You can do this by holding the wire up to your finger or by using a ring mandrel.
If you're using a mandrel, it's a good idea to size the ring slightly larger than you need. The wrapping process will make the ring smaller, so this extra space will ensure it fits perfectly when you're done.
Step 3: Wrapping the Wire
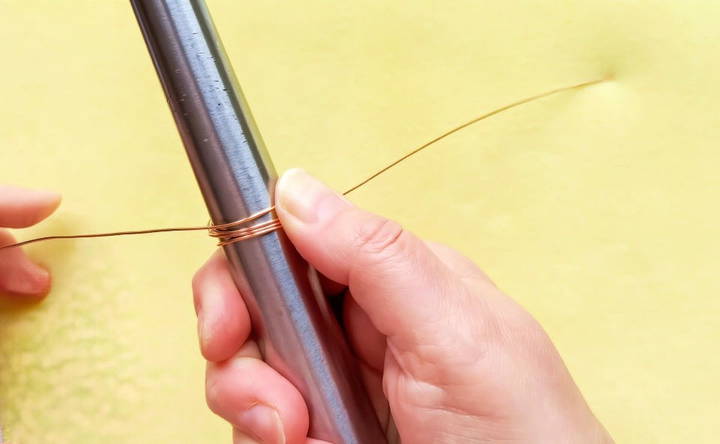
With your beads centered and your ring size in mind, it's time to wrap the wire around the mandrel (or your improvised tool). Place the beads where you want them on the ring and hold them in place.
Now, wrap each side of the wire around the mandrel, making sure the wires cross neatly at the back. You should end up with four strands of wire wrapping around the back of the ring. These wraps help make the ring's structure and add comfort when worn.
As you wrap, keep the wires flat and even. If they get twisted or cross over each other, the ring can feel uncomfortable. Take your time with this step to get the neatest result.
Step 4: Securing the Beads
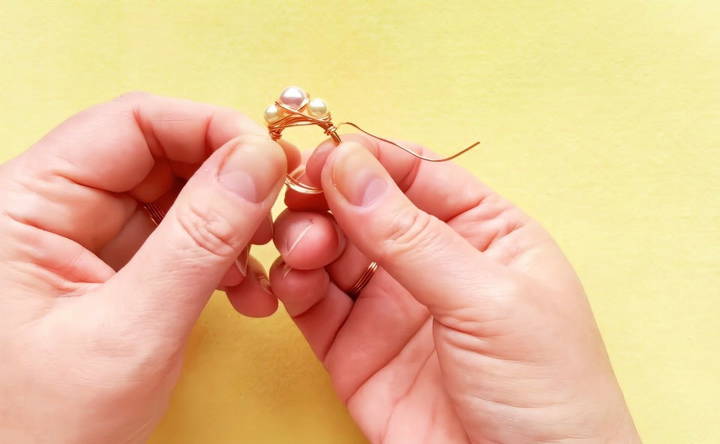
Once you've completed the wraps, it's time to secure the beads by wrapping the wire around them. Take one end of the wire and bring it over the top of the beads, securing it by wrapping it underneath the other wires. Repeat this process with the other side of the wire.
This step is a bit tricky because the wire needs to be pulled tightly without moving the beads out of place. Once the beads are secure, give the wires a final firm pull to ensure everything is in place.
Step 5: Finishing the Ring
With the ring nearly complete, you'll want to finish off the wire by wrapping it around the base of the ring. I recommend doing two wraps on each side to make the ring extra secure. Use your chain-nose pliers to tuck in any loose ends and trim off the excess wire with your flush cutters.
To make sure the ends of the wire are smooth and won't poke your skin, use a jewelry file or an emery board to file down the sharp edges. I like to cut the wire so that the ends are on the side of the ring rather than underneath, which keeps the inside of the ring smooth and comfortable.
Step 6: Adjusting the Fit
Once you've finished wrapping and trimming the wire, slide the ring off the mandrel. Now's the time to try it on and make any final adjustments. If the ring feels too tight or too loose, gently stretch or compress it on the mandrel until it fits just right.
Tips for Customization
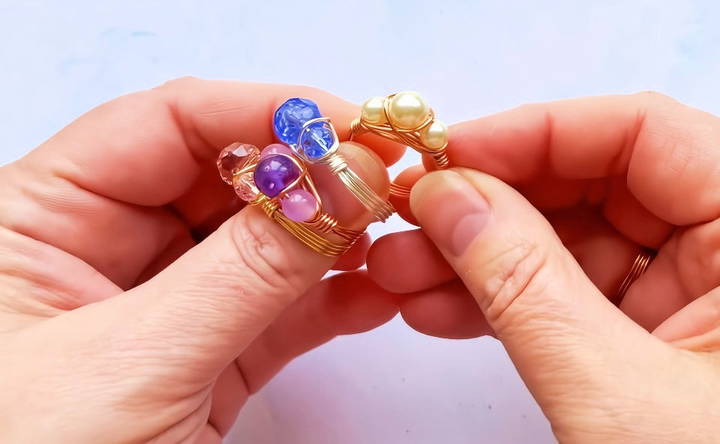
One of the best things about making wire rings is how customizable they are. Here are a few tips to help you get creative with your designs:
- Experiment with bead sizes: While I used 8mm and 6mm beads, you can use any size combination that fits your style. Try using smaller beads for a more delicate look or larger beads for a bold statement piece.
- Mix and match wire colors: Don't be afraid to mix different wire colors, like gold and silver, for a unique two-tone look.
- Use different beads: Faux pearls and crystals are great options, but you can use any type of bead that inspires you. Just make sure the hole is big enough for your wire to pass through.
- Add multiple layers: If you're feeling ambitious, try adding more wraps or beads to make a more intricate design.
Step by Step Video Tutorial
Customization Ideas
Customizing your wire rings can make them unique and personal. Here are some easy and creative ideas to help you add a personal touch to your wire rings:
Personalization
- Initials and Names: Use wire to form the initials or names of loved ones. This adds sentimental value to your rings.
- Birthstones: Incorporate birthstones into your wire rings. You can wrap the wire around the stone to secure it in place. Birthstones make the rings more meaningful and special.
- Symbols and Shapes: Make symbols or shapes that have personal significance. Hearts, stars, or infinity symbols are popular choices. These can be easily formed with wire and add a unique flair to your rings.
Seasonal Designs
- Spring and Summer: Use bright and vibrant colors. Add a small flower or leaf charm to your rings. These designs can reflect the freshness and energy of the seasons.
- Fall and Winter: Opt for warmer tones like gold or copper. Incorporate elements like snowflakes or autumn leaves. These designs can capture the essence of the colder seasons.
Themed Rings
- Holidays: Make rings that celebrate holidays. For example, use red and green wire for Christmas-themed rings or orange and black for Halloween.
- Special Occasions: Design rings for special occasions like birthdays, anniversaries, or weddings. You can add small charms or beads that represent the occasion.
Mixed Materials
- Beads and Gemstones: Combine wire with beads or gemstones. This adds color and texture to your rings. You can use a single bead as a focal point or multiple beads for a more intricate design.
- Leather and Fabric: Wrap wire around strips of leather or fabric. This makes a mixed-media look that is both stylish and unique.
Engraving
- Engraved Messages: If you have access to engraving tools, you can engrave small messages or dates onto metal wire rings. This adds a personal and lasting touch.
Adjustable Rings
- Adjustable Designs: Make rings that can be adjusted to fit different finger sizes. This makes them versatile and comfortable to wear.
Experiment with Wire Gauges
- Different Thicknesses: Use different wire gauges to make varied looks. Thicker wire can be used for bold designs, while thinner wire is great for delicate and intricate patterns.
By incorporating these customization ideas, you can make wire rings that are not only beautiful but also meaningful and unique.
Common Mistakes and How to Avoid Them
Making wire rings can be a fun and rewarding craft, but beginners often encounter some common mistakes. Here's a guide to help you avoid these pitfalls and make beautiful, durable wire rings.
1. Using the Wrong Wire Type
- Mistake: Choosing the wrong type of wire can lead to rings that are too soft, too hard, or prone to tarnishing.
- How to Avoid: Use jewelry-grade wire such as copper, sterling silver, or gold-filled wire. These materials are durable and less likely to tarnish. Avoid using craft wire, which can be too soft and may not hold its shape well.
2. Incorrect Wire Gauge
- Mistake: Using wire that is too thick or too thin can make the ring uncomfortable or difficult to work with.
- How to Avoid: For most wire rings, a gauge between 18 and 22 is ideal. Thicker wire (lower gauge) is harder to bend but more durable, while thinner wire (higher gauge) is easier to manipulate but may not be as strong.
3. Poor Measurement
- Mistake: Not measuring the wire correctly can result in rings that are too small or too large.
- How to Avoid: Use a ring mandrel or a ring sizer to measure your finger accurately. Cut a little extra wire to ensure you have enough to work with and trim the excess after forming the ring.
4. Inconsistent Wrapping
- Mistake: Uneven or loose wrapping can make the ring look messy and unprofessional.
- How to Avoid: Practice consistent tension while wrapping the wire. Use tools like flat-nose pliers to help keep the wire tight and even. Take your time to ensure each wrap is neat and uniform.
5. Sharp Edges
- Mistake: Leaving sharp edges on the wire can cause discomfort or injury.
- How to Avoid: Always file down the ends of the wire after cutting. Use a jewelry file or a nail file to smooth out any rough or sharp edges.
6. Overworking the Wire
- Mistake: Bending and unbending the wire too many times can weaken it, causing it to break.
- How to Avoid: Plan your design carefully before you start. Try to make each bend and twist only once. If you need to adjust, do so gently to avoid weakening the wire.
7. Lack of Practice
- Mistake: Expecting perfect results on the first try can lead to frustration.
- How to Avoid: Practice makes perfect. Start with simple designs and gradually move to more complex ones as you gain confidence and skill. Don't be discouraged by initial mistakes; they are part of the learning process.
8. Ignoring Finishing Touches
- Mistake: Skipping the final touches can make the ring look unfinished.
- How to Avoid: Take the time to polish your ring and check for any rough spots. Use a polishing cloth to give the wire a nice shine. Ensure all ends are securely tucked in and smooth.
By being aware of these common mistakes and knowing how to avoid them, you can improve your wire ring-making skills and make beautiful, professional-looking rings.
FAQs About DIY Wire Rings
Discover all you need to know in our FAQs about DIY wire rings, from materials to techniques. Perfect for jewelry enthusiasts!
Copper, silver, and gold-filled wires are popular choices. Copper is affordable and easy to work with, while silver and gold-filled wires are more durable and hypoallergenic.
You can use a ring mandrel or a ring sizer to measure your ring size. Alternatively, wrap a strip of paper around your finger, mark where it overlaps, and measure the length to find your size.
Beginners can start with simple designs like a basic loop ring, a beaded wire ring, or a wrapped wire ring. These designs are easy to make and require minimal tools.
Use round-nose pliers to make small loops at the ends of the wire. Tuck these loops into the ring band to prevent sharp edges from sticking out.
Yes, you can make adjustable wire rings by leaving a small gap in the band. This allows the ring to be resized easily by gently pulling or pushing the ends.
Conclusion
Making your own DIY wire rings is not only a fun and creative activity but also a great way to personalize your jewelry collection. With just a few simple materials, you can make a ring that fits your style and makes your hands look fabulous, even if they aren't your favorite features (like mine!). Plus, the more you practice, the easier and faster the process becomes.
So, grab your wire, beads, and tools, and start crafting your own custom wire rings today. I guarantee you'll be making dozens before you know it!


