Building my own custom exterior door was one of the best DIY projects I've done. At first, it felt a bit challenging. I had no idea where to begin. But with some research and patience, I found a step-by-step guide. I gathered all the tools and materials needed. It was exciting, and I learned a lot along the way.
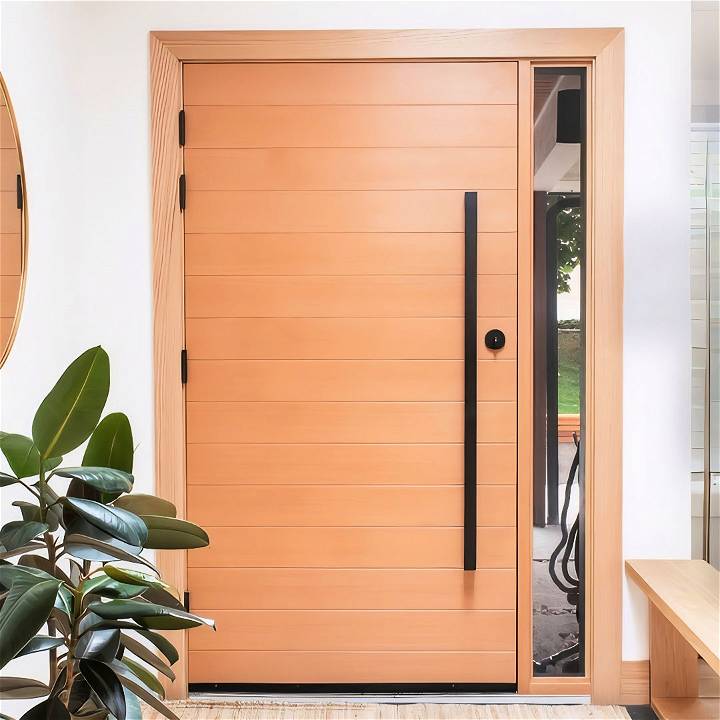
Making a DIY exterior door allowed me to add a personal touch to my home. It felt so rewarding to see the end result. I saved some money and had a great time in the process. If you want to try something similar, this simple, easy-to-follow guide can help you get started. These tips and steps will surely assist you in building your door with confidence.
Materials Needed
Before diving in, it's essential to gather all necessary materials. Here's a list of what you'll need and why each item is crucial:
- Aluminum Sill: Provides a durable, weather-resistant base for the door.
- Oak Door Jambs: Ensures a strong framework due to its hardwood properties.
- Oak Header: Supports the top frame structure.
- Wood Glue and Silicone: For solid, weatherproof joints.
- Wood Screws and 3-inch GRK R4 Framing Screws: To secure all components firmly.
- Hinges and Door Hardware: Essential for attaching and operating the door.
- Weather Barrier (and Adhesive): Prevents moisture infiltration.
- Expanding Foam and Shims: For insulation and leveling.
- Trim Router and Chisels: For precise cuts and shaping.
- Levels, Impact Driver, Drill, Hammer, Sharp Knife, Tape Measure: Necessary tools for installation.
- Stain and Water-Based Exterior Clear Coat: To finish and protect the wood parts.
Step by Step Instructions
Learn how to install a DIY exterior door with our step-by-step instructions. From measuring to finishing, make your door installation a breeze!
Step 1: Measuring and Cutting
Master door installation with our guide on measuring the existing door, cutting oak door jambs, crafting the sill seat, and cleaning up.
Measuring the Existing Door
I started by measuring the existing door because the new door needed to be the exact same size. This ensured a perfect fit and saved me from additional adjustments.
Cutting the Oak Door Jambs
Using my miter saw, I cut the door jambs to the required lengths. To accommodate the thickness of the header, I marked the top of each jamb and adjusted my miter saw's depth stop to carve out a seat for the header to sit in.
Crafting the Sill Seat
The aluminum sill had a 6-7 degree angle, so I cut a sliver to help mark where I had to cut on the jamb. Again, I used my miter saw to remove the necessary section, ensuring the sill would rest perfectly.
Cleaning Up
I cleaned up all saw cuts using a chisel, ensuring a neat and precise fit.
Step 2: Assembling the Frame
Learn about assembling the frame, attaching the header and sill, and installing the mold post for your project in simple, easy steps.
Attaching the Header and Sill
I glued the header to the jambs using wood glue and then secured it with wood screws, counter-sinking the holes to prevent the oak from splitting. For the aluminum sill, I used silicone, then attached it using screws.
Installing the Mold Post
I measured the width of the door, added 1/4 inch for clearing spaces (1/8 inch on each side), and then attached the mold post with silicone and wood glue. I fixed it to the sill using 3-inch wood screws, ensuring it sat flush.
Step 3: Preparing for Hinges and Installing Door
Learn how to prepare for hinges, mark and cut hinge positions, and hang your door efficiently with this comprehensive guide.
Marking and Cutting Hinge Positions
I marked positions for hinges at 5 inches from the top and 10 inches from the bottom, adding an additional hinge at the top due to the door's weight. Using a trim router and a homemade jig, I cut out perfect recesses for the hinges.
Hanging the Door
I pre-drilled holes for screws, attached the hinges to the frame, and then mounted the door. I ensured an equal 1/8 inch gap around the door for smooth operation.
Step 4: Finishing the Frame and Door
Learn how to finish the frame and door with expert techniques on staining and applying a clear coat for a professional look.
Staining
For aesthetic appeal, I stained the exterior oak parts black, highlighting the grain. I then sanded the entire door to 180 grit and eased sharp edges by hand.
Applying Clear Coat
Using a quality stain brush, I applied a water-based exterior clear coat in long strokes, following the wood grain. I repeated this process four times, sanding lightly with 220 grit sandpaper between coats.
Step 5: Removing the Old Door and Frame
Easily remove your old door and frame with our step-by-step guide. Learn how to clean the opening and prepare for a new installation.
Removing the Existing Door
I knocked out the hinge pins and removed the existing door. Using a Sawzall, I carefully cut any screws or nails holding the old frame and wiggled it free.
Cleaning the Opening
With the old frame out, I cleaned the door opening thoroughly, checking for leaks or needed repairs.
Step 6: Installing the New Frame
Learn about installing the new frame, setting up, and applying weather barriers to secure your home with our step-by-step guide.
Setting Up
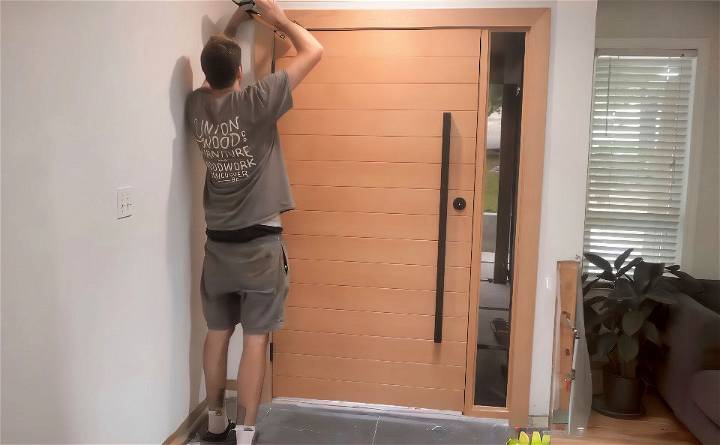
I brought the new frame in, aligning it flush with the interior drywall. Using shims, I leveled and plumbed the frame, securing it with GRK R4 framing screws.
Applying Weather Barrier
I sprayed weather barrier adhesive and placed strips up the sides of the opening, ensuring coverage to prevent moisture infiltration.
Step 7: Securing and Insulating
Learn about securing and insulating with foaming techniques and final fixing methods for optimal energy efficiency and safety.
Foaming and Final Fixing
I used expanding foam around the frame for insulation and added extra fixings to fully secure the heavy door. Once the foam dried, I cut away excess and removed the shims.
Step 8: Installing Hardware
Learn efficient steps for installing hardware, including lock and handle setup and final adjustments for a perfect finish.
Lock and Handle
I installed the lockset by drilling the necessary holes and mortising for plates, ensuring everything was aligned properly. The handle installation followed similar precision.
Final Adjustments
I adjusted the frame to maintain an even gap around the door, ensuring smooth operation. Finally, I installed weather stripping and finished with trims.
Design Customization
When it comes to personalizing your home, the exterior door is a focal point that can reflect your style and taste. Here's how you can customize your DIY exterior door to make a statement that's uniquely you:
Choose Your Color Wisely
Selecting the right color for your door is crucial. In 2024, bold and dark hues are in vogue. Think deep navy, charcoal black, or rich burgundy to add sophistication and drama to your entrance. If you prefer a classic look, a high gloss finish in dark mahogany or black can provide an elegant touch.
Material Matters
The material of your door not only determines its durability but also its aesthetic appeal. For a timeless look, solid woods like mahogany are popular. If you're looking for something more contemporary, fiberglass doors with a woodgrain finish in colors like Tricorn Black or Slate offer a modern twist.
Glass Inserts
Incorporating glass into your door design can brighten your entryway and make a stylish statement. Full-height doors with custom glass inserts are trending, allowing natural light to filter through while maintaining privacy.
Hardware Highlights
Decorative hardware can transform the look of your door. From sleek modern handles to vintage knockers, choose hardware that complements your door's style and color.
Lighting the Way
Proper lighting can enhance your door's design and improve visibility. Flank your door with sconces or pendant lights to illuminate your entryway in the evenings.
Smart Locks
For added convenience and security, consider installing ‘smart' locks. These innovative devices offer keyless entry and can often be controlled remotely.
By considering these elements, you can design a door that not only stands out but also complements the overall aesthetic of your home.
Troubleshooting Common Issues
When you're working on a DIY exterior door project, you might encounter a few hiccups along the way. Here's a guide to help you troubleshoot some of the most common issues:
Door Hinge Problems
If your door isn't closing properly or you hear a squeak, check the hinges. Tighten any loose screws and lubricate the hinges with a silicone-based product to ensure smooth movement.
Latch and Lock Troubles
A misaligned strike plate can cause latch issues, while a worn-out lock can compromise security. Adjust the strike plate and lubricate the lock with graphite powder for a quick fix.
Drafty Doors
Feeling a draft? Replace worn weatherstripping and use caulking to seal any gaps around the door frame to keep your home cozy and energy-efficient.
Sagging Doors
Doors that sag and scrape the floor are often due to loose hinges. Tighten them up to get your door back in alignment.
Sticking Doors
Sticking doors can be caused by humidity or loose hinges. Adjust the hinges and sand down any areas where the door sticks to the frame to solve this problem.
Warped Doors
Doors exposed to moisture can warp. To fix this, apply wood glue to the concave side and clamp it flat until it dries.
By addressing these common issues, you can ensure your DIY exterior door functions properly and looks great.
Maintenance and Upkeep
Keeping your exterior door in top condition not only enhances your home's curb appeal but also ensures it functions properly for years to come. Here's a straightforward guide to maintaining your DIY exterior door:
Regular Cleaning
Dirt and debris can accumulate on your door, dulling its appearance and potentially damaging the finish. To keep your door looking its best, gently clean it with a soft brush or cloth and a mild soap solution. Rinse with clean water and dry thoroughly.
Inspect and Tighten Hardware
Over time, the screws and fittings on your door may loosen. Periodically check the hinges, knobs, and locks, and tighten them as needed. This simple step can prevent many common door issues.
Weatherstripping Check
Weatherstripping seals the gaps around your door, keeping out drafts and moisture. Inspect it regularly for wear and tear, and replace it if you find any damage. This helps maintain your home's energy efficiency.
Touch-Up Finishes
Exposure to the elements can cause the finish on your door to fade or peel. Every few years, or as needed, sand down any rough spots and apply a fresh coat of paint, stain, or sealant to protect the wood and keep it looking fresh.
Lubricate Moving Parts
Lubrication can easily remediate squeaky hinges or stiff locks. To ensure smooth operation, use a silicone-based lubricant for hinges and graphite powder for locks.
Protect from Moisture
Wooden doors are particularly susceptible to moisture, which can lead to warping. To prevent water damage, make sure your door is properly sealed and protected with a suitable finish.
By following these maintenance tips, you can ensure that your exterior door remains a beautiful and functional part of your home for many years.
Safety Considerations
Ensuring safety is paramount when undertaking a DIY exterior door project. Here are some key considerations to keep in mind to protect yourself and your home:
Personal Protective Equipment (PPE)
Always wear the right PPE. This includes safety goggles to protect your eyes from flying debris, gloves to safeguard your hands, and a dust mask when sanding or cutting wood.
Tool Safety
Use power tools with care. Read the manual before use, check that tools are in good working order, and always follow the recommended safety procedures. Keep your workspace well-ventilated to avoid inhaling dust or fumes.
Door Strength
Choose a solid-core or metal door for enhanced security. These materials are more resistant to forced entry than hollow doors. Ensure that the door fits snugly within the frame without any excessive gaps.
Locks and Deadbolts
Install high-quality locks and deadbolts. A deadbolt should have at least a one-inch throw. Consider a lock with a grade 2 rating or higher for better security.
Lighting and Visibility
Good exterior lighting can deter intruders. Install lights above the door and ensure the area is clear of any obstructions that could provide hiding spots.
Security Systems
Think about adding a security camera or a smart lock that can be monitored remotely. This adds an extra layer of protection and convenience.
Compliance with Local Codes
Make sure your door design complies with any local building codes or regulations. This ensures that your door meets safety standards and provides adequate security.
By adhering to these safety tips, you can build a secure exterior door and ensure a safe installation. Taking the time to do it right pays off both now and later.
FAQs About DIY Exterior Door
Explore the essential faqs about DIY exterior doors, offering expert tips and guidance for a successful and secure home improvement project.
Yes, you can replace your exterior door yourself if you have basic carpentry skills. You’ll need to order a prehung exterior door that fits your opening and use tools like levels, a caulk gun, and a reciprocating saw. The process involves removing the old door, preparing the opening, and installing the new door with attention to weatherproofing.
To ensure your DIY exterior door is weather-tight, start by using a roll of flexible self-sticking flashing membrane and polyurethane caulk. During installation, use minimal expanding foam and a backer rod around the door frame to seal gaps. Make sure the sill is properly treated and that the door is correctly aligned and hung.
Detailed plans for building an exterior door can be found online. These plans will guide you through the design and construction process, including the selection of materials, cutting and assembling the parts, and finishing the door for installation. Look for resources that offer comprehensive instructions and support for DIYers.
To choose the right size for your DIY exterior door, measure the width and height of your current door or the door opening. Round up to the nearest full inch to determine the size of the door you need. For example, if the door measures 35-3/4 inches wide and 79-1/2 inches tall, you would order a 36-inch by 80-inch door. Ensure to measure the jamb width from the backside of the interior trim to the backside of the exterior trim to specify when ordering a prehung door.
When designing your DIY exterior door, consider the architectural style of your home and the level of security you desire. Choose materials that are durable and weather-resistant, such as fiberglass, steel, or solid wood. Think about the door's insulation properties and whether you want to include windows for natural light. Additionally, consider the door's color, texture, and hardware to complement your home's exterior.
Conclusion
Wrapping up, learning how to build an exterior door can be a rewarding project. From selecting materials to assembling your DIY exterior door, each step is essential for ensuring quality and durability. Building a custom exterior door not only enhances the curb appeal of your home but also adds a personal touch. With the right tools and a bit of patience, you can build a door that reflects your style and meets your needs.


