Building a DIY rain barrel stand is simpler than you might think. I remember when I started mine, it felt like a big project, but it quickly became a fun and rewarding experience. With just a few tools and some basic materials, I built a sturdy stand that fits perfectly in my garden. It not only supports my rain barrel securely but also adds a nice touch to the yard.
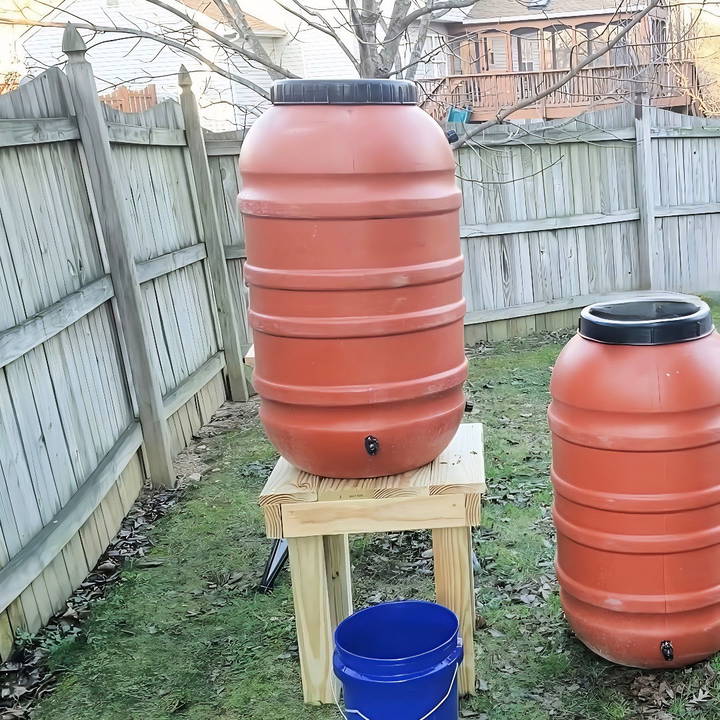
I'm sharing these tips to guide you through the process, and I'm confident they will help you build a functional and attractive stand for your rain barrel. Get ready to get hands-on with this project!
Why Build a Rain Barrel Stand?
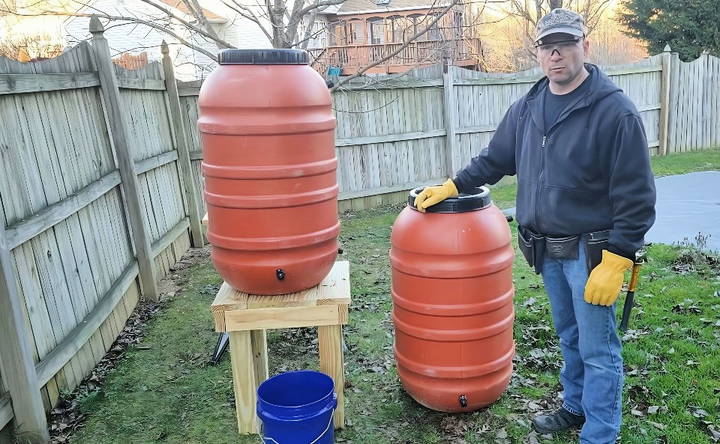
Before we jump into the building process, let's talk about why you'd want a rain barrel stand in the first place. One of the main benefits is that it elevates the rain barrel, allowing enough clearance for a bucket underneath. This means you can easily access and use the collected rainwater. Without the stand, the rain barrel sits flush on the ground, making it difficult to utilize the water efficiently.
Materials You'll Need
For this project, I needed very specific materials that you might find at your local home improvement store. Let me guide you through each item and explain why they're essential for our rain barrel stand:
- One 4x4 (8 feet long): This will serve as the stand's legs, providing strength and support. The 4x4 is crucial for withstanding the weight of a full rain barrel, which can be significant.
- One 2x4 (8 feet long): These will form the frame that supports the deck boards. The 2x4 offers structural integrity.
- One deck board (8 feet long): Deck boards are designed to withstand outdoor elements, which is why I chose it for the surface area of the stand. It needs to be weather-resistant to ensure durability.
- Goggles and gloves: Safety is paramount when working with tools, so these personal protective items are non-negotiable.
- Tape measure and square: Precision is key to a successful build, making these measuring tools vital for accurate cuts and alignment.
- Pencil: Essential for marking measurements on your wood before cutting.
- Saw: You'll need this to cut your wood pieces to the right size.
- Power drill and exterior screws (both 3-inch and 2.5-inch): Power drills make assembling the stand much easier and faster, while the screws are necessary for joining the pieces together securely.
Now that we've covered the materials, let's dive into the actual building process!
Step by Step Instructions
Learn how to build a DIY rain barrel stand with our step-by-step instructions. Perfect for garden enthusiasts looking to maximize rainwater collection!
Step 1: Cutting the Wood
With all my materials gathered, the first task was cutting the wood to the required lengths. Here's how I did it:
- 4x4 Into Legs: I cut the 4x4 into four pieces, each 2 feet long. These pieces will serve as the legs of the stand, providing strength and elevation.
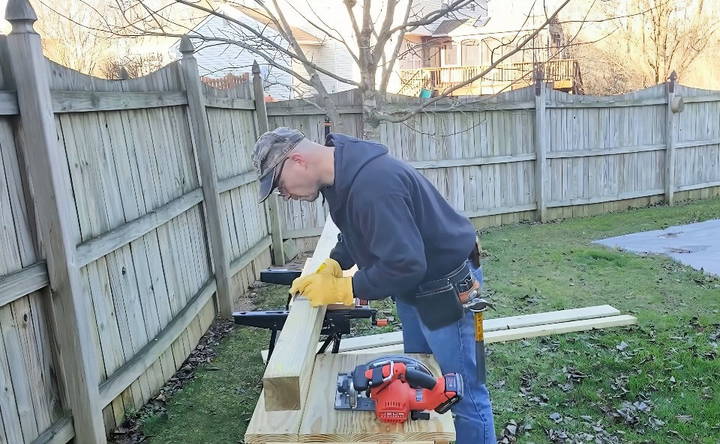
- Cutting the 2x4: The 2x4 was cut into four pieces as well. Two pieces were 22 inches long, and the other two were 18.5 inches long. These will form the frame of the stand.
- Deck Board Pieces: Lastly, the deck board was cut into four 22-inch long pieces. These will be the slats on top of the frame where the rain barrel will sit.
Step 2: Assembling the Frame
Now that all the wood was ready, assembly was the next step. The frame is essentially the skeleton of the stand, and here's how I put it together:
- Attaching the Short Sides: I attached the 18.5-inch 2x4 pieces at the ends of the 22-inch pieces to form a rectangular frame. Using the power drill and 3-inch screws, I secured these joints, ensuring they were sturdy.
- Completing the Frame: With the short sides secured, I checked everything was square. A square tool helped make sure the corners were at 90-degree angles, giving me confidence that the stand would sit level on the ground.
Step 3: Adding the Legs
The legs gave the stand its height and stability. Here's how I attached them:
- Aligning the Legs: Each 2-foot 4x4 was aligned at the corners of the frame I constructed earlier. This step required some patience and precision to ensure the legs were perfectly vertical.
- Securing the Legs: With my power drill and 3-inch screws, I secured each leg to the outer corners of the frame. This provided a strong base, capable of holding weight.
Step 4: Attaching the Deck Boards
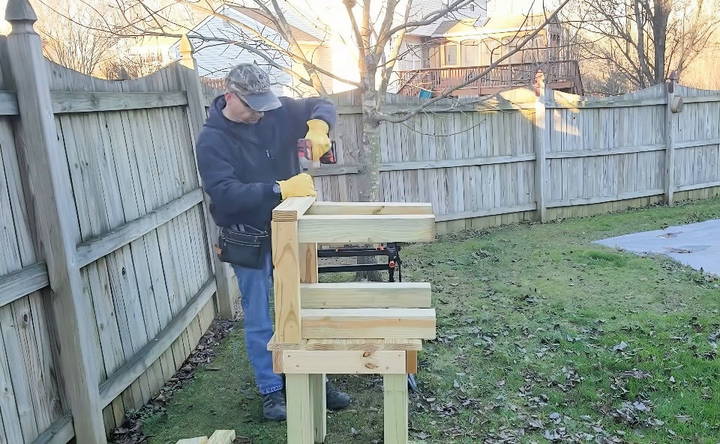
The final structural element was attaching the deck boards. These boards provide a stable platform for the barrel. Here's how I did it:
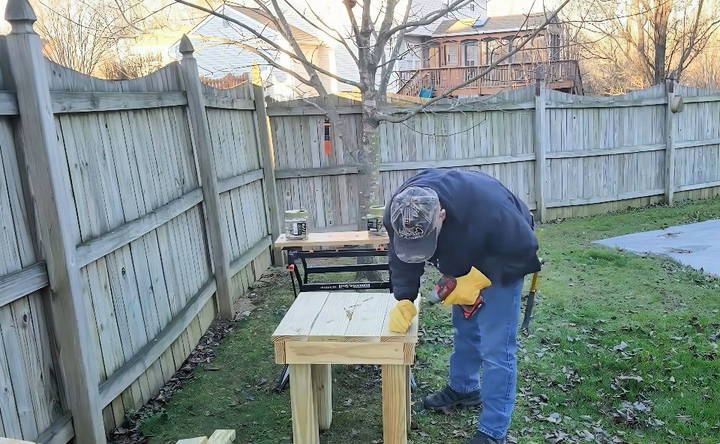
- Positioning the Deck Boards: I placed the four 22-inch deck boards evenly across the top frame. I ensured there were small gaps between the boards to allow for water drainage, preventing any pooling.
- Securing the Deck Boards: Using the 2.5-inch screws, I fastened each board to the frame below. This completed the assembly and guaranteed a strong, durable surface.
Final Touches and Tips
After assembly, I gave everything one last check. I made sure all screws were tight and that the stand did not wobble.
Tips for a Successful Build
- Safety First:
Always use goggles and gloves. Protect your eyes and hands, especially when cutting and drilling. - Measure Twice, Cut Once:
This old adage holds true. Be sure of your measurements before making any cuts to avoid unnecessary waste. - Keep it Level:
If your stand isn't level, make necessary adjustments. This ensures the rain barrel isn't lopsided when filled, which could cause it to tip or leak.
Benefits of Building Your Own Stand
The personal satisfaction I got from completing this project was immense. Not only did I manage to build a fully functional rain barrel stand, but I also learned a lot along the way. Building it myself saved money compared to buying one, and I could customize it to fit my specific needs and space.
Building a rain barrel stand may seem daunting initially, but breaking it down into manageable steps makes it achievable even for a beginner. It feels rewarding to know that my DIY effort contributes to water conservation and garden sustainability.
Design Variations
When it comes to building a rain barrel stand, there are several design variations to consider. Each design has its own benefits and can be tailored to fit your specific needs and aesthetic preferences. Here are some popular options:
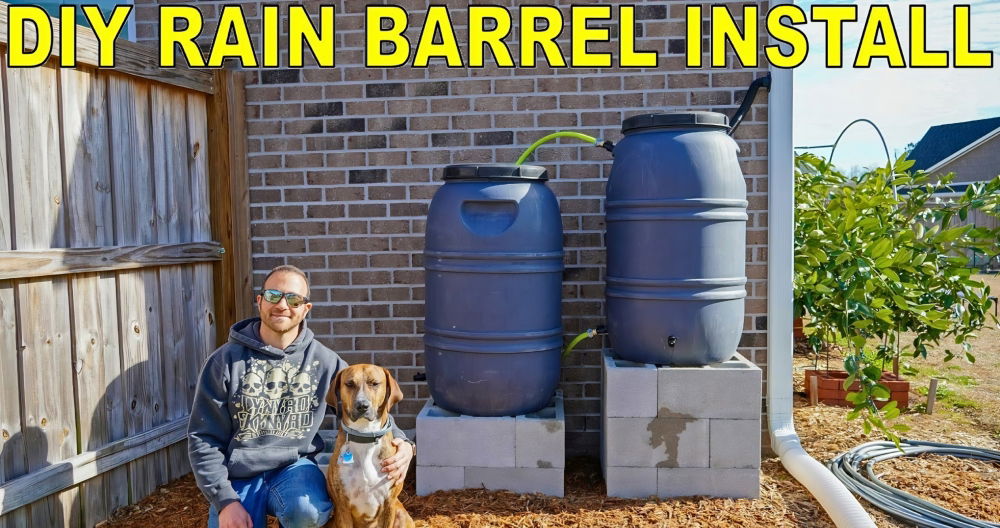
Cinder Block Stand
A cinder block stand is a quick and cost-effective option. It requires minimal tools and can be assembled in minutes.
Materials Needed:
- Cinder blocks (4-8, depending on height)
- Leveling sand or gravel
Steps:
- Level the ground where the stand will be placed.
- Arrange the cinder blocks in a square or rectangular pattern.
- Stack additional blocks to reach the desired height.
- Ensure the blocks are stable and level.
Metal Frame Stand
A metal frame stand offers a modern look and is highly durable. This design is ideal for those who prefer a sleek, industrial aesthetic.
Materials Needed:
- Metal pipes or rods
- Pipe connectors
- Metal screws or bolts
- Rust-resistant paint
Steps:
- Cut the metal pipes to the required lengths.
- Connect the pipes using pipe connectors to form a frame.
- Secure the connections with screws or bolts.
- Paint the frame with rust-resistant paint.
Recycled Pallet Stand
Using recycled pallets is an eco-friendly option. This design repurposes old pallets, making it both sustainable and budget-friendly.
Materials Needed:
- Wooden pallets
- Saw
- Hammer and nails
- Sandpaper
Steps:
- Disassemble the pallets and cut the wood to size.
- Sand the wood to remove splinters.
- Assemble the wood into a sturdy frame.
- Secure the frame with nails.
Decorative Stand
For those who want their rain barrel stand to be a focal point in the garden, a decorative stand is the way to go. This design can incorporate artistic elements and custom finishes.
Materials Needed:
- Decorative wood or metal
- Paint or stain
- Decorative elements (e.g., tiles, stones)
Steps:
- Choose a base design (wooden, metal, etc.).
- Add decorative elements to the base.
- Paint or stain the stand to match your garden decor.
- Seal the stand to protect against the elements.
Selecting a rain barrel stand design depends on your preferences, budget, and materials. Simple or decorative, each has unique benefits, enhancing functionality and appearance.
Troubleshooting Common Issues
Building and maintaining a rain barrel stand can sometimes come with challenges. Here are some common issues you might encounter and how to solve them.
Unstable Stand
- An unstable stand can cause your rain barrel to tip over, especially when full.
- Solution: Check the ground: ensure the ground is level. Use a spirit level to check and add sand or gravel to even it out. Secure the stand: use brackets or stakes to anchor the stand to the ground. Reinforce the structure: add cross braces or supports to strengthen the stand.
Wood Rot
- Wooden stands are prone to rot, especially if they are not treated properly.
- Solution: Use treated wood: choose pressure-treated wood or apply a wood preservative. Seal the wood: apply a waterproof sealant to protect against moisture. Regular maintenance: inspect the stand regularly and reapply sealant as needed.
Rust on Metal Stands
- Metal stands can rust over time, weakening the structure.
- Solution: Choose rust-resistant materials, such as galvanized steel or aluminum. Apply rust-proof paint: coat the stand with rust-proof paint or a rust inhibitor. Regular inspection: check for signs of rust and treat immediately.
Shifting or Settling
Over time, the stand may shift or settle, causing the rain barrel to become uneven.
- Solution: Check the base: ensure the base is solid and level. Add more gravel or sand if needed. Reposition the stand: adjust the stand and barrel to ensure they are level. Periodic checks: regularly check the stand and base for any movement.
Leaks
Leaks can occur at the connections between the rain barrel and the stand.
- Solution: Check connections: ensure all connections are tight and secure. Use sealant: apply waterproof sealant to any joints or connections. Replace damaged parts: replace any damaged or worn-out parts immediately.
Pest Infestation
Pests like insects or rodents may be attracted to the rain barrel stand.
- Solution: Keep the area clean: regularly clean the area around the stand to remove debris. Use pest repellents: apply natural pest repellents around the stand. Seal openings: ensure there are no gaps or openings where pests can enter.
Overflow Issues
During heavy rain, the rain barrel may overflow, causing water to spill over.
- Solution: Install an overflow system: attach an overflow hose to direct excess water away from the stand. Regularly empty the barrel: ensure the barrel is not always full by using the collected water regularly. Check downspouts: ensure downspouts are properly directed into the barrel.
Fixing common issues ensures your rain barrel stand stays durable and functional. Regular maintenance and quick repairs prevent major problems and keep your system smooth.
FAQs About DIY Rain Barrel Stands
Discover essential FAQs about DIY rain barrel stands and learn how to build durable, eco-friendly solutions for effective rainwater harvesting.
Elevating your rain barrel increases water pressure, making it easier to water your garden. Gravity helps the water flow faster from the barrel to your plants. An elevated barrel also makes it easier to fill watering cans.
For optimal water pressure, elevate your rain barrel at least two feet above the highest point in your garden. This ensures a steady flow of water, even when the barrel is not full.
Secure the Barrel: Ensure the rain barrel is securely placed to prevent it from tipping over.
Check Stability: Regularly check the stand for stability, especially after heavy rain or strong winds.
Use Treated Wood: If using wood, consider treated wood to prevent rot and extend the life of your stand.
Absolutely! Using recycled materials is a great way to be eco-friendly and save money. You can repurpose items like old pallets, bricks, or even sturdy crates. Just ensure that the materials are strong enough to support the weight of a full rain barrel.
Regular maintenance is key to ensuring the longevity of your rain barrel stand. Here are some tips:
Inspect for Rot: If you used wood, check for signs of rot or insect damage, especially if the wood is untreated.
Check Stability: Ensure the stand remains stable and level. Adjust or reinforce as needed.
Clean Regularly: Keep the area around the stand clean to prevent debris buildup, which can attract pests.
Wrapping Up
Building a DIY rain barrel stand turned into an enlightening and enjoyable weekend project. I hope my journey and the detailed steps here inspire you to build one yourself. It's not merely about the stand but knowing that each raindrop collected serves a greater purpose in living sustainably.


