Building a DIY power hammer from scrap metal is a project that sounds daunting but is incredibly rewarding. This adventure began after my fascination with metal shaping and a nudge from a friend who builds hammers. I thought, why not take on the challenge of constructing my own power hammer using only readily available materials and tools? Here's how I did it.
Gathering the Materials
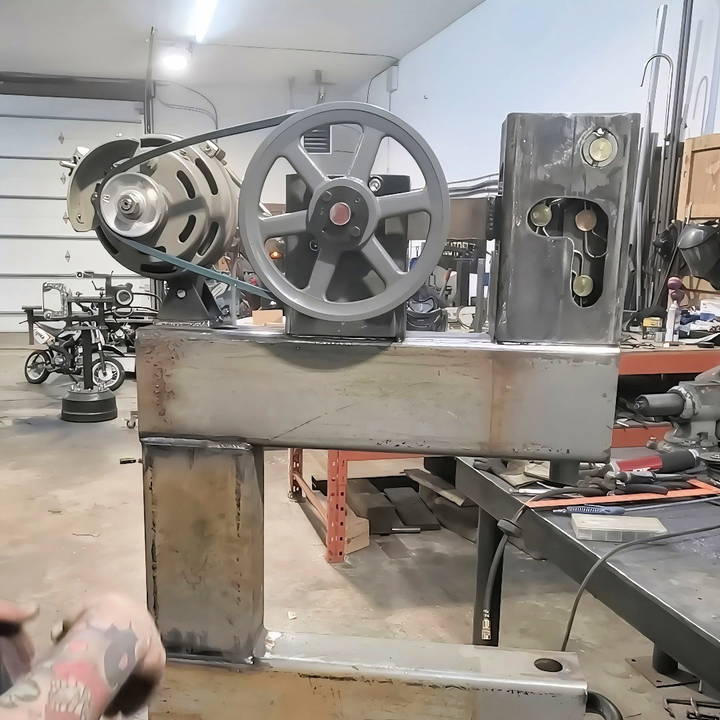
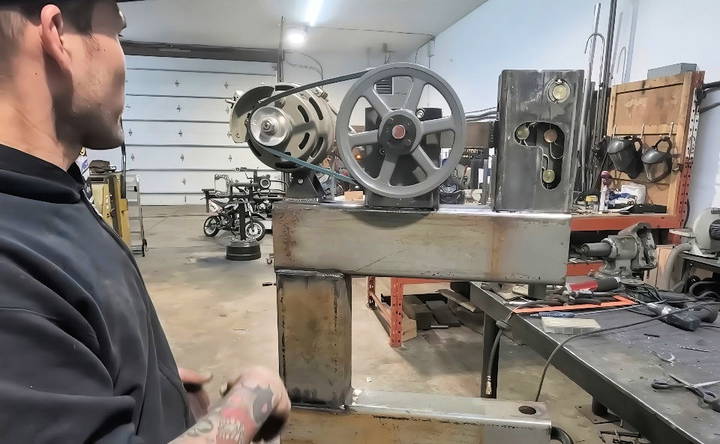
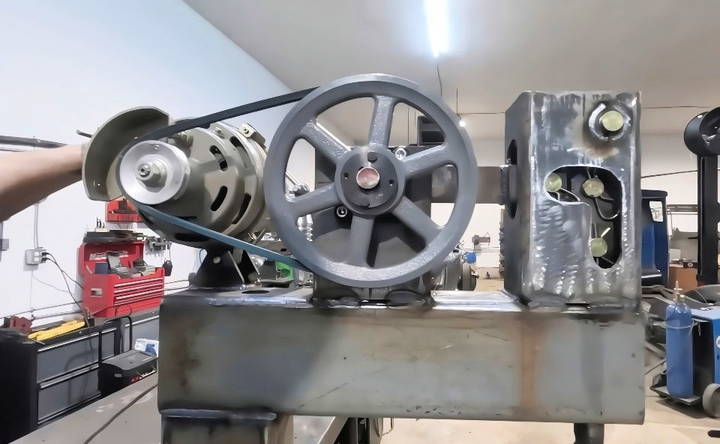
- Finding the Right Motor: The first thing I needed for this power hammer project was a motor. After a quick search on Marketplace, I found a clutch-driven half horsepower sewing machine motor for just $25. It wasn't a powerful motor, but the affordability made it a fitting start. Finding a motor cheap enough ensures that the project stays budget-friendly, a key aspect of this build.
Other Key Components
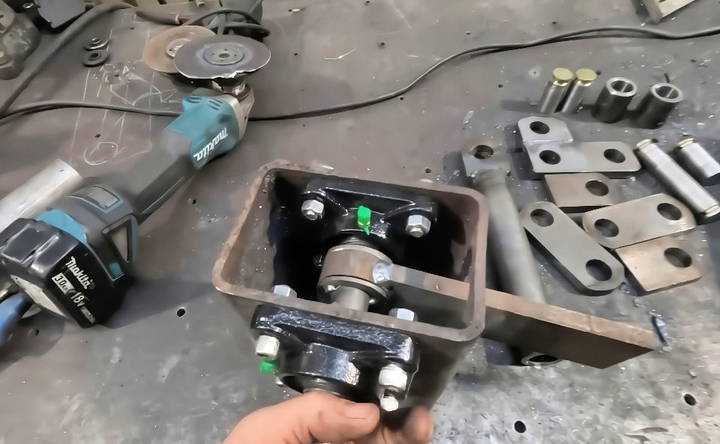
- Flange Bearings: I had a few of these inch flange bearings lying around, which are relatively easy to find and inexpensive. They help facilitate movement by reducing friction between rotating parts. They were essential for the camshaft assembly, allowing smooth operation.
- Shaft and Pulleys: I discovered some one-inch diameter shafts in my scrap pile. These were perfect for the shafts needed in the mechanical mechanism. Luckily, I also found a one-inch shaft-sized pulley, which was necessary to leverage the motor's power effectively.
- Steel Tubing: Through some digging in my scrap stash, I came across various pipes and DOM tubes that fit snugly into one another. These would be perfect for making the frame and movable parts of the hammer. DOM (Drawn Over Mandrel) tubing is particularly useful because it provides precise dimensions with no interior ridges, making it ideal for sliding components.
Step by Step Instructions
Learn how to build a DIY power hammer with our step-by-step instructions, from drawing plans to final testing and safety improvements. Perfect for metalworking hobbyists!
Step 1: Drawing Up the Plans
Before cutting any metal, I needed a simple blueprint. My design was inspired by the relationship between various types of hammers, such as Pettingell and Pullmax machines. The frame would take the shape of a 'C', with space for the upper and lower tool holders.
Step 2: Cutting and Assembling
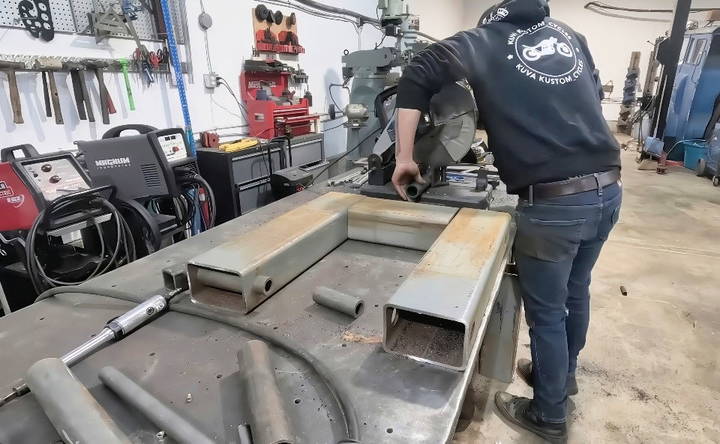
Using a drill press and an angle grinder, I cut the 4x6 tubing, making the frame's body. These large steel pieces provided a solid structure, necessary to withstand the constant impacts and vibrations during hammering.
Step 3: Making a Stable Base
For stability, I used a hefty chunk of scrap metal as the base. A solid base helps absorb vibrations, reducing operational noise and prolonging the life of the machine. Welding all the frame parts together, including the base, turned out to produce exactly the rugged frame I needed.
The Mechanical Motion – Making the Hammer Move
Learn how to make the hammer move by making the camshaft, constructing the linkage system, and connecting the rod and bearings step-by-step.
Step 4: Building the Camshaft
To build the camshaft, I drilled an off-center hole in a piece of round solid metal bar. This eccentric placement allows the camshaft to convert rotary motion into linear motion, a crucial mechanism that provides the up-and-down motion necessary for the hammering action.
Step 5: Constructing the Linkage System
The linkage system translates the rotational movement from the motor into the hammer's vertical motion. I employed a shackle-type linkage, where a series of arms connect to a fixed pivot point, translated into the desired linear motion.
Step 6: Connecting Rod and Bearings
I used thick flat bar metal to build robust connecting rods. By welding and bolting these pieces together with flange bearings, I achieved a setup where the movement was smooth and aligned. This structure ensured that the hammer's stroke was efficient, maximizing the modest power provided by the motor.
Assembling the Hammer
Discover detailed instructions for assembling the hammer with steps on adding adjustments, tool holders, and final mechanical touches.
Step 7: Adding Adjustments and Tool Holders
I welded pieces of DOM tubing into the frame, making channels for the tool holders to move up and down. The adjustability allowed me to fine-tune the height and pressure of the hammer. I made simple adjustments by placing bolts at strategic points, which could be turned to lift or lower the tool holder.
Step 8: Wrapping Up Mechanically
With the frame and mechanical systems ready, I mounted the motor onto the structure. A key decision was to swap the motor's small pulley with a larger one. By doing so, I increased the mechanical advantage, allowing the motor to apply more force despite its low horsepower. This step was crucial in achieving adequate hammer force.
Final Touches and Testing
Master step-by-step final touches on your project with testing, making shrinking dies, and ensuring safety and improvements. Learn more now!
Step 9: Testing the Setup
Connecting power to the motor was a significant moment. The clutch mechanism allowed for controlled operation, and the adjustments allowed for fine precision. After several tests with basic material, I confirmed that the machine could shape metal effectively.
Step 10: Making and Using Shrinking Dies
For shaping techniques like shrinking, specially designed dies were necessary. By practicing with various scrap pieces, I experimented with different die forms, which could later be swapped into the holder, encouraging effective metal shaping.
Step 11: Safety and Improvements
With the basic construction completed, ensuring proper safety measures was vital. Adding protective covers around moving parts and reinforcing the base for additional stability were post-build improvements. Communicating how the machine engaged and disengaged was necessary for safe operation.
Advanced Modifications
Enhancing your DIY power hammer can significantly improve its performance and versatility. Here are some advanced modifications you can consider:
Adjustable Stroke Length
- Why It Matters: Adjusting the stroke length allows you to control the hammer's impact force. This is useful for different forging tasks, from delicate work to heavy-duty forging.
- How to Implement: Install an adjustable linkage or a variable speed motor. This lets you change the stroke length easily.
Tooling Attachments
- Why It Matters: Different tooling attachments can expand the range of shapes and textures you can achieve.
- How to Implement: Use swages, fullers, and flatters. These can be attached to the hammer to build various effects on the metal.
Pneumatic Assist
- Why It Matters: Adding a pneumatic assist can increase the hammer's power and efficiency.
- How to Implement: Integrate a pneumatic cylinder with your existing setup. This can be controlled with a foot pedal for precision.
Noise Reduction
- Why It Matters: Power hammers can be very loud, which can be a nuisance and a safety concern.
- How to Implement: Add rubber mounts and sound-dampening materials around the hammer. This will help reduce the noise levels significantly.
Safety Features
- Why It Matters: Enhancing safety features can prevent accidents and injuries.
- How to Implement: Install emergency stop buttons and safety guards. Ensure all moving parts are covered to prevent accidental contact.
Digital Controls
- Why It Matters: Digital controls can provide more precise control over the hammer's operation.
- How to Implement: Use a programmable logic controller (PLC) to automate and control the hammer's movements. This can include setting specific patterns or sequences for repetitive tasks.
Enhanced Base Stability
- Why It Matters: A stable base reduces vibrations and improves the hammer's efficiency.
- How to Implement: Reinforce the base with additional weight or use a more robust material. Ensure the base is securely anchored to the floor.
Cooling System
- Why It Matters: Continuous operation can cause the hammer to overheat, affecting performance.
- How to Implement: Install a cooling system, such as a fan or water-cooling setup, to keep the hammer at an optimal temperature.
Power Source Upgrade
- Why It Matters: Upgrading the power source can provide more consistent and reliable performance.
- How to Implement: Consider switching to a more powerful motor or using a hydraulic system for better force and control.
Enhance your DIY power hammer's performance and safety with these upgrades, ensuring a more efficient and enjoyable forging experience.
Common Issues and Troubleshooting
Building and using a DIY power hammer can be rewarding, but you might encounter some common issues. Here's a guide to help you troubleshoot and fix these problems.
Irregular Stroke Patterns
- Problem: The hammer's stroke is inconsistent, leading to uneven forging.
- Solution: Check for misalignment in the linkage or worn-out parts. Tighten any loose bolts and replace worn components. Regular lubrication can also help maintain smooth operation.
Excess Noise or Vibration
- Problem: The power hammer is excessively noisy or vibrates too much.
- Solution: Ensure the hammer is securely anchored to a stable base. Add rubber mounts to dampen vibrations. Check for loose parts and tighten them. Regular maintenance can prevent these issues.
Decreased Striking Power
- Problem: The hammer's striking force is weaker than expected.
- Solution: Inspect the spring or pneumatic system for wear and tear. Replace any damaged parts. Ensure the motor is functioning correctly and providing adequate power.
Overheating
- Problem: The power hammer overheats during use.
- Solution: Install a cooling system, such as a fan or water-cooling setup. Ensure proper ventilation around the motor and other heat-generating components. Take breaks to allow the machine to cool down.
Jammed Hammer Head
- Problem: The hammer head gets stuck and doesn't move freely.
- Solution: Check for obstructions in the hammer's path. Clean and lubricate the moving parts. Ensure the linkage is properly aligned and not bent.
Inconsistent Speed
- Problem: The hammer's speed varies unexpectedly.
- Solution: Inspect the motor and speed control system. Ensure the variable speed motor is functioning correctly. Replace any faulty electrical components.
Safety Concerns
- Problem: Safety features are not functioning or are absent.
- Solution: Install emergency stop buttons and safety guards. Regularly check and maintain these features to ensure they are operational. Always follow safety guidelines when using the power hammer.
Maintenance Tips
- Regular Checks: Perform regular inspections to identify and fix issues early.
- Lubrication: Keep all moving parts well-lubricated to reduce wear and tear.
- Cleaning: Clean the hammer regularly to prevent dust and debris buildup.
- Replacement: Replace worn-out parts promptly to maintain optimal performance.
Follow these tips to keep your DIY power hammer running efficiently. Regular maintenance and timely repairs ensure longer lifespan and better performance.
FAQs About DIY Power Hammers
Discover essential FAQs about DIY power hammers. Learn about materials, construction tips, and safety measures to enhance your DIY projects.
A DIY power hammer is a mechanical forging tool that automates the hammering process, making it easier to shape and forge metal. It's especially useful for blacksmiths and metalworkers who want to reduce the physical strain of manual hammering and increase efficiency and precision in their work.
Safety is crucial when building and using a power hammer. Ensure all parts are securely fastened and the structure is stable. Use proper safety gear, such as gloves and eye protection, when operating the hammer. Regularly inspect the machine for any wear and tear, and maintain it properly to prevent accidents.
Yes, one of the benefits of building your own power hammer is the ability to customize it. You can adjust the size, power, and features to match your specific forging requirements. This flexibility allows you to build a tool that perfectly fits your workflow and projects.
There are many resources available online, including detailed plans, video tutorials, and community forums. Websites like Little Lovelies by Allison and The Self-Sufficient Living offer step-by-step guides and inspiration for various DIY power hammer projects. These resources can provide valuable insights and tips to help you successfully build your own power hammer.
The time required to build a DIY power hammer can vary depending on your experience, the complexity of the design, and the availability of materials and tools. On average, it might take anywhere from a few days to a couple of weeks to complete the project. Planning and preparation are key to ensuring a smooth build process. Breaking the project into manageable steps and setting aside dedicated time for each phase can help you stay on track and avoid feeling overwhelmed.
Reflecting on the Project
Throughout this journey of building a DIY power hammer from scrapyard finds and a bit of mechanical ingenuity, I learned the importance of strategic planning and adaptability. Each part of the build required adjusting plans according to the available materials. This improvisation not only kept costs down but also provided a deep sense of satisfaction from problem-solving.
Why You Should Try It Too!
If you're passionate about metalworking and have a knack for mechanical projects, building your own power hammer could be an enriching experience. Start by gathering scrap metals, draw out a simple design, and tackle the construction one piece at a time. With basic tools and a bold imagination, you can build a working power hammer tailor-made to your needs.
Building a power hammer was more than just a project. It was a test of creativity, resourcefulness, and mechanical understanding. And if I can build one using simple tools and scrap metal, so can you. Dive into your piles of metal, let your creativity loose, and shape your future with your own DIY power hammer.


