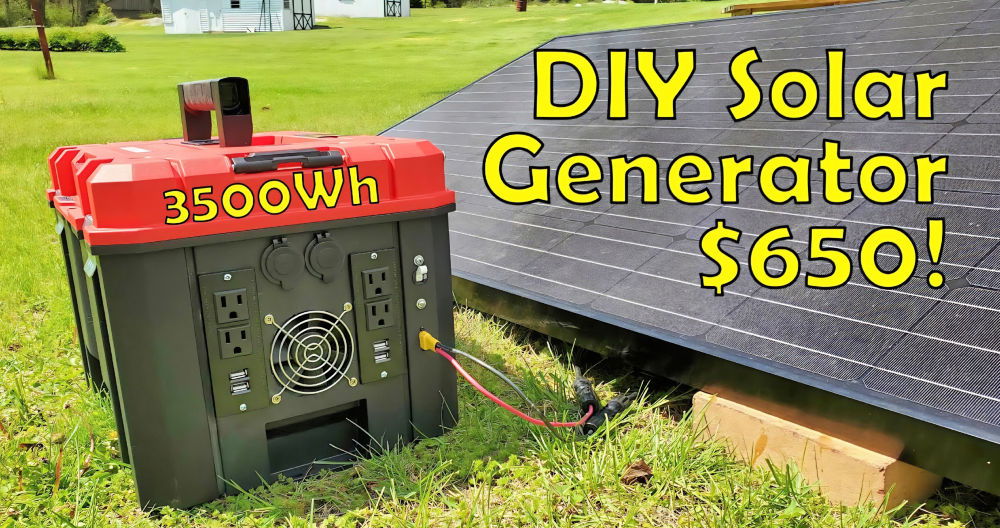
Building a DIY power station at home can be a fulfilling and useful project. A DIY power station lets you build a backup power source to meet specific needs, like running small appliances during a power outage. This project involves assembling a DIY battery box and connecting it to other essential components for energy storage. Not only is it practical, but it also provides hands-on experience with electrical components and wiring.
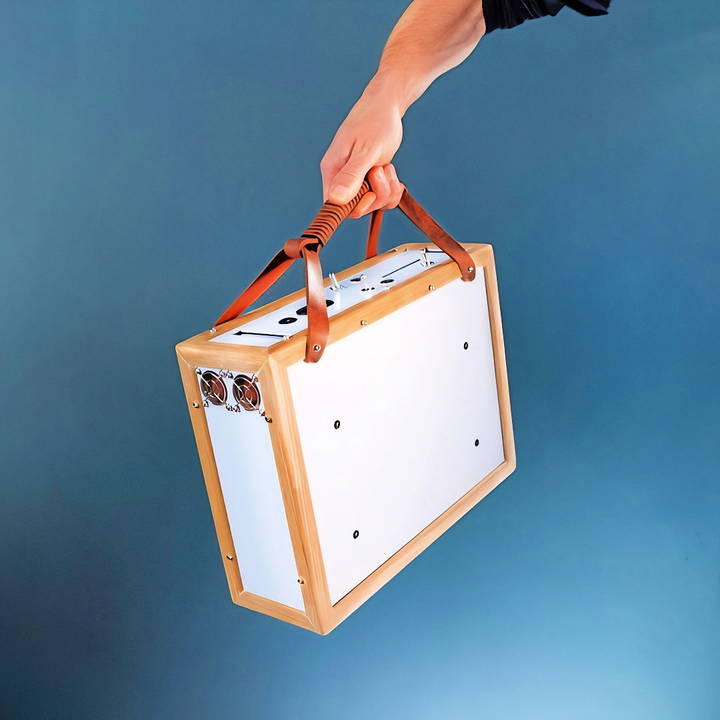
To start, gather the materials needed for your DIY battery box, including batteries, an inverter, a charge controller, and wiring. Follow a clear guide to safely assemble all the parts. Learn how to connect the power station to your appliances in a secure and efficient manner. These steps ensure a reliable power supply when you need it most.
Keep reading to discover detailed steps, essential tools, and safety tips for building your own DIY power station.
Understanding the Fundamentals
The heart of any power station is its battery cells. For my project, I used lithium-ion cells, which, while capable of delivering massive power, need to be handled with care due to their potential for overheating and even catching fire if misused. This requires a diligent approach to their assembly and monitoring.
Materials Needed and Why
- Lithium-Ion Battery Cells - I chose these for their high power-to-weight ratio and rechargeability.
- Plastic Battery Spacers - To keep the cells separated and prevent short circuits.
- Spot Welder and Nickel Strips - For securely connecting the cells without causing heat damage.
- Battery Management System (BMS) - A crucial component for protecting the cells from overcharging and balancing them to ensure uniform discharge.
- Voltage Regulators - To convert the battery's output to usable voltages for various applications.
- USB Type-C and Direct Power Outlets - For accessibility and the ability to charge multiple devices.
- Cabling, Insulating Materials, and Connectors - Essential for safely assembling and utilizing the power station.
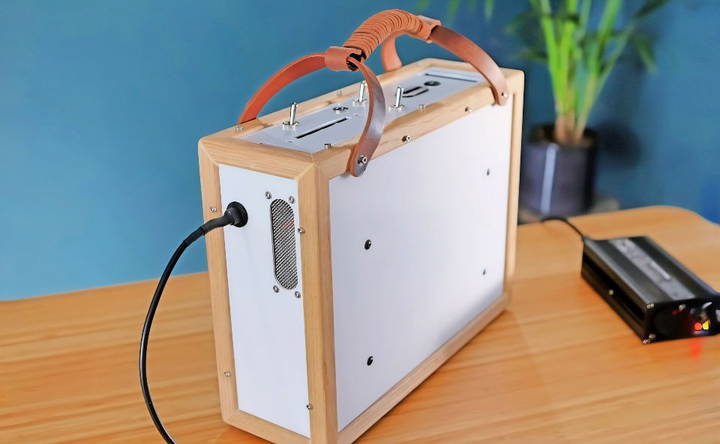
- Custom Enclosure - To house everything in a portable, durable, and aesthetically pleasing manner.
Step by Step Instructions
Learn to build your own power station with our step-by-step guide. From preparing cells to configuring outputs, ensure your DIY success!
Preparing the Cells
The first step was to measure and match the voltage of each cell, grouping them as closely as possible to ensure a balanced load. I then used plastic spacers to align and link the cells into 12 parallel sets, securing them together while preventing physical contact.
Spot Welding the Connections
After meticulously organizing the cells, I spot welded nickel strips to connect the parallel groups in series. This step required a precise and careful approach to avoid any accidental short circuits. The welding had to be rapid to minimize heat exposure, which could damage the cells.
Installing the Battery Management System
The BMS was perhaps the most critical component. It was installed after the cells were connected, ensuring that each cell group's voltage could be individually monitored and balanced. Wiring the BMS required a clear layout and careful soldering to avoid any errors.
Enclosure and Insulation
Protecting the electrical components from physical damage was equally important. I used PTFE sheets for their excellent insulating properties and a custom-designed aluminum enclosure to house the entire assembly. The enclosure was not only functional but also gave the power station a professional look.
Adding the Power Outputs
With the internal assembly complete, I turned my attention to the power outputs. I soldered on a variety of connectors, including USB Type-C and direct power outlets, ensuring each connection was secure and well-insulated. Each output was carefully integrated into the enclosure, making sure they were accessible and labelled accordingly.
Configuring and Testing
The final step was programming the BMS for the specific battery configuration and testing the entire system under load. Connecting a microwave and running it successfully was a thrilling reward for all the meticulous planning and assembly.
Customization Ideas for Your DIY Power Station
When building your own DIY power station, customization is key to meeting your specific needs. Here are some ideas to make your power station truly yours:
Choose the Right Size for Your Needs
- Start Small: If you're new to DIY projects, begin with a small power station that can charge your phone or power a lamp. This will give you a feel for the basics.
- Go Big: For more advanced users, consider building a larger system that can power home appliances or even your entire home during an outage.
Selecting Batteries
- Lithium vs. Lead-Acid: Lithium batteries are lighter and last longer, while lead-acid batteries are more affordable. Decide based on your budget and portability needs.
- Capacity: Determine how much energy you'll need and choose a battery with the appropriate capacity. A higher capacity means longer use between charges.
Solar Panels
- Portable Panels: If you move around a lot, portable solar panels are a great option. They can be set up quickly wherever you go.
- Fixed Panels: For a stationary setup, larger fixed panels are more efficient. They can collect more energy throughout the day.
Inverters
- Size Matters: Make sure the inverter can handle the total wattage of your devices. A too-small inverter won't be able to power your devices, while a too-large one can be unnecessarily expensive.
- Pure Sine Wave: For sensitive electronics, a pure sine wave inverter is a must. It provides clean power that won't damage your devices.
Add-Ons and Upgrades
- USB Ports: Add USB ports to charge devices directly without needing an adapter.
- Display Screens: Install a display screen to monitor input and output, battery levels, and system health.
- Expandable Storage: Design your power station so you can add more batteries later if needed.
Personal Touches
- Color and Design: Paint your power station or add decals to match your style.
- Wheels or Handles: For portability, add wheels or handles to move your power station easily.
Safety Features
- Circuit Breakers: Install circuit breakers to protect against overloads.
- Ventilation: Ensure proper ventilation to prevent overheating, especially if you're using lead-acid batteries.
Use these customization ideas to build an energy station tailored to your needs and style. Success in DIY projects comes from planning and creativity.
Advanced Techniques and Upgrades for Your DIY Power Station
Enhancing your DIY power station with advanced techniques and upgrades can significantly improve its efficiency and functionality. Here's how you can take your power station to the next level:
Incorporate a Battery Management System (BMS)
- A BMS monitors and manages your battery pack's health, ensuring safety and longevity.
- It prevents overcharging and deep discharging, which can harm batteries.
Upgrade to a Smart Inverter
- Smart inverters come with features like remote monitoring and control.
- They can adjust power output based on consumption needs, improving efficiency.
Use High-Efficiency Solar Panels
- Opt for monocrystalline solar panels, which have higher efficiency rates.
- They convert more sunlight into electricity, making your setup more compact and powerful.
Integrate a Solar Charge Controller with MPPT
- Maximum Power Point Tracking (MPPT) technology maximizes the energy harvest from solar panels.
- It adjusts the input voltage to deliver the most efficient charge to the batteries.
Expand Energy Storage
- Connect additional batteries in parallel to increase storage capacity.
- Ensure all batteries are of the same type and age for optimal performance.
Add an Automatic Transfer Switch (ATS)
- An ATS automatically switches to battery power during a grid outage.
- It provides uninterrupted power, making it ideal for critical loads.
Implement IoT Connectivity
- Connect your power station to the internet for remote monitoring and control.
- Use apps to track energy production, consumption, and battery status in real-time.
Enhance Portability
- Design your power station with handles, wheels, or a lightweight frame for easy transport.
- Consider using lithium-ion batteries for a lighter setup.
Customize Power Outputs
- Tailor the number and types of outputs (AC, DC, USB) to match your devices.
- Include fast-charging USB ports for quick device charging.
Safety Upgrades
- Install fuses and circuit breakers to protect against electrical faults.
- Add ventilation or cooling systems to maintain optimal operating temperatures.
Use advanced techniques and upgrades to make your DIY power station more robust, efficient, and user-friendly. Always prioritize safety and consult experts if unsure about changes.
Troubleshooting Common Issues with DIY Power Stations
Building a DIY power station can be a rewarding project, but it's not uncommon to run into a few hiccups along the way. Here are some common issues you might encounter and how to troubleshoot them:
Battery Not Charging
- Check Connections: Ensure all cables are securely connected and the terminals are clean.
- Inspect Charger: Verify that the charger is functioning and compatible with your battery type.
Inverter Issues
- Power Output: If the inverter isn't providing power, check if it's turned on and if the battery has charge.
- Overload: Reduce the load if the inverter shuts down due to an overload or overheating.
Solar Panel Efficiency
- Clean Panels: Dirt and debris can reduce efficiency. Clean your panels regularly.
- Reposition: Make sure your panels are positioned to get maximum sunlight throughout the day.
System Monitoring
- Display Errors: If your monitoring system shows errors, reset it and check for loose connections.
- Accuracy: Calibrate your system if the readings for input and output don't seem accurate.
Portability Problems
- Weight: If your power station is too heavy, consider switching to lighter lithium batteries.
- Size: Use a compact design or add wheels for easier transportation.
Safety Concerns
- Fuses and Breakers: Install fuses and circuit breakers to prevent electrical fires.
- Ventilation: Batteries can overheat; ensure your power station is well-ventilated.
Performance Under Load
- Capacity: If your power station can't handle the load, you may need to upgrade your battery or inverter.
- Balanced Load: Distribute the load evenly to prevent straining one part of the system.
Address these issues to keep your DIY power station running well. Safety first—consult a professional if unsure about any steps.
FAQs About DIY Power Station
Discover answers to common questions about DIY Power Station, including setup tips, safety concerns, and the best materials for building your own.
A DIY power station is a homemade version of a commercial portable power supply. It typically involves a battery pack that can store electrical energy, which you can use to power devices like phones, lamps, or even small appliances when you’re away from the grid.
To build a DIY power station, you’ll need a deep cycle battery, an inverter to convert the battery’s DC power to AC power, and outlets to plug in your devices. You’ll also need a sturdy container to house everything, like a toolbox, and some basic tools and materials for assembly, such as a drill, screws, and electrical tape.
Building your own power station can be cost-effective compared to buying a pre-made one. It allows you to customize the size and features to fit your specific needs. Plus, it's a fun and rewarding project that can provide you with a reliable power source for camping trips, emergencies, or any situation where you need portable power.
Yes, you can charge your DIY power station with solar panels. You’ll need to ensure that the solar panel output matches your battery’s specifications. Additionally, you may need a charge controller to regulate the power going into the battery to prevent overcharging.
When selecting a battery for your DIY power station, consider the battery's capacity, which is measured in amp-hours (Ah). This will determine how long it can power your devices. Also, look for a deep cycle battery, as they are designed for the kind of repeated charging and discharging you'll need for a portable power station.
Conclusion:
Wrapping up, building a DIY power station at home is a rewarding and practical project. By making your own DIY battery box, you gain valuable skills and have a reliable backup power source. Remember to prioritize safety and follow instructions carefully. This way, you'll have an efficient, cost-effective solution that meets your power needs. Enjoy the process and the benefits of your new power station!


