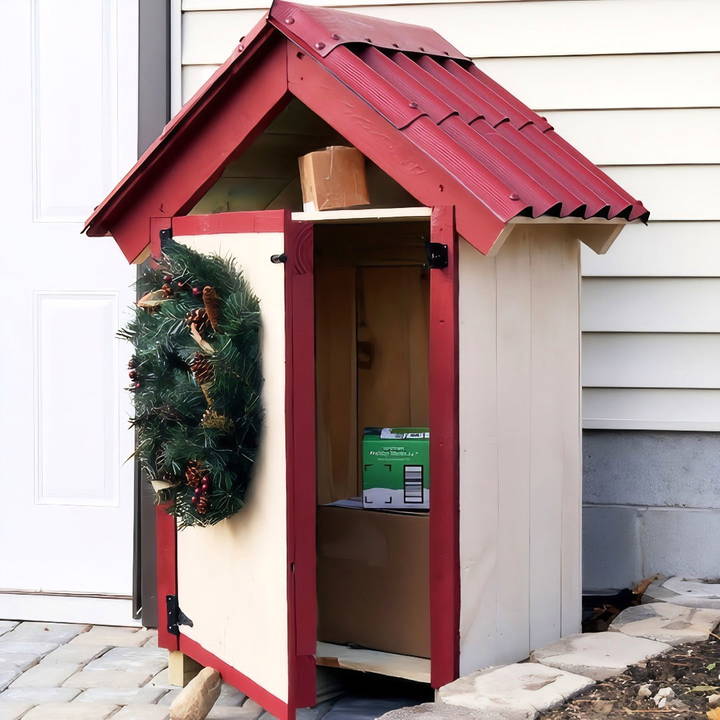
As someone who frequently receives packages, especially during the holiday season, I needed a reliable way to protect deliveries from weather and theft. Inspired by the simplicity and practicality of building a DIY package drop box with just three tools, I decided to share my experience so you can build your own package drop box, even if you don't have access to a full woodworking shop.
Why Build a Package Drop Box?
Packages left outside are vulnerable to harsh weather and potential theft. A parcel box can safeguard your deliveries and keep your front yard looking tidy. Plus, this DIY project can be completed with minimal tools, making it perfect for anyone who enjoys hands-on tasks without needing specialized equipment.
Tools You'll Need
I wanted to keep things simple, so I limited myself to just three tools:
- Circular Saw – This versatile tool handles most of the cutting work.
- Drill – Essential for fastening the pieces together.
- Jigsaw – Perfect for precision cuts, especially when crafting the roof and door.
If you've ever worked on a DIY project, you know that fewer tools can often mean more creative problem-solving. Limiting myself to these tools helped me focus on the essentials, and it also means anyone can tackle this build without a fully stocked workshop.
Materials
The materials I used are readily available at any home improvement store:
- Two-by-fours for the structure.
- Fence boards (5 ½ inches wide) for the siding.
- Deck screws (various sizes) for assembly.
- Hinges and a gate lock for the door.
- Tar roofing sheet (optional) for weather protection.
The choice of materials was driven by durability and ease of use. These boards and screws are not only affordable but also weather-resistant, ensuring the parcel box will last through various seasons.
Step by Step Instructions
Build your own DIY package drop box with our step-by-step instructions. Perfect for safe deliveries, from base prep to final touches. Get started today!
Step 1: Preparing the Base and Frame
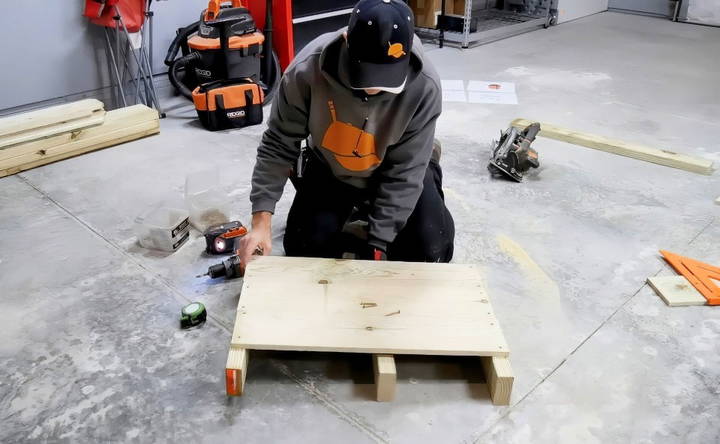
The first step was cutting the two-by-fours to size for the base. Without a miter saw, I used a circular saw and a speed square to ensure the cuts were straight and perpendicular. A speed square is an excellent tool to guide your saw and make sure the edges come out square. If you're new to using a circular saw, a simple trick is to mark your cut line, then draw an arrow showing which side of the line to cut on. This ensures accurate cuts.
Once the base was done, I moved on to cutting the two-by-fours for the frame. If you're used to the precision of a workshop table saw, it can feel a bit limiting at first, but with patience and careful measurements, the circular saw does a great job.
Step 2: Assembling the Sides
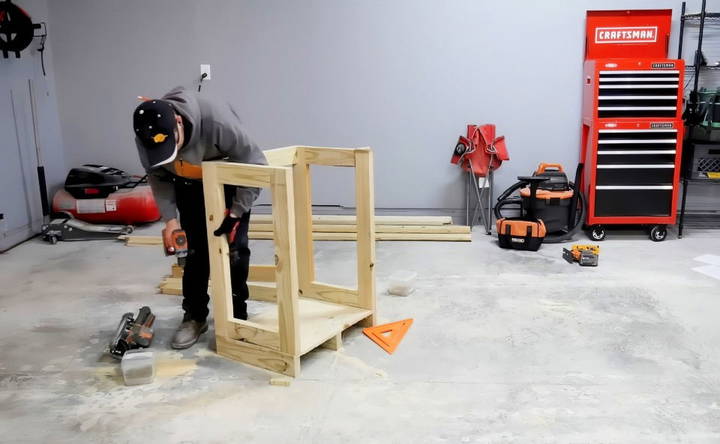
With the base and frame ready, I started assembling the sides of the box. I used 2 ½-inch deck screws to "toe-nail" the boards together. This means driving screws at an angle to join two boards, which might seem tricky, but once you get the hang of it, it's a solid technique for strong joints. For added strength, I made sure the screws angled toward each other.
By assembling both sides separately, I ensured that the structure remained square and sturdy once I joined them together with cross braces. These braces are key to maintaining the box's structural integrity as it begins to take shape.
Step 3: Building the Door
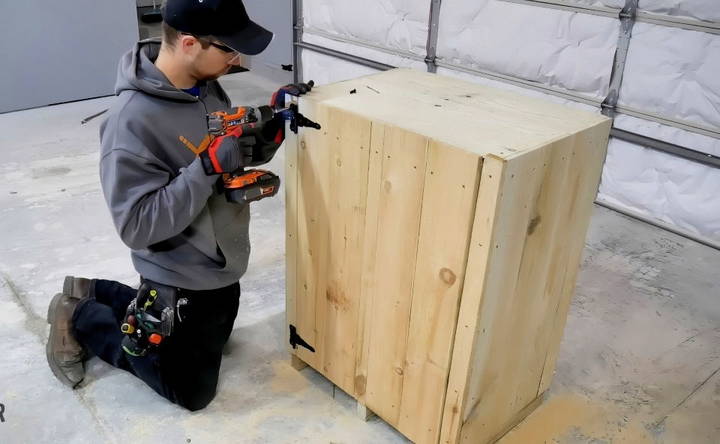
Next came the door, which might seem intimidating but is quite straightforward. I used off-cuts from the siding boards to cover the frame. A handy tip here: always keep your scraps until the end of the project, as they often come in handy. For example, one of my off-cuts ended up being the perfect size for finishing the door.
When attaching the door, it's important to ensure it swings freely. I laid down a few deck screws as temporary spacers to help with the alignment. This step was crucial in making sure the door opened and closed smoothly without scraping the frame.
Step 4: Attaching the Roof
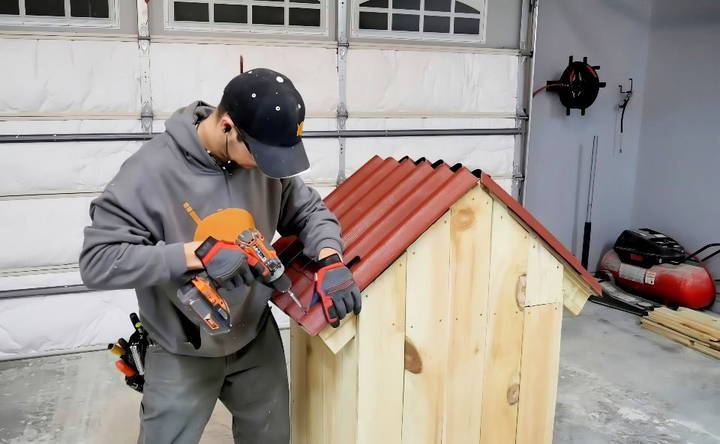
For the roof, I used fence boards, just like I did for the sides. The challenge was ensuring the peak was cut at the correct angle so it would sit flush with the sides. Using my jigsaw, I carefully cut the boards to match the roof's slope.
If you've ever used a jigsaw, you know it can be a bit tricky to get a clean, straight cut, especially on wet, pressure-treated wood. The trick is to let the blade do the work and not rush it. By moving slowly and steadily, I got smooth cuts that fit perfectly together.
To finish the roof, I added a layer of tar sheet, which I cut using a utility knife. This roofing material is durable and weather-resistant, perfect for protecting the box from rain and snow. I went with a red tar sheet to match other outdoor features of my home, and it gave the box a nice, cohesive look.
Step 5: Painting and Final Touches
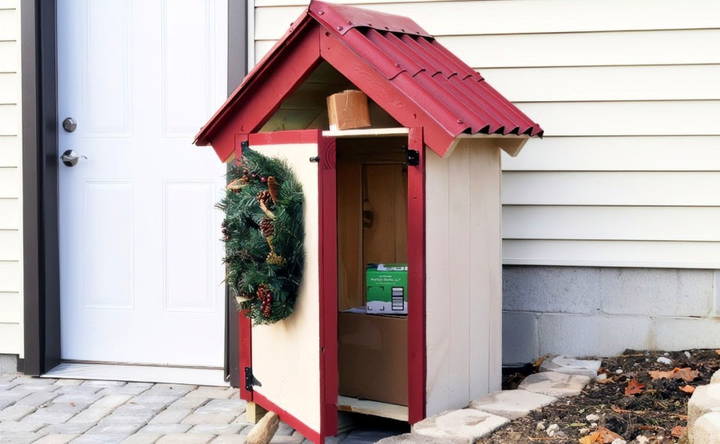
After building the box, my wife and I painted it with exterior-grade paint to match our house. Not only does this add an extra layer of weather protection, but it also blends the parcel box into the overall aesthetic of our home.
Once the paint dried, I attached the hinges and a simple gate lock. I recommend using black hardware for a modern, sleek look. The hinges should be spaced evenly on the door for stability, and the lock mechanism should be easy to use yet secure enough to protect your packages.
Lessons Learned and Tips for Success
Building this parcel box was a great learning experience, and here are a few key takeaways:
- Measure twice, cut once: This classic advice is especially important when working with limited tools. Double-check your measurements before making any cuts to avoid wasting materials.
- Use temporary supports: When cutting or attaching boards, use temporary screws or clamps to hold things in place. This prevents mistakes and keeps your hands safe from the saw blade.
- Patience is key: While it might be tempting to rush through certain steps, taking your time will result in cleaner cuts and a sturdier final product.
Customization Ideas
Customizing your DIY package drop box can make it not only functional but also visually appealing and tailored to your specific needs. Here are some easy-to-follow customization ideas:
1. Aesthetic Enhancements
Discover top-notch aesthetic enhancements for your home with expert painting and staining services and stunning decorative elements. Transform your space today!
Painting and Staining:
- Choose Colors: Select colors that match your home's exterior. Use weather-resistant paint to ensure durability.
- Staining Wood: If your drop box is wooden, consider staining it to highlight the natural grain. This adds a rustic charm.
Decorative Elements:
- Stencils and Decals: Use stencils or decals to add patterns or designs. This can personalize your drop box.
- House Numbers: Add your house number to the drop box for a cohesive look with your home.
2. Functional Additions
Enhance your van with functional additions including advanced locks, weatherproofing, and efficient lighting for improved security and comfort.
Locks and Security:
- Install a Lock: Add a simple lock to keep your packages secure. Combination locks are a good choice for ease of use.
- Smart Locks: For advanced security, consider a smart lock that you can control via your smartphone.
Weatherproofing:
- Sealant: Apply a waterproof sealant to protect the drop box from rain and snow.
- Weather Stripping: Use weather stripping around the lid to prevent water from seeping in.
Lighting:
- Motion-Sensor Lights: Install motion-sensor lights to illuminate the drop box area at night. This can deter thieves and help you locate the box in the dark.
- Solar Lights: Consider solar-powered lights for an eco-friendly option.
3. Practical Features
Discover practical features like parcel shelves and delivery instructions for efficient and organized package handling. Improve your delivery process today!
Parcel Shelves:
- Internal Shelves: Add shelves inside the drop box to organize packages. This is especially useful for larger boxes.
- Adjustable Shelves: Use adjustable shelves to accommodate packages of different sizes.
Delivery Instructions:
- Instruction Plaque: Attach a small plaque with delivery instructions for couriers. This ensures packages are placed correctly.
- QR Code: Include a QR code that links to detailed instructions or a video guide for couriers.
4. Personal Touches
Add personal touches to your home decor with family names and seasonal decorations. Make a warm, welcoming atmosphere for every occasion!
Family Name:
- Name Plate: Add a nameplate with your family name. This adds a personal touch and makes the drop box uniquely yours.
- Engraving: For a more permanent solution, consider engraving your family name into the box.
Seasonal Decorations:
- Holiday Themes: Decorate your dropbox according to the season or holidays. This can include festive lights, wreaths, or themed decals.
- Interchangeable Panels: Use interchangeable panels that you can swap out for different seasons or events.
Enhance your package drop box to be secure, functional, and stylish, ensuring it meets your needs and reflects your style.
Troubleshooting Common Issues
Even the best DIY package drop boxes can encounter problems. Here are some common issues and practical solutions to keep your Dropbox functional and secure.
Water Leakage
Problem: Water getting inside the drop box can damage packages.
Solution:
- Sealant: Apply a waterproof sealant to all joints and seams.
- Weather Stripping: Use weather stripping around the lid to build a tight seal.
- Drainage Holes: Drill small drainage holes at the bottom to allow water to escape.
Theft Attempts
Problem: Thieves may try to break into the drop box.
Solution:
- Sturdy Materials: Use strong materials like metal or thick wood.
- Locks: Install a robust lock. Combination locks or smart locks offer added security.
- Visibility: Place the drop box in a visible area to deter thieves.
Structural Weaknesses
Problem: The drop box may become unstable or weak over time.
Solution:
- Reinforcement: Add extra support beams or brackets inside the box.
- Regular Checks: Inspect the box regularly for signs of wear and tear.
- Quality Materials: Use high-quality, durable materials from the start.
Difficulty in Access
Problem: Couriers or homeowners may find it hard to access the drop box.
Solution:
- Clear Instructions: Attach clear instructions for couriers on how to use the drop box.
- Easy Access: Ensure the drop box is at a convenient height and location.
- Smooth Mechanisms: Regularly oil hinges and locks to keep them working smoothly.
Weather Damage
Problem: Extreme weather conditions can damage the drop box.
Solution:
- Weatherproofing: Apply a weatherproof coating to protect against rain, snow, and UV rays.
- Shelter: Place the drop box under a porch or awning to shield it from direct exposure.
- Seasonal Maintenance: Perform seasonal maintenance checks and touch-ups.
Package Size Issues
Problem: Some packages may be too large to fit in the drop box.
Solution:
- Size Consideration: Build the drop box with ample space to accommodate larger packages.
- Flexible Design: Consider a design with adjustable shelves or compartments.
- Alternative Solutions: For very large packages, provide an alternative secure location or instructions for the courier.
Hinges and Locks Malfunction
Problem: Hinges or locks may become stiff or break.
Solution:
- Lubrication: Regularly lubricate hinges and locks to keep them functioning smoothly.
- Replacement: Replace any broken or worn-out parts promptly.
- Quality Hardware: Use high-quality hardware to reduce the risk of malfunctions.
Maintain your DIY package drop box to keep it reliable and secure. Regular upkeep and smart design prevent most issues and protect your packages.
FAQs About DIY Package Drop Boxes
Explore answers to common questions about DIY package drop boxes to enhance your home's security and convenience. Discover tips and solutions now!
A DIY package drop box is a secure container you build yourself to receive and store deliveries. It helps protect your packages from theft, weather, and damage.
Building your own drop box can save you money and provide a custom solution that fits your specific needs. It ensures your packages are safe and dry until you can retrieve them.
Select a spot that is easily accessible for delivery drivers but not too visible from the street. Near your front door or porch is usually a good choice.
Use waterproof sealant on all wooden surfaces and add a roof or cover to protect from rain and snow. Ensure all joints are sealed properly to prevent water from getting inside.
Yes, you can add a lock for extra security. Consider using a padlock or a smart lock that you can control with your phone.
Conclusion: A Simple, Rewarding Project
In the end, building this DIY package drop box with just three tools was both challenging and rewarding. It reminded me that you don't need a high-tech workshop to complete a solid woodworking project. With careful planning, a bit of creativity, and the right materials, you can build something practical and beautiful with minimal equipment.
If you're looking for a straightforward DIY project that will protect your packages and add a functional element to your home, this parcel box is a great choice. Plus, you'll feel a sense of accomplishment every time a delivery arrives and is safely stored inside.


