Building things for my furry friend always brings joy. One day, I decided to build a DIY elevated dog bed for my dog, Rocky. An elevated bed offers great comfort and keeps him off the cold floor. I gathered my materials, followed some clear instructions, and within hours, Rocky had his new bed. It made me happy to see him so comfortable.
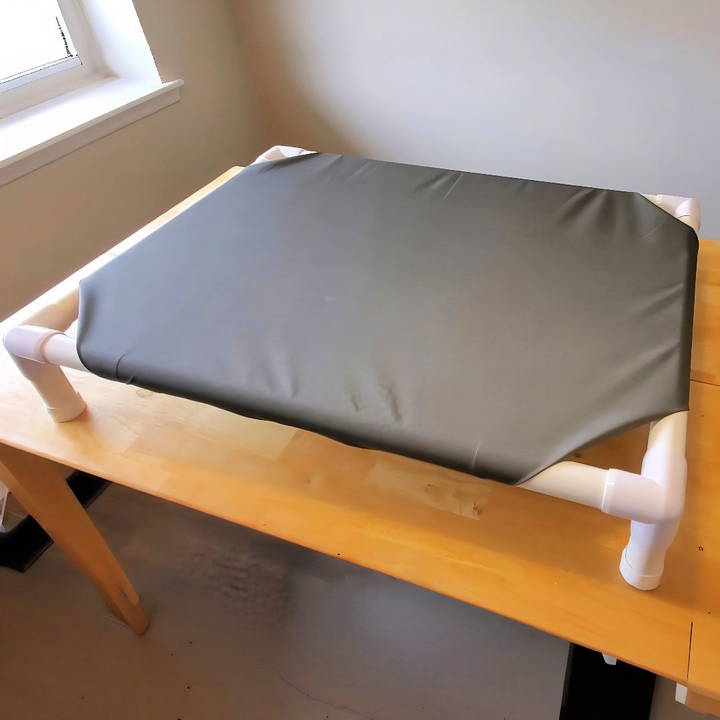
I'm sharing these steps, hoping they help you build a comfy bed for your dog too. If you love your pet and want to give them a cozy rest, this guide is for you. It's easy and fun. I'm excited to share this step-by-step building guide with you. These steps are simple and helpful, encouraging you to get started right away.
Materials Needed
Here's what you'll need to build your own elevated dog bed:
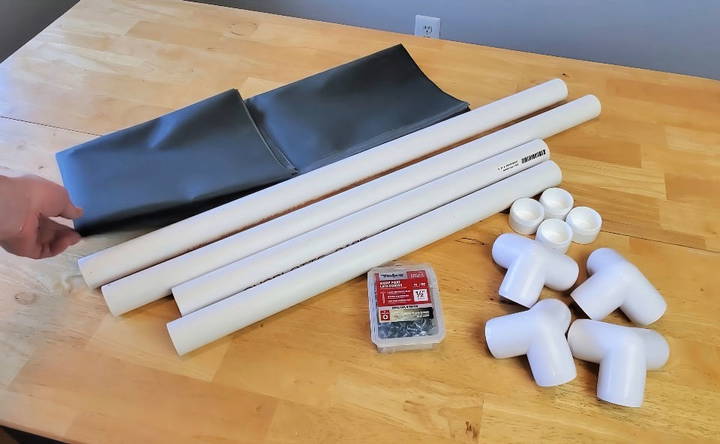
- PVC Pipes: One standard 10-foot length of 1¼ inch PVC pipe will suffice. It's strong enough to withstand your pet's weight.
- Outdoor Fabric: Durable and preferably sold as marine fabric. You'll need a 42x32 inch rectangle. The robust nature of marine fabric makes it ideal for pets.
- PVC Fittings: Four three-way corner fittings and four flat end caps. The three-way fittings build the corners of the frame, and flat end caps enhance the bed's stability.
- Self-Tapping Screws: Specifically, ½ inch lath screws with built-in washers are recommended. The built-in washer adds stability, ensuring the fabric doesn't rip over time.
- Additional Tools: Rubber mallet, sandpaper, clamps, measuring tape, and a screwdriver or power drill.
Step by Step Instructions
Make a cozy DIY raised dog bed with our easy, step-by-step instructions, from cutting pvc pipes to securing the fabric and tightening the final adjustments.
Step 1: Cutting the PVC Pipes
First, cut your PVC pipe into six segments: two 32½ inch pieces, two 23½ inch pieces, and four 4-inch pieces (these will serve as the bed's legs). Accuracy is key here because it ensures the bed's frame is even. After cutting, sand down the edges with fine-grit sandpaper to remove any rough spots and debris. Compressed air can be useful to blow off shavings and keep your workspace clean.
Step 2: Assemble the Frame
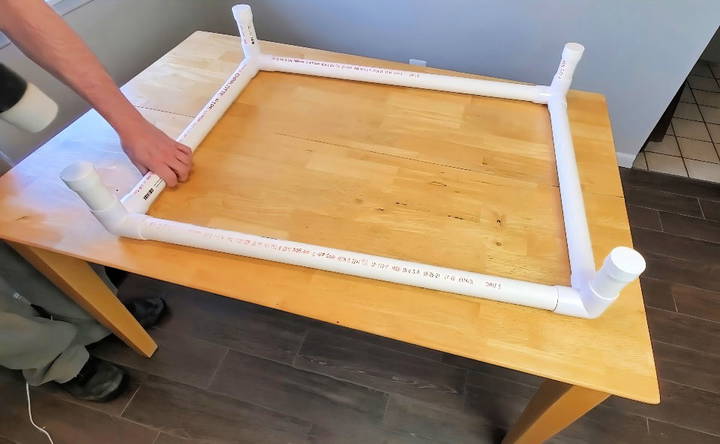
Assemble your frame by connecting the cut PVC pipes with the three-way corner fittings. The two 32½ inch pipes should form the long sides, and the two 23½ inch pipes form the short sides of your rectangle. Ensure the markings and barcodes on the pipes face downwards for a cleaner look.
Step 3: Adding the Legs
Attach the 4-inch pieces into the remaining open spaces of the three-way corner fittings. These pieces will act as the legs. Secure the flat end caps at the bottom of each leg. Using your rubber mallet, tap each fitting lightly to ensure all parts are snugly connected.
Step 4: Preparing the Fabric
Lay out your fabric, noting that marine fabric often has two sides: one dull and one more vibrant. Position the more vibrant side face down. Place the frame upside down on the fabric, ensuring it is centered. Measure the gaps on all sides to ensure uniformity.
Step 5: Folding the Corners
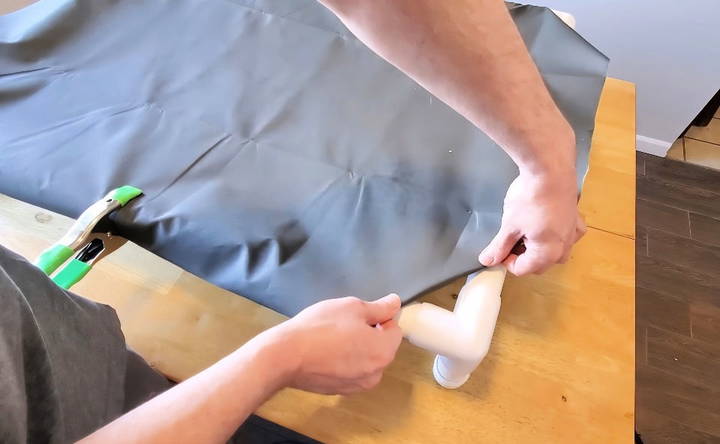
Fold each corner of the fabric to clear the three-way fittings, making sure the folds lie flat to avoid bunching. This step is crucial for a neat appearance and smooth attachment.
Step 6: Securing the Fabric
Begin by folding the edge of the fabric approximately ½ inch inwards for added strength and place a screw in the middle of one long side. This fold builds extra durability by providing a double layer of fabric for the screws to hold. Using clamps will help keep the fabric taut while allowing you to check the alignment and appearance from the top side.
Step 7: Continue Attaching Screws
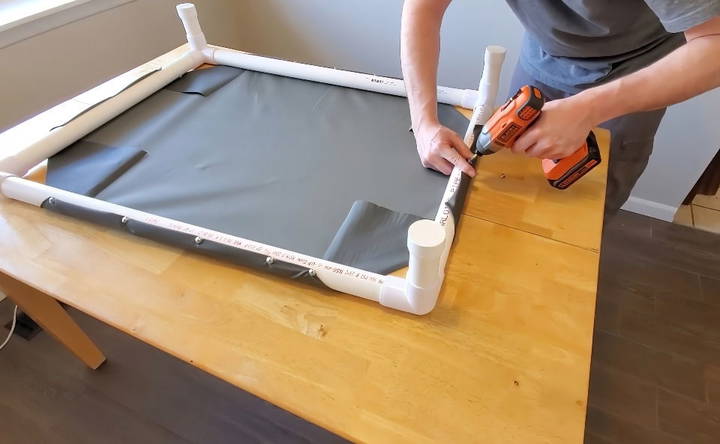
Work your way outward from the center, adding more screws but stopping before the corners. Once the middle section of one long side is secure, proceed to the opposite side. Pull the fabric tight as you go to ensure it remains taut and wrinkle-free. Repeat this process on the shorter sides.
Step 8: Folding and Securing the Corners
Carefully fold the remaining fabric at the corners, securing each piece with screws to ensure no slack around the fittings. The goal is to have even and neat folds, making a tidy and durable finish.
Step 9: Reinforce with Additional Screws
After the fabric is securely attached on all sides, add a few more screws along each side for extra strength. This will ensure the fabric remains immovable and enhances the bed's overall durability.
Step 10: Tighten and Final Adjustments
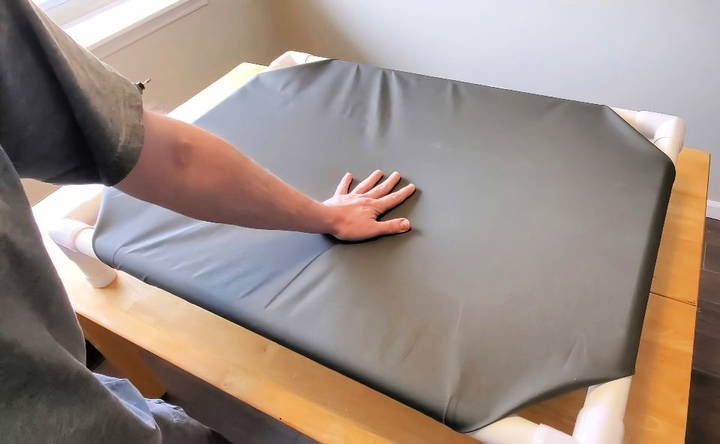
Twist the pipes slightly to make the fabric as taut as possible. Be cautious while doing this to avoid damaging the frame. If twisting by hand proves difficult, consider using a pipe wrench, but be mindful of the pipes' surface to prevent marring.
Step 11: Secure the Fittings
Finally, for added stability, place screws through the fittings and into the pipes. This step ensures that the pipes don't twist under the weight of your pet.
Customization Ideas for Your DIY Raised Dog Bed
Building a raised dog bed that's tailored to your pet's needs can make a big difference in their comfort and your satisfaction with the project. Here are some customization ideas to consider:
- Choose the Right Size: Measure your dog's length and height to ensure the bed is large enough for them to stretch out but cozy enough to feel secure. For larger breeds, reinforce the structure to support their weight.
- Select Comfortable Bedding: Opt for a cushion that provides ample support and retains its shape over time. Memory foam is a great option for older dogs with joint issues.
- Incorporate Easy-to-Clean Materials: Use removable and washable covers to make cleaning a breeze. Materials like canvas or heavy-duty cotton are durable and easy to maintain.
- Add Personal Touches: Paint the bed frame in a color that matches your home decor or stencil your dog's name onto the bed for a personal touch.
- Ensure Safety: Sand down any rough edges and use non-toxic paints and finishes to prevent any health hazards.
- Consider Mobility: If your dog has trouble jumping, add steps or a ramp to the bed design to make it more accessible.
- Think About Portability: If you move the bed often, add casters or handles to make it easy to transport.
By incorporating these ideas, you'll build a bed that's not just a comfortable spot for your dog but also a functional and stylish addition to your home. The key is to tailor the bed to your dog's unique needs and your own lifestyle.
Safety Considerations for Your DIY Raised Dog Bed
When building a DIY-raised dog bed, safety is paramount. Here's how to ensure your furry friend's new bed is not only comfortable but also secure and safe:
- Sturdy Construction: Make sure the bed frame is solid and can support your dog's weight without wobbling. Use quality materials and check all joints and connections are tight.
- Non-toxic Materials: Choose paints and finishes that are non-toxic and pet-safe. Avoid treated woods that may contain harmful chemicals.
- Smooth Edges: Sand down any sharp or rough edges on the bed frame to prevent scratches or injuries to your dog.
- Appropriate Height: The bed should be high enough to protect your dog from drafts but low enough to prevent injury from jumping off. For smaller or older dogs, consider a lower height.
- Secure Bedding: Attach the cushion or mattress firmly to the frame to prevent it from slipping off. This is especially important for active dogs who might move around a lot in their sleep.
- Regular Inspection: Periodically check the bed for any signs of wear and tear, such as loose screws or frayed fabric, and repair them promptly.
- Fire Safety: Keep the bed away from heat sources like radiators or open flames to reduce the risk of fire.
By following these guidelines, you can build a safe haven for your dog to give you peace of mind and provide your pet with a secure place to rest.
FAQs About DIY Raised Dog Bed
Discover answers to common questions about DIY raised dog beds, from materials to steps, making pet comfort easy and affordable.
Raised dog beds provide several advantages for your furry friend. They help to alleviate pressure on joints, which is especially beneficial for older dogs or those with arthritis. Elevated beds also promote air circulation, keeping your dog cooler in hot weather and away from cold drafts in winter. Additionally, they can prevent pests like fleas and ticks from jumping onto the bed.
To determine the right size for your dog’s bed, measure your dog from the tip of their nose to the base of their tail for length, and the widest part of their body for width. The bed should be large enough for your dog to lie down comfortably without any part of their body hanging off the edge.
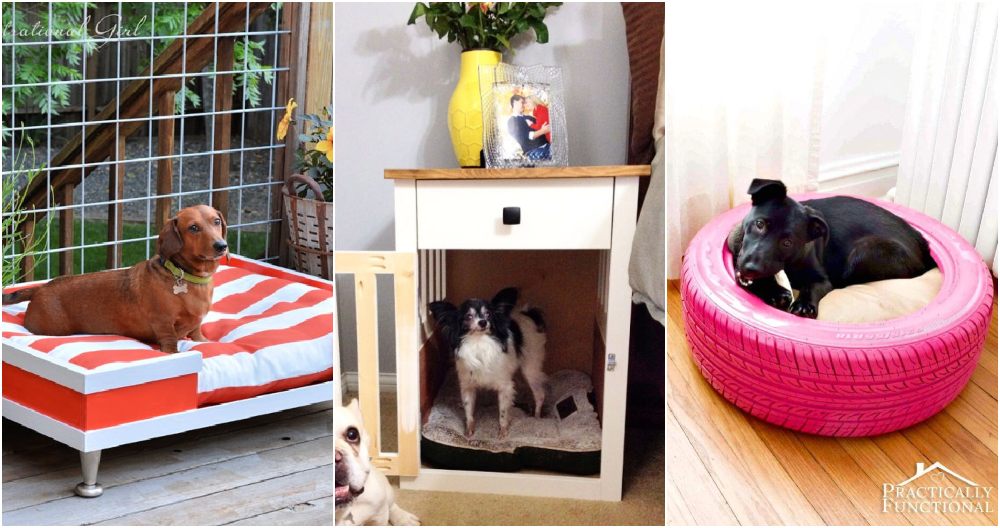
Yes, there are raised dog bed designs suitable for all skill levels. Some plans are very simple and require minimal tools and materials. For instance, a DIY dog bed from a recycled tire is considered an easy project that repurposes an old tire into a cozy bed. Choose a plan that matches your comfort level with DIY tasks.
Absolutely! If you're looking for a unique design, consider converting old furniture like an end table into a stylish raised bed. Or, for a more advanced project, you can build a bed out of a wine barrel. These creative options not only provide comfort for your dog but also add a touch of personality to your home.
To ensure stability and safety, select a design that matches your dog's weight and size. Use sturdy materials and ensure all joints are securely fastened. For a PVC bed, ensure the pipes are cut to the correct length and the fittings are tight. If you're using wood, sand down any rough edges to prevent splinters. Always double-check for loose screws or sharp edges before letting your dog use the bed. It's also a good idea to place the bed against a wall to provide additional support and prevent tipping.
Conclusion
Taking time to make this DIY raised dog bed showed me just how fulfilling it is to handcraft something for a loved one. Don't hesitate; start today and see the joy it brings to your pet.


