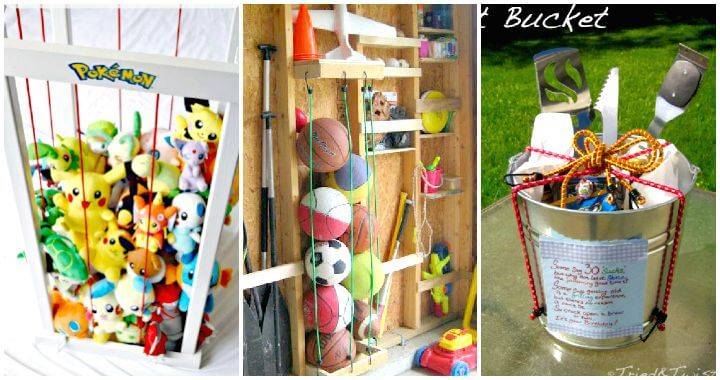
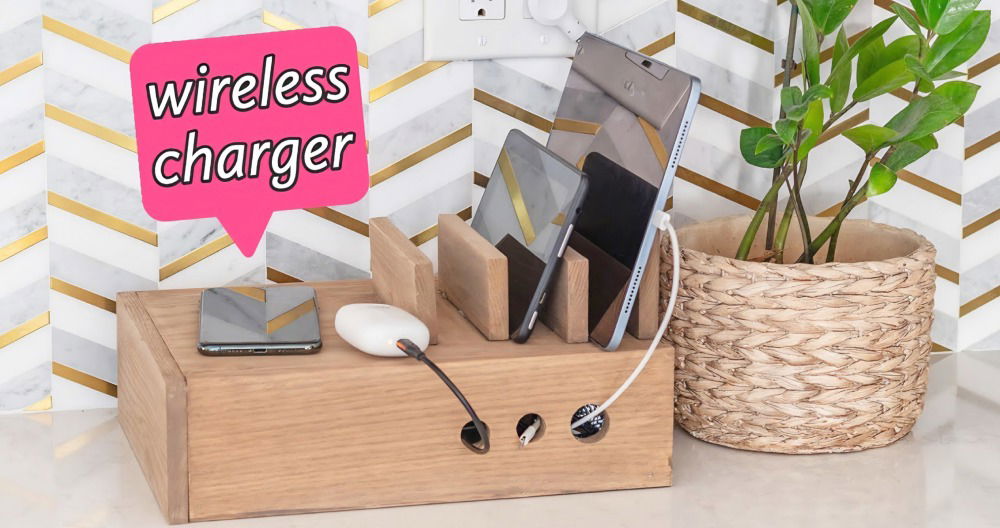
Keeping your workspace tidy is easier with a DIY cord organizer. Cord organizers help you manage tangles and keep cables in order. You can build a functional and affordable cable management solution in a few minutes using materials you already have at home. This approach saves money and reduces clutter, making it simpler to find and use your cords when needed.
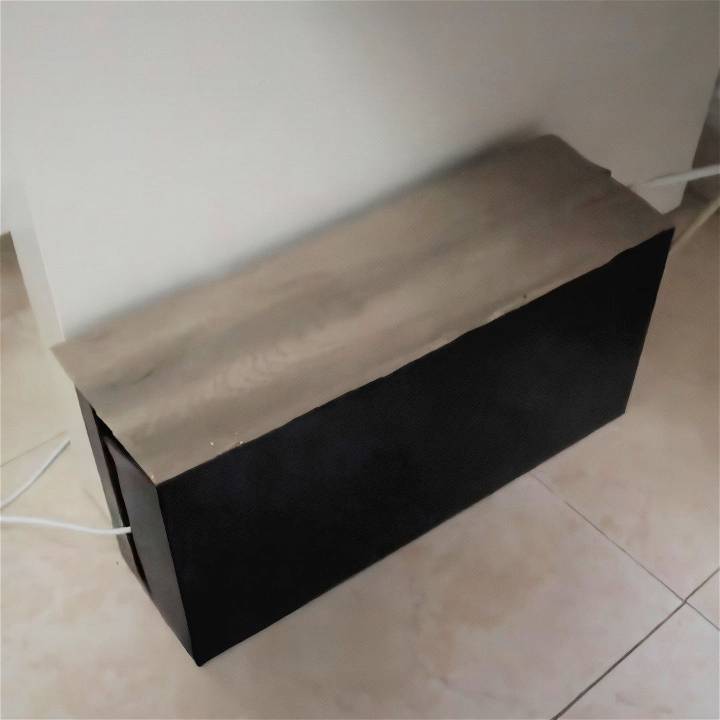
Another great option is a DIY cable management box. These boxes conceal and contain your cables, adding a neat appearance to your setup. Constructing a custom cable box can provide a tailored fit for your workspace needs. It's both a practical and customizable solution that simplifies cord management while enhancing the look of your area.
Materials Needed
Before diving into the project, let's take a look at the materials we need and why they're essential:
- Cardboard Box: Any size that accommodates your power strip and plugs.
- Pen Knife: For precision cutting of the cardboard.
- Ruler and Pen: To mark out the dimensions and positions for cutting.
- Scissors: To trim off any excess cardboard.
- Sharpie Marker: To highlight the areas you need to cut.
- Wooden Contact Paper: To give a polished finish to the box.
- Black Acrylic Paint: To paint the cardboard for aesthetics.
- Paintbrush: A bigger brush will speed up the painting process.
Understanding these materials will ensure you have everything you need to start and customize your box to your liking. Now, let's get into the steps!
Step by Step Instructions
Make a neat and tidy workspace with our DIY cable management box guide. Follow our easy, step-by-step instructions to organize your cables today.
Step 1: Draft the Design
First, I needed to draft a rough design for my cable management box. Like most of us, I had a chaotic mix of cables under my desk. So, I sketched out an initial idea with dimensions that fit my space.
Tip: Use a ruler and a pen to get accurate measurements for your power strip and any large chargers you might have. Keep in mind that your dimensions may differ from mine, so customize accordingly!
Step 2: Mark and Cut the Cardboard Box
With the design sketch ready, I marked the cardboard box to prepare for cutting. Here's how I did it:
- Mark the Areas: Use your ruler and pen to mark the areas that need cutting. Make sure to leave enough space for the power strip and any large adapters.
- Cut the Box: Using a pen knife carefully cut along the lines you marked. Safety first—make sure to cut away from your body.
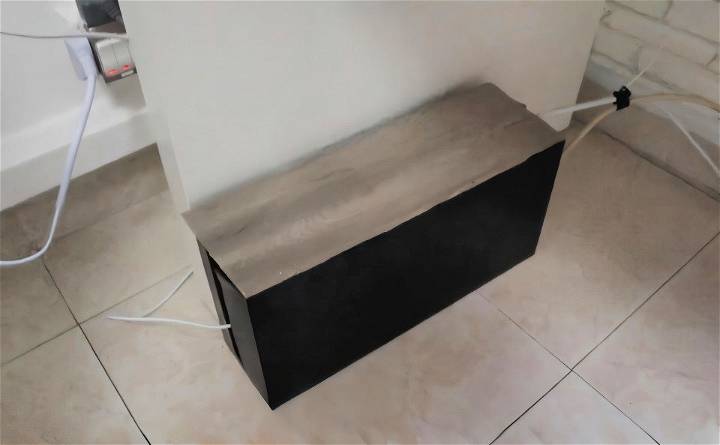
The Result: I ended up with a box roughly taller than 14cm, as my MacBook Pro charger is pretty bulky. I also cut out a hole on each side for the cables to pass through.
Step 3: Fitting the Power Strip
Now that I had the basic structure, it was time to fit the power strip inside the box:
- Place the power strip inside the box.
- Mark the areas where the cables will come out.
- Use a light-colored Sharpie marker for these marks, as they are easier to see against the cardboard.
Then, I grabbed my pen knife again to cut out the holes where the marks were made, ensuring the cables could easily pass through. If needed, trim off the edges with scissors.
Step 4: Adjust for Bigger Plugs
I noticed my box didn't fit my MacBook Pro charger correctly—it was getting stuck. Here's how I fixed it:
- Marked a larger hole area using the Sharpie.
- Used the pen knife to cut out a bigger hole.
- Retested to ensure a proper fit.
This way, I was sure that all my devices and chargers fit comfortably into the management box.
Step 5: DIY the Top
To give the box a neat look, I decided to build a polished top:
- Measured the wooden contact paper to fit the dimensions of the box top.
- Cut the contact paper accordingly.
- Pasted the contact paper on top for a sleek, wooden finish.
Step 6: Paint the Box
The last aesthetic step was painting the box. I chose black acrylic paint for a clean look:
- Spread out some newspaper to avoid a mess.
- Used a large paintbrush to quickly cover the cardboard in black paint.
Larger brushes make this job faster. Wait for the paint to dry before handling it further.
Final Adjustments and Testing
Once everything was in place, I tested the fit one last time:
- I placed all my cables and power strips back into the box.
- Ensured the cables could easily pass through the holes.
- Made any minor adjustments for a perfect fit.
Customization Tips
Building a DIY cable management box is not just about functionality; it's also an opportunity to add a personal touch to your workspace or living area. Here are some tips to help you customize your cable management box:
- Choose Your Materials Wisely Start by selecting materials that reflect your style. If you prefer a modern look, consider using sleek materials like acrylic or metal. For a warmer, rustic appeal, wood might be your material of choice. Remember, the material should be durable and able to withstand the weight of the cables.
- Color It Your Way Painting your cable management box is one of the easiest ways to customize it. Choose a color that complements your room's decor, or go bold with a contrasting shade. If you're feeling artistic, try patterns or stencils for a unique design.
- Add Some Texture Textures can add depth and interest to your cable management box. Consider wrapping it with fabric, leather, or even textured wallpaper. This not only looks great but can also provide additional protection to the box.
- Personalize with Decor Who says cable management boxes have to be plain? Personalize yours with stickers, decals, or even hand-drawn illustrations. If you're into crafts, you could also add embellishments like beads or sequins.
- Functionality Meets Design Think about adding features that enhance both the design and functionality. For example, if you're a tech enthusiast, you might integrate LED lights for a futuristic look that also helps you see the cables better in the dark.
- Keep It Eco-Friendly: If sustainability is important to you, consider using recycled materials or upcycling items you already have at home. An old shoebox or storage container can be transformed into a beautiful and functional cable management box.
- Mix and Match: Don't be afraid to mix and match different customization options. Combine colors, textures, and personal touches to build a cable management box that's truly one-of-a-kind.
Turn a cable box into a unique piece that's functional and personal. Enjoy the process and aim for a space that's organized and reflects you.
Advanced Modifications
For those looking to take their DIY cable management box to the next level, advanced modifications can enhance both functionality and aesthetics. Here are some ideas to upgrade your cable management system:
- Integrate USB Ports Adding USB ports to your cable management box can provide convenient charging points for your devices. You can either repurpose an old USB hub or install new ports, ensuring they're securely mounted and connected to a power source.
- Wireless Charging Pad If you use devices that support wireless charging, consider incorporating a wireless charging pad into the top of your cable management box. This allows you to charge your devices simply by placing them on top of the box, reducing cable clutter even further.
- Built-in Surge Protector: For added safety, install a surge protector inside your cable management box. This will protect your devices from power surges and electrical spikes, which is especially important if you live in an area prone to electrical storms.
- Cable Labels and Management: To keep cables organized within the box, bundle them together with cable ties or clips. Label each cable or use color-coded ties to identify which cable belongs to which device quickly.
- Ventilation Electronics can generate heat, so it's important to ensure your cable management box is well-ventilated. Drill holes or include a mesh section to allow air to circulate and prevent overheating.
- Magnetic Lid or Side Panel: For easy access, build a lid or side panel that attaches magnetically. This makes it simple to open the box when you need to add or remove cables but keeps it securely closed the rest of the time.
- Decorative Elements: Don't forget the visual appeal! Use paint, decals, or other decorative elements to personalize the exterior of your cable management box. This can turn a functional item into a piece of decor.
Advanced modifications make your cable management box functional and suited to your style, making cable management a seamless, enjoyable routine.
Troubleshooting Common Issues
When crafting a DIY cable management box, you might encounter a few hiccups along the way. Here's how to troubleshoot some common issues:
- Problem: Cables Keep Falling Out. If your cables are slipping out of the box, consider adding rubber grommets or adhesive-backed cable holders inside the box to secure the cables in place.
- Problem: Difficulty Identifying Cables To avoid confusion, label each cable using color-coded ties or tags. This will save you time and prevent unplugging the wrong cable.
- Problem: The box is Overheating. Ensure your box has proper ventilation to prevent overheating. Drill holes or include a mesh section for air circulation.
- Problem: Lid Won't Stay Closed. If the lid is loose or hard to open, use magnetic strips for a secure yet easily accessible closure.
- Problem: Tangled Cables Inside the Box Use dividers or clips inside the box to keep cables neatly separated and tangle-free.
- Problem: Static Build-Up To reduce static, avoid using materials that generate static electricity, like certain plastics. Opt for wood or metal instead.
- Problem: Difficulty Accessing Cables Make a hinged lid or a side panel that opens easily for quick access to your cables without having to remove the entire lid.
By addressing these common issues, your DIY cable management box will be both functional and frustration-free. The key is to keep things simple and efficient.
Maintenance Advice
Keeping your DIY cable management box in top condition is crucial for ensuring it continues to serve its purpose effectively. Here's some straightforward advice on maintaining your cable management solution:
- Regular Cleaning Dust and debris can accumulate in your cable box over time. To prevent this, schedule regular cleaning sessions. Use a soft cloth or a hand-held vacuum to remove dust from inside the box. For stubborn dirt, a damp cloth with mild soap can do the trick, but make sure everything is dry before placing cables back inside.
- Inspect Cables Periodically Every few months, take a moment to inspect the cables for any signs of wear and tear. Look for frayed wires or damaged insulation. If you find any issues, replace the cables immediately to prevent potential hazards.
- Manage Cable Lengths Long cables can become tangled and build a mess inside the box. Use zip ties or Velcro straps to keep cables neatly coiled and prevent them from intertwining.
- Avoid Overloading: Don't cram too many cables into a single box. This can lead to overheating and potentially damage the cables or connected devices. If you have numerous cables, consider using multiple boxes to distribute them evenly.
- Ventilation Check: Make sure your cable management box has adequate ventilation to dissipate heat. If your box is a closed system, drill some holes or add a mesh section to allow air to flow freely.
- Update As Needed As technology advances, you might encounter new types of cables or connectors. Update your cable management system accordingly to accommodate these changes and keep it functional.
- Labeling System: Maintain a labeling system for your cables. This not only helps with identification but also ensures that you can easily spot if a cable is missing or has been placed in the wrong spot.
By following these simple maintenance tips, you can ensure that your DIY cable management box remains a reliable and efficient part of your workspace for years to come.
Safety Considerations
When it comes to managing cables, safety is paramount. A well-organized cable management box not only tidies up your space but also minimizes risks. Here are some key safety considerations to keep in mind:
- Choose the Right Materials Your cable management box should be made of non-conductive, fire-resistant materials to reduce the risk of electrical hazards. Avoid materials that can easily catch fire or melt, such as certain plastics.
- Proper Ventilation To prevent overheating, ensure your box is well-ventilated. Overheating can lead to a fire hazard, especially if the box stores multiple electrical devices. If necessary, modify the box to include additional ventilation holes or slots.
- Avoid Overloading: Do not fill the cable management box with too many devices. Overloading can cause excessive heat buildup, which is a potential fire risk. Use multiple boxes if you have a lot of cables and devices.
- Secure Cable Entries and Exits: Make sure the cables enter and exit the box through designated openings that protect them from abrasion. Sharp edges can damage insulation and build electrical hazards.
- Regular Inspections: Inspect your cable management box regularly for signs of wear or damage. Look for frayed cables, loose connections, or any other signs of deterioration.
- Child Safety: If you have young children, consider a box with a child-proof lock to prevent curious little hands from accessing the contents.
- Follow the Manufacturer's Instructions. If you're using a pre-made cable management box, always follow the manufacturer's instructions and warnings to ensure safe use.
Follow these safety tips to keep cables and devices secure. Regular maintenance and planning will prevent accidents and keep your cable management safe at home or work.
FAQs About DIY Cable Management Box
Discover essential faqs about DIY cable management box. Learn solutions to organize and declutter your cables efficiently.
Start by considering the number of devices you need to manage and the size of the power strip you’ll be using. Sketch a 3D design on paper, deciding on the number and shape of the holes for the cables. Ensure the design is functional and provides easy access to the cables and power strip.
After measuring and marking the spots for the holes in your box, use a cutting tool to build openings carefully. For a clean look, you can use a compass to draw semicircles or any shape you prefer for the cable exits. Always prioritize safety by securing the box before cutting.
Absolutely! You can paint the box or cover it with decorative paper to match your home decor. Feel free to add labels or use different colors for various types of cables to make identification easier. Personalizing your box not only makes it unique but also helps in organizing the cables better.
Yes, when working with tools, always wear protective gear like safety goggles and gloves. Make sure the power strip inside the box is not overloaded and that there’s enough ventilation to prevent overheating. It’s also important to use a surge protector to safeguard your devices.
To ensure longevity, choose a box made of strong material like wood or thick cardboard. If you're using cardboard, consider reinforcing the corners with tape or additional layers. For wooden boxes, sanding the edges and applying a sealant can protect against wear and tear. Additionally, make sure the holes for the cables are not too large, as this can weaken the structure of the box.
Conclusion
Wrapping up, mastering the art of making a DIY cord organizer that you can make in minutes is both satisfying and practical. By following simple steps, you can keep your cords tidy and accessible. Explore the endless possibilities of making your own DIY cable management box and enjoy a clutter-free space.


