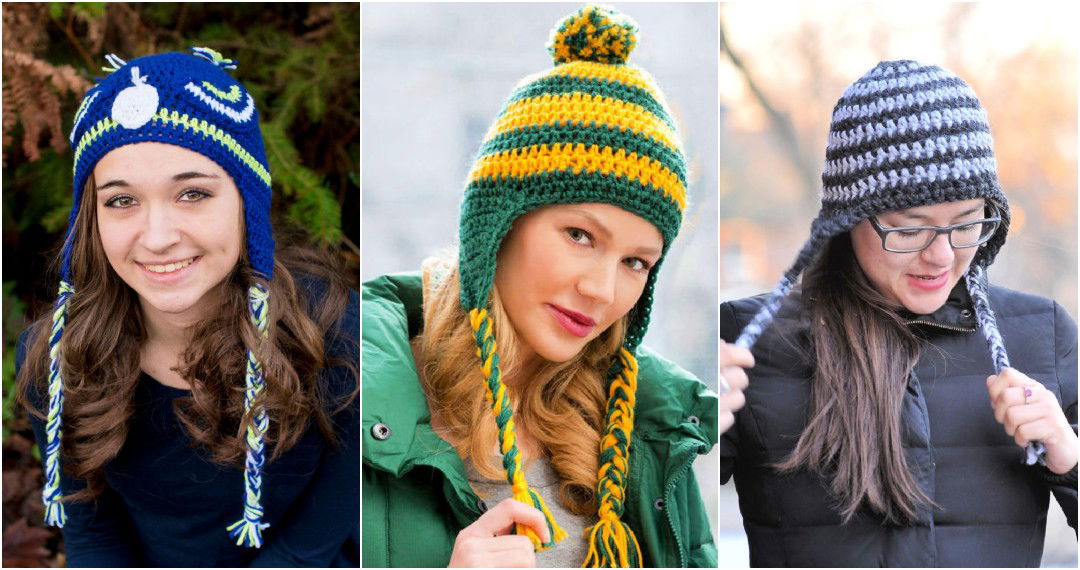
Learning how to crochet a cap is exciting and rewarding! I remember the first time I made one for my niece. I was nervous about getting it right, but I followed a simple pattern and soon had a lovely, cozy cap. The feeling of accomplishment was fantastic, and my niece loved her new hat. It was such a great experience and full of joy.
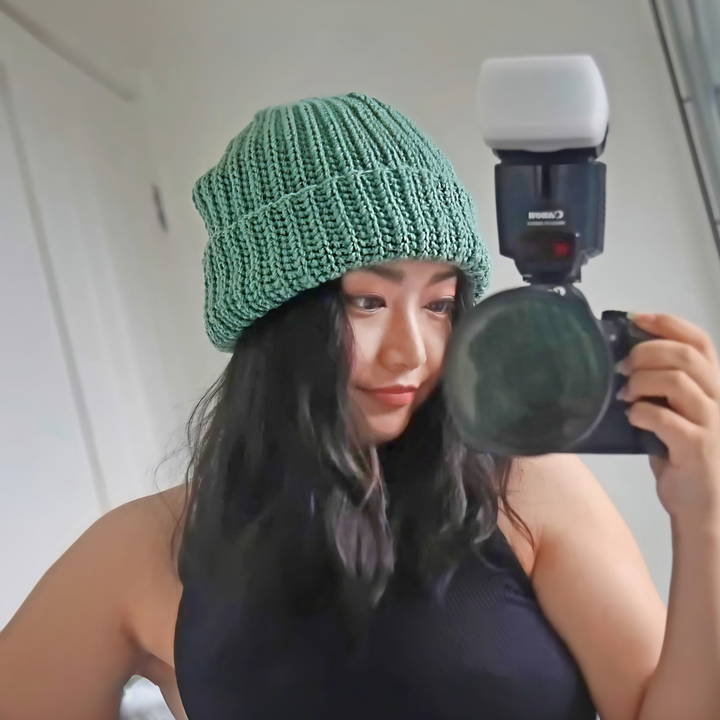
I am helping you with this guide on how to crochet a cap, along with a free pattern, to make your work easier. This easy-to-follow pattern will have you making beautiful, warm caps in no time. It's the perfect way to combine creativity and relaxation while making something useful.
So, get your crochet hooks ready and start your own wonderful journey into crochet.
Materials Needed
- Any weight yarn (thin or chunky works well)
- Crochet hook suitable for your yarn
- Measuring tape
- Scissors
- Yarn needle
Step by Step Instructions
Learn how to crochet a cap with our easy step-by-step instructions on crochet caps. Perfect for beginners. Start your crochet journey today!
Measuring and Starting Your Chain
- Measure Your Head: Use a measuring tape to determine the circumference of your head or of the head of the person who will wear the beanie. You'll also need to measure the length of the beanie from the top of the head to the ear.
- Making the Starting Chain: Make a slip knot on your hook. Chain loosely until your chain measures approximately 15 inches or the length from the top of the head to the ear, including the portion you wish to fold up.
Making the Ribbed Texture
- Double Slip Stitch Crochet: Insert your hook into the back loop of the second chain from the hook. Yarn over and pull up a loop. Now, with three loops on your hook, pull the first loop through the other two, making a Double Slip Stitch Crochet. This stitch will give your beanie a ribbed, knit-like texture.
- Mark Your First Stitch: If you're a beginner, consider using a stitch marker to mark your first stitch. It makes it easier to identify when you come back around.
- Continue the Pattern: Keep crocheting the double slip stitch in the back loops of each stitch across the row. When you reach the end, chain one and turn your work to start the next row.
Forming the Beanie
- Repeat for Size: Continue the mentioned pattern until the piece wraps comfortably around your head. The number of rows will depend on the circumference of your head and the stretch of your yarn.
- Joining Ends: Once your rectangle is long enough, fold it so the two short ends meet, with the right sides facing each other. Slip stitch the ends together to form a tube.
Closing the Top
- Gather the Top: Cut the yarn, leaving a long tail. Thread the tail through a yarn needle and weave in and out of the stitches at the top edge of the beanie. Pull tight to gather the top of the beanie and secure with a knot.
- Finishing Touches: Turn the beanie to the right side. You can choose to add a pom-pom or leave it as is. Weave in any loose ends.
Video Tutorial
For a step-by-step video tutorial, watch this YouTube video by CherilynQ.
Size and Fit Customization
Making a crochet cap that fits perfectly is essential for comfort and style. Here's a straightforward guide to customizing the size and fit of your crochet cap:
Measuring Head Circumference:
Start by measuring the head circumference of the person who will wear the cap. Use a soft tape measure and wrap it around the head, just above the ears and eyebrows. Make sure the tape is snug but not tight. Please write down this measurement; it's the key to a well-fitting cap.
Understanding Crochet Cap Sizing:
Crochet caps can stretch, so you'll want the finished cap to be slightly smaller than the actual head circumference. A good rule of thumb is to subtract about 1-2 inches (2.5-5 cm) from the head measurement for adults and 1 inch (2.5 cm) for children. This will ensure a snug, comfortable fit.
Adjusting the Pattern:
If you're following a pattern, look for the head circumference it's designed for. To adjust the size, you can:
- Change the hook size: Using a larger hook will make the cap bigger, and a smaller hook will make it smaller.
- Alter the number of stitches: Increase or decrease the initial number of stitches to adjust the width of the cap.
- Modify the number of rows: Add or remove rows to change the length of the cap.
Gauge Swatch:
Before starting your project, crochet a small gauge swatch using the yarn and hook you plan to use. Measure the swatch to see how many stitches and rows per inch you have. Compare this with the pattern's gauge to ensure your cap will be the right size.
Fitting as You Go:
Try the cap on as you crochet to check the fit. It should feel comfortable and not too tight. If it's too loose or too snug, adjust your stitches accordingly.
Finishing Touches:
Once you've completed the cap, try it on again. If it's a bit tight, you can gently stretch it to fit. If it's too loose, you can add an elastic band on the inside edge for a better grip.
Every head is unique, just like every crochet project. Don't hesitate to make adjustments for that perfect fit.
Stitch Techniques and Patterns
When it comes to crocheting caps, the variety of stitches and patterns you can use is vast and exciting. Here's a guide to some popular techniques and patterns that will add texture and character to your crochet caps.
Basic Stitches for Beginners:
- Single Crochet (sc): This is the simplest crochet stitch and forms a tight, dense fabric. It's perfect for the main body of a cap.
- Double Crochet (dc): Double crochet stitches are taller and make a looser fabric, which is great for a more breathable cap.
Textured Stitches for Added Interest:
- Bobble Stitch: This stitch makes a puffy, textured dot on your fabric. It's a fun way to add a pop of dimension to your cap.
- Front Post Double Crochet (FPdc): By crocheting around the post of the stitch below instead of into the top of the stitch, you can make a ribbed texture that's ideal for the brim of a cap.
Patterns for Advanced Crocheters:
- Cable Patterns: Just like in knitting, you can make cables in crochet for a classic, cozy look.
- Lace Patterns: For a lighter cap, try incorporating lace patterns with openwork and spaces.
Combining Stitches for Unique Designs:
Experiment by combining different stitches to make unique patterns. For example, alternate single and double crochet stitches for a simple, textured pattern.
Making Colorwork:
- Stripes: Change colors every few rows to make stripes. This is an easy way to add color without complicating the pattern.
- Tapestry Crochet: Carry multiple colors of yarn and switch between them to make intricate, multi-colored designs.
Finishing Techniques:
- Invisible Join: When finishing your cap, use an invisible join to connect the end of your work to the beginning seamlessly.
- Blocking: To give your cap a professional finish, wet it and pin it into shape on a foam board to dry.
The key to a successful crochet project is practice. Don't be afraid to try new stitches and techniques.
Troubleshooting Common Issues
Crocheting can be a relaxing and rewarding activity, but like any craft, it can come with its own set of challenges. Here are some common issues crocheters face and how to solve them:
Uneven Edges
- Solution: Uneven edges often occur due to inconsistent tension or incorrect stitch counts. To fix this, practice maintaining a consistent grip on your yarn and hook. Also, count your stitches at the end of each row to ensure you have the correct number.
Too Tight or Too Loose Stitches
- Solution: If your stitches are too tight, try relaxing your grip on the hook or use a larger hook size. For stitches that are too loose, do the opposite: tighten your grip or switch to a smaller hook.
Curling Project
- Solution: Curling can happen when the tension is too tight or if there's a disparity in stitch heights. Make sure to keep an even tension and check if you're using the correct stitch for the pattern.
Difficulty Following Patterns
- Solution: Patterns can be confusing, especially for beginners. Break the pattern down into smaller sections, and use stitch markers to help you keep track of your place. Don't hesitate to look up tutorials for unfamiliar terms or stitches.
Joining New Yarn
- Solution: To join a new yarn seamlessly, tie the end of the old yarn to the beginning of the new yarn with a small knot. Continue crocheting as usual, and later weave in the ends with a yarn needle.
Choosing the Wrong Yarn
- Solution: The yarn type can greatly affect the outcome of your project. For caps, choose a yarn that matches the recommended weight in the pattern and consider the cap's intended use—cotton for summer, wool for winter.
Losing Place in the Pattern
- Solution: Use a row counter or make notes to keep track of your progress. If you lose your place, count the stitches and rows to determine where you are in the pattern.
Finishing Touches
- Solution: For a professional-looking finish, take the time to block your cap and weave in ends neatly. Blocking will shape the cap and even out the stitches, while well-weaved ends will prevent unraveling.
Discover solutions for common crochet issues to enhance project quality and crafting experience. Overcome hurdles with ease through practice and tips.
FAQs About Free Crochet Cap Pattern
Discover faqs about free crochet cap pattern – get answers to common questions, tips, and instructions to make stylish crochet caps easily!
To ensure a good fit for a crochet cap, you need two main measurements: the head circumference and the hat length. For head circumference, measure around the forehead, keeping the tape straight and snug. For hat length, measure from the top of the head to mid-ear. Standard charts can provide guidance if you can’t measure the person’s head.
Selecting the right yarn is crucial for the comfort and appearance of your crochet cap. Consider the season and the wearer's sensitivity to certain materials. For example, cotton or bamboo yarns are great for summer, while wool or acrylic may be better for winter. Always check the yarn label for care instructions and recommended hook size.
Yes, you can adjust a crochet cap pattern to fit different sizes. Use the head circumference and hat length measurements to modify the pattern accordingly. Remember to account for the stretchiness of the yarn and to check your gauge to ensure the cap will fit properly.
There are several methods to start crocheting a cap, but the most common are the top-down and bottom-up approaches. Top-down starts from the crown and works downward, which is great for custom sizing. Bottom-up starts from the brim and works upward, which can be easier for beginners.
To care for your crochet cap, follow the washing and drying instructions on the yarn label. Most caps can be gently hand-washed in cool water with mild detergent. Lay the cap flat to dry to maintain its shape and avoid stretching.
Conclusion
Now, pick up your hook and yarn, and let's crochet the cap together. Each stitch brings you closer to a charming cap that you can be proud of. Happy crocheting!


