Making a blanket fort was one of my favorite things to do as a kid. It's not only fun but also a great way to let your imagination run wild. You'll need some blankets, pillows, chairs, and clips to hold everything together. Get started by positioning the chairs in a square or rectangular shape and draping blankets over them.
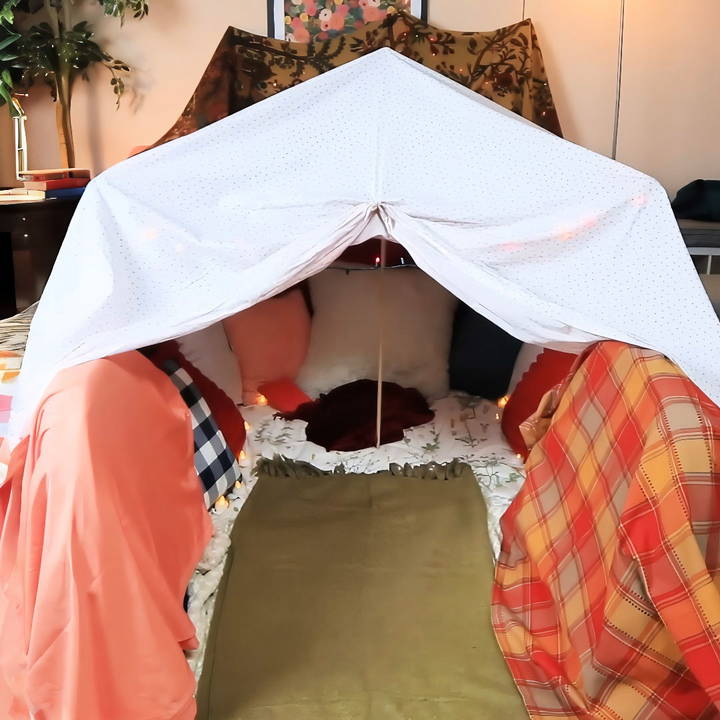
Once you have your basic structure, fill the inside with pillows and maybe some fairy lights if you have them. This can be a perfect little hideaway for reading a book, playing games, or just relaxing.
Building a blanket fort doesn't require a lot of materials, but the joy it brings is totally worth it. Try it and share the fun moments with your family or friends!
Materials You'll Need
Before we get started, gather the following materials. Each of these items plays a crucial role in making a sturdy, comfortable, and cozy fort.
- Sheets and Blankets: These form the walls and roof of your fort. Blankets add warmth and softness, while sheets help cover larger areas.
- Cushions and Pillows: These make the floor and add comfort to your seating or lounging area.
- Chairs: Use them as the main structural supports.
- Wooden Dowels or Broomsticks: Useful for making elevated sections and providing additional support.
- Clothespins and Binder Clips: These secure the sheets and blankets in place.
- String and Tape: Provides additional support and helps secure the structure.
- String Lights, Electric Tea Lights, and LED Lights: Essential for making a cozy and inviting ambiance.
- Heavy Books: Help anchor the sheets or blankets.
- Entertainment: Think books, a laptop, or anything else to keep you entertained inside your fort.
- Snacks: Because what's a cozy fort without some delicious treats?
- Friends: Everything's more fun with friends!
Step by Step Instructions
Learn how to make a blanket fort with our step-by-step guide. From choosing a location to adding lights and snacks, make the perfect hideaway today!
Step 1: Choose a Location
Select a suitable location for your fort. A living room or a spacious bedroom is ideal. Ensure the space is clear of any obstacles or fragile items. I cleared my living room, pushing the coffee table aside to make room.
Step 2: Build the Walls
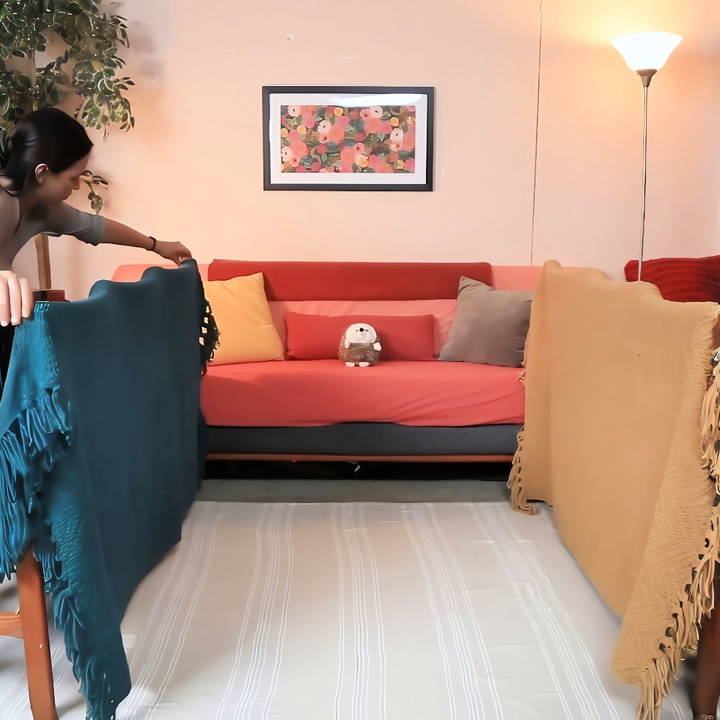
Start by setting up the chairs. Place them back-to-back or in a square formation, leaving enough space between them for a roomy interior. These chairs will serve as the main pillars of your fort.
Step 3: Drape the Blankets
Drape blankets over the backs of the chairs. This forms the basic walls of your fort. Use heavier blankets for added stability. I used my thick comforter at this stage, which worked perfectly.
Step 4: Make the Floor
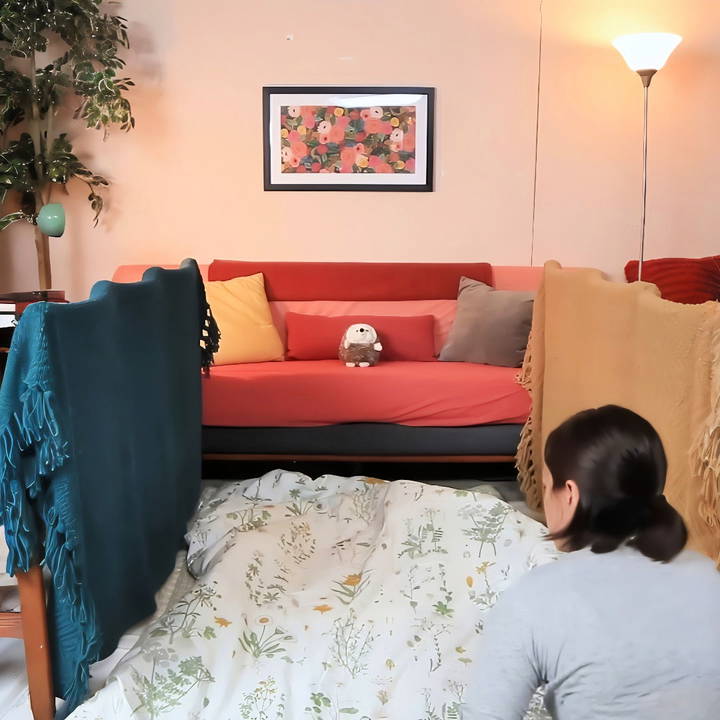
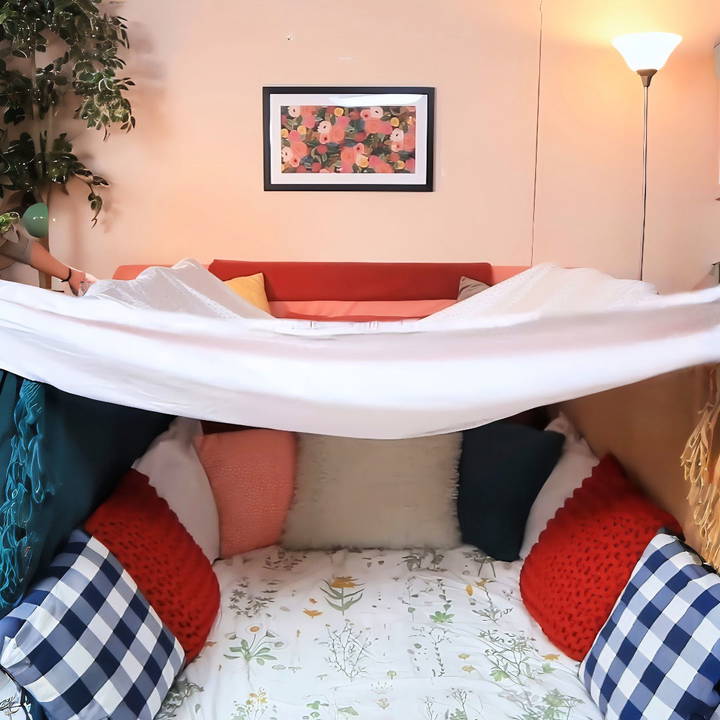
Layer blankets and cushions on the floor between the chairs for comfort. This step transforms your fort into a cozy sanctuary. I scattered all my extra pillows and throws to make it irresistibly soft.
Step 5: Line the Walls with Pillows and Cushions
Line the sides of the fort with pillows and cushions, adding an extra layer of comfort and insulation. It makes the walls softer and more inviting.
Step 6: Construct the Roof
Drape a sheet over the top of the chairs to make the roof. Secure the edges by placing heavy books on them. This will help keep the roof in place and provide some weight to the structure. For my fort, I used my largest, lightest sheet so that the roof wouldn't sag too much.
Step 7: Secure Dowels and Broomsticks
For additional support, secure wooden dowels or broomsticks between couch cushions or tie them across the tops of the chairs. Run a string across them to provide even more stability. This step is especially useful if you want to make a multi-level fort.
Step 8: Make a Second Level (Optional)
If you're feeling ambitious, drape another sheet across the dowels to make a second level inside your fort. Secure the sheets together using clothespins or binder clips. This adds a sense of adventure and can make your fort even more fun.
Step 9: Raise the Roof
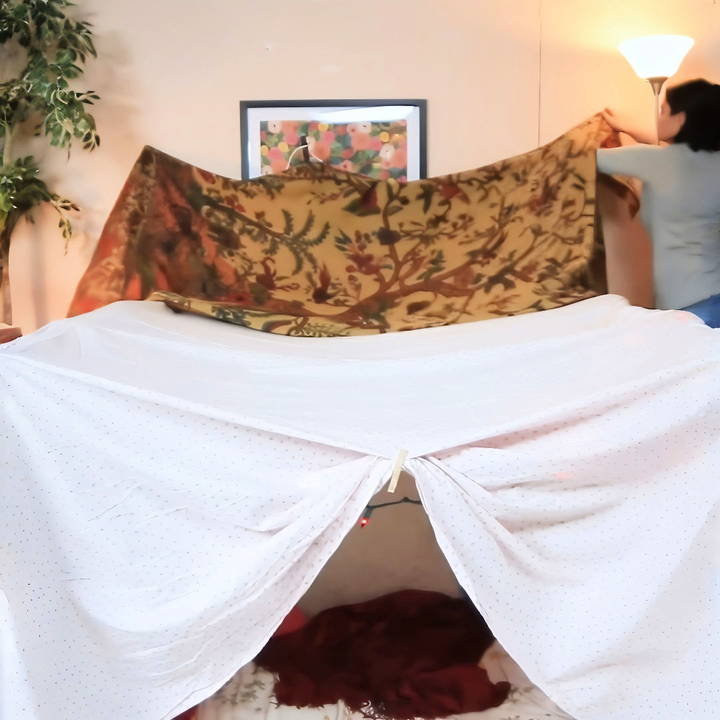
Use additional dowels or sticks to prop up the central part of your roof. This increases the headroom inside the fort, making it more spacious and comfortable. I found that using a taller broomstick in the center worked wonders for my fort's height.
Step 10: Add Lights
String lights, electric tea lights, or LED lights can transform your fort into a magical retreat. Secure the lights using binder clips or tape. This makes a warm, cozy glow that's perfect for relaxing or reading. I opted for some soft fairy lights, and the ambiance was simply enchanting.
Step 11: Add Entertainment
If you plan to spend some serious time in your fort, be sure to bring in some entertainment. A laptop, books, a portable speaker, or even a TV can make your fort experience more enjoyable. I brought in my laptop for some movie marathons and my favorite books for reading.
Step 12: Don't Forget the Snacks
Stock up on snacks and drinks. This way, you won't have to leave your fort for a while. I made sure to bring popcorn, some chocolate, and a few sodas.
Step 13: Invite Friends
Finally, invite your friends to join you. A blanket fort is always more fun with company. My friends and I spent hours chatting, watching movies, and reminiscing about old times.
Customization Ideas
When it comes to building your own fort, customization is key to making it a personal retreat or a fun play area. Here are some ideas to inspire you:
- Choose a Theme: Decide on a theme that reflects your personality or interests. Whether it's a medieval castle, a space station, or a pirate ship, a theme can guide your design choices and make the building process more enjoyable.
- Color and Paint: Select colors that blend with the environment or stand out, depending on the effect you want. Use outdoor-friendly paint for durability. Consider murals or patterns for an artistic touch.
- Interior Design: Make the inside of your fort cozy with cushions, rugs, and blankets. If it's a play fort, add elements like a chalkboard wall or a rope ladder for extra fun.
- Lighting: Install solar-powered lights for a warm glow in the evenings. String lights can add a whimsical feel, while spotlights can highlight special features.
- Landscaping: Surround your fort with plants that complement its style. Flowering vines can soften the look of a wooden fort, while cacti and succulents suit a desert theme.
- Furniture: Build or repurpose furniture to fit the size and style of your fort. A built-in bench or a hammock can be both practical and inviting.
- Accessories: Add flags, banners, or signs to personalize your fort. Wind chimes, bird feeders, or a weather vane can add character and interest.
- Safety Features: Ensure your fort is safe by smoothing rough edges, securing loose parts, and making sure the structure is stable.
The goal is to make a space that feels uniquely yours. Encourage family and friends to contribute ideas, and most importantly, have fun with it!
FAQs About How to Build a Fort
Discover answers to common FAQs about how to build a fort, including materials, techniques, and safety tips to make your fort-building fun and safe!
Pick a spot in your home where you have space to spread out, like a living room or bedroom. Ensure it’s away from high-traffic areas to avoid disturbances. The location should have furniture that can support your fort’s structure, such as a table to drape blankets over or chairs to outline the walls.
For the walls, you can use sofa cushions or pillows. Place them vertically for sturdiness and use weighty objects to keep them from falling over. If you’re using blankets, drape them over furniture and secure them with clips. You can also create panels by wrapping blankets around the walls and securing them with clips for extra stability.
The roof can be made by stretching sheets across the tops of your walls. Use lightweight sheets to prevent the structure from collapsing. If your fort is under a bunk bed or a table, you can make a vaulted ceiling effect. Secure the sheets with clips to ensure they stay in place.
To make your fort cozy, line the floor with soft blankets and pillows. Add string lights or LED lights for a warm ambiance. You can also bring in a laptop, books, or games for entertainment. Don’t forget to stock up on snacks for the ultimate fort experience.
Safety is key when building a fort. Make sure the materials you use are sturdy and safe. Avoid using heavy objects that could fall and cause injury. Ensure there are no sharp objects or obstacles within the fort area. If you're using furniture, make sure it's stable and won't tip over. It's also important to have enough space inside the fort to move around comfortably without the risk of collapsing the structure. Always supervise young children during play to ensure their safety.
Conclusion:
Making a DIY blanket fort is easy and super fun. Follow these steps, and you'll have a cozy spot to enjoy your indoor adventures today!


