Learning how to make stained glass opened up a new world for me. It started as a small project to fill my weekends, but it quickly grew into a passion. I began with simple patterns, learning how to cut glass and join pieces together. It was challenging at first, but very rewarding to see each piece come together to form a beautiful window.
As I got better, my projects became more ambitious. I experimented with different colors and textures, discovering the beauty in each piece of glass. My home filled with light and color, each window telling its own story. The process taught me patience and precision, skills I found useful in other areas of my life.
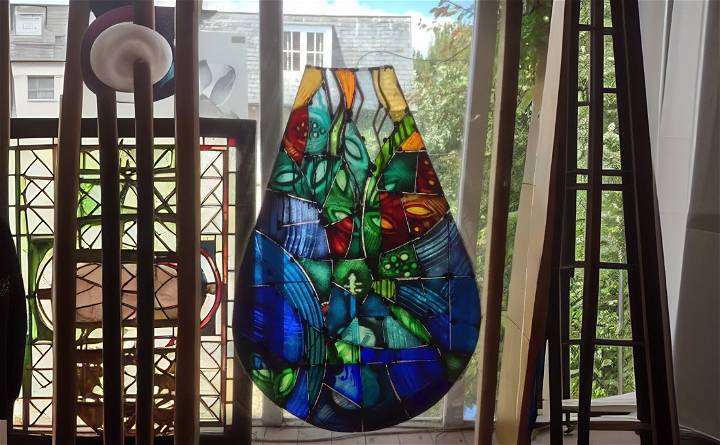
If I can do it, so can you. This guide will help you get started with making your own stained glass, offering step-by-step instructions and tips to make your project a success. Let's brighten up your world with some stained glass.
Choosing a Pattern for Your Stained Glass Project
Choosing the right pattern for your stained glass project is a crucial step. The pattern you choose will not only determine the look of your final piece but also the complexity of the process. Here are some tips to help you choose the right pattern.
Understand Your Skill Level
Firstly, it's important to understand your skill level. If you're a beginner, start with a simple pattern that doesn't have too many pieces or complex shapes. As you gain more experience, you can gradually move on to more intricate designs.
Consider the Purpose of the Piece
Next, consider the purpose of the piece. Are you making a decorative window panel, a lampshade, or a piece of wall art? The purpose of the piece can influence the complexity and style of the pattern you choose.
Choose a Pattern That You Love
Finally, choose a pattern that you love. Stained glass projects can be time-consuming, so it's important to choose a design that you'll enjoy working on. Whether you prefer geometric patterns, floral designs, or abstract art, choose a pattern that speaks to you.
The most important thing is to enjoy the process. Don't be afraid to experiment with different patterns and designs.
How to Make Stained Glass - Step by Step Guide
Learn how to make stunning stained glass creations with our step-by-step guide. Master the art of stained glass with easy to follow instructions.
Step by Step Instructions
Learn how to make beautiful stained glass with our step-by-step instructions. Make stunning pieces with this easy-to-follow guide.
Step 1: Design Phase
Start with a paper sketch of the window opening, outlining key elements of your design, such as themes or central figures. Initially, use pencil sketches to layout the basic structure. Once satisfied, add color to your designs with water-soluble pencils. Play with different color schemes until you find one that resonates with your vision. Finalize your design on a larger scale and seek any necessary permissions if you're installing the window in a public space, like a church.
Step 2: Making a Cartoon
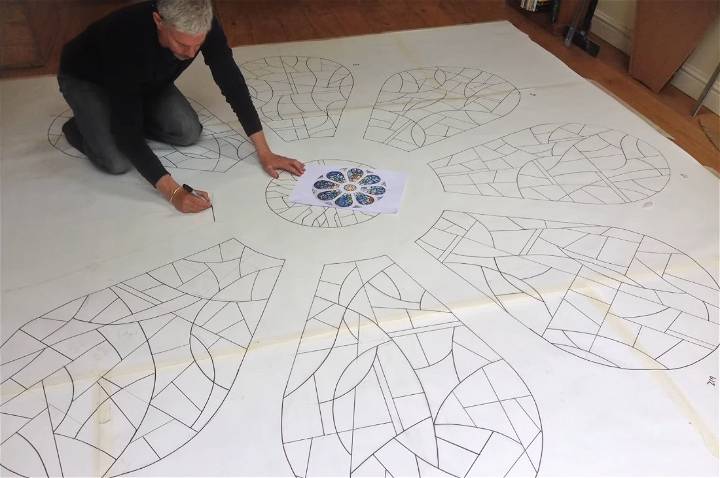
A 'cartoon' in stained glass terminology is a full-size, detailed drawing that guides each piece's placement. Transfer your final design to a to-scale drawing, marking precisely where each glass piece will go. This step requires accuracy and will serve as the blueprint for your creation.
Step 3: Glass Cutting
Select colored glass pieces that match your design. Carefully cut each piece following your cartoon, ensuring they fit together perfectly. Use a glass cutter and safety equipment to avoid injury. Each cut piece is temporarily placed on an easel, awaiting the painting phase.
Step 4: Glass Painting
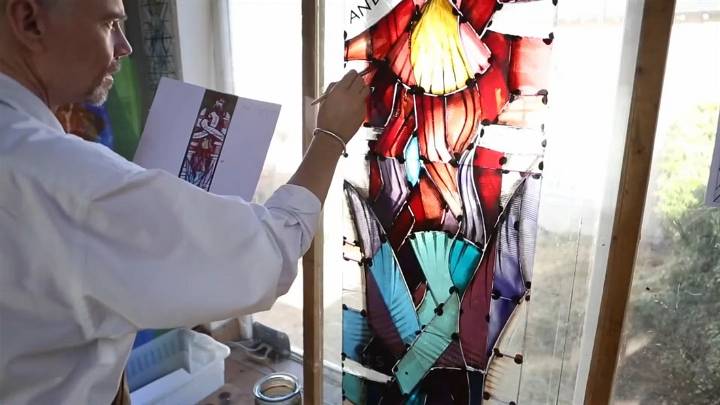
Add details to your glass pieces with special glass paint. This stage allows for creativity in shading and detailing, bringing your design to life. After painting, each piece is fired in a kiln to set the paint, a process that may be repeated to achieve the desired effect.
Step 5: Leading and Soldering
Assemble the painted glass pieces using lead came, fitting them together like a jigsaw puzzle based on your cartoon. After assembly, solder the joints where the lead came meets to secure the structure. This technique, centuries old, requires patience and precision.
Step 6: Cementing
Cementing involves filling the gaps between the glass and the lead came to weatherproof the window and strengthen the structure. Though messy, it's a crucial step in ensuring the longevity and durability of your stained glass.
Step 7: Installation
The final step is to install your stained glass window in its designated space. This process might involve removing old glass and preparing the window space for your new artwork. Use appropriate materials that complement the setting, such as lime mortar for stone installations, ensuring the artwork is secure and correctly displayed.
Video Tutorial
For a visual walkthrough of the stained glass-making process, watch Derek Hunt's tutorial on making stained glass.
This step-by-step video tutorial complements this written guide by illuminating the techniques discussed, making it accessible for beginners and experts alike.
Making stained glass is a blend of art and craft, demanding both creative vision and technical skill. By following these steps and utilizing resources like video tutorials, you can embark on the journey of making your stained glass window, a process that is not only immensely satisfying but results in a timeless piece of art.
Stained Glass Project Ideas
Stained glass is a versatile medium that can be used in a variety of creative projects. Whether you're a beginner or an experienced artist, here are some project ideas to inspire your next stained glass creation.
Window Panels
Window panels are a classic stained glass project. They can range from small, decorative pieces to large, intricate designs that cover an entire window. Consider making a panel that reflects your personal style or complements the decor of your home.
Sun Catchers
Suncatchers are small, decorative pieces that are hung in windows to catch the light. They're a great project for beginners because they require fewer pieces of glass and less soldering than larger projects. Plus, they make great gifts!
Picture Frames
A stained glass picture frame can add a unique touch to your favorite photos. You can make a simple frame with a single color of glass, or use a variety of colors and textures to make a more complex design.
Mirrors
Adding a stained glass border to a mirror can transform it into a piece of art. This is a great project for intermediate to advanced artists, as it requires precise cutting and soldering.
Lampshades
Stained glass lampshades are a challenging but rewarding project. They require a good understanding of three-dimensional construction and a lot of patience. But the end result is a beautiful, functional piece of art.
The most important part of any stained glass project is to have fun and let your creativity shine!
Safety Precautions in Stained Glass Crafting
Working with stained glass involves handling sharp objects and potentially hazardous materials. Therefore, it's crucial to prioritize safety. Here are some safety precautions to keep in mind.
Protective Gear
Always wear protective gear. This includes safety glasses to protect your eyes from flying glass shards, and gloves to protect your hands from sharp edges. When soldering, use a fume extractor or work in a well-ventilated area to avoid inhaling harmful fumes.
Proper Handling of Tools
Handle tools with care. Glass cutters, soldering irons, and grinders are all tools that can cause injury if not used properly. Always follow the manufacturer's instructions and use these tools with caution.
Safe Workspace
Maintain a safe workspace. Keep your work area clean and organized to prevent accidents. Dispose of glass scraps properly and keep sharp tools out of reach when not in use.
First Aid
Have a first aid kit readily available. Despite taking precautions, accidents can still happen. It's important to be prepared to treat minor injuries.
Safety should always be your first priority when working with stained glass. By following these precautions, you can enjoy your craft while minimizing the risk of injury.
Troubleshooting Tips for Stained Glass Crafting
Stained glass crafting can be a complex process, and it's not uncommon to encounter some challenges along the way. Here are some troubleshooting tips to help you overcome common issues.
Glass Cutting Difficulties
- Problem: The glass doesn't cut cleanly.
- Solution: Ensure your glass cutter is in good condition. A dull or damaged cutter can result in uneven cuts. Also, apply a consistent pressure when scoring the glass. Too much pressure can cause the glass to chip, while too little pressure may not score the glass deeply enough.
Copper Foil Issues
- Problem: The copper foil doesn't stick to the glass.
- Solution: Clean the glass thoroughly before applying the foil. Any dirt or oil on the surface of the glass can prevent the foil from adhering properly. Also, burnish the foil after applying it to ensure it sticks firmly to the glass.
Soldering Challenges
- Problem: The solder doesn't flow smoothly.
- Solution: Check your soldering iron temperature. If it's too hot, the solder may melt too quickly and become difficult to control. If it's too cold, the solder may not melt evenly. Also, ensure you're using a good quality flux and apply it evenly to the copper foil before soldering.
Patience and practice are key when working with stained glass. Don't be discouraged by these challenges. With time and experience, you'll be able to make beautiful stained glass pieces.
FAQs About Stained Glass Crafting
Discover the answers to all your questions about stained glass crafting in this comprehensive FAQ guide. Learn the ins and outs of this beautiful art form.
What type of glass is used for stained glass?
Cathedral glass and opalescent glass are the two most common types of glass used in stained glass projects. Cathedral glass is transparent and smooth, while opalescent glass is more opaque.
What tools do I need to start with stained glass crafting?
You'll need a glass cutter, grozer pliers, copper foil, gel or liquid flux, a soldering iron, solder, and an electric glass grinder.
How do I cut stained glass?
Stained glass is cut by scoring the surface with a glass cutter, then applying pressure to break the glass along the scored line.
Why is my solder not sticking to the copper foil?
This could be due to a lack of flux or dirty copper foil. Flux helps the solder flow and adhere to the copper foil. Make sure to apply flux to the copper foil before soldering.
How do I polish my finished stained glass project?
You can polish your finished stained glass project using a special glass cleaner and a soft cloth. This will remove any flux residue and give your project a shiny finish.
Can I make stained glass at home?
Yes, you can make stained glass at home. However, it's important to have a dedicated workspace and to follow safety precautions, as you'll be working with glass and soldering equipment.
How long does it take to make a stained glass window?
The time it takes to make a stained glass window can vary greatly depending on the complexity of the design and your skill level. A simple design might take a few hours, while a more complex design could take several days or even weeks.
Can I sell my stained glass creations?
Yes, many stained glass artists sell their creations. You could sell your work at craft fairs, in local shops, or online.
How do I repair a broken piece of stained glass?
To repair a broken piece of stained glass, you'll need to remove the broken piece, cut a new piece of glass to fit, wrap it in copper foil, and solder it in place.
What's the difference between lead came and copper foil techniques?
The lead came technique involves fitting the glass pieces into lead channels, while the copper foil technique involves wrapping the edges of the glass pieces in adhesive copper tape. The copper foil technique allows for more intricate designs.
Conclusion:
Making stained glass can really transform your home and add a unique touch to your decor. I hope this guide inspires you to pick up this craft and start making your own beautiful windows. Remember, it all starts with a single piece of glass, and from there, the possibilities are endless.


