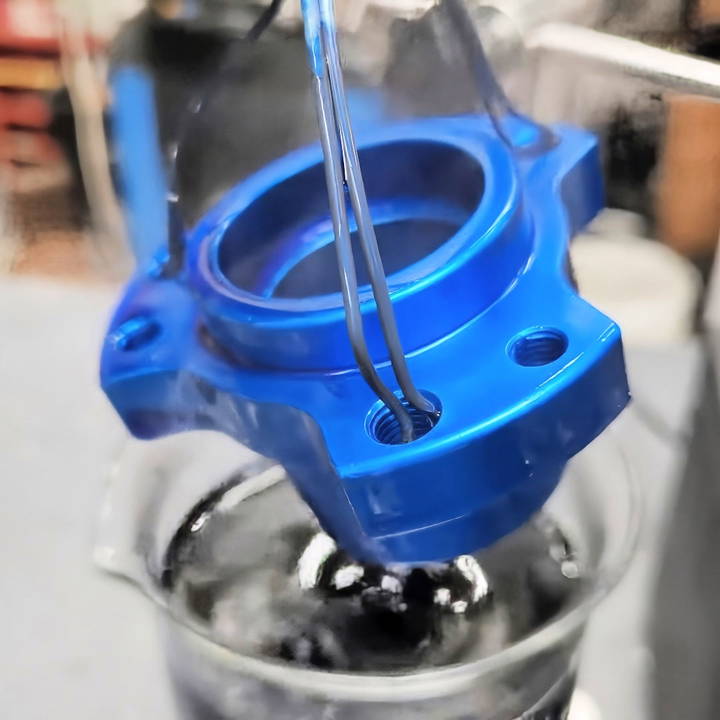
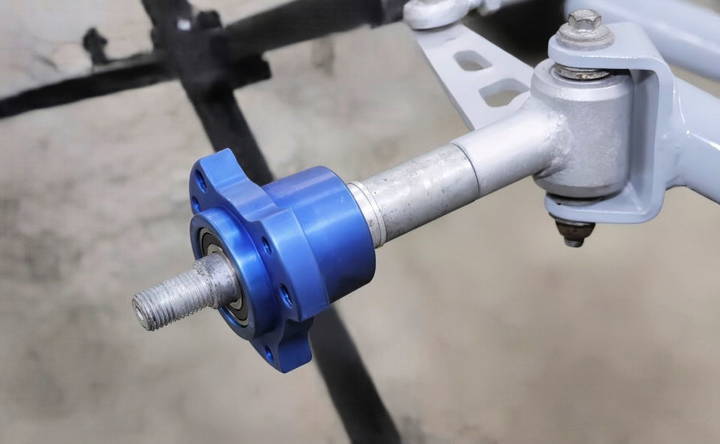
Ever since I embarked on my jet go-kart project, I realized that achieving a professional finish was high on my list of priorities. And what's better than anodizing, a process that gives aluminum parts a beautiful, durable coat? Let me take you through my home anodizing procedure. This isn't a how-to for professionals, but if you're eager to dip your toes into DIY aluminum anodizing, this guide will illuminate the path.
Understanding Why We Anodize
Before diving into the process, let's underscore why anodizing is beneficial. Anodizing aluminum parts not only improves their aesthetic appearance by adding color but also enhances their corrosion resistance and increases surface hardness. This means parts are longer-lasting and maintain their beauty over time.
Step by Step Instructions
Learn how to anodize aluminum with step-by-step instructions, from the pre-anodizing cleaning process to sealing the color, ensuring safety and quality.
The Pre-Anodizing Cleaning Process
Discover the essential materials and steps for the pre-anodizing cleaning process, ensuring optimal anodizing results. Boost your metal finishing quality today!
Materials Needed
- Brillo Pad and Soap: The soap is essential for removing any initial grime or grease. The Brillo pad aids in scrubbing the aluminum without scratching it.
- Water: Necessary for rinsing away the soap and dirt.
Steps
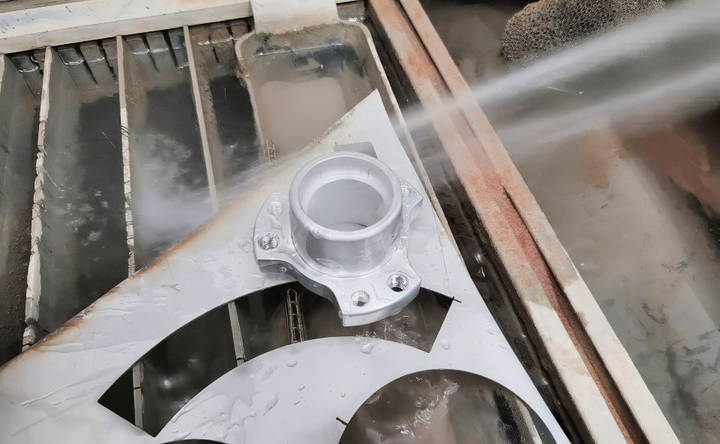
- Wash the Aluminum Part: Begin by thoroughly washing the aluminum parts with soap and water. This ensures that the surface is clean.
- Scrub with a Brillo Pad: Use the pad to scrub the part gently. The goal is to eliminate any corrosion or leftover contaminants.
- Rinse Again: Once you're done scrubbing, rinse the part with water to remove any soap residues.
Securing the Aluminum Part
Learn how to secure aluminum parts effectively. Discover essential materials and step-by-step instructions for ensuring stability and precision.
Materials Needed
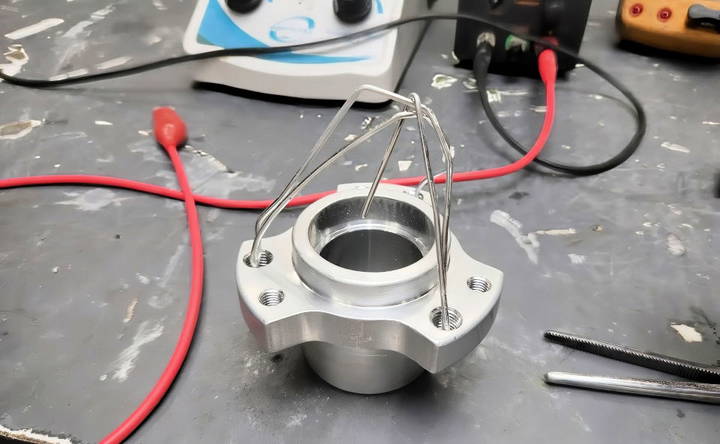
- Fixture for Holding: You'll need something to hold the part. This prevents the entire surface from anodizing, ensuring you have control over the process.
Steps
- Set Up the Fixture: Attach the part to a fixture. Ensure the contact points do not anodize, as they'll connect to the anode.
Preparing the Etching Bath
Learn how to safely prepare an etching bath. Follow our step-by-step guide to ensure a secure and efficient etching process. Safety first!
Safety First!
- Goggles and Gloves: Always wear goggles and gloves to protect yourself from any splashes or spills.
Steps
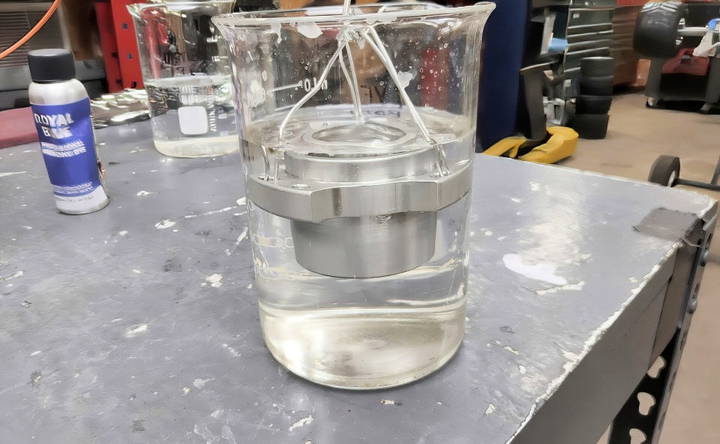
- Place in Etching Bath: Insert the aluminum part into the etching bath. Etching prepares the surface for better adhesion of the anodized layer.
The Anodizing Process
Learn about the anodizing process, necessary materials, and step-by-step instructions to achieve a durable, corrosion-resistant finish on metals.
Materials Needed
- DC Power Supply: Vital for making the electric current needed for anodizing.
- Acid Bath: Typically consists of sulfuric acid. This is where the actual anodizing happens.
- Distilled Water: For thorough rinsing without leaving mineral deposits.
Steps
- Rinse Post-Etching: After the etching bath, rinse the part with distilled water.
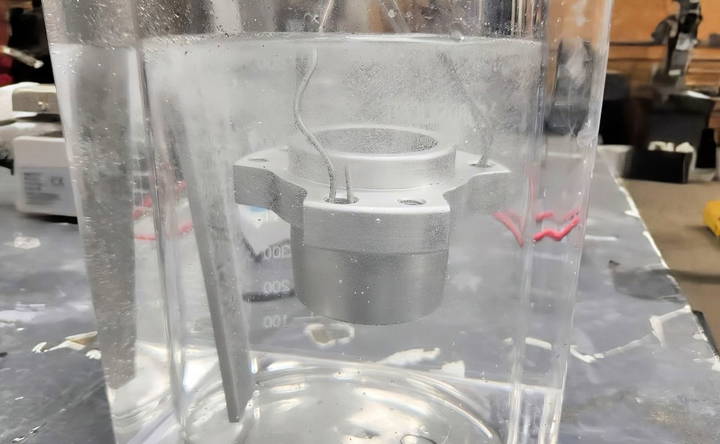
- Submerge in Acid Bath: Carefully submerge your cleaned part into the acid bath.
- Apply DC Current:
- Start with 16 volts and 3 amps. Monitor adjustments according to the surface area.
- As anodizing progresses, the current might need adjustments. Keep an eye on the voltage drop as this indicates anodization is underway.
- Watch the Time: Generally for a small part, I leave it for about 1 hour and 20 minutes. Check periodically for the desired hue and oxide layer development.
Neutralizing and Coloring
Discover the essential steps for neutralizing and coloring hair effectively. Achieve perfect results with these expert hair care tips.
Steps
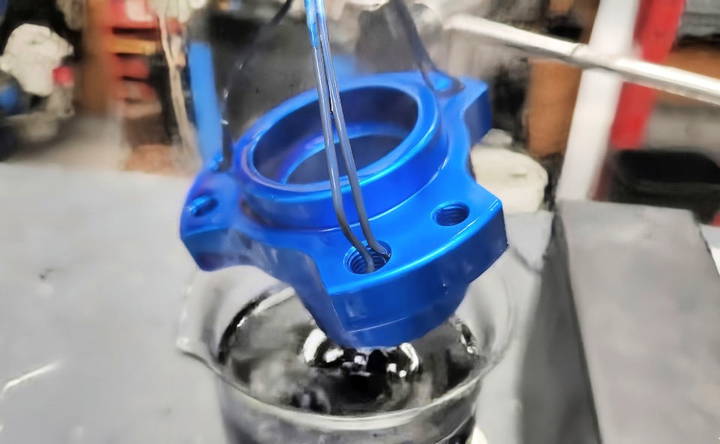
- Neutralize: After removing the part from the anodizing bath, dip it in a neutralizing solution. This step helps stop the chemical reaction.
- Rinse Thoroughly: Use distilled water.
- Add Color: If color is desired, immerse the part in your choice of dye. This is optional, but I find it an exciting way to customize!
Sealing the Color
Learn how to seal color with our step-by-step guide. Discover essential materials and instructions for flawless, long-lasting results.
Materials Needed
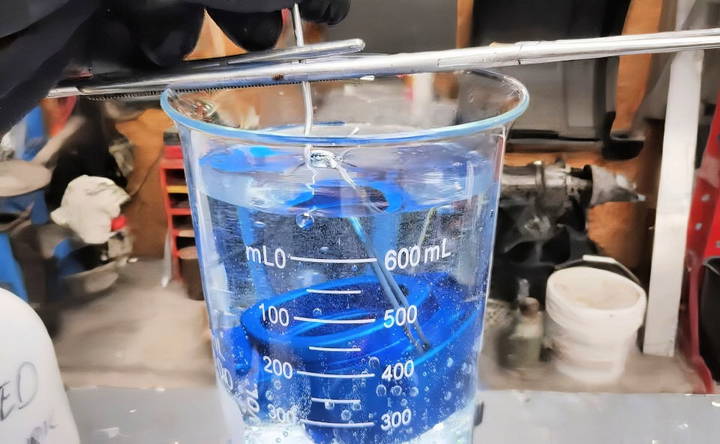
- Boiling Water Bath: This seals the dye, locking in the color through the oxide layer.
Steps
- Boil the Part: Immerse the colored part in a boiling water bath for about 15 minutes. This final step ensures the anodized layer seals correctly.
Advanced Techniques in Anodizing Aluminum
Anodizing aluminum can be taken to the next level with some advanced techniques. These methods can help you achieve unique finishes and improve the durability of your anodized pieces. Here are some advanced techniques to consider:
Hard Anodizing
Hard anodizing, also known as Type III anodizing, makes a thicker and more durable oxide layer on the aluminum surface. This technique is ideal for parts that need to withstand heavy wear and tear.
Steps:
- Preparation: Clean the aluminum thoroughly.
- Anodizing Bath: Use a sulfuric acid bath at a lower temperature (0°C to 5°C).
- Current Density: Apply a higher current density (2-3 amps per square decimeter).
- Duration: Extend the anodizing time to achieve the desired thickness.
Two-Step Coloring
This technique allows you to achieve a two-tone color effect on your anodized aluminum.
Steps:
- First Anodizing: Anodize the aluminum as usual.
- First Dyeing: Dye the anodized aluminum with the first color.
- Second Anodizing: Anodize the piece again to seal the first dye.
- Second Dyeing: Apply the second color dye to achieve the two-tone effect.
Electrolytic Coloring
Electrolytic coloring involves using metal salts to make a range of colors on the anodized aluminum.
Steps:
- Anodizing: Anodize the aluminum in a sulfuric acid bath.
- Coloring Bath: Immerse the anodized aluminum in a bath containing metal salts (e.g., tin, cobalt, or nickel).
- Current Application: Apply an alternating current to deposit the metal salts into the pores of the anodized layer.
- Sealing: Seal the anodized aluminum to lock in the color.
Masking Techniques
Masking allows you to make patterns or designs on the anodized aluminum by protecting certain areas from the anodizing process.
Steps:
- Masking: Apply a masking material (e.g., tape or resist) to the areas you want to protect.
- Anodizing: Anodize the aluminum as usual.
- Removing Mask: Remove the masking material to reveal the un-anodized areas.
- Optional Dyeing: Dye the anodized areas if desired.
Plasma Electrolytic Oxidation (PEO)
PEO is an advanced technique that makes a ceramic-like coating on the aluminum surface, providing excellent wear and corrosion resistance.
Steps:
- Preparation: Clean the aluminum thoroughly.
- Electrolyte Bath: Use an electrolyte solution containing silicates or phosphates.
- High Voltage: Apply a high voltage (200-600V) to the aluminum.
- Duration: Allow the process to continue until the desired coating thickness is achieved.
Using these advanced techniques, you can greatly improve both functions and looks in your anodized aluminum projects.
Common Mistakes and Troubleshooting in Anodizing Aluminum
Anodizing aluminum can be a rewarding process, but it's easy to make mistakes. Here are some common issues and how to troubleshoot them.
Poor Surface Preparation
- Mistake: Not cleaning the aluminum properly before anodizing.
- Solution: Ensure the aluminum is free of grease, oil, and dirt. Use a degreaser and rinse thoroughly with water.
Uneven Anodizing
- Mistake: Uneven or patchy anodizing results.
- Solution: Check the electrical connections. Ensure the aluminum is fully submerged in the anodizing bath. Maintain a consistent current and temperature.
Burning or Overheating
- Mistake: The aluminum gets burned or overheated during anodizing.
- Solution: Reduce the current density. Keep the anodizing bath cool, ideally between 20°C to 25°C. Use a cooling system if necessary.
Poor Dye Absorption
- Mistake: The aluminum does not absorb dye well.
- Solution: Ensure the anodizing layer is thick enough to hold the dye. Use a high-quality dye and follow the manufacturer's instructions. Maintain the dye bath at the recommended temperature.
Sealing Issues
- Mistake: The anodized layer is not properly sealed, leading to fading or corrosion.
- Solution: Seal the anodized aluminum immediately after dyeing. Use boiling water or a nickel acetate solution for sealing. Ensure the sealing process lasts at least 15 minutes.
Contaminated Anodizing Bath
- Mistake: Contaminants in the anodizing bath affect the quality of the anodized layer.
- Solution: Regularly check and maintain the anodizing bath. Filter the solution to remove impurities. Replace the bath solution periodically.
Inconsistent Results
- Mistake: Inconsistent anodizing results from batch to batch.
- Solution: Standardize your process. Use the same materials, equipment, and conditions for each batch. Keep detailed records of your process parameters.
Electrical Connection Problems
- Mistake: Poor electrical connections lead to incomplete anodizing.
- Solution: Ensure all connections are secure and conductive. Use aluminum wire or clamps to connect the workpiece to the power source.
Overly Thick Anodizing Layer
- Mistake: The anodizing layer is too thick, causing it to become brittle.
- Solution: Monitor the anodizing time and current density. Aim for the recommended thickness for your specific application.
Safety Oversights
- Mistake: Ignoring safety precautions can lead to accidents.
- Solution: Always wear protective gear, including gloves, goggles, and aprons. Work in a well-ventilated area. Handle chemicals with care and follow safety guidelines.
By knowing and correcting common mistakes, you can enhance your anodized aluminum projects, ensuring better results and a safer work environment.
FAQs About How to Anodize Aluminum
Discover the essential FAQs about how to anodize aluminum, covering process details, benefits, and tips for achieving durable, corrosion-resistant finishes.
Anodizing is a process that makes a protective oxide layer on the surface of aluminum. This layer makes the aluminum more resistant to corrosion and wear. It also allows the aluminum to be dyed in various colors. Anodizing is commonly used in industries like aerospace, automotive, and electronics for both functional and decorative purposes.
Anodizing involves handling hazardous chemicals, so it's important to take safety precautions:
Work in a well-ventilated area.
Wear rubber gloves and safety goggles.
Avoid skin contact with sulfuric acid and lye.
Keep a neutralizing solution (baking soda and water) nearby in case of spills.
Dispose of chemicals properly according to local regulations.
Yes, you can anodize aluminum in various colors by using different dyes. After the anodizing process, the aluminum part can be placed in a dye bath to achieve the desired color. Common colors include black, blue, red, and gold. The color is sealed into the anodized layer by boiling the part in distilled water.
Maintaining anodized aluminum is relatively simple:
Regular Cleaning: Use mild soap and water to clean the surface. Avoid abrasive cleaners that can scratch the anodized layer.
Avoid Harsh Chemicals: Do not use strong acids or alkalis, as they can damage the anodized coating.
Protect from Scratches: Handle anodized aluminum with care to prevent scratches that can compromise the protective layer.
Here are some common issues and troubleshooting tips:
Uneven Coating: This can be caused by poor cleaning or inconsistent electrical contact. Ensure the aluminum is thoroughly cleaned and the electrical connections are secure.
Burn Marks: These can occur if the current is too high. Reduce the current and monitor the process closely.
Color Variations: Inconsistent dyeing can result from uneven anodizing or dye bath issues. Ensure the anodizing process is uniform and the dye bath is properly mixed.
Final Thoughts and Safety Reminders
Anodizing at home requires patience and care, but the results are genuinely rewarding. Always prioritize safety by wearing appropriate gear like goggles and gloves, especially when dealing with chemicals. If followed attentively, these steps should provide a spectacular finish to any aluminum project, much like it did for my jet go-kart.
As I continue to improve my anodizing technique, it's clear that practice invites proficiency. And remember, each anodizing setup slightly varies based on personal resources and ambitions, so don't be afraid to experiment within safety guidelines.
Thank you for walking through this process with me. To see more about my projects—like the jet go-kart build that inspired this anodizing journey—be sure to explore further insights and visuals from my main channel, Warped Perception. Anodizing may seem daunting, but with practice and the right approach, you too can transform ordinary aluminum into something extraordinary.


