Last summer, my pool's filter broke down, and professional repairs were too expensive. Determined to find a solution, I decided to build my own homemade DIY pool filter. Using basic materials and a bit of creativity, I managed to keep my pool clean without spending a fortune.
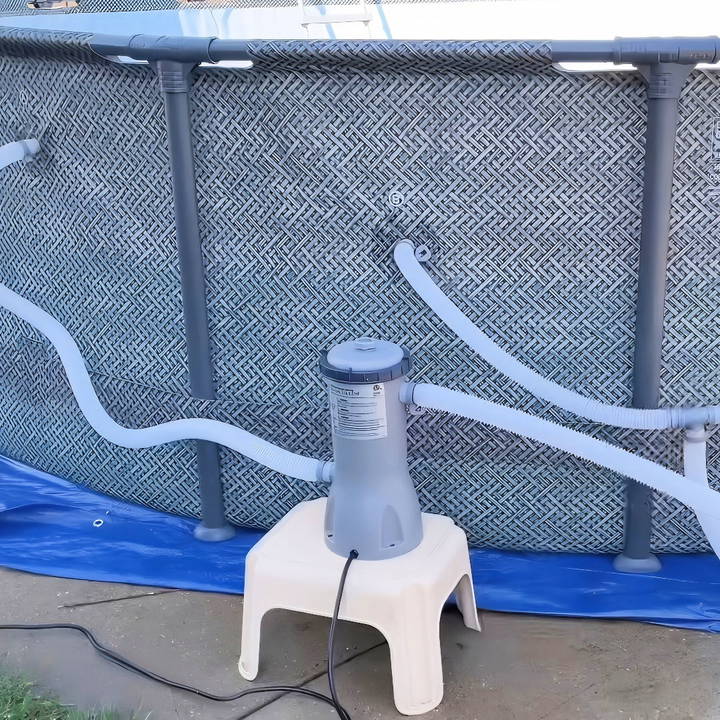
Constructing the filter was easier than I expected, and it taught me valuable lessons about pool maintenance. By sharing my journey, I hope to help others build their own cost-effective solution.
I believe that if I could build a DIY pool filter myself, you can too. In the following guide, I'll walk you through each step so you can enjoy a clean pool without overspending.
Step by Step Instructions
Learn how to set up your DIY pool filter with easy, step-by-step instructions. From unboxing to operating the pump, get your pool ready quickly!
Step 1: Unboxing the Filter Pump
Discover the step-by-step unboxing of the filter pump. Learn all materials needed and identify components effortlessly in this comprehensive guide.
Materials Needed:
- Bestway Flow Clear 1000 GPH Filter Pump: This is our main piece of equipment.
- Hoses and Clamps: To connect the pump to the pool.
- Debris Screens: To filter out large debris from the water.
- Jet Connector and T-Joiner: For water circulation.
- Plugs and Stoppers: To control water flow during installation.
Let's get started by unboxing our filter pump.
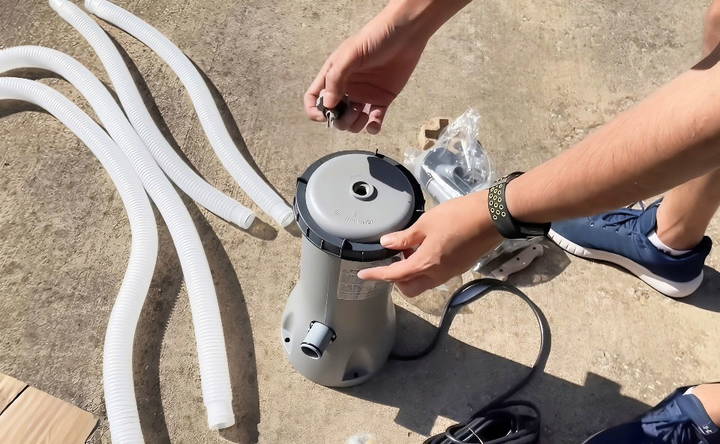
Unboxing the Components
- Open the Box: Carefully open to reveal the main unit and accessories.
- Inspect all Parts: Make sure all listed components are present - the pump unit, hoses, clamps, debris screens, jet connector, T-joiner, plugs, and stoppers.
Each item is necessary to ensure your filter pump operates correctly. The hoses transfer water in and out, the debris screens catch larger particles, and the jet connector helps return clean water.
Step 2: Preparing the Pump
Learn how to prepare your pump by removing the air release valve, opening the filter cap, and reassembling the pump efficiently.
Removing the Air Release Valve
- Twist off the Air Release Valve: This valve will release air pressure, and you might hear a hiss. This is normal.
- Replace the Valve: After releasing the air, twist the valve back into place securely.
Opening the Filter Cap
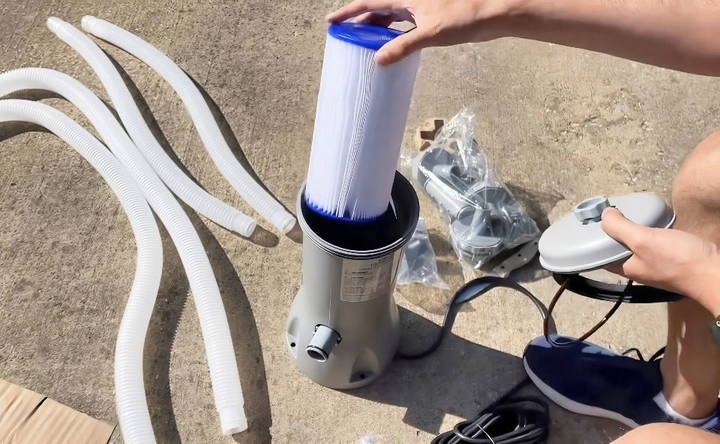
- Twist the Lid Ring Counterclockwise: This opens the top of the unit.
- Remove the Filter Cap: Take off the cap carefully.
- Inspect the Cartridge: Inside, you'll find a Type A and C cartridge. This is essential for filtering your pool water.
Reassembling the Pump
- Reinsert the Filter Cap Seal: Ensure it's lubricated for smooth reassembly.
- Replace the Filter Cap: Twist the lid ring back on securely.
Now, your pump unit is ready for the connection phase.
Step 3: Connecting the Pump to the Pool
Learn step-by-step instructions on connecting the pump to the pool, including safety tips, hose attachment, and installing debris screens and connectors.
Important Safety Note
Ensure that the pool water level covers the intake valves before starting the pump. This prevents the pump from drawing in air instead of water.
Attaching the Hoses
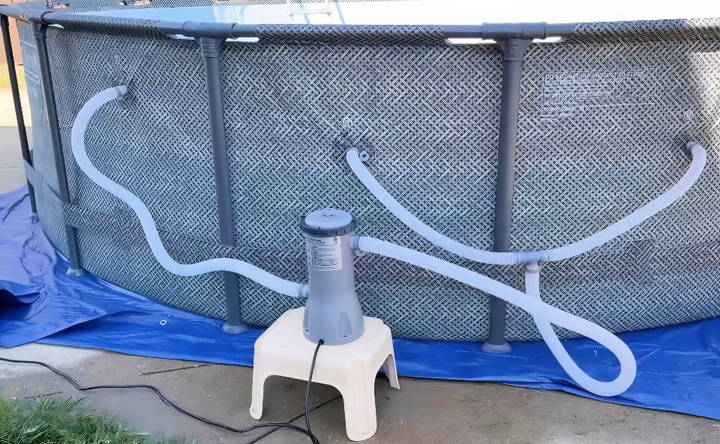
- Identify the Ports: On the pump, port A returns clean water, and port B pulls debris-laden water.
- Attach Short Hoses to Port B: These will draw water into the pump for filtering. Push firmly to ensure a snug fit.
- Secure with Clamps: Use fly nuts to clamp the hoses securely.
Installing the Debris Screens and Jet Connector
- Insert Debris Screens: Place them on the B-side intake valves.
- Attach the Jet Connector: Connect this to the A-side to spray filtered water back into the pool.
Connecting the T-Joiner
- Attach Hoses to the T-Joiner: This may require some gentle twisting to prevent the gasket from rolling.
- Secure with Clamps: Ensure the fly nuts are tightened.
Step 4: Final Connections and Setup
Complete your final connections and setup by connecting the plugs and ensuring proper assembly for optimal performance.
Connecting the Plugs
- Insert the Plugs into Valves: These stop water from flowing out during setup.
- Attach Longer Hose: Connect this to the A-side for returning filtered water.
Ensuring Proper Assembly
- Zip-Tie Heavy Pipes: To prevent sagging from the weight of water.
- Cut off Excess Zip Ties: Trim neatly.
Step 5: Operating the Pump
Learn how to operate the pump, check water levels, set the timer, and start the pump efficiently with our step-by-step guide.
Water Level Check
- Wait for the Water Level to Cover Intake Valves: Typically takes about an hour for filling.
Setting Up the Timer and Plug
- Check Timer: The waterproof, grounded three-prong plug has a timer to control the operation duration.
- Plug In Safely: Ensure your hands are dry to avoid electrical hazards.
- Set the Timer: Choose the desired hours of operation (1 to 10 hours).
Start the Pump
- Open the Release Valve: Listen for the air to escape, akin to an instant pot.
- Start the Pump: Listen for the sound of clean water being filtered and released back into the pool.
Helpful Tips for Maintenance
Discover helpful tips for maintenance, including regular cleaning and efficient drainage, to keep your home in top shape year-round.
Regular Cleaning
- Change Filter Cartridges Every Two Weeks: Ensures optimal sanitation and performance.
- Monitor Water Levels: Keeps the pump from running dry, potentially causing damage.
Efficient Drainage
- Use the Drainage Connector: Manage runoff to your yard or garden to prevent water pooling.
Common Issues and Troubleshooting
Clogging
- Issue: Clogging is a common problem in DIY pool filters. It happens when debris and dirt accumulate, blocking the filter and reducing water flow.
- Solution: Regularly clean the filter to prevent clogging. Rinse the filter media with a hose to remove debris. For cartridge filters, soak them in a cleaning solution to dissolve oils and dirt. Replace the filter media if it is too dirty or damaged.
Leaks
- Issue: Leaks can occur in various parts of the filter system, such as the connections, hoses, or the filter tank itself.
- Solution: Inspect all connections and hoses for signs of wear or damage. Tighten any loose fittings and replace damaged parts. If the filter tank is leaking, check for cracks and repair them with a suitable sealant or replace the tank if necessary.
Pressure Problems
- Issue: High or low pressure in the filter system can indicate underlying issues. High pressure usually means the filter is dirty, while low pressure might suggest a blockage or a problem with the pump.
- Solution: Monitor the pressure gauge regularly. If the pressure is high, clean or backwash the filter. If the pressure is low, check for blockages in the system and ensure the pump is working correctly. Clean the pump strainer and impeller if needed.
Sand or DE in Pool
- Issue: Sand or diatomaceous earth (DE) can sometimes leak into the pool, indicating a problem with the filter's internal components.
- Solution: For sand filters, inspect the laterals and standpipe for cracks or damage and replace them if necessary. For DE filters, check the grids for tears and replace any damaged ones. Ensure you are using the correct amount of filter media.
Air in the System
- Issue: Air can enter the filter system, causing bubbles in the pool and reducing the efficiency of the filter.
- Solution: Check all connections and seals for leaks. Ensure the pump lid is tightly closed and the O-ring is in good condition. Bleed the air from the system using the air relief valve on the filter.
Chemical Imbalance
- Issue: A chemical imbalance in the pool water can affect the performance of the filter and lead to issues like cloudy water or algae growth.
- Solution: Regularly test the pool water and maintain proper chemical levels. Adjust the pH, chlorine, and alkalinity as needed. Use algaecides and clarifiers to help maintain clear water.
Address common issues and follow tips to keep your DIY pool filter running well. Regular maintenance and quick fixes extend filter life and ensure a clean, safe pool.
FAQs About DIY Pool Filters
Discover the most common FAQs about DIY pool filters, including maintenance tips, cost-saving benefits, and step-by-step guides.
While DIY pool filters are cost-effective, there are some potential drawbacks:
Effectiveness: A DIY filter may not be as effective as a commercial one in filtering out very fine particles.
Maintenance: You’ll need to regularly check and replace the filter media to ensure it continues to work well.
Durability: DIY filters might not last as long as professionally made ones, so you may need to replace parts more frequently.
Maintaining a DIY pool filter is straightforward:
Regular cleaning: Check the filter media regularly and clean or replace it as needed.
Inspect connections: Ensure all PVC connections and hose clamps are tight and not leaking.
Monitor performance: Keep an eye on the water flow and clarity. If you notice a decrease in performance, it might be time to clean or replace parts of the filter.
Yes, you can use sand as a filter media in your DIY pool filter. Sand is a common and effective filter media that can trap dirt and debris. Here's how you can use it:
Choose the right sand: Use pool filter sand, which is specifically designed for filtering water.
Layering: Place a layer of gravel at the bottom of your filter bucket to prevent sand from escaping, then add the sand on top.
Maintenance: Regularly backwash the filter to clean the sand and maintain its effectiveness.
The frequency of replacing the filter media depends on the type of media you use and how often you use your pool. Here are some general guidelines:
Poly-fill filter media: Replace every 2-4 weeks, or when it becomes visibly dirty.
Sand: Replace every 3-5 years, but backwash regularly to keep it clean.
Cartridge filters: Replace every 1-2 years, depending on usage and maintenance.
Absolutely! A DIY pool filter can be used for both in-ground and above-ground pools. The key is to ensure that the filter is properly connected to your pool pump and that it can handle the volume of water in your pool. Here are some tips:
Sizing: Make sure your filter is large enough to handle the water capacity of your pool.
Pump compatibility: Ensure your pool pump is powerful enough to circulate water through the DIY filter.
Installation: Follow the same installation steps as you would for an in-ground pool, ensuring all connections are secure and leak-free.
Enjoying Your Pool
Once the setup is complete and the pump is running, you'll have clean, filtered water. The whole process of unboxing and setting up the filter pump might seem extensive, but taking it step by step makes it manageable. Now, you can enjoy your pool with the peace of mind that it's being maintained efficiently.
By following this DIY pool filter guide, you, too, can set up your filter pump with confidence. Enjoy the refreshing, clean water all summer long! If you found this guide helpful and have any further questions or need additional tips, feel free to reach out.


