Making my own pens has been a fun and rewarding experience. The first time I decorated a simple pen, I felt a great sense of accomplishment. It's surprising how a few simple steps can turn an ordinary pen into something special. Crafting these DIY pens has become a favorite hobby of mine.
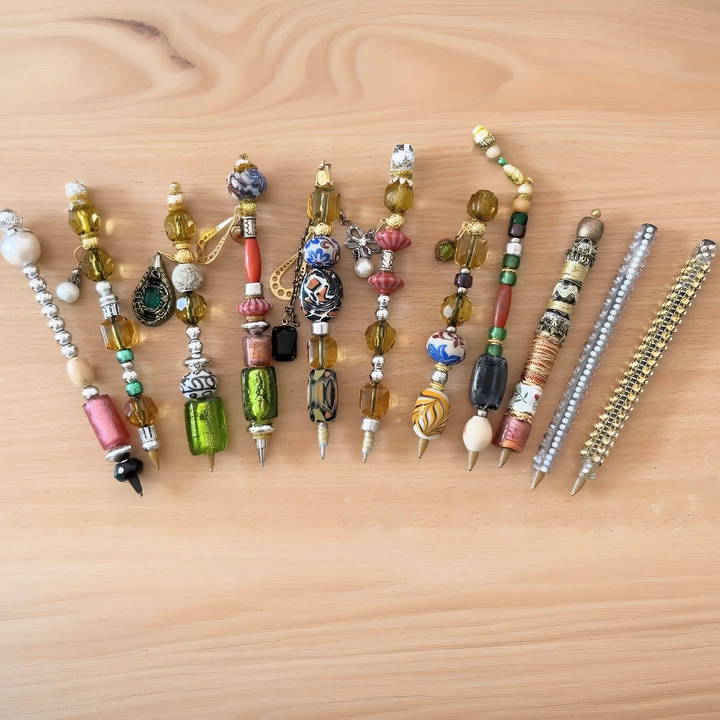
In this guide, I'll share how I make adorable DIY pens. It's a simple process that anyone can follow. I enjoy adding my personal touch to everyday items, and pens are a great place to start. I'm excited to help you make your own cute pens.
So let's get started, and I'll show you step-by-step how to make these charming pens. I'm sure you'll find it enjoyable and easy to do.
Materials You'll Need
Discover the essential materials you'll need: regular pens, beads with wide openings, glue, head pins, double-sided tape, ribbon, and a styrofoam block.
Regular Pens
- Purpose: These will be the base of our beaded pens. Avoid using gel pens as their ink cartridges tend to be too thick.
Beads with Wide Openings
- Purpose: These will serve as the decorative elements threaded onto the pen's ink cartridge. Ensure the openings are wide enough to fit.
Glue (E6000, Super Glue, or Hot Glue)
- Purpose: Glue is essential for securing the beads in place. E6000 or super glue is ideal for strong adhesion, while hot glue can be useful, especially for the topmost beads.
Head Pins
- Purpose: These are used to secure the final bead and can also serve as a base for adding charms.
Double-Sided Tape
- Purpose: This will help make a stopper at the end of the ink cartridge if it doesn't have one.
Ribbon or String
- Purpose: Needed to wrap around the ink cartridge to make a grip and secure the beads.
Styrofoam Block
- Purpose: To hold the pen upright while securing the beads.
Step by Step Instructions on DIY Pens
Learn how to make DIY pens with our step-by-step guide! From preparing pens to threading beads and adding decorations, get creative with ease.
Step 1: Prepare Your Pens
- Remove the Ink Cartridge: Begin by removing the ink cartridge from your pen casing. Keep these casings; they can be repurposed for other projects.
Step 2: Select and Prepare Your Beads
- Check the Bead Openings: Ensure that the beads you choose have openings wide enough to slide over the ink cartridge.
- Make a Stopper if Needed: If your ink cartridge doesn't have a stopper at the end, wrap double-sided tape around the bottom part and secure it with ribbon or string.
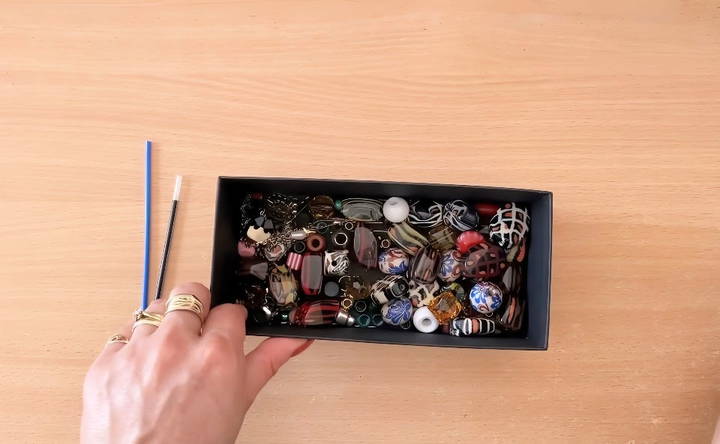
Step 3: Thread the Beads
- Start Threading Beads: Carefully thread your selected beads onto the ink cartridge. This can be done in any pattern or color scheme you prefer.
- Secure with Glue: For additional stability, add a bit of glue between the beads. E6000 or super glue is ideal, but hot glue can also be used, especially at the ends.
Step 4: Secure the Top Bead
- Use Head Pins: Place a bead cap on the ink cartridge, followed by a head pin through the top bead. Trim the pin to prevent it from touching the ink.
- Glue the Bead Discreetly: Apply hot glue or super glue to secure the head pin and top bead. This step ensures the beads stay in place and add a decorative touch.
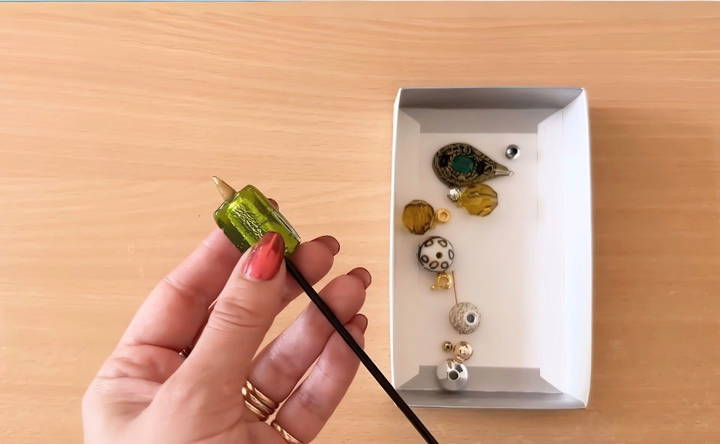
Step 5: Check the Ink Flow
- Allow Airflow: Ensure that the pin doesn't obstruct the ink flow by bending it slightly to make space. This prevents the ink from being blocked and ensures smooth writing.
Step 6: Additional Decorations
- Add Charms and Additional Beads: If desired, add charms or extra decorative elements using the head pins.
Bonus: Making Wrapped Ribbon Pens
For a unique touch, you can also make a wrapped ribbon pen:
- Wrap the Ink Cartridge: Wrap the ink cartridge in ribbon or string, securing with glue. This makes a chunky, comfortable grip and adds a layer of personalization.
- Seal the Top: Use glue to secure the end of the ribbon at the top of the cartridge.
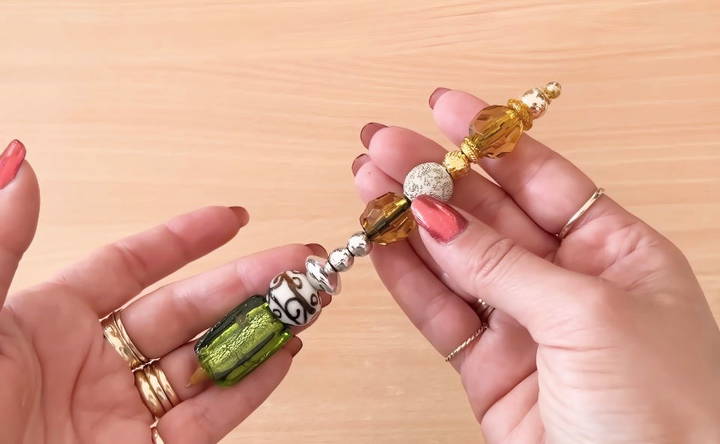
Final Check and Usage
- Inspect Your Pen
- Ensure all beads are securely in place and that the pen writes smoothly.
- Admire and Use!
- Enjoy your beautiful new beaded pen. They may not be the most comfortable for extensive writing, but they are perfect for journaling, notes, and everyday use.
Customization Ideas
Customizing your DIY pens can make them unique and personal. Here are some simple and creative ideas to help you get started:
Engraving and Personalization
- Engraving: Use an engraving tool to add names, initials, or designs to your pens. This can be done on wooden or metal pens. Engraving adds a personal touch and makes your pens great for gifts.
- Stickers and Decals: Apply stickers or decals to your pens. You can find a variety of designs online or make your own using printable sticker paper. This method is quick and easy, perfect for adding a fun element to your pens.
Adding Decorative Elements
- Washi Tape: Wrap washi tape around the barrel of your pen. Washi tape comes in many colors and patterns, allowing you to make a unique look. Simply cut the tape to size and wrap it around the pen.
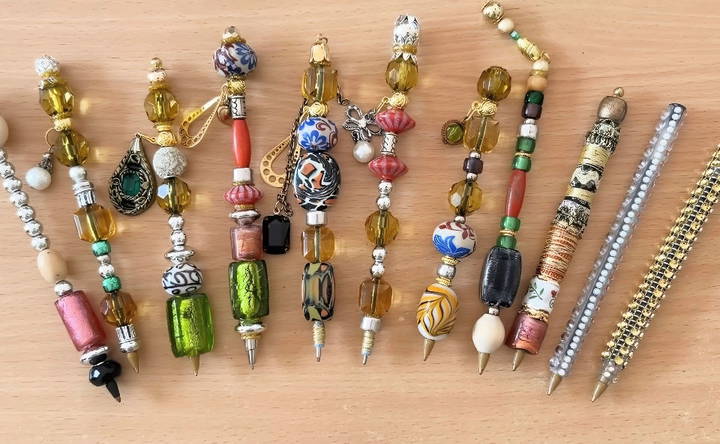
- Beads and Charms: Attach beads or charms to the top of your pen. Use a small amount of glue to secure them in place. This adds a decorative and tactile element to your pens.
- Paint and Nail Polish: Use acrylic paint or nail polish to decorate your pens. You can make patterns, ombre effects, or even tiny paintings. Make sure to let the paint dry completely before using the pen.
Mixed Media Customization
- Fabric and Ribbon: Wrap fabric or ribbon around your pen for a soft and textured look. Secure the ends with a small amount of glue. This method is great for making a cozy, handmade feel.
- Glitter and Vinyl: Add some sparkle with glitter or vinyl. Apply a thin layer of glue to the pen and sprinkle glitter over it. For vinyl, cut out shapes or patterns and stick them onto the pen. Seal with a clear coat to prevent peeling.
Practical Customization
- Grip Enhancements: Improve the comfort of your pen by adding a custom grip. Use foam or silicone grips, or make your own with polymer clay. This not only personalizes your pen but also makes it more comfortable to use.
- Functional Additions: Attach a small magnet to the pen cap so it can stick to metal surfaces. This is useful for keeping your pen handy on a fridge or a whiteboard.
Tips for Successful Customization
- Plan Your Design: Sketch out your design ideas before starting. This helps you visualize the final product and make any adjustments beforehand.
- Test Materials: Try out different materials and techniques on a spare pen first. This allows you to see how they work and make any necessary changes.
- Take Your Time: Customizing pens can be a delicate process. Take your time to ensure each step is done carefully and accurately.
By following these customization ideas, you can make DIY pens that are not only functional but also uniquely yours.
Troubleshooting Common Issues
When making DIY pens, you might encounter some common problems. Here are solutions to help you troubleshoot and fix these issues:
Ink Flow Problems
- Issue: The pen doesn't write smoothly or the ink skips.
- Solution: Check if the ink cartridge is properly installed. Sometimes, air bubbles can block the ink flow. Gently tap the pen on a soft surface to remove air bubbles. If the problem persists, try replacing the ink cartridge.
Uneven Finish
- Issue: The pen's surface is rough or uneven.
- Solution: Sand the pen with fine-grit sandpaper. Start with a coarser grit and gradually move to finer grits. This will smooth out the surface. After sanding, apply a finish like varnish or polish to protect the pen and give it a smooth feel.
Loose Parts
- Issue: Parts of the pen, like the cap or clip, are loose.
- Solution: Use a small amount of strong adhesive, like super glue, to secure loose parts. Be careful not to use too much glue, as it can seep out and make a mess. Hold the parts together until the glue sets.
Cracked or Split Wood
- Issue: The wooden parts of the pen crack or split during the making process.
- Solution: Ensure you are using sharp tools when cutting or drilling the wood. Dull tools can cause the wood to crack. If a crack does occur, you can fill it with wood glue and clamp it until it dries. For larger cracks, consider using wood filler.
Misaligned Components
- Issue: The pen components are not aligned properly.
- Solution: Double-check the alignment before final assembly. Use a jig or alignment tool to ensure all parts fit together correctly. If parts are already glued, gently heat the glue with a hairdryer to soften it, then realign the components.
Air Bubbles in Resin Pens
- Issue: Air bubbles appear in the resin.
- Solution: Use a heat gun or a small torch to gently pass over the resin surface. This will help pop the air bubbles. Alternatively, you can use a toothpick to remove bubbles manually. Make sure to work in a dust-free environment to avoid debris settling in the resin.
Ink Leakage
- Issue: The pen leaks ink.
- Solution: Ensure that all seals and connections are tight. Check the ink cartridge for any damage. If the cartridge is damaged, replace it. Also, avoid overfilling the ink reservoir, as this can cause leaks.
Pen Not Writing
- Issue: The pen doesn't write at all.
- Solution: Check if the ink cartridge is empty or dried out. Replace it if necessary. If the pen still doesn't write, try cleaning the nib or tip with a damp cloth. Sometimes, dried ink can block the flow.
Tips for Preventing Issues
- Use Quality Materials: Invest in good quality materials and tools. This can prevent many common issues.
- Follow Instructions: Carefully follow the instructions for each step of the pen-making process.
- Take Your Time: Rushing can lead to mistakes. Take your time to ensure each step is done correctly.
By addressing these common issues, you can ensure your DIY pens are both functional and beautiful.
FAQs About DIY Pens
Discover answers to common questions about DIY pens, including materials, techniques, and tips for crafting your custom writing instrument.
Yes, you can customize your DIY pen in various ways:
Engraving: Add personalized designs or text to the pen body.
Painting: Use acrylic or enamel paints to add color and patterns.
Adding accessories: Attach decorative elements like beads or charms.
Making a pen from natural materials can be a fun and eco-friendly project. Here’s how:
Choose a suitable stick: Look for sticks with a hollow core, like bamboo or forsythia.
Cut the stick to size: Use pruners to trim the stick to the desired length.
Shape the tip: Carve one end of the stick to a point using a knife.
Hollow out the core: Ensure the core is hollow enough to hold ink.
Insert the ink: Dip the tip in ink or insert a small ink reservoir.
Engraving a DIY pen can add a personal touch. Here are some tips:
Choose the right tool: Use a fine-tipped engraving tool for precision.
Practice on scrap material: Before engraving your pen, practice on a similar material.
Secure the pen: Use a clamp or holder to keep the pen steady while engraving.
Plan your design: Sketch your design on paper first, then lightly mark it on the pen.
Engrave slowly: Take your time to ensure clean and accurate lines.
Proper maintenance can extend the life of your DIY pen:
Clean the nib regularly: Wipe the nib with a soft cloth to remove ink residue.
Store the pen properly: Keep the pen capped when not in use to prevent the ink from drying out.
Refill the ink: Replace the ink cartridge or refill the ink reservoir as needed.
Avoid dropping the pen: Handle the pen with care to prevent damage to the nib and body.
Yes, you can make a DIY pen with a refillable ink system. Here's how:
Choose a refillable ink cartridge: Select a cartridge compatible with your pen body.
Install the cartridge: Insert the cartridge into the pen body as you would with a regular ink cartridge.
Refill the ink: Use a syringe or dropper to refill the cartridge with ink when it runs low.
Seal the cartridge: Ensure the cartridge is properly sealed to prevent leaks.
Conclusion
Crafting your own DIY Pens is a rewarding and creative process. Not only do they make for stylish writing instruments, but they also serve as unique gifts and personalized touches to your stationery collection. By following these steps, you can confidently make your own beaded pens with flair and functionality.
Thank you for joining me in this delightful craft journey. I hope you feel inspired to make your own fancy pens and share the joy with others. Let me know which designs you try and which ones you love the most.


