Making your own DIY motorized blinds can be a fun and rewarding project. These smart blinds add a touch of convenience and modernity to your home. With a few simple tools and some basic instructions, you can transform your regular blinds into motorized ones. This project is perfect for anyone wanting to add a high-tech feature to their living space without breaking the bank.
Upgrading to DIY smart blinds not only enhances the appearance of your windows but also increases energy efficiency. These blinds can be controlled remotely, allowing for better light management and privacy. Plus, the flexibility to open or close your blinds at the touch of a button makes them a practical addition to any home.
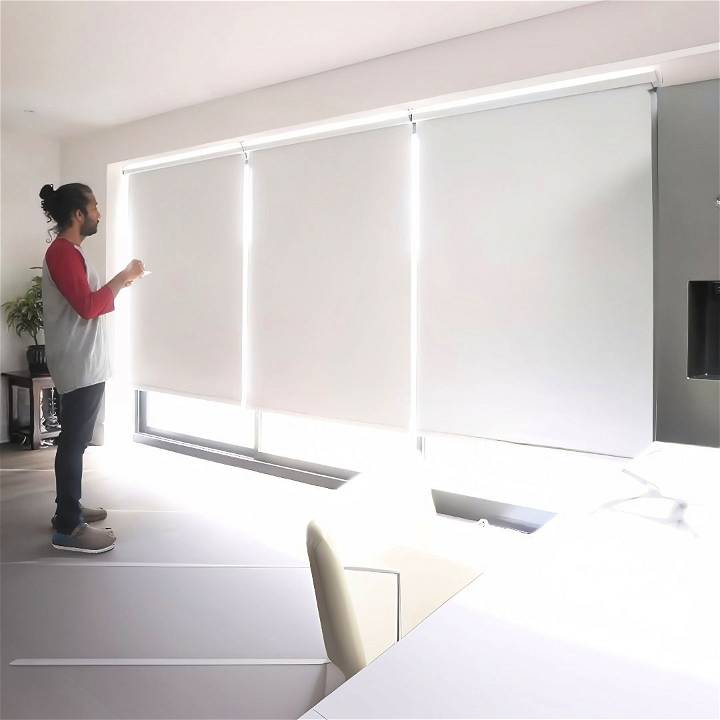
Transform your home with our easy DIY motorized blinds. Enjoy convenience and style with simple installation. Tech-savvy and budget-friendly!
Materials You'll Need
Before diving into the process, it's crucial to gather all the necessary materials. This ensures a smoother installation experience. Here's what I used:
- Roller Blinds: I bought made-to-measure roller blinds from a local retailer.
- Motor Kit: Includes a motor compatible with your roller tube's diameter and a mounting bracket.
- Power Cable / Terminal Block: Needed if your motor is mains powered.
- Remote Control: Often comes with the motor kit.
- Measuring Tape: To get precise measurements of the window frame.
- Screws and Screwdriver: For mounting the blinds.
- Spirit Level: To ensure everything is straight.
Step by Step Instructions
Learn how to install DIY motorized blinds with ease! Step-by-step guide from measuring to final adjustments for perfect fit and functionality.
Step 1: Measure and Buy the Blinds
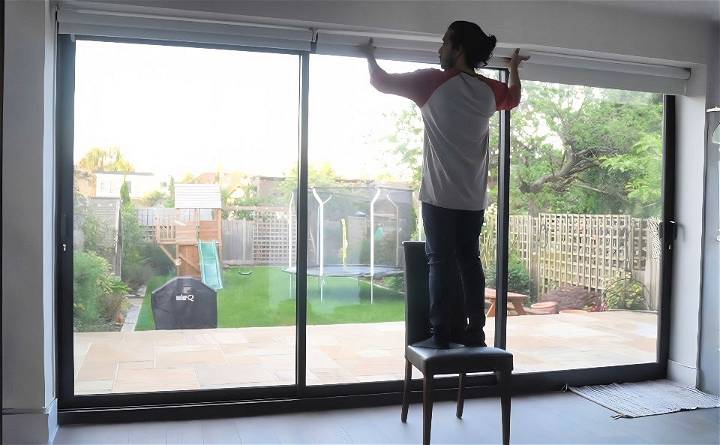
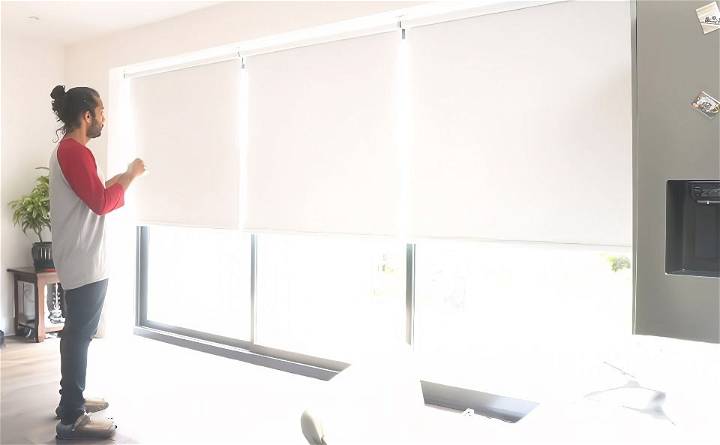
First, measure the dimensions of the windows where you want to install the blinds. My patio doors were about three and a half meters wide, so I decided to use three individual blinds, one for each glass panel. Accurate measurements are crucial, especially when fitting multiple blinds within the same recess.
I ordered my blinds from a retailer that offered custom measurements and had a two-week turnaround time. It's advisable to start with just one blind (preferably the center one) to test fit and measure any necessary adjustments.
Step 2: Choose the Right Motor
Not all motors are buildd equal, so it's essential to pick one that fits your roller tube's diameter. Measure the inner and outer diameters of the roller tube and choose a compatible motor. Manufacturers often provide this information, so check the product details carefully.
Step 3: Test Fit and Adjust Measurements
Once your first set of blinds arrives, test fit it with the motor and mounting bracket. For me, the motor and mounting bracket were about five millimeters slimmer than the pull cord mechanism. This required adjusting the width of the side blinds to account for the reduction. After making these adjustments, I placed the order for the remaining two blinds.
Step 4: Install the Blinds
Now comes the fun part—installation. Here's a step-by-step guide to mounting your blinds:
- Mount the Brackets: Start by securing the mounting brackets to the window frame. Use a spirit level to make sure they're perfectly aligned.
- Install the Motor: Insert the motor into the roller tube. My motor required connecting to mains power, so I replaced the short power cable with a terminal block for easier installation.
- Fit the Roller Tube: Slide the roller tube into the brackets, making sure it fits snugly. Double-check to ensure it's level.
Step 5: Configure the Blinds
Once each blind is securely mounted, it's time to configure the motors. Follow these steps:
- Power Up Each Motor Individually: To avoid remote control chaos, power up each motor one at a time.
- Pair the Remote: Most motors come with a specific pairing sequence for the remote. This often involves pressing a combination of buttons to sync the remote with the motor.
- Set Height Limits: Configure the upper and lower limits of your blinds using the remote. This ensures that your blinds open and close to the right positions every time.
Step 6: Fine-Tuning and Final Adjustments
After configuring each blind individually, test them to make sure they operate smoothly. If they need any fine-tuning, now is the time to make those adjustments. For example, if a blind isn't stopping at the correct height, you can re-adjust the limits using the remote.
Additional Tips
- Safety First: Make sure to read the manual for safety instructions, especially if using mains power.
- Hide the Cables: For a cleaner look, use cable management solutions to hide any exposed wires.
- Seek Help If Needed: If you're not comfortable working with electrical components, it's okay to seek help from a professional.
Customization and Personalization
When it comes to making your home truly yours, the details matter. Customizing your motorized blinds is a fantastic way to add a personal touch to your space while enhancing functionality. Let's explore how you can tailor these modern window treatments to your style and needs.
- Choosing Your Style Start by selecting a fabric that complements your interior design. Whether you prefer a minimalist look with sleek, neutral colors or a bold statement with vibrant patterns, there's a fabric out there for you. Consider the room's function, too; blackout materials are great for bedrooms, while lighter, sheer fabrics work well in living areas.
- Smart Controls for Smart Homes Personalization isn't just about aesthetics; it's also about convenience. Many motorized blinds can be connected to smart home systems, allowing you to control them with your voice or a smartphone app. You can even set schedules for your blinds to open and close at specific times, perfect for waking up to natural light or securing your home when you're away.
- Preserving Privacy and Views Adjustability is a key benefit of motorized blinds. With the press of a button, you can set your blinds to the perfect position for privacy without sacrificing your view or natural light. This is especially useful in rooms facing the street or neighbors.
- Child and Pet Safety: If you have little ones or furry friends running around, safety is paramount. Motorized blinds eliminate the need for cords, which can be a hazard. This means you can have peace of mind while keeping your home stylish and functional.
- Long-Term Investment: While customizing your motorized blinds might seem like a small change, it's an investment in your home's comfort and value. Personalized blinds not only enhance your daily living experience but can also be a selling point if you ever decide to move.
Make a space that feels personal and simplifies life with custom motorized blinds. Focus on what matters, and enjoy the comfort and style tailored to you.
Energy Efficiency and Sustainability
Energy efficiency and sustainability are crucial for home improvement projects, like installing motorized blinds. These window coverings help build a greener home.
- Reducing Energy Consumption Motorized blinds can help you cut down on energy usage in several ways. By closing them during the hottest part of the day, you can keep your home cooler and reduce the need for air conditioning. Conversely, opening them up during sunny winter days can bring in warmth, minimizing heating requirements.
- Solar Power Options Some motorized blinds have solar-powered options. These use small solar panels to charge the batteries that operate the blinds, harnessing the power of the sun to save electricity. It's a clean, renewable energy source that also reduces your carbon footprint.
- Materials Matter: When selecting your motorized blinds, consider the materials. Eco-friendly fabrics and materials that are made from sustainable sources or contain recycled content are available. These choices not only look good but also support environmental conservation.
- Smart Home Integration Smart homes are not just about convenience; they're also about efficiency. By integrating your motorized blinds with a smart home system, you can optimize their operation based on the time of day, temperature, and even whether you're at home or away, ensuring that energy isn't wasted.
- Longevity and Durability Investing in high-quality motorized blinds means they'll last longer, reducing the need for replacements and the environmental impact of manufacturing new products. Look for blinds with a strong warranty and a reputation for durability.
- The Takeaway: By choosing motorized blinds that prioritize energy efficiency and sustainability, you're making a smart choice for your wallet and the planet. They offer a practical, stylish way to enhance your home's energy performance and your commitment to a sustainable lifestyle. Every small step towards energy efficiency contributes to a larger impact on our environment.
FAQs About DIY Motorized Blinds
Explore common questions & comprehensive answers on DIY motorized blinds. Learn about installation, cost, benefits, and more for smarter living.
DIY motorized blinds are window coverings that you can automate yourself, allowing for remote or scheduled operation. They typically involve retrofitting your existing blinds with a motor that can control the raising, lowering, or tilting of the blinds. This can be done using various types of motors, such as roller motors for roller blinds, tilt motors for Venetian blinds, or blind engines that pull the existing cords.
Yes, many DIY motorized blind solutions offer smart home integration, enabling you to control your blinds through voice commands or smart home apps. Some motors are compatible with systems like Alexa, Google Assistant, or Tuya and may require additional hubs for connectivity.
When selecting a motor for your blinds, consider the size of your blinds, the type of blinds (roller, Venetian, etc.), and the compatibility with your smart home system. Additionally, think about how visible you want the motor to be, as some may sit exposed on the wall while others are hidden within the blind’s mechanisms.
The difficulty level can vary based on the product you choose. Some blind engines are simple to install and attach to the existing cord or chain of your shades. Others, like powered rollers, may require more effort as you’ll need to modify the rollers. However, many solutions are designed for easy installation and come with instructions to guide you through the process.
Maintaining your DIY motorized blinds involves regular cleaning, checking the batteries or power source, and ensuring the motor and controls are functioning correctly. If you encounter issues, first check the power source and remote control batteries. For connectivity problems, ensure your smart hub is online, and the blinds are paired correctly. If the blinds are not responding, reset the motor according to the manufacturer's instructions and re-pair the device with your control system.
Conclusion
Wrapping up, making your DIY motorized blinds is a fantastic way to elevate your windows. This project not only enhances your home's functionality but also adds a modern touch to any room. Following the steps outlined in this guide will bring you closer to smart home convenience. Enjoy automating your blinds and adding value to your living space with your custom DIY smart blinds.


