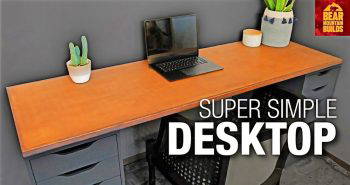
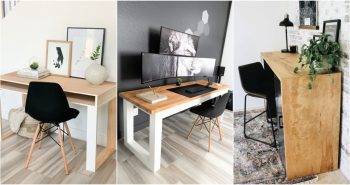
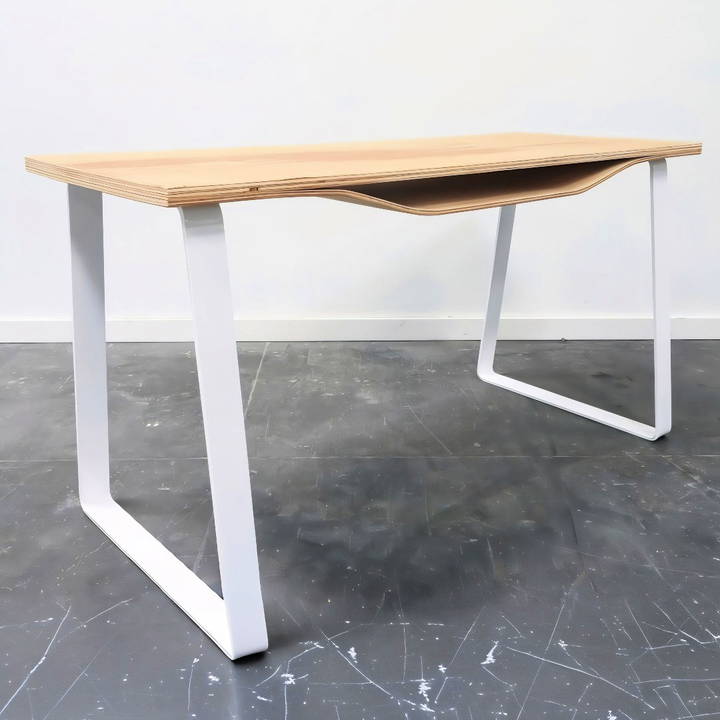
Building my own furniture has always been a rewarding experience, and recently I took on the challenge of making a sleek DIY plywood desk using just three basic power tools. This project not only tested my woodworking skills but also taught me some valuable techniques, like kerf bending, to achieve elegant curves with plywood.
Materials and Tools Needed
Find the essential materials and tools needed for your next project, including detailed lists for efficient planning and execution.
Materials:
- 3/4-inch thick birch veneer furniture-grade plywood
- Two sheets of 1/4-inch thick plywood
- Wood glue
- Wood putty
- Prefabricated steel legs (I used flat bar legs from Semi Exact)
- Sandpaper (100, 150, and 220 grit)
- Clean rags
- Plant-based wood finish
Tools:
- Circular saw
- Clamps (spring clamps and standard clamps)
- Speed square
- Orbital sander
- Measuring tape
- Straight edge or trim board
- Sanding sponge
Step by Step Instructions
Learn how to build a custom DIY plywood desk with easy-to-follow, step-by-step instructions. Perfect your design and explore kerf bending in this DIY guide.
Planning the Desk Design
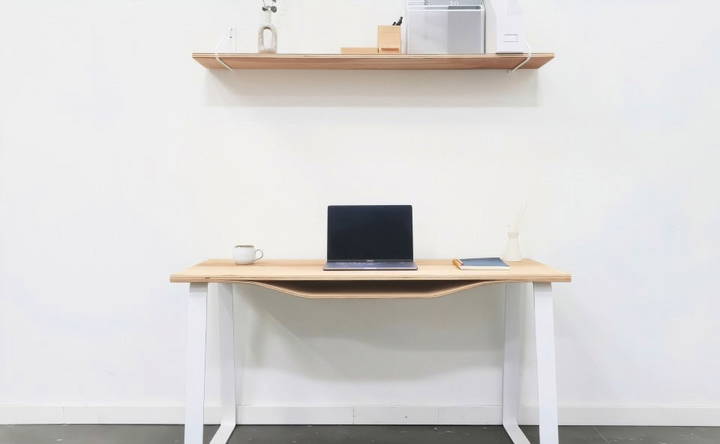
The vision was to build a desk with a smooth, curved shelf beneath the desktop, perfect for holding a laptop or books. The desk would feature a minimalist aesthetic, highlighting the natural beauty of birch plywood.
Cutting the Desktop
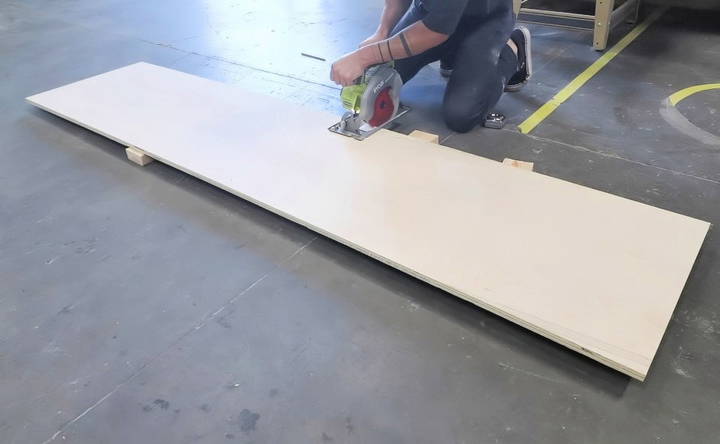
Starting with the 3/4-inch birch plywood, I measured and marked the dimensions for the desktop surface. Using a straight edge clamped down with spring clamps, I guided my circular saw to make precise cuts. For crosscuts, the speed square was invaluable, ensuring straight and accurate lines.
Preparing the Curved Shelf
The curved bottom shelf was the most intriguing part of this project. It required flexibility from rigid plywood, which I achieved through kerf bending.
What is Kerf Bending?
Kerf bending involves making a series of cuts (kerfs) partially through the material to allow it to bend smoothly. This technique is especially useful when working with plywood, as it enables the wood to flex without breaking.
Scoring the Plywood
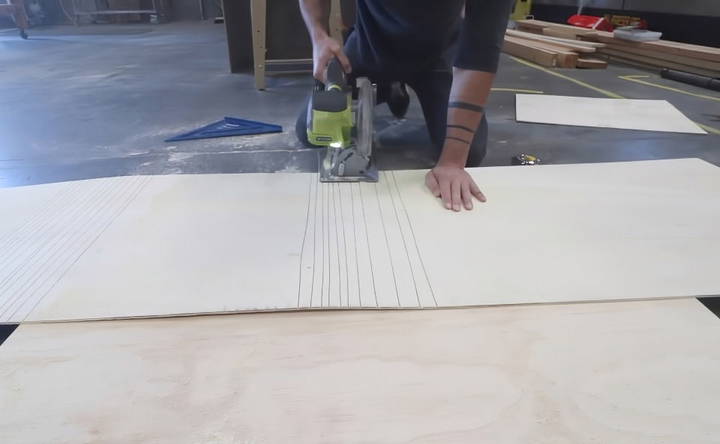
I took the two sheets of 1/4-inch plywood and cut them to match the width of the desktop. Leaving them slightly longer than needed allowed for adjustments after bending. Marking out the center 16 inches for the shelf space, I then marked 8 inches on either side where the bends would occur.
Setting the circular saw to cut halfway through the plywood thickness, I made cuts every half-inch within the marked 8-inch sections. This scoring made the plywood flexible enough to form the desired curves.
Forming the Curve
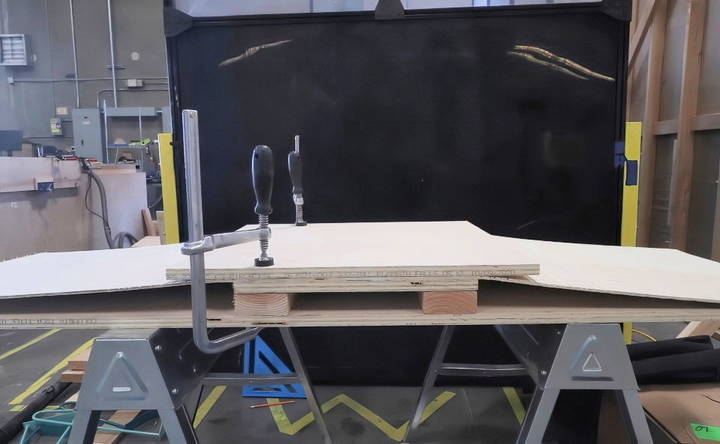
To build the curve, I placed a 16-inch wide piece of plywood (the same width as the desktop) on top of two 2x4s. This setup provided a form around which the kerf-cut plywood could bend.
I laid one of the scored 1/4-inch plywood sheets on top of the form, aligning it carefully. Clamping it down at the center and edges ensured it stayed in place. Before applying glue, I did a dry fit to see how the bends would form and where the ends would meet.
Gluing the Layers
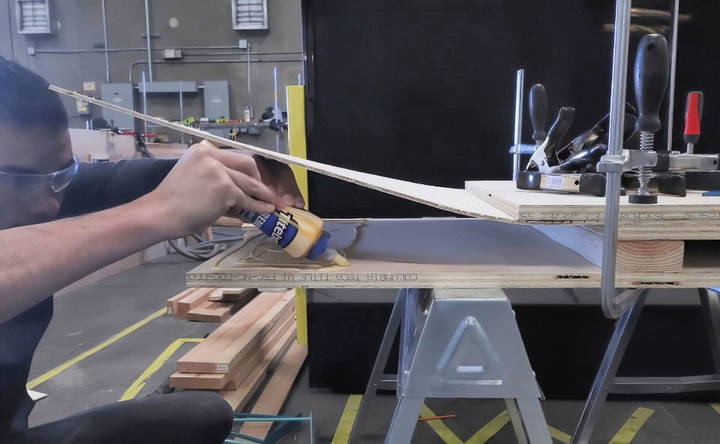
With the positioning confirmed, I applied wood glue generously within the kerf-cut areas and along the sections that would contact the 3/4-inch plywood. Clamping it securely was crucial, especially around the bends, to ensure a tight bond.
After the first layer was set, I applied a heavy coat of glue over it, paying special attention to fill the kerf cuts. The second 1/4-inch plywood sheet was then placed on top, this time with the scored side facing down to provide a smooth underside for the shelf.
Clamps were once again applied, not only around the edges but also directly over the curved sections. This ensured both layers bonded well and formed a strong, cohesive curve.
Trimming Excess Material
Once the glue had cured—waiting at least four hours for the initial set and overnight for full strength—I removed the clamps. The overhanging plywood was trimmed using the circular saw guided by a clamped straight edge. This step brought the desk to its final dimensions.
Sanding and Finishing
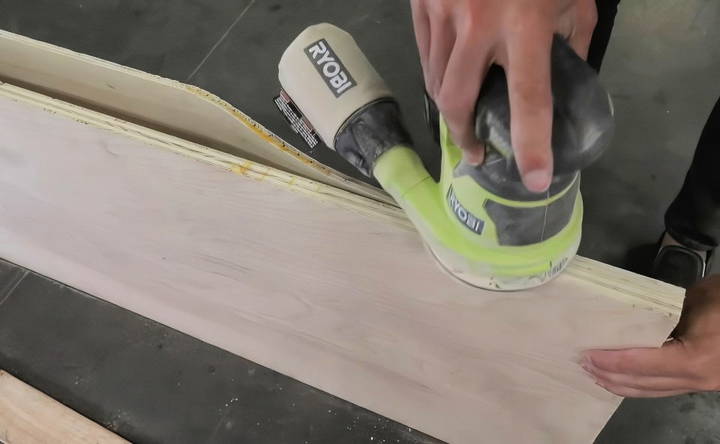
Sanding was essential to achieve a smooth, professional look. Starting with 100-grit sandpaper on the orbital sander, I worked my way up to 150 and then 220 grit. The edges were rounded slightly to remove any sharpness.
Inside the shelf area, a sanding sponge allowed me to reach tight spots and ensure the entire piece was smooth to the touch.
Filling Gaps and Imperfections
Despite careful construction, small gaps or imperfections can appear along the edges. Wood putty came to the rescue, filling these areas seamlessly. After the putty dried, a final pass with 220-grit sandpaper prepared the desk for finishing.
Attaching the Legs
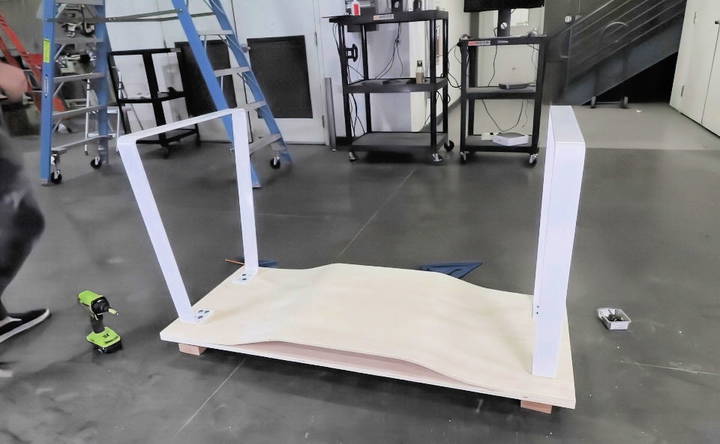
The prefabricated steel legs added both stability and a modern aesthetic. I chose flat bar legs, which provided a sturdy base without drawing attention away from the wooden desktop.
Attaching them was straightforward. Pre-drilling holes ensured the wood wouldn't split, and screws secured the legs firmly in place.
Applying the Wood Finish
To protect the wood and enhance its natural grain, I used a plant-based wood finish. Applying a thick coat with a clean rag, I let it soak in for about ten minutes. A touch-up coat addressed any dry spots, followed by another ten-minute wait.
Finally, I used fresh rags to wipe off any excess finish, revealing a subtle sheen that highlighted the birch veneer beautifully.
Lessons Learned and Tips
- Overestimating Material Length: Initially, I left the 1/4-inch plywood sheets longer than necessary, thinking I might need the extra length. In hindsight, this wasn't needed and just added extra trimming work.
- Glue Management: Keeping glue confined to the bonding areas prevented excess squeeze-out, which can be messy and difficult to sand off, especially in tight corners.
- Clamping Techniques: Using a combination of spring clamps and regular clamps provided even pressure across both flat surfaces and curved sections.
- Patience with Drying Times: Allowing ample time for the glue and finishes to cure ensured a stronger, more durable final product.
Exploring Kerf Bending Further
This project opened my eyes to the possibilities of kerf bending. By adjusting the spacing and depth of the cuts, different radii of curves can be achieved. It's a versatile technique that I'm excited to incorporate into future projects.
Building this desk was a fulfilling endeavor that combined simplicity with a touch of sophistication. Using only three basic power tools—a circular saw, an orbital sander, and clamps—I was able to build a functional piece of furniture that suits my needs perfectly.
The desk not only serves as a workspace but also as a testament to what can be accomplished with minimal tools and a bit of creativity. It's projects like these that remind me why I enjoy woodworking so much.
Advanced Techniques and Upgrades
Ready to take your DIY plywood desk to the next level? Let's dive into some advanced techniques and upgrades that will transform your desk from basic to brilliant.
Custom Finishes
Don't settle for a plain plywood surface. Get creative with custom finishes!
- Staining: Choose a stain that complements your room's decor and brings out the natural beauty of the plywood.
- Painting: A bold paint color can add a vibrant touch to your workspace.
- Epoxy Resin: For a super smooth and durable finish, consider coating your desk with epoxy resin.
Drawer Systems
Add functionality and storage space with a built-in drawer system.
- Pre-made Drawer Slides: Choose from a variety of pre-made drawer slides to suit your needs.
- Custom Drawers: If you're feeling ambitious, design and build your own custom drawers to perfectly fit your desk.
Cable Management
Keep those cords and cables organized with a clever cable management system.
- Grommets: Install grommets in your desk to neatly route cables through the surface.
- Cable Trays: Attach cable trays under your desk to keep cords out of sight and out of mind.
- Wireless Charging: Integrate a wireless charging pad into your desk for a clutter-free charging solution.
Lighting Upgrades
Brighten up your workspace with some stylish lighting upgrades.
- LED Strip Lights: Add a touch of ambiance with LED strip lights under your desk or along the edges.
- Desk Lamp: Choose a desk lamp with adjustable brightness and color temperature to build the perfect lighting for any task.
Ergonomic Enhancements
Make your desk more comfortable and ergonomic with a few simple additions.
- Keyboard Tray: Install a keyboard tray to keep your wrists in a neutral position and prevent strain.
- Monitor Arm: A monitor arm frees up desk space and allows you to adjust the height and angle of your monitor for optimal viewing.
- Standing Desk Converter: If you prefer to stand while working, consider adding a standing desk converter to your plywood desk.
These are just a few ideas to get you started. With a little creativity and ingenuity, you can build a DIY plywood desk that is truly one-of-a-kind and perfectly suited to your needs.
Troubleshooting and Common Mistakes
Even the most seasoned DIYers can encounter hiccups along the way. Here's a look at some common mistakes to avoid and how to troubleshoot problems that may arise during your plywood desk project.
Incorrect Measurements
Problem: Pieces don't fit together properly, leading to a wonky or unstable desk.
Solution:
- Double-check: Always measure twice and cut once! Take your time and ensure accuracy before making any cuts.
- Adjust: If a piece is slightly off, try sanding or trimming it to fit.
- Start Over: If a major mistake is made, don't be afraid to start over with a new piece of plywood.
Uneven Cuts
Problem: The desk looks unprofessional and may even be unstable.
Solution:
- Use a Guide: A saw guide or a straight edge will help you make clean, straight cuts.
- Practice: If you're new to using a saw, practice on scrap pieces of plywood before cutting your final pieces.
- Sand: Sanding can help smooth out minor imperfections in your cuts.
Weak Joints
Problem: The desk may wobble or even collapse under pressure.
Solution:
- Use the Right Fasteners: Choose screws or nails that are the appropriate size and strength for your project.
- Pre-drill: Pre-drilling pilot holes will help prevent the wood from splitting.
- Use Wood Glue: Adding wood glue to your joints will provide extra strength and stability.
Ignoring Safety
Problem: Accidents can happen, resulting in injuries.
Solution:
- Wear Safety Gear: Always wear safety glasses, gloves, and hearing protection when using power tools.
- Work in a Well-Ventilated Area: Use proper ventilation when working with paints, stains, or other chemicals.
- Follow Tool Instructions: Read and follow the instructions for all tools and equipment.
Additional Troubleshooting Tips
- If your desk is wobbly: Check that all joints are tight and secure, and add additional bracing if necessary.
- If your desk is scratched or dented: Sand the affected area and reapply the finish.
- If your desk is too short or too tall: Add or remove leg extensions to adjust the height.
Making mistakes is okay! Learn and keep going. With patience and perseverance, you'll build a beautiful, functional DIY plywood desk.
FAQs About DIY Plywood Desk
Discover the essential FAQs about DIY plywood desks, from design tips to assembly techniques. Perfect for your next home project!
Yes, you can use other types of wood like solid wood or MDF, each with its own advantages and drawbacks. Solid wood offers a natural look and durability, but it can be more expensive. MDF is budget-friendly and easy to work with, but it may not be as strong as plywood. Consider your budget, desired aesthetic, and skill level when choosing your material.
To prevent warping, ensure the plywood is properly sealed and finished on all sides, including the edges. Use a moisture-resistant finish and consider adding support structures like cross braces or additional legs to distribute weight evenly. Avoid placing your desk in areas with high humidity or direct sunlight.
Several methods can be used to attach legs securely, including using metal L brackets, wood screws driven at an angle, or pocket hole joinery. Choose a method that suits your skill level and tools available. Ensure the legs are attached evenly and provide adequate support for the desk's intended use.
Yes, you can add drawers to your desk by building drawer boxes from plywood or purchasing pre-made ones. Install drawer slides on the inside of the desk frame and attach the drawer boxes to the slides. Consider adding drawer pulls or handles for easy access.
You can customize your desk in various ways, such as adding shelves, a keyboard tray, or cable management solutions. You can also adjust the desk's dimensions to fit your workspace and preferences. Get creative with paint, stain, or other finishes to match your decor.
Conclusion
Building this DIY plywood desk was a journey of creativity and practical problem-solving. With just a few tools and materials, it's possible to build furniture that is both functional and aesthetically pleasing. I look forward to more projects like this and hope to inspire others to embark on their own DIY adventures.


