I always wanted to make something beautiful for my mom's birthday. So, I decided to make a paper flower bouquet. I started by gathering colorful paper, scissors, glue, and some floral wire. With these basic supplies, I set myself up on the kitchen table and began my fun project.
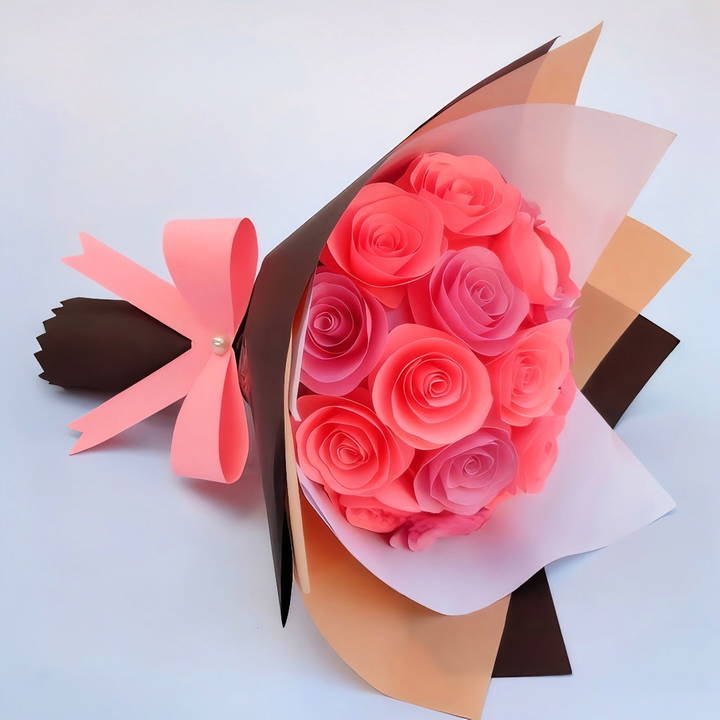
I'm helping with this: These steps below can help you make wonderful gifts, too.
Materials Needed
- Small Glue Gun with Glue Sticks: The glue gun is essential for quickly and securely attaching the paper petals and leaves to form each flower and the bouquet. I recommend using an ultra bond glue gun with premium quality sticks for a strong hold.
- Acrylic Paint: These paints are perfect for adding color to your flowers. You can blend colors to match specific flowers or to make a unique design.
- Color Paper (100 Assorted Papers for Craft): This will be the main material for making the petals and leaves of your flowers. The assortment of colors allows for creativity and variation in your bouquet.
- Coconut Shell: This serves as a sustainable and sturdy base to hold your paper flowers. Plus, it adds a unique, natural touch to the overall design.
- Glitter Foam Sheet: A bit of glitter adds a sparkly effect to some of your flowers, making your bouquet stand out even more.
- Holographic Sheet: Similar to the glitter foam sheet, this material adds a dazzling, reflective quality to your bouquet.
- White Glue (Fevicol): This is used for attaching parts that don't require the immediate bonding that a glue gun provides, like wrapping the bouquet or adding finer details.
Step by Step Instructions
Learn how to make a beautiful DIY paper flower bouquet! Follow step-by-step instructions from making petals to adding final touches.
Make Your Flower Petals and Leaves
- Select Your Color Paper: Choose the colors you want for your flowers and leaves. Think about real flowers for inspiration or go wild with your imagination.
- Cut Out Petals and Leaves: Based on real flowers or your own designs, cut out petals and leaves from your chosen color papers. Remember, there's no “wrong” shape, but varying sizes and styles can make your bouquet look more natural.
Paint Your Petals (Optional)
- Mix Your Acrylic Paints: This step is optional but can add a beautiful depth to your flowers. Mix colors to get the shade you want.
- Paint Your Petals: Lightly brush the edges or the whole petal with your paint. Let them dry completely.
Assemble Your Flowers
- Prepare Your Glue Gun: Plug in your glue gun and let it warm up. Ensure you have your ultra bond glue sticks ready.
- Glue the Petals Together: Start by attaching the petals at their base, one by one, around a central point. Build up the layers until you're happy with the flower's size.
- Add the Leaves: Using either your glue gun or white glue, attach the leaves to the base of your flowers.
Prepare Your Bouquet Base
- Use the Coconut Shell as Your Holder: Take your coconut shell and ensure it's clean and dry. This will act as the base of your bouquet.
- Arrange Your Flowers: Once you have enough flowers, start arranging them in the coconut shell. Use your glue gun to secure them in place. Remember, it's all about balance and making the bouquet look full and vibrant.
Add Sparkle and Shine
- Cut Shapes from Glitter Foam and Holographic Sheets: To add that extra special touch, cut small shapes or strips from the glitter foam and holographic sheets. These can be leaves, circles, or any design that complements your flowers.
- Glue Them to Your Bouquet: Strategically place your sparkly shapes among the flowers and leaves, using your glue gun to attach them securely.
Final Touches
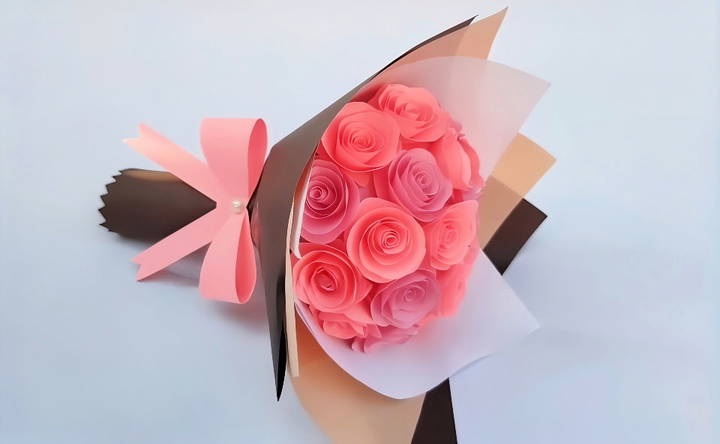
- Wrap Your Bouquet: If you plan to gift your paper flower bouquet or just want to add a finishing touch, consider wrapping the coconut shell base in a decorative paper or tying it with a ribbon.
- Admire Your Handiwork: Take a step back and enjoy your beautiful, handcrafted paper flower bouquet. It's a testament to your creativity and hard work.
Customization Tips for Paper Flower Bouquets
Making a paper flower bouquet is not just about crafting something beautiful; it's also about personalizing it to reflect your style or the sentiment you wish to convey. Here are some tips to customize your paper flower bouquets:
- Choose a Color Scheme: Select colors that match the occasion. For a wedding, consider the theme colors. For a more personal touch, use the recipient's favorite colors.
- Vary the Flower Types: Mix different types of paper flowers to add variety. Roses, peonies, and lilies made from paper can provide a diverse texture and appearance.
- Incorporate Personal Elements: Add elements that have a special meaning, like a piece of fabric from an old dress or handwritten notes on the petals.
- Play with Sizes: Combine large and small flowers to make depth. Smaller buds can fill gaps and add intricacy to your bouquet.
- Add Non-floral Elements: Consider adding paper butterflies, bees, or leaves to bring your bouquet to life.
- Consider the Stem: Use different materials for the stems, such as straws, skewers, or wire, to achieve the desired stiffness and height.
- Wrap It Up: Choose a wrapping paper that complements your bouquet. Add ribbons or lace for a finishing touch.
The charm of a paper flower bouquet is in its uniqueness and your personal touch. Use these tips to make a visually stunning and meaningful bouquet.
Troubleshooting Common Issues in Paper Flower Crafting
When crafting paper flowers for your bouquet, you might encounter a few hurdles along the way. Here's a guide to overcoming common issues with simple, clear solutions:
Paper Tears Easily
- Solution: Use thicker paper or apply a clear adhesive film to reinforce delicate areas.
Flowers Don't Look Realistic
- Solution: Study real flowers and mimic the petal shapes and arrangements. Adding subtle color gradients can also enhance realism.
Difficulty Shaping Petals
- Solution: Gently wrap the petals around a pen or use a crafting tool designed for shaping to make a natural curve.
Bouquet Lacks Volume
- Solution: Increase the number of petals per flower or add filler elements like paper leaves or baby's breath.
Colors Fade Over Time
- Solution: Use high-quality, fade-resistant paper or spray finished flowers with a UV-resistant sealant.
Stems Are Too Flimsy
- Solution: Double up the stem material or insert a wire for added strength and flexibility.
Adhesive Doesn't Hold
- Solution: Switch to a stronger glue, such as hot glue or a floral adhesive, for a more secure bond.
Fixing these issues will make your paper flower bouquets both lovely and durable. Practice enhances perfection, and solving problems will boost your skills.
Maintenance and Preservation of Paper Flower Bouquets
Ensuring your paper flower bouquets remain vibrant and intact over time requires some care. Here's how you can maintain and preserve your creations:
- Avoid Direct Sunlight: Keep your bouquet away from direct sunlight to prevent the colors from fading. A shaded spot or a room with indirect light is ideal.
- Dust Regularly: Use a soft brush or a blow dryer on a cool, low setting to gently remove dust from the flowers.
- Store Properly: If you need to store the bouquet, place it in a dry, airtight container. You can also wrap it in acid-free tissue paper to protect the colors.
- Handle with Care: When moving your bouquet, hold it by the base to avoid crushing the delicate paper petals.
- Keep Away from Moisture: Paper is susceptible to water damage, so ensure your bouquet is displayed in a dry area.
- Use Sealants for Longevity: Spraying a light coat of clear craft sealant can add a layer of protection against dust and moisture.
By following these simple steps, you can enjoy your paper flower bouquet for years to come. The key to preservation is gentle care and protection from the elements.
FAQs About Making a Paper Flower Bouquet
Discover answers to common questions on making a paper flower bouquet, including materials, techniques, and tips for beautiful results.
Begin by cutting your paper into squares. Each square will form a petal. Fold the squares diagonally to create a crease, then shape them into petals. Roll the petals and secure them with glue to form flowers. Add stems using floral wire.
Yes, you can! Use cardstock to create a vase by cutting and rolling it into shape. Glue the edges to secure it. You can decorate the vase with markers or crayons to match your flowers.
Once you have your flowers and vase ready, arrange the flowers by attaching them to a foam hemisphere with hot glue. Place the hemisphere inside the vase, and insert the stems of the flowers into the foam to secure them in place.
To give your bouquet a realistic touch, use different shades of the same color for depth. Also, gently curl the edges of the petals with a pencil or your fingers for a more natural look. Adding green paper leaves can also enhance the bouquet’s realism.
Variety can be introduced by using different types of flowers, colors, and sizes. For example, you can make roses, daisies, and lilies using various folding techniques. Incorporating different shades of the same color can add depth, while mixing flower sizes can give your bouquet a more natural look. Don't hesitate to experiment with patterns and textures as well.
Conclusion
Making these flowers was not only enjoyable but also fulfilling. Seeing my mom's smile when she received them made all the effort worth it. Now, with this guide, you can make your own beautiful flower bouquet with paper. Start crafting today and bring joy to someone special.


