Are you tired of your outdated kitchen countertops but can't afford a full renovation? Painting your countertops is an affordable and creative solution to give your kitchen a fresh, modern look without breaking the bank. In this article, we'll learn the step-by-step process of painting your countertops, based on a real-life experience. With the right materials, a little patience, and creativity, you can completely transform your countertops for as little as $65.
Here's how you can do it.
Why Paint Your Countertops?
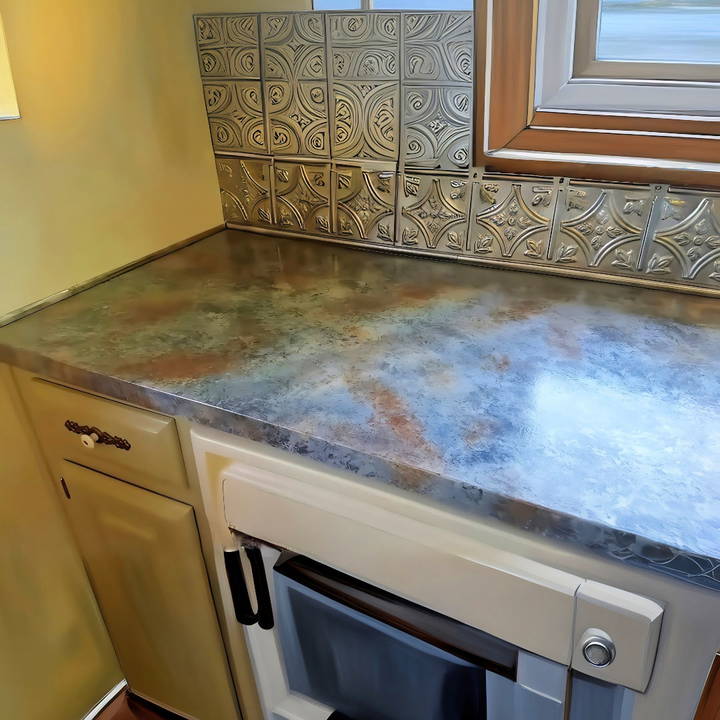
Countertops take a lot of wear and tear over time, which can lead to scratches, discoloration, and general signs of age. Replacing them can be expensive, especially if you're on a tight budget. Painting your countertops is an easy, DIY-friendly alternative that allows you to customize your kitchen's look.
By painting your countertops, you can achieve a custom design that mimics expensive materials such as granite or slate at a fraction of the cost. Plus, this method is perfect for anyone who loves a good weekend project.
Tools and Materials You'll Need
Here are the essential tools and materials to paint your countertops:
- Primer: For laminate or similar surfaces, a good-quality primer is key. In this case, a dark gray primer was used to make a strong base for the final paint layers.
- Foam Rollers and Brushes: Foam rollers are ideal for applying an even layer of paint and primer, while brushes help in those hard-to-reach places around the sink and edges.
- Acrylic Paints: Choose your color palette based on the final look you want. The project used various shades of gray to mimic a slate finish.
- Zinc (dark gray)
- Slate Grey (medium gray)
- Martha Stewart Wet Cement (light gray)
- Craft Smart Nickel (metallic silver)
- Mica Flakes (Optional): These add a little sparkle to the countertop but are optional and can increase the complexity of the project.
- Two-part Wood Filler: Ideal for filling in seams or gaps in your countertops before painting.
- Painter's Tape: Essential for protecting areas you don't want to paint, such as sinks, cabinets, and backsplashes.
- Sandpaper (400-grit) and Scouring Pads: Necessary for smoothing the countertop and ensuring the paint adheres properly.
- Clear Coat (Polyurethane): A durable top coat to protect your painted countertops. Minwax One Coat Polyurethane was used in this project for a crystal-clear finish.
Step by Step Instructions
Learn how to paint countertops with our step-by-step instructions. From preparation to sealing, transform your kitchen effortlessly!
Step 1: Preparation and Cleaning
As with any DIY project, proper preparation is crucial for a successful result. Before applying any primer or paint, you'll need to prepare your countertops by thoroughly cleaning them. Here's how:
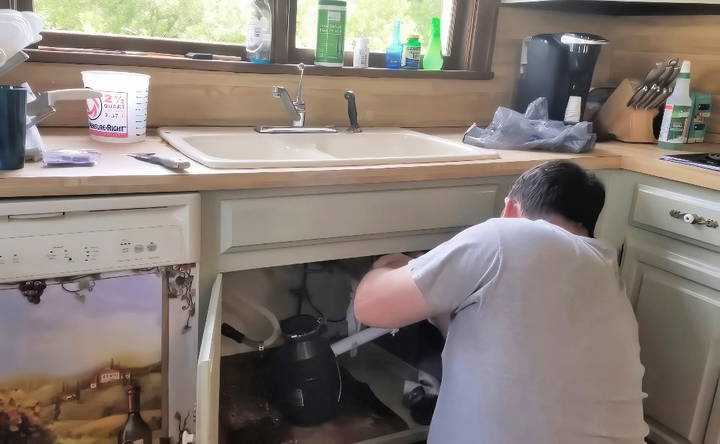
- Remove Old Hardware: If you have a sink or other fixtures that you're planning to replace, now's the time to do it. This project started by replacing an old cast-iron sink with a new stainless-steel one. Removing the old hardware first makes it easier to tape off and paint around the new fixtures.
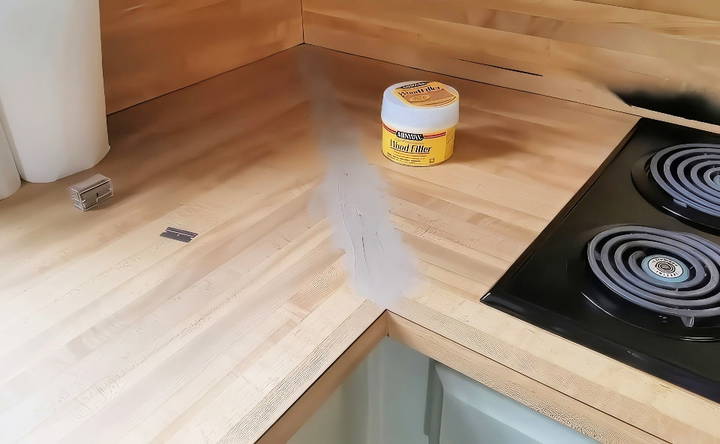
- Fill in Seams or Gaps: Use a two-part wood filler to smooth over any seams in your countertops. Sand down the filler after it dries to ensure a seamless surface for painting.
- Clean the Surface: Use a strong cleaner, like Mean Green, to remove grease, dirt, and any residue. A scouring pad will help scrub off adhesive or buildup, ensuring your paint sticks properly.
- Taping Off the Edges: Tape off any areas you want to protect, like your new sink, backsplash, or cabinets, to avoid accidental paint splatters. Make sure the tape is firmly in place.
Step 2: Priming the Countertop
Once your countertops are clean, smooth, and dry, it's time to apply the primer. This is a key step that ensures the paint adheres properly and lasts longer.
- Choose the Right Primer: For this project, Bulls Eye 1-2-3 Primer was tinted to a dark gray color to act as a solid base for the paint layers.
- Cut in with a Brush: Using a small brush, carefully apply primer around the sink, backsplash, and other tricky areas where the roller might not reach. Be sure to cover edges and seams for an even finish.
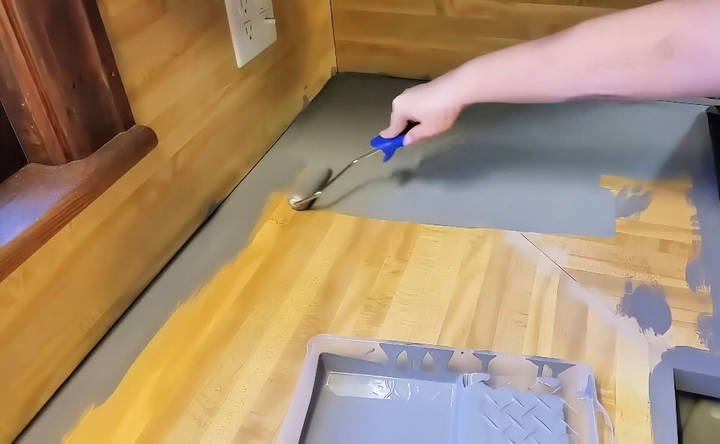
- Roll on the Primer: With a foam roller, apply a thin, even layer of primer across the entire countertop. Apply firm pressure to ensure the primer adheres properly, especially in high-traffic areas like the corners. Allow the primer to dry completely before moving on to the next step.
Tip: Two coats of primer are recommended for the best results. Let the first coat dry fully before applying the second.
Step 3: Painting the Base Color
Now that the primer has dried, it's time for the fun part—applying the paint! You'll want to start with your darkest color and work your way to the lightest to make a natural, stone-like effect.
- Start with the Darkest Color (Zinc): Using a balled-up plastic bag or sponge, dip it lightly into your darkest gray paint (Zinc) and dab off the excess on a paper plate. Then, apply the paint to the countertop in a random, non-uniform pattern. The goal is to mimic the texture of stone, so avoid making a repetitive pattern.
- Cover the Entire Countertop: Dab the paint over the entire countertop surface, making sure to get the edges and corners. Don't worry if it looks imperfect at this stage—you're building layers for depth.
- Let It Dry Completely: After applying the first color, let the paint dry fully before moving on to the next color. This will prevent smudging or blending of the colors.
Step 4: Adding Depth with Additional Colors
Now that the base layer is dry, you can add more layers of color to give the countertop a realistic, dimensional look.
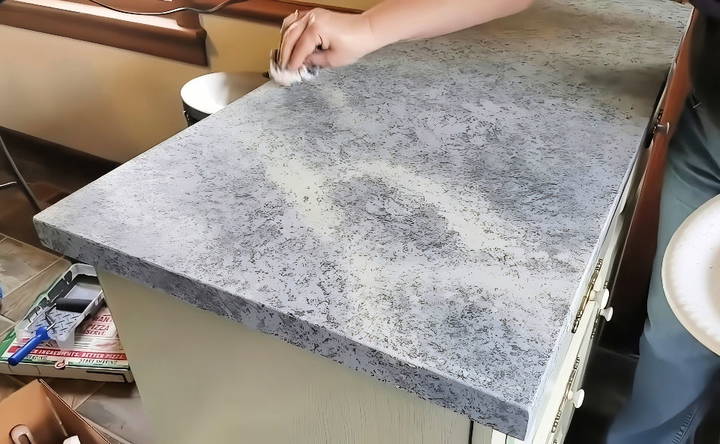
- Apply the Medium Gray (Slate Grey): For the second layer, switch to a lighter gray (Slate Grey). This time, use a paper towel instead of the plastic bag to achieve a different texture. Lightly dab the paint over the first layer, focusing on areas that need more depth or contrast.
- Continue Layering Colors: After the second layer is dry, you can move on to the next color, which in this case was Martha Stewart's Wet Cement. This light gray adds a soft, stone-like texture that mimics natural slate. Again, use a plastic bag or paper towel to apply the paint in a random pattern.
- Metallic Highlights: For a bit of shimmer, lightly apply Craft Smart Nickel metallic paint to give the countertop a subtle sheen. This step is optional but adds a luxurious touch.
- Build Veining: If you want to mimic the veins found in natural stone, carefully make vein-like streaks with the light gray paint. Use a small brush or even a plastic bag to drag the paint in thin, irregular lines across the surface.
Tip: Don't rush this process. Let each layer of paint dry completely before moving on to the next to avoid blending and muddying the colors.
Step 5: Optional—Adding Mica Flakes
For an extra sparkle, you can sprinkle mica flakes over the countertop before applying the clear coat. However, this step can add complexity to the process, as the flakes can sometimes cause a rough texture. If you're aiming for a quick and simple finish, you might want to skip this step.
Step 6: Sealing the Countertop with a Clear Coat
Once you're satisfied with the painted look, it's time to protect your hard work by sealing it with a clear coat.
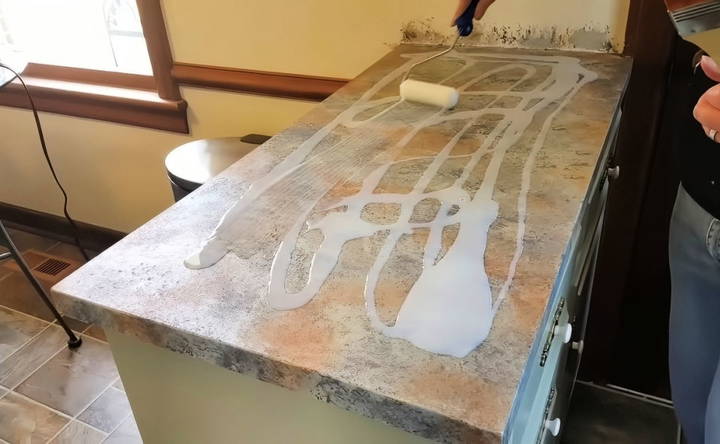
- Apply the Clear Coat: Minwax One Coat Polyurethane was used in this project. It's a thick, durable clear coat that protects your countertop from wear and tear. You can pour a small amount directly onto the countertop and use a foam roller to spread it evenly.
- Watch for Drips: As you apply the clear coat, be sure to watch for drips along the edges. Use a brush to smooth out any excess clear coat, especially on the sides and corners.
- Let It Dry Thoroughly: Depending on the thickness of the clear coat, it may take several days to fully dry and cure. While the countertop may seem dry to the touch after 24 hours, it's best to wait a full week before using it heavily to avoid scratches or dents.
Step 7: Sanding and Smoothing the Countertop (Optional)
After applying the clear coat, you might notice some roughness or bumps, especially if you used mica flakes. If the surface feels uneven, you can sand it down for a smoother finish. Here's how to do it:
- Assess the Surface: Once the clear coat is completely dry (usually after 24 hours), run your hand over the countertop to feel for any raised areas or imperfections, especially from the mica flakes.
- Use Fine Sandpaper: If necessary, use 400-grit wet or dry sandpaper to gently sand the surface. Be cautious—you're not trying to remove the clear coat but to smooth out any bumps. Make sure to use even pressure to avoid making dips or inconsistencies in the surface.
- Clean Up the Dust: After sanding, wipe the countertop down with a clean, damp cloth to remove any dust or debris. Let it dry completely before applying another clear coat.
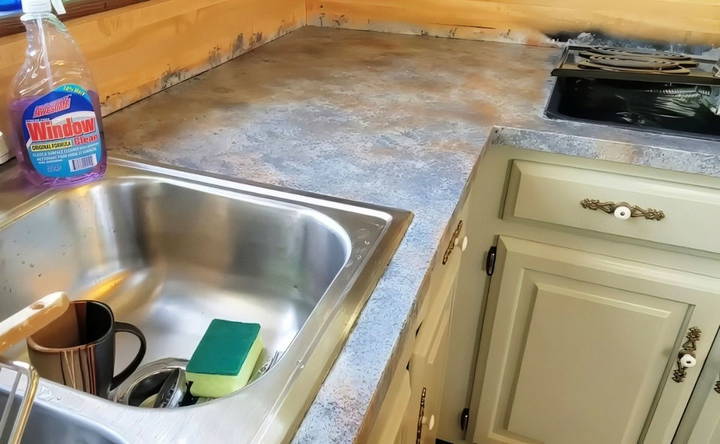
- Apply a Second Clear Coat: If you've sanded the surface, it's a good idea to apply a second layer of the clear coat for extra protection and a smoother finish. Follow the same process as the first application, using a foam roller to spread the clear coat evenly.
Step 8: Final Touches and Curing Time
Now that your countertop has been painted, sealed, and sanded, it's time to allow the clear coat to fully cure. This process ensures that your new countertop is durable enough to withstand everyday use.
- Cure Time: While the clear coat may feel dry to the touch after 24 to 48 hours, it's best to give the countertop a full week or even up to two weeks to cure completely. During this time, avoid placing heavy objects on the surface, cutting directly on it, or exposing it to water for extended periods.
- Light Use: You can start using the countertop for light tasks after about three days, but be cautious not to scratch or dent it. For instance, avoid dragging heavy kitchen appliances across the surface or using it as a cutting board during this curing phase.
- Check for Any Additional Sanding: Once the clear coat is fully cured, check the countertop again for any remaining rough spots. If you find any, repeat the sanding and clear coating process as needed until the surface is smooth and even.
Maintenance and Care for Painted Countertops
To ensure the longevity of your newly painted countertops, it's important to follow a few simple care and maintenance guidelines:
- Avoid Harsh Chemicals: While the clear coat provides some protection, harsh cleaning chemicals can damage the finish over time. Instead, use gentle, non-abrasive cleaners such as a mixture of water and mild dish soap. A microfiber cloth is ideal for wiping down the surface regularly.
- Use Cutting Boards and Trivets: Painted countertops, even when sealed, are not as durable as natural stone. Avoid cutting directly on the surface, as this can cause scratches or gouges. Always use cutting boards for food preparation. Similarly, use trivets or hot pads under hot pots and pans to prevent heat damage to the clear coat.
- Watch for Water Damage: While the clear coat is water-resistant, it's still a good idea to clean up spills quickly to prevent water from seeping through any weak spots. Standing water, especially near sinks, can potentially damage the clear coat and underlying paint.
- Reapply Clear Coat as Needed: Over time, your clear coat may start to show signs of wear, especially in high-traffic areas like near the sink or stove. If you notice scratches or dull areas, lightly sand the surface and reapply another layer of clear coat to keep your countertops looking fresh.
- Avoid Abrasive Scrubbers: Never use abrasive scrubbers or sponges on the countertop, as they can damage the paint and clear coat. Stick to soft sponges or cloths when cleaning.
Troubleshooting Common Issues
Here are some potential problems you may encounter while painting countertops, along with tips on how to resolve them:
- Bumpy Surface After Clear Coat: If you used mica flakes or applied the clear coat too thickly, the surface may feel rough or uneven. Sanding and applying another clear coat can help smooth things out.
- Roller Marks in the Clear Coat: Roller marks can occur if the clear coat is applied unevenly or too thinly. Using a foam roller and working slowly in small sections can help avoid this issue. Also, don't overwork the clear coat—allow it to self-level as it dries.
- Paint Peeling or Lifting: This can happen if the primer wasn't applied properly or if the countertop wasn't cleaned thoroughly before painting. If you notice peeling, you may need to sand the affected area, reapply primer, and repaint. Always ensure the surface is clean and dry before applying any coats.
- Clear Coat Turning Yellow: Some polyurethane products can yellow over time, especially when exposed to sunlight. To avoid this, choose a product labeled as “non-yellowing,” like the Minwax One Coat Polyurethane used in this project.
Advantages and Disadvantages of Painting Countertops
Before you start, it's essential to understand both the benefits and the potential drawbacks of painting your countertops. This will help you make an informed decision about whether this project is right for your home.
Advantages:
- Cost-Effective: Painting your countertops is significantly cheaper than replacing them. In this example, the entire project was completed for around $65.
- Customizable: You can choose any color or finish to match your kitchen's aesthetic. Whether you want a sleek slate look or a faux granite finish, painting allows for creative freedom.
- Quick Update: Compared to a full renovation, painting your countertops is a relatively quick way to transform your kitchen. Most of the work can be completed over a weekend, though curing time will extend the overall timeline.
- DIY-Friendly: You don't need to be a professional painter to achieve good results. As long as you follow the steps carefully, even beginners can tackle this project successfully.
Disadvantages:
- Durability: Painted countertops, while durable, are not as tough as natural stone or engineered materials like quartz. You'll need to be more mindful of using cutting boards and avoiding harsh chemicals.
- Limited Longevity: Over time, the clear coat may wear down, and the painted surface could become scratched or damaged. However, you can always touch it up with a new coat of paint and clear sealant.
- Curing Time: While the painting process is relatively quick, the clear coat needs time to cure fully, which can be inconvenient if you need to use your kitchen immediately.
Final Thoughts: Is Painting Your Countertops Right for You?
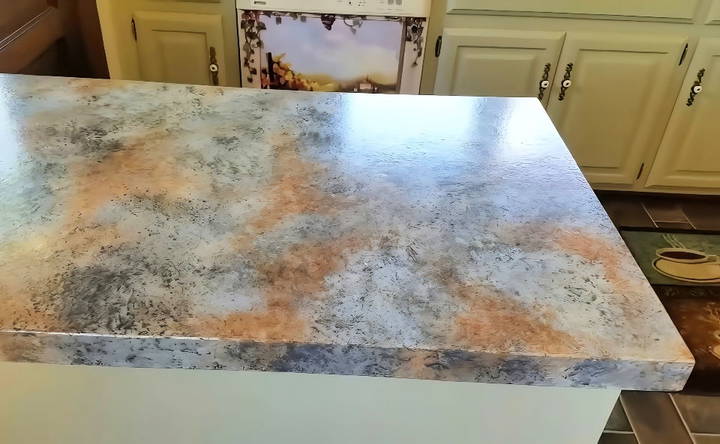
Painting your countertops is an excellent option if you're looking for a budget-friendly and creative way to update your kitchen. It offers a significant visual upgrade without the high costs of replacing countertops altogether. While it does require some patience, especially during the curing process, the end result can be a unique, custom finish that transforms your kitchen space.
By following these steps, you'll be well on your way to achieving a stunning countertop transformation. With attention to detail and proper care, your newly painted countertops will last for years to come. Enjoy your DIY project and the beautiful kitchen update that results from it!
FAQs About Painting Countertops
Discover answers to common questions about painting countertops. Learn about materials, techniques, durability, and maintenance for a fresh look.
This method is suitable for old laminate countertops. It’s essential to properly clean and sand the surface to ensure the paint adheres well.
Yes, but plan accordingly. While it’s possible to work with the sink in place, it may require taping off areas and allowing extra drying time between steps.
Depending on how many coats you apply and the drying time for each, the project may take several days, especially with the clear coat, which can take up to 14 days to fully cure.
The finish is durable when properly sealed, but you should avoid cutting directly on the countertop and always use trivets for hot pans.
Use gentle cleaners and avoid abrasive scrubbing. Wipe spills promptly, and reapply a clear coat as needed to maintain durability.
Sanding with fine grit sandpaper can smooth out any roughness caused by mica flakes. You can also skip the flakes to avoid extra work.
The countertops can last for years with proper care. There may be minor wear near high-use areas, but these can be touched up.
One of the great things about this process is that you can repaint over your work if the outcome isn't to your liking.
Acrylic craft paint works well when sealed with multiple coats of clear polyurethane. Ensure you select colors that fit your design vision.


