Fixing paint chips on your car can help maintain its appearance and protect it from rust. Start by thoroughly cleaning the area around the paint chips to remove dirt and debris. Next, use fine-grit sandpaper to smooth any rough edges. Apply a primer to the affected area and let it dry completely. Once dry, carefully apply the matching paint to the chipped spots. Finish with a clear coat for added protection and a shiny finish.

Regular maintenance of chipped paint on cars can save you money on costly repairs. Keeping your car's paint in good condition also helps maintain its value. If you're unsure about the process, seek professional assistance to ensure quality results. By addressing paint chips promptly, you can keep your car looking its best.
Stay tuned for detailed steps and pro tips in the next section!
Understanding Paint Chips and Their Impact on Car Value
When you notice small, flaking areas of paint on your car, these are known as paint chips. They might seem minor, but they can have a significant impact on your car's overall appearance and value. Here's what you need to know:
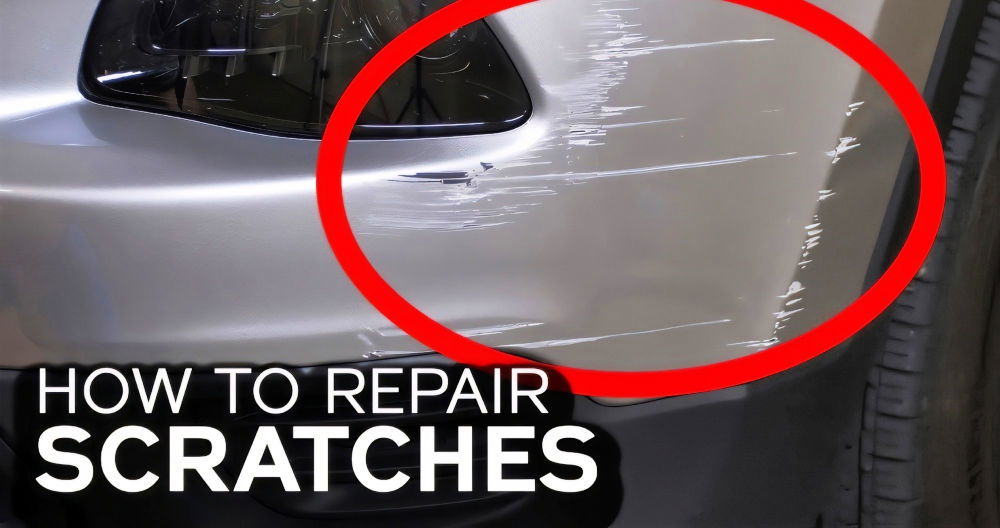
- What Are Paint Chips? Paint chips are small areas where the car's paint has come off, often due to stones or debris hitting the vehicle at high speeds. They can vary in size, from tiny specks to larger flakes.
- Why Should You Care? Firstly, paint chips can lead to rust if left untreated, causing more extensive damage to your car's body. Secondly, they affect the aesthetic appeal of your vehicle, which is crucial if you plan to sell it in the future. Cars with a flawless paint job tend to fetch higher prices in the market.
- How Do Paint Chips Affect Car Value? The value of a car is determined by several factors, including its exterior condition. Paint chips can lower the resale value because they suggest the car may not have been well-maintained. Additionally, potential buyers may factor in the cost of repairing the paint chips and reduce their offer accordingly.
- Can You Fix Them Yourself? Yes, many paint chips can be fixed at home with the right tools and techniques. However, for a perfect match and finish, sometimes professional help might be the best option, especially for luxury or vintage cars.
- Prevention Is Better Than Cure To maintain your car's value, it's best to prevent paint chips where possible. Using a protective film on the car's front, regular washing, and avoiding tailgating can reduce the risk of paint chips.
Taking care of paint chips is not just about maintaining your car's beauty—it's also about preserving its value. Addressing them promptly and effectively can save you money and keep your car looking its best.
Materials Needed and Their Purpose:
Discover all the materials needed and their purpose to complete your project successfully. Find detailed requirements and usage tips here!
- Filler Spreader or Piece of Plastic: To evenly spread paint and filler over the chipped area.
- Color-matched Paint: To cover the chip and blend it with the surrounding area.
- Drill with a Buffing Pad: This is used to polish the repaired area to a glossy finish.
- Compound Polish: To smooth out the repair and give it a shine.
- Sandpaper (2000 grit): To prepare the area by smoothing any jagged edges and helping the paint adhere.
- Clear Coat Lacquer: To protect the paint job and ensure it matches the rest of the car's shine.
- Microfiber Cloth or Tissue: This is used to check progress without leaving residues.
Step by Step Instructions
Learn how to fix paint chips on your car with our step-by-step guide. From preparing to final buffing and marveling at the results, it's all here!
Preparing the Area
First, I lightly sanded the chipped area with 2000 grit sandpaper. This step is crucial as it removes any rough edges and ensures the new paint sticks properly. I made sure not to apply too much pressure to avoid creating more damage.
Applying the Paint
After shaking the paint container well, I carefully applied a generous amount of color-matched paint directly into the chip using a small brush. This step was a bit nerve-racking at first, but I found that applying more paint than what seemed necessary was key, as it shrinks upon drying.
Smoothing the Area
Once the paint was slightly dry (I waited around 10 minutes), I used the filler spreader to gently remove any excess paint, ensuring only the chip was filled. In some cases, using a hairdryer or a hot air gun can speed up the drying process, but caution is imperative to avoid overheating the paint.
Sanding and Applying Clear Coat
After allowing sufficient drying time, I sanded the area again with 2000 grit sandpaper to ensure it was perfectly smooth and level with the car's surface. Following that, I applied clear coat lacquer in the same manner as the paint, spreading it evenly over the chip and slightly beyond to ensure a seamless finish.
Final Buffing
The final step was perhaps the most satisfying. After the lacquer had fully dried (I recommend waiting at least a couple of hours), I used a drill with a buffing pad attachment and some compound polish to buff the area. This process required a gentle touch and patience, gradually increasing pressure to achieve a glossy shine that blended perfectly with the rest of the car's paint.
Marveling at the Results
Upon completion, the chip was nearly invisible. It is important to note that this method doesn't necessarily return the car to its factory state but substantially improves the appearance and prevents the chip from leading to further damage, such as rust.
Understanding Car Paint Codes
Car paint codes are essential for maintaining the original appearance of your vehicle's paint job. Whether you're touching up a scratch or repainting a panel, using the correct paint code ensures a perfect match. Here's what you need to know about paint codes:
What Is a Paint Code?
A paint code is a unique identifier assigned by the manufacturer. It precisely matches the color of your car's original paint. This code is usually a combination of letters and numbers.
Where to Find Your Paint Code
You can locate your car's paint code in several places:
- Under the Hood: Look for a sticker or plate that lists the paint code.
- Driver's Door Jamb: Open the driver's side door and check the door jamb for a label.
- Owner's Manual: Sometimes, the paint code is listed in the manual.
- Window Sticker: If you have the original window sticker from when the car was new, it may list the paint code.
How to Read Paint Codes
Paint codes can be straightforward or complex, especially if your car has a two-tone paint job. The code may include a base color code and a secondary color code for accent areas.
Why Paint Codes Matter
Using the correct paint code is crucial when repairing paint chips or scratches. A mismatched paint job can stand out and reduce your car's aesthetic appeal. Moreover, it can affect the car's resale value.
Tips for Using Paint Codes
- Double-check the Code: Verify the paint code with your dealership or a professional to ensure accuracy.
- Test the Color: Before applying the paint to your car, test it on a small, inconspicuous area to confirm it matches.
Using the correct paint code is crucial for car maintenance. It keeps your vehicle looking good and maintains its value, ensuring repairs match the original paint.

Troubleshooting Common Issues
When fixing paint chips on your car, you might encounter a few hiccups along the way. Here's a guide to help you troubleshoot some common issues:
Paint Not Matching
- Cause: The biggest challenge is finding an exact match for your car's paint.
- Solution: Always use the paint code found on your vehicle to purchase the correct color. Test the paint on a small, hidden part of your car first.
Paint Bubbling
- Cause: Paint bubbling can occur if the area wasn't cleaned properly or if there's rust underneath.
- Solution: Remove any rust with sandpaper and clean the area thoroughly before applying new paint.
Uneven Paint Surface
- Cause: This usually happens when the paint is applied too thickly or unevenly.
- Solution: Apply thin, even coats of paint and allow it to dry completely between layers.
Clear Coat Peeling
- Cause: The clear coat may peel if not applied correctly or if the underlying paint isn't compatible.
- Solution: Make sure the base paint is completely dry and apply the clear coat smoothly and evenly.
Dust or Debris in the Paint
- Cause: Painting in a dusty environment or not cleaning the surface well can trap particles.
- Solution: Clean the area with a tack cloth before painting and try to work in a clean, controlled environment.
Touch-Up Paint Not Sticking
- Cause: Oils, waxes, or other substances on the car's surface can prevent paint from adhering.
- Solution: Clean the chip thoroughly with alcohol wipes before applying touch-up paint.
Visible Brush Strokes
- Cause: Using a brush that's too large or not suitable for touch-ups can leave marks.
- Solution: Use a fine-tipped brush or a paint pen designed for automotive touch-ups.
By anticipating these common issues and knowing how to solve them, you'll be better prepared to tackle paint chip repairs.
Preventive Measures and Maintenance Tips
Keeping your car's paint in top condition not only makes it look great but also protects the value of your vehicle. Here are some straightforward tips to help you maintain that new-car finish:
Regular Washing
- Why: Dirt and grime can cause scratches and dull your car's paint over time.
- How: Wash your car regularly with car-specific cleaners and a soft sponge or cloth. Avoid harsh chemicals and abrasive brushes.
Wise Parking
- Why: The sun's UV rays can fade and damage your car's paint.
- How: Whenever possible, park in the shade or use a car cover to protect your car from direct sunlight.
Waxing and Sealing
- Why: A good wax or sealant provides a protective layer against environmental elements.
- How: Apply a high-quality wax or paint sealant after washing to create a barrier against UV rays, rain, and pollutants.
Mindful Driving
- Why: Small stones and debris on roads can chip your car's paint.
- How: Keep a safe distance from other vehicles, especially on loose or gravelly surfaces.
Immediate Attention to Chips and Scratches
- Why: Ignoring chips can lead to rust and more extensive paint damage.
- How: Use a touch-up pen or paint that matches your car's paint code for quick fixes.
Professional Protection
- Why: Sometimes, a professional touch can provide long-term protection.
- How: Consider professional paint protection treatments like ceramic coatings for added durability.
By following these simple yet effective tips, you can keep your car's paint looking fresh and vibrant, preserving both its appearance and value.
FAQs About How to Fix Paint Chips on Car
Discover quick solutions to fix paint chips on your car. get answers to FAQs about repairing car paint chips and maintaining your vehicle's pristine look.
To fix a small paint chip, you'll need soap and water for cleaning, automotive polishing compound, denatured alcohol, a small brush or a paper match for application, primer, touch-up paint that matches your car's color, and polishing compound for finishing.
First, wash the area with soap and water. Then, remove any rust with fine-grit sandpaper and clean the area with denatured alcohol to remove wax and grime. This will ensure the new paint adheres properly.
After cleaning and priming the chipped area, apply a small amount of touch-up paint with a fine brush. Test the color match on a piece of paper first. Apply a second coat if necessary, allowing each layer to dry thoroughly.
For medium-sized chips, you may need to sand the area more extensively, use a larger amount of primer, and possibly apply several layers of touch-up paint. For large chips, it might be best to consult a professional as the repair process can be more complex.
Once the touch-up paint has dried, gently rub the area with an automotive polishing compound to blend the repair with the surrounding paint. This will help create a smooth and unnoticeable finish.
Conclusion:
In conclusion, learning how to fix paint chips on a car can save you money and keep your vehicle looking its best. With the right tools and techniques, anyone can tackle this common issue. Fixing chipped paint on your car not only improves its appearance but also helps maintain its value. Remember to be patient and follow each step carefully. Whether it's choosing the right paint or applying it smoothly, every detail counts. Protect your car's exterior and enjoy the satisfaction of a job well done.


