Build the perfect DIY horseshoe pit with our step-by-step guide. I remember when I first wanted to build one in my backyard. It seemed simple, but I quickly learned there are key steps to follow. Understanding the right measurements and choosing the right materials made all the difference. I gathered my tools, excited to make a fun space for friends and family.
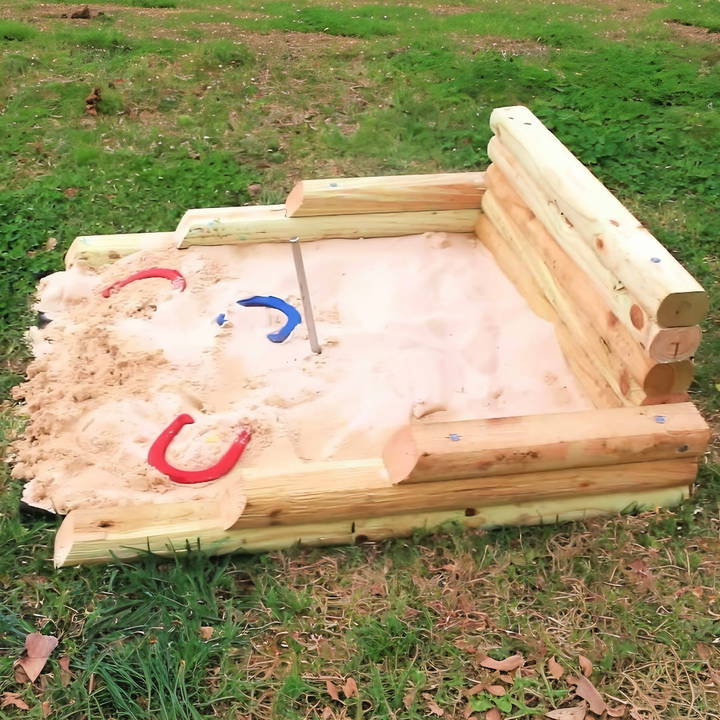
Building the perfect DIY horseshoe pit was a journey. I spent time researching and finding tips online. I found a few plans that helped guide my work. It was satisfying to see it come together. I couldn't wait to play a few games.
If you're keen to build your own, I promise these tips will help you get started. I'm happy to share what I learned along the way!
Choosing the Right Materials
To embark on this project, we needed a few essential materials:
- Horseshoe Kit: Of course, the fundamental component. Ours had been gathering dust for a while.
- Landscape Timbers: A cost-effective alternative to construction lumber, used for the frame of the sand pits.
- Nails and Hammer: Large nails for securing the frame into the ground and smaller ones for assembling the pieces.
- Sand: This fills the pit, providing a perfect landing ground for the horseshoes.
- Weed Block Material: A preventive measure against weeds sprouting in our game area.
- Evolution Sliding Miter Saw: This tool was invaluable for making precise cuts on our landscape timbers.
These materials were chosen for their durability, cost-effectiveness, and ease of use.
Step by Step Instructions
Learn how to build a horseshoe pit with our step-by-step guide, from choosing the location to adding sand. Easy and detailed instructions are included.
1. Location and Measurement
First, find the perfect spot in your backyard with enough space. Measure out 40 feet, the standard distance between horseshoe stakes.
2. Cutting the Timbers
Using the sliding miter saw, cut the landscape timbers into specific lengths for the sides and back of the pit. The precise cuts ensured our pit would have a professional appearance.
3. Pre-Drill to Prevent Splitting
Before assembling, I pre-drilled holes in the baseboards of the frame to prevent the wood from splitting when inserting the nails. This is a crucial step for the longevity of the pit.
4. Assembling the Frame
Position the cut timbers around the stake, using long nails to secure the baseboards into the ground and shorter nails for connecting the side pieces. It's important to make sure the stakes are centered within the box and facing each other accurately.
5. Preparing the Ground
We removed grass and weeds from the area and laid down weed block material to discourage future growth beneath the sand.
6. Adding Sand
With the frame in place, it was time to fill the pit with sand. We used about four bags for each pit, ensuring a sufficient layer for the horseshoes to land in.
A Few Unexpected Yet Useful Tips
- Hammer Selection: Interestingly, a smaller hammer proved to be more effective than a large sledgehammer for this project. It offered control and reduced the risk of damaging the wood.
- Backboard Height: To catch any stray horseshoes, we made the backboard of the pit three timbers high. This also added an extra safety measure.
- Dog-Proofing: Our dog found the sand pit irresistible. As a quick solution, I built a cover using leftover materials. This not only protected the sand but also prevented our dog from turning the pit into his playground.
Building the horseshoe pit with my son was about making memories and family time. Even with our dog's interference, fixing it made the project more rewarding.
Playing Surface Maintenance
Maintaining your horseshoe pit ensures optimal gameplay and safety. Follow these simple steps to keep your pet in top condition:
Regular Raking:
- Why Rake?: Regularly rake the surface of your horseshoe pit. Raking helps distribute the sand or gravel evenly, prevents uneven spots, and keeps the pit level.
- How Often?: Aim for weekly maintenance, especially if the pit sees frequent use. After heavy rain or wind, check and rake as needed.
Weed Control:
- Weeds and Grass: Keep an eye out for any weeds or grass trying to invade your pit. Weeds can disrupt the playing surface and affect the trajectory of horseshoes.
- Remove Weeds: Pull out any weeds by hand or use a small garden tool. Be thorough to prevent regrowth.
Smooth the Surface:
- Level It Out: Use a flat-edged rake to smooth out any uneven areas. Pay attention to spots where horseshoes land; they should have a consistent surface.
- Fill Low Spots: If you notice low spots, add a bit of sand or gravel to level them.
Check Stakes and Markers:
- Stake Alignment: Ensure the stakes are still aligned properly. Over time, they might shift due to weather or play.
- Re-Mark Foul Lines: If the foul lines (the distance from the stakes) have faded, remark them using paint or chalk.
Inspect for Hazards:
- Debris: Regularly remove any debris (sticks, leaves, etc.) from the pit. These can affect gameplay and pose tripping hazards.
- Inspect Stakes: Check that the stakes are secure and not wobbly. Tighten or reposition them if needed.
Address Drainage Issues:
- Drainage: If your pit tends to collect water after rain, consider improving drainage. Add a slight slope to the pit or build a small trench to redirect water away.
A well-maintained horseshoe pit ensures fair play, reduces the risk of injury, and enhances the overall experience for players.
FAQs About How to Build a Horseshoe Pit
Our comprehensive FAQs guide will help you discover everything you need to know about building a horseshoe pit, from materials to measurements.
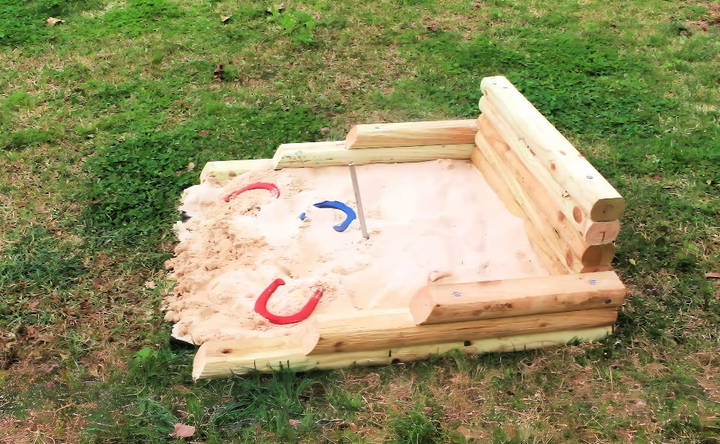
A regulation horseshoe pit requires stakes to be 40 feet apart. Each stake should sit within a rectangular box that measures at least 31 by 43 inches but no larger than 36 by 72 inches. For backyard play, common dimensions are 36 by 48 inches for each box. You’ll need two boxes—one for stakes and one for pitching. So, allocate a 48-by-6-foot rectangular area for the game. Orient the pits in a north/south direction for comfortable play all day.
Assuming you're making a pair of 36 by 48-inch horseshoe pits, cut eight pieces of lumber: four measuring 36 inches and four measuring 48 inches. Assemble these pieces into two identical rectangular boxes using appropriate fasteners. You can set the boxes directly on the ground or dig trenches for a flush fit. Optionally, place landscaping fabric at the bottom to suppress weed growth and prevent sand from sinking into the dirt.
Set your stakes a minimum of 21 inches from the front of each box. The stakes should protrude about 14 to 15 inches from the ground. Drive them on a bias, leaning slightly toward the other pit at an angle of about 3 inches.
The best sand for horseshoe pits is the type used for sandboxes. Purchase enough sand to fill both pits. Depending on the exact dimensions of your boxes, expect to use five to six bags of sand per pit.
If you want to invest more effort, consider adding backboards and pitching platforms. However, a simple design is often enough to entertain players of all ages and skill levels. Now grab your horseshoes, enjoy the game, and remember: “Scoring a ringer” might be harder than building the pit itself!
Final Thoughts
Starting a project like this can feel overwhelming, but taking small steps makes it easier. The first swing of a hammer or the first pitch of a horseshoe brings joy and satisfaction. Just remember, like any project, it takes time and patience. I believe you can do this, and I am excited for you to build your own DIY horseshoe pit!


