A tree swing brings back memories of childhood fun and adds charm to any backyard. I remember the day I decided to make one. I wanted a place where my family could relax and enjoy simple pleasures. With a sturdy tree and some basic materials, I began planning. The process was simpler than I thought, and I learned a lot along the way.
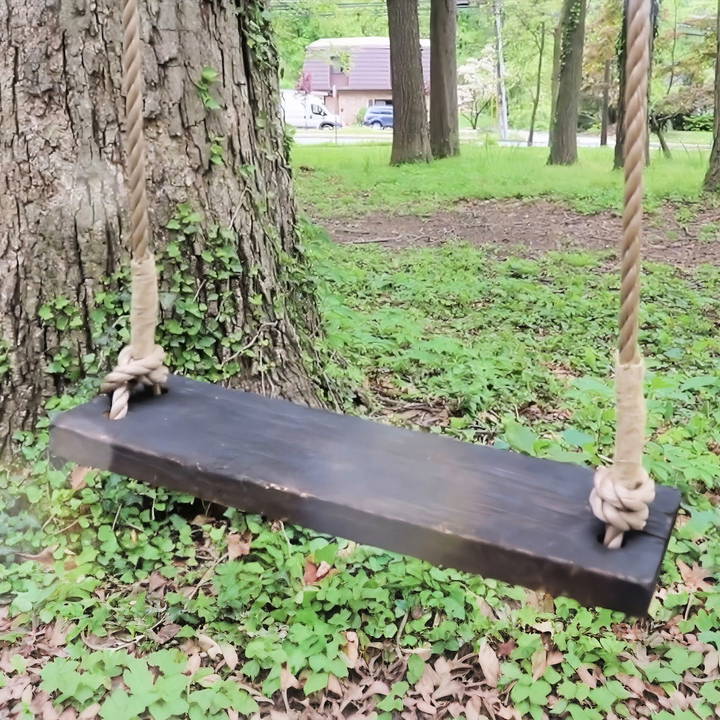
Making a DIY tree swing is not only satisfying but also quite easy. All you need are some strong ropes, a solid wooden seat, and a reliable tree branch. The steps are clear, and the results are rewarding. I've laid out everything in detail below. I'm here to help you build a cozy corner in your backyard that you'll love.
Gathering the Materials: Essentials for Success
Before diving into the project, it's essential to have the right materials on hand. Each component plays a crucial role in ensuring your swing is safe, durable, and enjoyable.
- Rope: The rope is the backbone of your swing. It's crucial to choose a strong, weather-resistant rope designed to bear weight safely. I recommend using a marine-grade rope, which provides excellent durability and resistance to the elements.
- Seat: Your swing's seat can be made from different materials, but I used a wooden plank. Wood offers a classic, sturdy option that can be beautifully customized. Selecting weather-resistant wood, such as cedar or redwood, helps prolong the life of your swing.
Tools
You'll need a well-equipped toolbox. Here's why each tool is necessary:
- Drill: Essential for making holes in the wooden seat.
- Saw: Required to cut the wooden plank to your desired size.
- Measuring Tape: Accurate measurements ensure the swing is balanced.
- Sandpaper: Smooth the edges of the wooden seat, making it safer and more comfortable.
- Ladder: Crucial for reaching the branch where your swing will hang.
Step by Step Instructions
Learn how to make a DIY tree swing with our step-by-step guide. From choosing the perfect tree to ensuring safety and enjoyment, get started today!
Choosing the Perfect Tree
The first step is finding the right tree. Look for a mature, healthy tree with a strong, horizontal branch. Ideally, the branch should be at least 8 inches in diameter to support weight. Make sure there are no visible signs of decay or weakness in the branch.
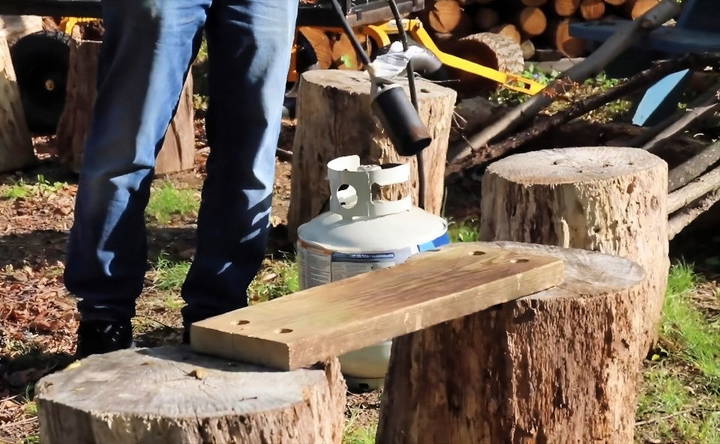
Preparing the Seat
- Cutting the Wood: Use your saw to trim the wooden plank to your preferred size. The seat I buildd was about 24 inches long, which comfortably seats both children and adults.
- Drilling Holes: Next, drill two holes on each end of the plank. These holes should be evenly spaced and align perfectly on both sides to ensure balance.
- Sanding the Edges: Use sandpaper to smooth out the edges and surface. This step is vital for preventing splinters and making it comfortable to sit on.
Attaching the Rope
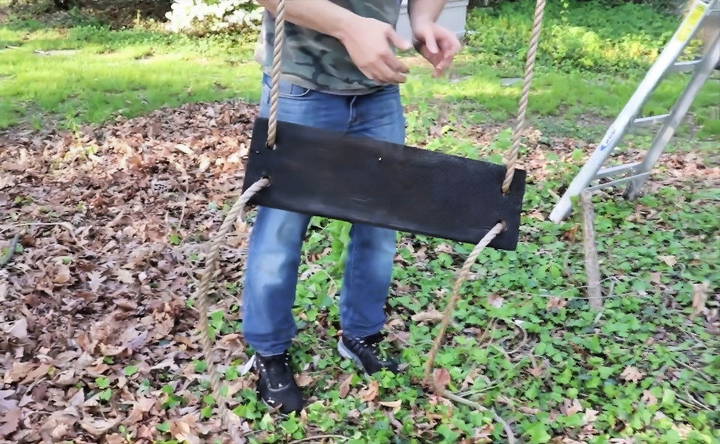
- Measure and Cut: Determine the length of the rope you'll need. The height at which you hang the swing will dictate this, so measure carefully to ensure the swing is not too high or low.
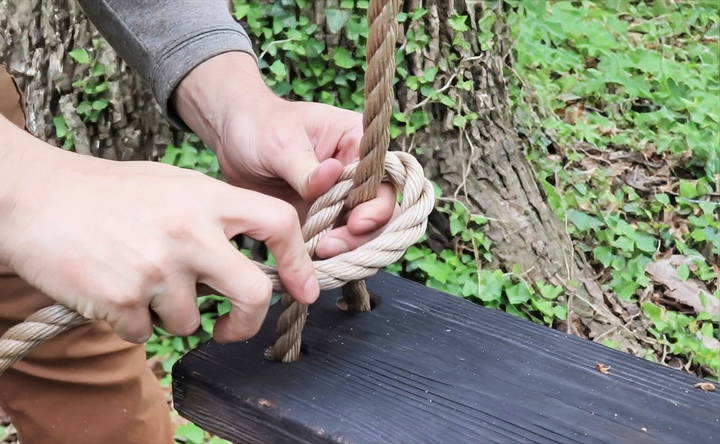
- Thread the Rope: Pass the rope through the holes on each side of the seat. Make sure you leave enough rope to tie secure knots both at the seat and on the tree branch.
- Tie Secure Knots: Using strong knots, such as the bowline knot, will provide added security for your swing. The knots should be tight and checked periodically for loosening.
Hanging the Swing
- Positioning: Use the ladder to reach the selected tree branch. Ensure you have someone to assist you for safety reasons.
- Loop the Rope: Throw the rope over the branch several times and make sure it is even on both sides before tying the knots.
- Test the Swing: Before letting anyone sit on it, test the swing yourself to make sure it holds steady and the ropes are secure. Adjust as necessary.
The Final Touches: Ensuring Safety and Enjoyment
Once your swing is up, it's time to ensure everything is just right for a safe and thrilling experience.
Routine Checks
Regularly inspect the knots, the condition of the rope, and the integrity of the tree branch. Wear and tear can occur over time, and it's best to address any issues promptly.
Enhancing the Experience
Adding a soft cushion to the seat can make your swing more comfortable. Also, consider enhancing the surrounding area with mulch or grass to build a soft landing zone.
Enjoying Your New Backyard Treasure
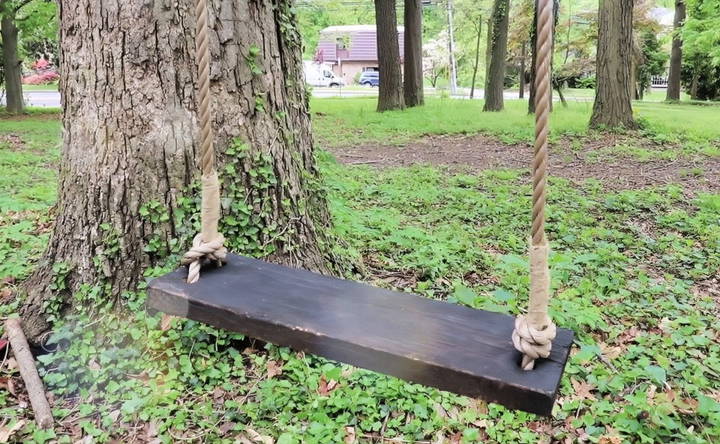
Building this DIY tree swing was an absolute pleasure, and seeing it become a favorite spot for both kids and adults was incredibly rewarding. It not only adds a whimsical element to the yard but also encourages everyone to enjoy the great outdoors.
This project taught me a lot about patience and precision. Each step—from selecting the right materials to tying secure knots—was crucial for ensuring the swing's longevity and safety. Plus, it became a valuable bonding activity for my family and me, as we worked together to bring a simple idea to life.
Customization Ideas
Customizing your DIY tree swing can make it unique and special. Here are some simple and creative ideas to personalize your swing:
Design Variations
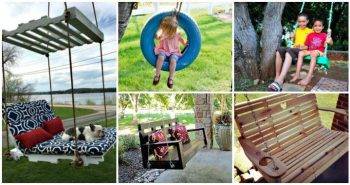
- Traditional Wooden Swing: Use a sturdy wooden plank as the seat. Sand the edges to prevent splinters. Paint or stain the wood to protect it from the elements.
- Tire Swing: Use an old tire as the seat. Clean the tire thoroughly before use. Drill drainage holes to prevent water accumulation.
- Disc Swing: Use a round wooden or plastic disc. Ensure the disc is strong enough to support weight. Add a cushion for extra comfort.
Personalization
- Paint and Decorate: Paint the swing in bright colors or patterns. Use weather-resistant paint to ensure longevity. Add stickers or decals for a fun touch.
- Cushions and Padding: Add a cushion to the seat for comfort. Use outdoor fabric that can withstand weather conditions. Secure the cushion with ties or Velcro.
- Rope and Chain Options: Use colorful ropes or chains to hang the swing. Ensure the materials are strong and weather-resistant. Consider using braided ropes for a decorative look.
Safety Enhancements
- Handles and Backrests: Add handles on the sides for extra support. Install a backrest for added comfort and safety. Ensure all additions are securely attached.
- Non-Slip Surfaces: Apply non-slip tape or paint to the seat. This helps prevent slipping, especially in wet conditions.
Eco-Friendly Touches
- Recycled Materials: Use recycled wood or tires for the swing. This is an environmentally friendly option.
- Natural Decorations: Decorate the swing with natural elements like vines or flowers. Ensure these decorations do not interfere with the swing's function.
Seasonal Themes
- Holiday Decorations: Decorate the swing for different holidays. Use removable decorations to change the theme easily.
- Seasonal Colors: Paint the swing in colors that match the season. This can make the swing a festive addition to your yard.
By customizing your tree swing, you can build a unique and enjoyable experience for everyone. These ideas are easy to implement and can make your swing stand out.
Troubleshooting Common Issues
Even with careful planning, you might encounter issues with your DIY tree swing. Here are some common problems and how to fix them:
Swing Stability
Uneven Swinging:
- Problem: The swing tilts to one side.
- Solution: Check if the ropes or chains are of equal length. Adjust them to ensure both sides are even. Make sure the branch is level and strong enough to support the swing.
Swing Swaying Too Much:
- Problem: The swing moves excessively side to side.
- Solution: Ensure the swing is hung from a single, sturdy branch. If using two ropes, they should be spaced evenly apart. Tighten the ropes or chains to reduce excessive movement.
Rope and Chain Wear
Fraying Ropes:
- Problem: The ropes start to fray or wear out.
- Solution: Regularly inspect the ropes for signs of wear. Replace them immediately if they show significant fraying. Use weather-resistant ropes to increase durability.
Rusty Chains:
- Problem: Chains begin to rust.
- Solution: Use galvanized or stainless steel chains to prevent rust. If rust appears, clean it off with a wire brush and apply a rust-resistant coating.
Seat Issues
Uncomfortable Seat:
- Problem: The seat is hard or uncomfortable.
- Solution: Add a cushion or padding to the seat. Use outdoor fabric that can withstand weather conditions. Ensure the cushion is securely attached to prevent slipping.
Slippery Seat:
- Problem: The seat is too slippery.
- Solution: Apply non-slip tape or paint to the seat surface. This will provide better grip and prevent slipping, especially in wet conditions.
Attachment Problems
Loose Knots:
- Problem: Knots in the ropes come undone.
- Solution: Use strong, secure knots like the bowline or double fisherman's knot. Regularly check and tighten the knots to ensure they remain secure.
Weak Attachment Points:
- Problem: The attachment points on the tree or swing are weak.
- Solution: Use heavy-duty eye bolts or tree swing straps to attach the swing. Ensure they are properly installed and can support the weight of the swing and user.
Environmental Factors
Weather Damage:
- Problem: The swing is damaged by weather conditions.
- Solution: Use weather-resistant materials for all parts of the swing. Regularly inspect and maintain the swing to address any weather-related damage promptly.
Tree Growth:
- Problem: The tree grows and affects the swing's position.
- Solution: Periodically adjust the swing's height and position to accommodate tree growth. Ensure the swing remains level and secure as the tree changes.
By addressing these common issues, you can ensure your tree swing remains safe and enjoyable for everyone. Regular maintenance and inspections are key to a long-lasting and fun swing experience.
FAQs About DIY Tree Swing
Discover answers to common questions about DIY tree swing projects, including materials, safety tips, and installation steps.
No, not every tree is suitable. Choose a healthy tree with a strong horizontal branch, at least 8 inches in diameter, and free from visible decay. This ensures the tree can support the swing safely.
Ensure the holes drilled in the seat are evenly spaced. When tying the rope, measure to confirm both sides are equal in length. Perform a swing test and make adjustments as necessary.
Many local hardware stores offer tool rentals, or you might consider borrowing from a friend or neighbor. Having the right tools is crucial for the swing's safety and your convenience.
Perform a monthly inspection, especially if the swing is used frequently. Check for any fraying in the rope or weakness in the knots and branch.
Final Thoughts
Building a DIY tree swing is more than just a weekend project; it's an opportunity to build memories. Watching the kids take their first swings or enjoying a quiet afternoon under the canopy of leaves truly makes all the effort worth it. Plus, with the knowledge and skills gained through this project, I'm ready to tackle even more DIY adventures!
By following this guide, I'm confident you can build a beautiful, safe, and fun swing that will be cherished for years to come.


