Making my DIY thermal camera was an exciting project. I had some basic electronics skills, but I had never tried something like this before. It started when I read about thermal cameras online. I was curious to see how they worked and if I could make one myself. With a few tools and some basic components, I decided to give it a shot.
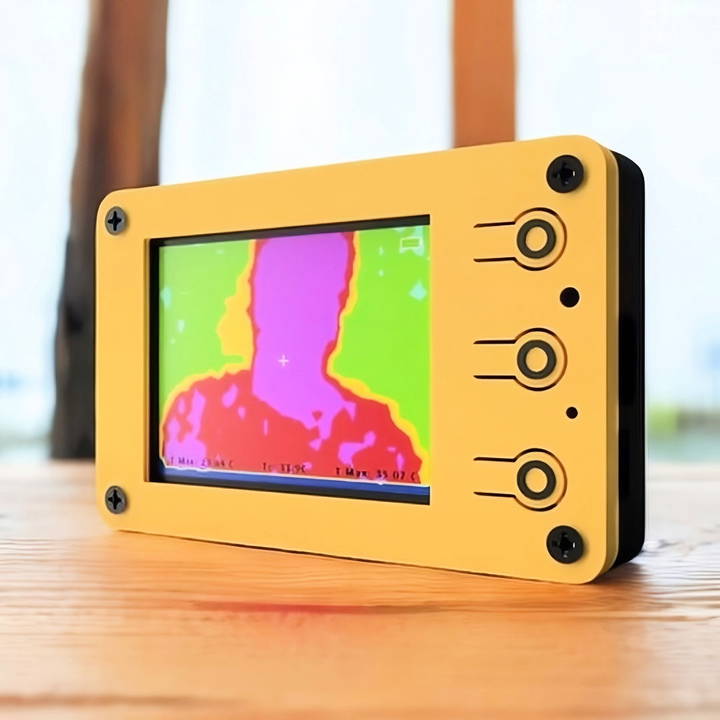
Following a guide, I slowly assembled the parts of my DIY thermal cam. I used a low-cost thermal sensor and connected it to a small microcontroller. It was challenging but fun. Soon, I could see heat signatures on my screen. I felt a great sense of achievement. This project helped me learn a lot, and I believe it can help you, too.
Introduction to Thermal Imaging Technology
Thermal imaging technology is a fascinating way to see the world. It allows us to visualize heat, which is something our eyes can't do on their own. This technology is used in many fields, from home inspections to wildlife research, because it helps us detect heat sources and measure temperature differences.
What is Thermal Imaging?
At its core, thermal imaging is all about detecting heat and turning it into an image we can see. Everything that has a temperature above absolute zero emits heat in the form of infrared energy. Thermal cameras are special devices that can see this energy and make pictures, called thermograms, that show us where the heat is and how much there is.
How Does a Thermal Camera Work?
A thermal camera works by capturing infrared radiation, which is a type of light that's invisible to our eyes. The camera has a sensor that detects this light and converts it into electrical signals. These signals are then processed to make a visual image that represents different temperatures with different colors. Usually, warmer areas are shown in reds and yellows, while cooler areas are depicted in blues and purples.
Why is Thermal Imaging Useful?
Thermal imaging is incredibly useful because it can help us see problems we wouldn't normally be able to see with our eyes. For example, it can show where a building is losing heat, which can help make it more energy-efficient. It can also help find people or animals in the dark or in smoke-filled rooms, which is why it's often used by firefighters and search and rescue teams.
The Benefits of Understanding Thermal Imaging
Understanding how thermal imaging works can be beneficial for anyone interested in DIY projects, especially those looking to make their own thermal camera. By learning about this technology, you can apply it in creative ways to solve problems, save energy, or even just satisfy your curiosity about the world around you.
Thermal imaging is a tool that can give us a new perspective on the world. It's not just for professionals; with a bit of knowledge and creativity, anyone can explore the fascinating world of heat and temperature.
Why the MLX90640?
The backbone of our DIY thermal camera is the MLX90640 thermal image sensor. This little powerhouse offers a pixel array of 32x24 at a fraction of the cost of other sensors - all for about $30! A perfect blend of affordability and functionality for our budget-friendly project.
Materials Needed:
- MLX90640 Thermal Image Sensor: To capture the thermal data.
- ESP32 Microcontroller: Acts as the brain to process our data.
- 1.8" TFT Display: To display the thermal images we capture.
- Lithium Polymer Battery: This provides a portable power source.
- USB Type-C Port with Charging Circuit: For programming the device and charging.
- 3D Printed Enclosure: To house all our components neatly.
Step by Step Instructions
Build your own DIY thermal camera step-by-step. From the circuit to testing, discover a colorful world with our easy guide!
Assembling Your Thermal Camera
Discover step-by-step instructions on how to assemble your thermal camera: circuit, power management, display, and enclosure. Perfect for DIY enthusiasts!
Step 1: The Circuit
Begin by laying out the ESP32, connecting it with the MLX90640 sensor. Integration is straightforward, with the ESP32 facilitating the data processing from our sensor. The USB Type-C port, along with its charging circuit, allows us to program the ESP32, and also keeps our device powered up.
Step 2: Power Management
Integrate the Lithium Polymer battery with a voltage regulator to ensure a steady 3.3V supply crucial for our ESP32's operation. With careful soldering and layout, this becomes the life source of our thermal camera.
Step 3: Bringing It to Life with a Display
The 1.8" TFT display connects to the ESP32, ready to showcase the thermal wonders we're about to capture. This step makes the project really start to feel like a camera.
Step 4: The Enclosure
All the electronics are neatly encompassed within a 3D printed enclosure I designed. This not only protects the components but also gives it a professional appearance. The design includes cutouts for the display, USB port, and buttons for operation.
Programming the Beast
Programming the ESP32 was the most intellectually demanding part of this journey. However, using readily available libraries and sample code linked with the ESP32 and MLX90640, I managed to compile a functional firmware that interprets the data from the sensor and displays it in a comprehensible thermal image on the TFT display.
The key here is patience and a bit of coding know-how. If you're not a seasoned coder, worry not. The internet is a treasure trove of resources and communities eager to help beginners.
Testing It Out: A World in Colors
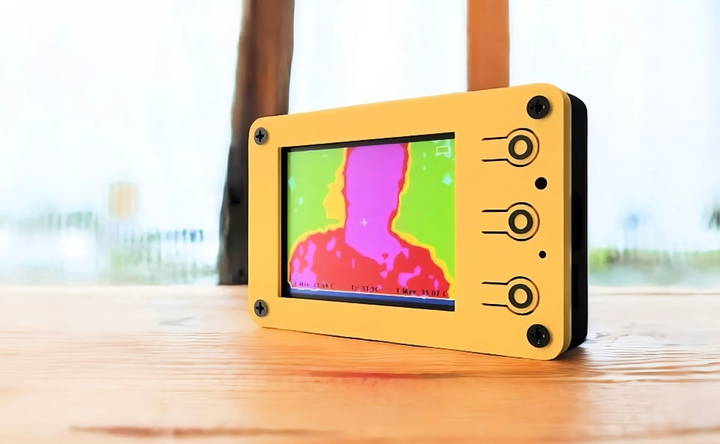
With the camera assembled and programmed, I powered it on. To my amazement, my creation sprung to life, translating the invisible heat patterns into a spectrum of colors right before my eyes. Electronics, human beings, pets, you name it, everything showed a new dimension when viewed through my DIY thermal camera.
Starting this project with more enthusiasm than expertise, making the thermal camera was rewarding, improving my technical skills and providing a practical tool for future projects.
Troubleshooting and Maintenance
When you embark on the journey of building a DIY thermal camera, it's important to be prepared for the bumps along the way. Troubleshooting is a natural part of any DIY project, and maintenance ensures your creation continues to work well into the future.
Common Issues and Solutions
- Power Problems: If your thermal camera isn't powering on, check all connections and ensure the power source is functioning. Batteries should be fully charged, and if using a Raspberry Pi, confirm that the micro USB cable is delivering power.
- Sensor Issues: The heart of your thermal camera is the sensor. If it's not detecting heat correctly, ensure that it's properly connected. For sensors like the MLX90640, you may need to update the firmware or adjust the I2C device rate on your Raspberry Pi.
- Image Clarity: If the images aren't clear or seem off, calibration is key. You might need to adjust the focus or update the software that processes the images. Remember, thermal cameras interpret heat, so environmental factors like sunlight or reflections can affect the readings.
- Software Glitches: Software is what brings your camera to life. If you're experiencing glitches, try updating the software or reviewing the code for errors. Online communities can be a great resource for finding solutions to common software issues.
Regular Maintenance Tips
- Keep It Clean: Dust and dirt can interfere with the camera's ability to detect heat. Gently clean the lens and sensor with a soft, dry cloth.
- Software Updates: Keep the software up to date. Developers often release patches that improve performance and add new features.
- Check the Connections: Regularly inspect all electrical connections and wires for signs of wear or damage. Loose connections can lead to inconsistent performance.
- Stay Informed: Join forums or follow blogs that focus on DIY thermal imaging. They can provide valuable insights and tips for maintaining your camera.
When to Seek Help
Don't hesitate to seek help if you're stuck. The DIY community is full of friendly, knowledgeable people who love to share their expertise. Whether it's a forum, a YouTube tutorial, or a local makerspace, there's always someone willing to assist.
Making and maintaining a DIY thermal camera can be rewarding. With patience and proper troubleshooting, you'll gain both a functional device and deeper knowledge of thermal imaging.
Legal and Safety Considerations
When diving into a DIY project like building a thermal camera, it's crucial to be aware of the legal and safety considerations to ensure a smooth and trouble-free experience.
Understanding the Legal Landscape
- Privacy Laws: Thermal cameras can detect heat signatures through walls and other barriers, which might raise privacy concerns. It's important to understand and respect privacy laws in your area, which may restrict the use of such devices to protect individuals' privacy.
- Regulations on Infrared Technology: Some countries have specific regulations on the use of infrared technology. These rules might limit the power, range, or functionality of thermal cameras, especially for commercial use. Make sure to check the local regulations before starting your project.
Prioritizing Safety
- Electrical Safety: Working with electronic components requires caution. Always disconnect the power before making any changes to your setup. Use insulated tools and wear protective gear if necessary.
- Handling Sensors and Components: Infrared sensors and other electronic components can be sensitive. Handle them with care to avoid damage, and follow the manufacturer's instructions for use and installation.
- Testing and Calibration: When testing your DIY thermal camera, start in a safe environment where there's no risk of fire or injury. Calibration is also important to ensure the camera's readings are accurate and reliable.
Ethical Use and Best Practices
- Responsible Usage: Use your thermal camera responsibly. Avoid using it in ways that could invade someone's privacy or in any situation that could be considered unethical.
- Sharing Your Project: If you plan to share your project online or with others, be transparent about its capabilities and limitations. Encourage ethical use and provide guidance on legal and safety considerations.
By keeping these legal and safety considerations in mind, you can enjoy building and using your DIY thermal camera while being a responsible member of the DIY community.
FAQs About DIY Thermal Camera
Discover essential FAQs About DIY Thermal Camera, covering setup, functionality, and usage tips in one concise guide.
A DIY thermal camera is a homemade device that captures images based on the heat emitted by objects. Unlike regular cameras, it uses infrared sensors to detect temperature differences and create a visual heat map.
A DIY thermal camera uses an infrared sensor to detect heat (infrared radiation) emitted by objects. This sensor is connected to a microcontroller or single-board computer like a Raspberry Pi, which processes the data and displays it as an image representing different temperatures.
Yes, you can build a DIY thermal camera for around $100. By sourcing affordable components and following detailed build instructions available online, you can make a functional thermal camera without the high cost of commercial ones.
A DIY thermal camera can be used for various applications, including:
Home insulation checks: Detecting areas where heat is escaping or cold drafts are entering.
Electronics troubleshooting: Identifying overheated components on circuit boards.
Security: Setting up a basic infrared security camera.
Educational projects: Learning about infrared technology and thermal imaging.
To ensure the accuracy of your DIY thermal camera, follow these steps:
Calibrate the sensor: Use a known temperature source, like boiling water or an ice bath, to calibrate your infrared sensor.
Update the firmware: Keep the microcontroller or single-board computer's firmware up-to-date to ensure it's running efficiently.
Shield from external factors: Protect the sensor from direct sunlight, wind, and other environmental factors that could affect its readings.
Regular testing: Periodically test your camera with known temperature sources to ensure it maintains accuracy over time.
Final Thoughts
Doing a DIY thermal camera project can be both educational and rewarding. Get started today with the steps provided here, and you might find joy in making something amazing.


