Building a DIY stair railing on a budget can be rewarding. One weekend, I decided to improve the safety and look of my stairs without spending too much. I planned it out, bought affordable materials, and was ready to start. This project not only saved me money but also gave me a sense of accomplishment.
With some basic tools and patience, the process was easier than I expected. First, I measured the distance and height of the railing. Then, I bought some wooden railings, brackets, and screws. I found tutorials helpful to ensure I did it right. If you follow these steps, you, too, can make something sturdy and stylish.
Modern Stair Railing Designs
When it comes to modern stair railing designs, the focus is on making a functional feature that complements your home's aesthetic while ensuring safety. Today's trends blend innovation with style, offering a variety of options to suit any taste.
- Sleek Materials: The use of materials like stainless steel, glass, and cable has become increasingly popular. These materials not only provide a clean, minimalist look but also offer durability and ease of maintenance. For instance, glass railings allow for unobstructed views and light flow, making spaces appear larger and more open.
- Wooden Warmth: Wood remains a timeless choice for stair railings, bringing warmth and natural beauty into the home. Modern designs often combine wood with metal or glass, striking a balance between traditional charm and contemporary flair.
- Industrial Influence: Industrial-style railings, characterized by their use of raw metals and geometric shapes, are on the rise. They add an edgy, urban touch to interiors and are particularly suited to loft spaces or homes with an industrial decor theme.
- Custom Curves: Curved and spiral staircases are making a comeback, offering elegance and a focal point within a space. Railings for these staircases are often custom-made to ensure a perfect fit and flow.
- Safety First: Beyond aesthetics, safety is paramount. Railings should be at a comfortable height, typically around 34 to 38 inches, and balusters should be spaced no more than 4 inches apart to prevent small children from slipping through.
- DIY-Friendly Options: For those looking to install or update stair railings themselves, there are plenty of DIY-friendly options. Kits that include all necessary components are available, and many manufacturers provide online tutorials to guide you through the installation process.
Design a stair railing that reflects your style and meets safety standards, whether industrial or classic. Keep it simple for both beauty and function.
Materials Needed and Their Purpose
- Sawzall: Essential for the demolition of the old railing.
- 16 gauge nails: To hold bottom parts in place.
- Cardboard: Laid out around the work area to protect floors during the demo.
- Various Tools (hammer, chisel, etc.): Remove the remaining post material.
- Baseboards: For a clean and finished look after the removal of the post-railing.
- 18 gauge nailer: To secure the baseboards in place.
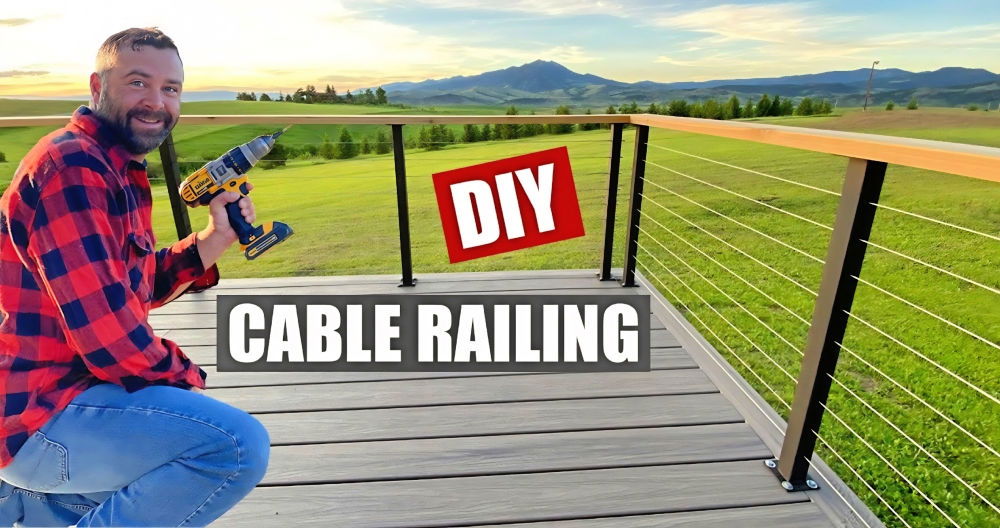
- Viewrail System: A comprehensive, easy-to-install cable railing system.
- Post level: To ensure posts are perfectly plumb.
- Composite shims: These are used to fine-tune the post alignments.
- Right Angle Grinder: This is for cutting cables to length.
- Protective Gear: Safety glasses and gloves for protection during the cutting process.
Step by Step Instructions
Learn how to install a DIY stair railing with our easy step-by-step instructions. Perfect for beginners. Safe, stylish, and budget-friendly!
Getting Started: The Demolition
The first step in my project was to remove the old railing. Armed with a Sawzall, I cut through the top rail that connected each post. The bottom parts were secured with some 16 gauge nails, but once those were cut, they were easy to pry off. I learned quickly to lay cardboard around my work area to protect my floors, a tip I can't stress enough.
Handling the Posts
Initially, I hoped simply cutting off the top section of the posts would reveal an easy way to remove them. However, they were solidly in place, leading me to try various methods to remove them bit by bit. This part of the process was slow and somewhat challenging, teaching me persistence and problem-solving. Eventually, cutting the posts further down and attacking from the inside of the stairs with a Sawzall proved effective.
Baseboards Installation
After clearing the space completely, I measured cut, and painted new baseboards to match my planned railing system, attaching them with an 18 gauge nailer. This portion of the project highlighted the importance of attention to detail, providing a solid foundation for the new railing.
Installing the New Cable Railing
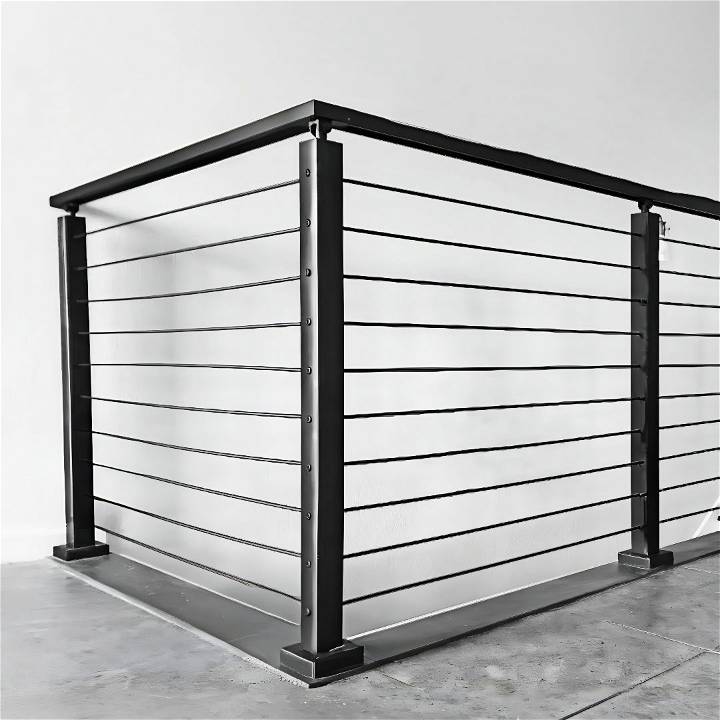
Choosing the Viewrail system was a game-changer. Their cable stair railing system was not only sturdy and beautiful but also shipped directly to my door, with all components clearly labeled and protected. Installing the posts evenly along the length of my staircase was straightforward once I got the hang of spacing and ensuring they were plum with the post level.
The top rail installation was satisfying. Attaching it to the posts with the provided hardware was a breeze, especially after cutting them at a 45-degree angle for corners. This step really made me appreciate how much the right materials and clear instructions streamline a project like this.
The Cables
Adding the cables was the most transformative step. Feeding them through the posts, crimping the ends, and tensioning them brought the whole system together. This step was another lesson in patience and the importance of precision. Each cable needed to be fed, cut and tensioned properly to maintain the system's integrity and appearance.
The Result
After a little over a day's work, my staircase area was completely transformed. The cable railing system opened up my space dramatically, offering a modern touch that aligns well with my home's overall aesthetic.
Troubleshooting Common Stair Railing Issues
When installing or maintaining a stair railing, you might encounter a few hiccups along the way. Here's a troubleshooting guide to help you solve common problems with ease and confidence.
- Loose Railings: Over time, railings can become loose. This is often due to the natural expansion and contraction of materials. To fix this, tighten any loose screws or bolts. If the railing remains wobbly, you may need to add additional support brackets.
- Squeaky Steps: If your stairs squeak when the railing is used, it could be due to loose treads or risers. Apply wood glue to the affected areas and secure them with screws. For a temporary fix, sprinkling talcum powder between the treads can reduce noise.
- Cracks in Wood: Wooden railings can develop cracks. Small cracks can be filled with wood filler, sanded down, and repainted or stained to match. Larger cracks might require the replacement of the affected section.
- Rust on Metal Railings: Rust is a common issue with metal railings, especially in humid environments. Remove rust with a wire brush and apply a rust-inhibiting primer followed by metal paint. Regular maintenance can prevent rust from reoccurring.
- Chipped Paint: Chipped paint can be unsightly. Sand the area until smooth, and apply a primer before repainting. Use paints formulated for the material of your railing for the best results.
- Difficulty in Installation: If you're struggling with installation, review the manufacturer's instructions. Ensure you have the correct tools and materials. Don't hesitate to seek help from a friend or a professional if needed.
- Mismatched Components: Sometimes, parts may not fit together as expected. Double-check measurements and product specifications. If necessary, exchange the parts for the correct size or adjust the installation space accordingly.
- Baluster Spacing: Incorrect baluster spacing can be a safety hazard. The space between balusters should not exceed 4 inches. If you find spacing issues, reposition the balusters to meet safety standards.
When in doubt, it's always best to consult with a professional. Safety should never be compromised. With these tips, you'll be well-equipped to handle common stair railing issues and ensure a safe and beautiful result.
Maintenance and Upkeep
Keeping your stair railing in top condition not only ensures it looks good but also guarantees it remains safe to use. Here's a straightforward guide to maintaining various types of stair railings.
Wooden Railings:
- Clean Regularly: Dust and clean wooden railings with a soft cloth or duster. For deeper cleaning, use a wood cleaner or a mixture of water and mild detergent, and finish with a dry cloth to avoid moisture damage.
- Inspect for Damage: Look for signs of wear, such as splinters or loose parts. Repair any damage promptly to maintain the integrity of the railing.
- Refinish Periodically: Over time, the finish on wood can fade or become scratched. Refinish your railing every few years to protect the wood and keep it looking fresh.
Metal Railings:
- Rust Prevention: Check for rust, especially in areas with high humidity. Treat any rust spots immediately with a rust remover, then prime and paint the affected area.
- Cleaning: Wipe down metal railings with a damp cloth. For outdoor railings, you may need to use a hose to remove dirt and debris.
- Lubricate Joints: If your railing has any moving parts, such as a gate, lubricate the hinges to ensure smooth operation.
Glass Railings:
- Streak-Free Shine: Use a glass cleaner or a mixture of vinegar and water to clean glass panels. Use a squeegee or a lint-free cloth for a streak-free finish.
- Check Fittings: Ensure that all fittings and supports are secure. Tighten any that have become loose over time to prevent wobbling or instability.
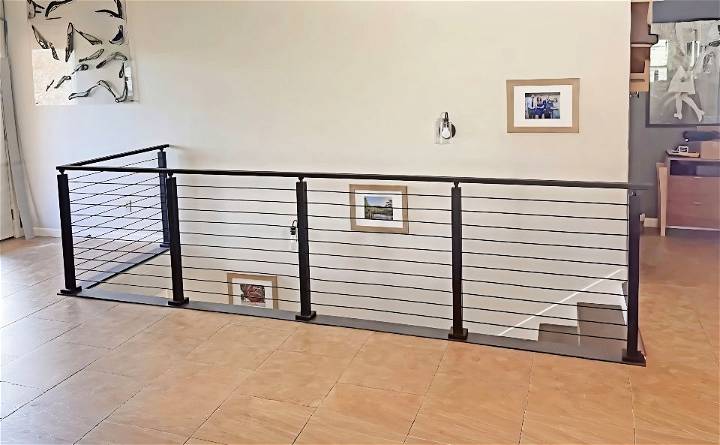
Cable Railings:
- Tension Check: Cable railings should be taut. If you notice any sagging, adjust the tensioners according to the manufacturer's instructions.
- Clean Cables: Use a mild cleaner and a soft brush to clean the cables. Rinse with water and dry to prevent corrosion.
General Tips:
- Annual Inspections: Conduct a thorough inspection of your stair railing at least once a year. Look for any signs of damage or wear and address them immediately.
- Professional Help: If you're unsure about how to fix a problem, don't hesitate to call in a professional. It's better to be safe than sorry, especially when it comes to structural elements like stair railings.
By following these simple maintenance steps, you can ensure your stair railing remains a safe and attractive feature in your home for years to come. Regular upkeep is the key to longevity and safety.
Safety Compliance and Building Codes
Ensuring your stair railing project meets safety compliance and building codes is crucial for the well-being of everyone who uses it. Here's a straightforward guide to help you understand and apply these standards.
- Know Your Codes: Building codes can vary by location, but they generally follow similar principles. For residential staircases, the International Residential Code (IRC) is a common standard. It outlines the minimum requirements for stair width, headroom, riser, tread heights, and more.
- Width and Clearance: The minimum width for stairways should not be less than 36 inches clear. When handrails are present, they should not project more than 4 ½ inches on either side.
- Headroom and Vertical Rise: Proper headroom is essential. The minimum headroom clearance for stairs should be no less than 6 feet 8 inches. Additionally, the maximum vertical rise for stairs between landings or floor levels is 151 inches (about 12 feet 7 inches).
- Riser Height and Tread Depth: Consistency in riser heights and tread depths is important to prevent tripping. The IRC provides limitations on riser heights and minimum tread widths to ensure a uniform flight of stairs.
- Handrails and Guardrails: Handrails and guardrails are not just for support; they're a safety barrier. They must be graspable and sturdy, and the balusters should be spaced to prevent small children from slipping through.
- Professional Consultation: If you're unsure about the codes or how to apply them, consult with a local building inspector or a professional. They can provide guidance specific to your area and project.
- Documentation: Keep records of your compliance with building codes, including plans, permits, and inspections. This is not only good practice but may also be required for insurance or future property transactions.
Follow safety and building codes to make your stair railing safe, legal, and attractive. These rules protect you and your loved ones, so adherence is crucial.
FAQs About DIY Stair Railing
Discover answers to common faqs about DIY stair railing. Get tips, materials, and safety guidelines for your home project.
Yes, you can use galvanized steel pipe for an industrial look without any welding. You’ll need floor flanges, fittings, spray paint, construction screws, and a drill. The fittings allow the pipes to connect securely to the flanges, making it a weld-free project.
Updating your stair railing with wrought iron spindles is a great way to add elegance. You'll need the spindles, baluster shoes, a hot glue gun with glue, and a saw with a metal cutting blade. This project requires cutting metal but can be completed in the afternoon.
For narrow stairways, a rebar railing can be a unique and sturdy option. It provides a rustic look and can be customized to fit the aesthetic of your home. The materials and tools required will depend on the specific design you choose.
Safety should be your top priority when installing a DIY stair railing. To ensure safety and compliance with building codes, you should:
Check local building codes for specific requirements on railing height, spacing, and materials.
Use sturdy materials that can withstand the necessary weight and pressure.
Securely fasten all components to the wall or stairs to prevent wobbling or collapse.
Regularly inspect the railing for any signs of wear or damage and repair promptly.
For a creative touch to your stair railing, consider these ideas:
Painted railings: Add a pop of color or intricate designs with paint.
Mixed materials: Combine wood with metal or glass for a contemporary look.
Rope railings: Use thick, marine-grade rope for a nautical theme.
Recycled materials: Repurpose old pipes, wood planks, or metal for an eco-friendly option.
Final Thoughts
After finishing my DIY stair railing, I was proud of what I did. It made my home safer and added personal charm. If I can do it, you can too. Give these steps a try; they'll help you build your own railing on a budget.


