Paver patios are a popular choice for homeowners looking to make a functional and attractive outdoor space. Essentially, a paver patio is an outdoor floor or platform made from paving stones, which are pieces of concrete or brick that are often used to make outdoor flooring. These patios can transform a simple backyard into a cozy extension of your home, providing a place to relax, entertain, and enjoy the outdoors.
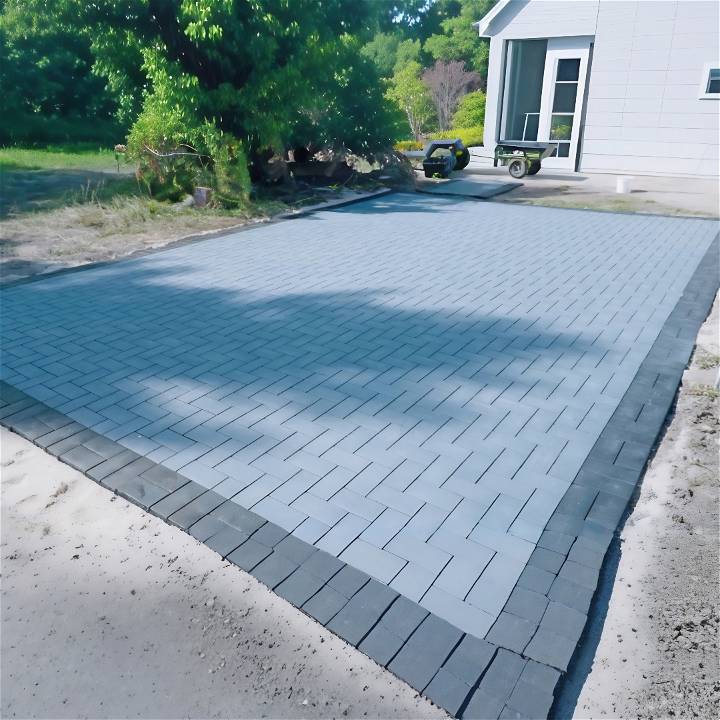
One of the main benefits of paver patios is their versatility. They come in various shapes, sizes, and colors, allowing for a high degree of customization to fit your personal style and the aesthetic of your home. Additionally, they are durable and can withstand various weather conditions, making them a long-lasting addition to your property.
Planning and Materials
Every successful project starts with a good plan. For me, it was about defining the space (16 feet by 25 feet) and picking materials that would be easy for a DIY newbie like myself, without compromising on the look.
Materials Needed:
- Ryobi Brushless Battery Powered Tiller: Perfect for breaking down compact soil and making excavation a breeze.
- Wheelbarrow & Shovels: Essential for moving dug-up soil.
- Road Mix (Base Material): Provides a strong foundation for the pavers.
- Sand: Needed for leveling and setting the pavers in place.
- Aspire Pavers by Brava: The star of the show! They are lightweight, easy to work with, and look fantastic.
- Tape Measure & Markers: For accurately planning out your area.
- PVC Pipes and 2x4 Lumber: For leveling the sand perfectly.
- Plate Compactor: For compacting the base material and sand, ensuring a stable paver installation.
- Landscape Adhesive: To secure the edges of the pavers, preventing movement.
Step by Step Instructions
Learn how to build a good-looking DIY paver patio with our step-by-step instructions. From marking and excavation to setting the pavers, we've got you covered!
Step 1: Marking and Excavation
First, I marked out the area for the patio using my tape measure and some markers. Then, the real work began. The Ryobi tiller made breaking up the compacted soil almost fun. Transferring the loosened soil to a different part of my yard with a wheelbarrow, I managed to clear and level the marked area. Remember, the depth you need to excavate depends on your base material's thickness, sand layer, and paver height.
Step 2: Laying the Foundation
After excavating, I spread road mix across the area to a depth of about four to six inches, then compacted it down with the plate compactor. This step is crucial as it forms the stable base for your pavers.
Step 3: Sand Layer
Next, I laid down the sand. Using PVC pipes and a 2x4, I buildd a perfectly level layer of sand over the compacted road mix. This layer was three-quarters of an inch thick. This trick with the PVC pipes works wonders for keeping everything even.
Step 4: Setting the Pavers
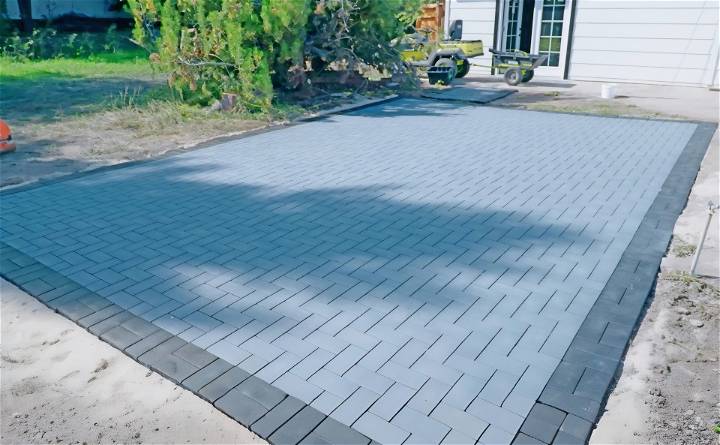
Now for the fun part – laying down the pavers. The Aspire Pavers were a dream to work with. They are much lighter than traditional stone pavers and come with a unique grid system that snaps together like a puzzle. This system not only made the installation process quick and easy but also ensured that I got the pattern right without any headache. I opted for a herringbone pattern with a border for an added visual impact.
Step 5: Compacting and Finishing Touches
Once all the pavers were laid, it was time to compact them into place. After running the plate compactor over the patio area, I spread a final layer of sand over the pavers to fill in any gaps. Then, I sealed the edges with landscape adhesive to ensure everything stayed put.
Weed Prevention and Drainage Solutions
When building a DIY paver patio, it's important to address weed prevention and drainage. These two factors are crucial for maintaining the beauty and functionality of your patio over time.
Weed Prevention: Weeds can grow between pavers and disrupt the smooth surface of your patio. To prevent this, start by laying a good foundation. Use a weed barrier fabric before adding the base material, like gravel or sand. This fabric acts as a block, preventing weeds from sprouting up through the joints of the pavers.
After laying the pavers, fill the joints with polymeric sand. This type of sand contains additives that, when activated with water, form a strong bond that not only deters weeds but also resists erosion.
Drainage Solutions: Proper drainage is essential to prevent water from pooling on your patio, which can lead to pavers shifting or becoming uneven. Ensure your patio has a slight slope away from your house for water runoff. A gradient of about 1 inch for every 4 feet of length is typically recommended.
For areas with heavy rainfall, consider installing a French drain system beneath the patio. This involves digging a trench, laying a perforated pipe, and covering it with gravel. It collects excess water and channels it away from the patio area.
By using weed prevention and drainage strategies, your paver patio will stay stable and attractive long-term. Implementing these measures during installation can prevent future maintenance problems.
Troubleshooting Common Issues
Building a DIY paver patio is a rewarding project, but sometimes, you might encounter issues that need fixing. Here are some common problems and their solutions:
- Pavers Settling or Shifting: If your pavers begin to settle or shift, it could be due to an inadequate base or poor drainage. To fix this, remove the affected pavers and check the base material. You may need to add more gravel and compact it properly. Also, ensure that the patio has a slight slope for water runoff.
- Weeds Growing Between Pavers: Weeds can be a nuisance between pavers. To combat this, regularly sweep sand into the joints and consider using a sealant to solidify the sand, which helps prevent weed seeds from taking root.
- Stains on Pavers: Stains from leaves, spills, or mildew can occur. For most stains, a solution of warm water and dish soap will do the trick. For tougher stains, you might need a paver cleaner available at home improvement stores.
- Loose Edge Pavers: Edge pavers may become loose if the edge restraints were not installed correctly. To secure them, remove the loose pavers, reinforce the edge with additional restraints or concrete, and then replace the pavers.
- Efflorescence (White Haze): A white haze may appear on pavers due to natural salts in the materials. This is usually temporary and can be cleaned with a specialized efflorescence remover.
By addressing issues promptly, you can protect your paver patio for years. Regular maintenance is key.
FAQs About DIY Paver Patio
Discover answers to all your questions about DIY paver patio projects. From materials to installation, get expert guidance in this comprehensive FAQ guide.
What is the best base for a paver patio?
The best base for a paver patio is a layer of compacted gravel topped with a layer of sand. This combination provides a stable foundation that allows for proper drainage and helps prevent the pavers from shifting over time.
How do I prevent weeds from growing between my pavers?
To prevent weeds, use a landscape fabric as a barrier beneath the base material. After laying the pavers, fill the joints with polymeric sand, which hardens and helps prevent weed growth.
Can I install pavers over an existing concrete patio?
Yes, you can install pavers over an existing concrete patio as long as the concrete is in good condition without major cracks or unevenness. It's important to ensure proper drainage and to use a bonding agent to adhere the pavers to the concrete.
How do I cut pavers to fit my patio design?
Pavers can be cut using a masonry saw, a circular saw with a diamond-tipped blade, or a chisel and hammer for smaller adjustments. Always wear protective eyewear and follow safety instructions when cutting pavers.
What should I do if my pavers become stained?
For most stains, a mixture of warm water and gentle detergent can be used to clean the pavers. For tougher stains, there are specialized paver cleaners available. Always test a small, inconspicuous area first to ensure the cleaner does not damage the pavers.
How often should I seal my paver patio?
Sealing your paver patio can help protect it from stains and fading. Sealing pavers every 3-5 years is typically recommended, but this can vary based on the climate, the amount of traffic the patio receives, and the type of sealant used.
Final Thoughts
The transformation was incredible. What was once a dull concrete slab is now a beautiful, inviting outdoor living space. This project was manageable even for someone with limited DIY experience, like myself, and the result is something I'm genuinely proud of.
If you've been pondering about upgrading your outdoor space, I hope my experience encourages you to give it a go. With the right materials and a bit of elbow grease, you can build an outdoor area you'll enjoy for years to come. And honestly, if I can do it, so can you!


