Building your own DIY closet doors can be a cost-effective way to enhance the look of your home. Making cheap closet doors doesn't mean sacrificing quality or style. By using affordable materials and simple tools, you can craft personalized, functional doors that fit your needs. These DIY sliding closet doors can provide a space-saving solution while adding a modern touch to any room.
Ready to get started? Continue to explore the next section for detailed steps and useful tips on building DIY closet doors to fit your home perfectly.
Materials Needed and Why
- Eight Quarter Poplar:
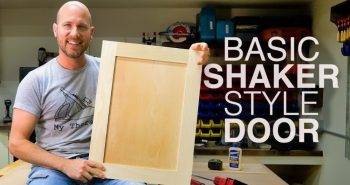
Poplar was my choice for the door frames because of its workability and durability. I opted for eight-quarter (2-inch thick) stock to ensure I could mill it down to a perfectly flat 1.5 inches - the thickness needed to match the original doors. - Half-Inch MDF:
MDF panels were chosen for the door insets due to their stability and smoothness, which is perfect for painted finishes. Their stability means they won't warp or change with humidity, an essential quality for closet doors.
Step by Step Instructions
Learn how to build your own DIY closet doors with our easy, step-by-step instructions. Perfect for making custom, stylish solutions.
Cutting and Milling the Poplar
The first step was cutting the poplar to rough lengths on my miter saw, then moving to the table saw to rip a somewhat straight edge. With a straight edge established, I used my jointer to both face joint and edge joint each board, ensuring my materials were perfectly flat and square. Finally, I planed the boards down to their final 1.5-inch thickness.
Making the Frame
With the pieces cut to their final width and thickness, I used my table saw to cut a 1-inch groove in the center of each board. This groove would eventually hold the MDF panel. Next, I cut tenons on each end of the frame pieces using a dado stack on my table saw, ensuring they would fit snugly into the grooves.
Assembling the Frame
After dry-fitting the frame pieces to ensure a good fit, I glued and clamped them together. It's vital during this step to check the squareness of the frame, making adjustments as needed before the glue sets.
Preparing and Inserting the MDF Panels
I measured the frame's interior and added two inches to both the length and width measurements for the MDF, accounting for the grooves. After cutting the MDF to size, I decided to add a visual element to the panels by making a faux shiplap look. Using my table saw, I made multiple parallel cuts within the MDF, giving the illusion of individual boards.
Finishing Touches
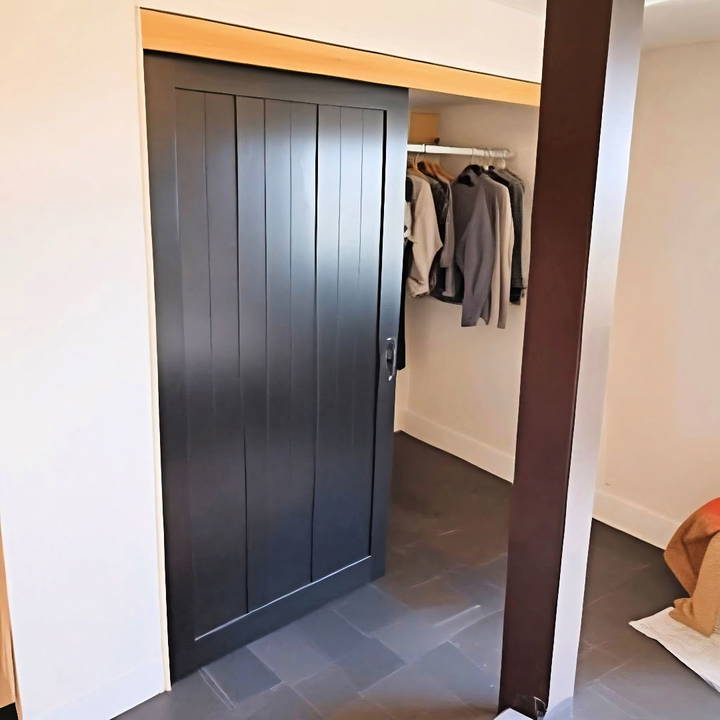
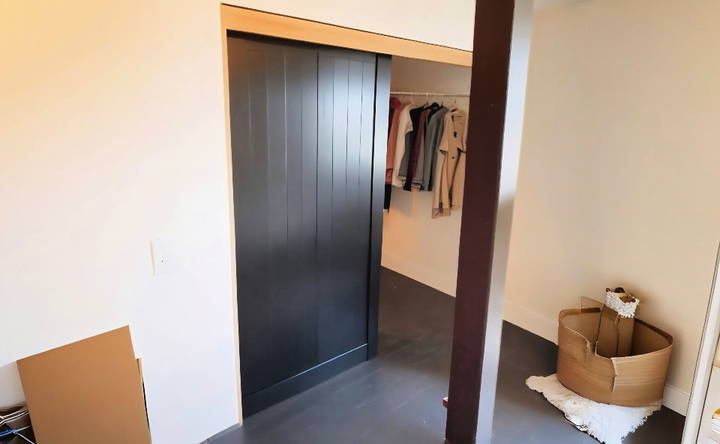
Before painting, I sanded down the frame and MDF panel, then rounded the edges of the frame with a router. I chose a simple black paint (Sherwin-Williams Tricorn Black in semi-gloss) for its elegance and timeless appeal. To make the painting process easier, I screwed a couple of long screws into the top and bottom of the doors. This allowed me to easily flip the doors to paint both sides without waiting for one side to dry.
Installation
Once the paint had dried, I removed the screws and began installing the hardware. Transferring the hardware from the old doors to the new ones was straightforward, as I could use the existing tracks. However, proper alignment was crucial to ensure smooth operation. After the hardware was installed, I hung the doors in place, making instantaneously noticeable transformations to the room's aesthetic.
Personalization Tips for DIY Closet Doors
Personalizing your closet doors can transform your space, making it more functional and reflective of your personal style. Here are some tips to help you customize your DIY closet doors:
- Choose Your Style: Think about the overall look you want to achieve. Do you prefer a modern, sleek design or a more rustic, traditional feel? Your choice will guide the materials and design elements you select.
- Add Color: Paint is an easy and affordable way to add personality. Choose a color that complements your room, or go bold with a contrasting shade for a statement piece.
- Incorporate Patterns: Use stencils or painter's tape to build patterns on your doors. Geometric shapes can add a contemporary touch, while floral designs can give a softer, more classic look.
- Use Wallpaper: Self-adhesive wallpaper is a great option for adding texture or intricate designs. It's also easily changeable if you decide to update the look in the future.
- Install Mirrors: Mirrors can make a small room feel larger and brighter. Consider adding a full-length mirror to one or both doors for functionality and style.
- Change Hardware: Swapping out knobs or handles is a simple change that can make a big difference. Choose hardware that matches your room's decor and your personal taste.
- Add Functional Elements: If you're short on space, consider adding hooks or a pegboard to the inside of your closet doors for additional storage.
- Think Outside the Box: Don't be afraid to get creative. Use chalkboard paint for a door that doubles as a message center, or attach a corkboard for a handy place to pin items.
The key to personalization is making choices that reflect who you are. Have fun with the process, and enjoy your unique, customized closet doors!
Troubleshooting Common Issues with DIY Closet Doors
When working on DIY closet doors, you might encounter a few common issues. Here's how to troubleshoot them effectively:
- Sticking Doors: If your closet doors stick or don't slide smoothly, check the tracks for debris and clean them out. If the problem persists, apply a silicone-based lubricant to the tracks.
- Misaligned Doors: Doors that don't hang straight may need their hinges adjusted. Loosen the screws slightly, realign the door, and then tighten the screws back up.
- Noisy Hinges: Squeaky hinges can be annoying. A quick fix is to apply a lubricant like WD-40. For a long-term solution, remove the hinge pins, clean them, and then apply a lubricating oil before reinserting.
- Loose Knobs or Handles: Tighten any loose hardware with a screwdriver. If the screws won't hold, fill the holes with wood filler, let it dry, and then reattach the hardware.
- Door Won't Stay Closed: Check the latch alignment. If it's off, adjust the position of the strike plate or the door latch. Adding magnetic catches can also help keep doors closed.
- Scratches or Dents: For minor scratches, use a wood marker or crayon that matches the door's color to fill them in. For dents, you can use wood filler, sand it down once dry, and then touch it up with paint.
- Gap Between Doors: If there's a gap between double doors, adjust the door positions by tightening or loosening the hinges. You can also install a door sweep to cover any gaps at the bottom.
By addressing these common issues, you'll ensure your DIY closet doors function well and look great. Remember, regular maintenance can prevent many problems from occurring in the first place.
Maintenance and Care for DIY Closet Doors
Keeping your DIY closet doors in top condition is important for both their appearance and functionality. Here's a straightforward guide to maintaining and caring for your closet doors:
- Regular Cleaning: Dust and clean your doors regularly. Use a soft cloth for painted doors and a mild cleaner for wooden doors. For glass panels, a streak-free glass cleaner works best.
- Check the Hardware: Every few months, inspect the hinges, knobs, and tracks. Tighten any loose screws and replace any worn-out parts.
- Lubricate Moving Parts: If you have sliding doors, keep the tracks and rollers lubricated. A silicone-based lubricant is recommended as it won't attract dust.
- Protect the Surface: Apply a sealant or finish to wooden doors to protect them from moisture and wear. For painted doors, touch up any chips or scratches promptly to prevent further damage.
- Adjust When Necessary: If you notice your doors are not opening or closing properly, make adjustments. This might involve realigning the doors or adjusting the tension on sliding door mechanisms.
- Avoid Moisture Damage: Ensure good ventilation in your closet to prevent moisture buildup, which can warp doors over time.
- Be Gentle: When using your closet doors, handle them gently. Avoid slamming or forcing them, as this can cause misalignment and damage.
By following these simple maintenance and care tips, you can ensure your DIY closet doors remain functional and beautiful for years to come.
FAQs About DIY Closet Doors
Find answers to common questions about DIY closet doors. Discover tips, materials, and installation steps for the perfect closet transformation.
Yes, you can update your closet doors without the need for complete replacement. Simple updates like adding stencils, wall decals, or decorative door panels can make a big difference. You can also apply peel-and-stick wallpaper or even paint a hand-painted mural for a personalized touch.
Yes, there are quick DIY projects that beginners can tackle. For instance, applying a new coat of paint or attaching fabric or wallpaper to the doors can be done with minimal tools and skills. Another easy project is to change out the hardware, such as handles or knobs, for an instant update.
To ensure your closet doors are safe, always use sturdy materials and secure fastenings. If you’re using hinges, make sure they’re properly aligned and screwed in place. For sliding doors, check that the tracks are installed level and the doors slide smoothly without resistance. Regular maintenance, such as tightening loose screws and checking for wear and tear, will also help keep your doors safe for everyday use.
The best paints or finishes for your DIY closet doors depend on the material of the doors and the look you want to achieve. For a durable finish, semi-gloss or gloss paint is ideal as it’s easy to clean and resists scuffing. If you prefer a more natural look, wood stains or sealants can enhance the grain while protecting the surface. Always prepare the doors properly before painting or staining by cleaning, sanding, and priming if necessary to ensure the best results.
Yes, adding mirrors to your DIY closet doors is a great way to make a room feel larger and brighter. You can purchase mirror tiles or panels to attach to the doors, or use a mirror adhesive to secure a larger mirror. Be sure to measure the doors carefully and choose a mirror that fits well within the frame. It's also important to use a safety backing on the mirror to prevent injury in case the glass breaks.
Conclusion
Wrapping up, building your own DIY closet doors can be a fun and cost-effective way to improve your home. With a bit of effort and creativity, you can build stylish and cheap closet doors that fit your needs. Enjoy the process, and happy crafting!


