Making a fabric storage box can be a fantastic way to organize your space while adding a personal touch. If you've ever found yourself wishing for more stylish storage, this simple sewing project is a great option. I've made several DIY fabric storage boxes, and they've been useful for holding everything from sewing supplies to decorative items. Here's a detailed guide to help you make one too.
Materials You'll Need
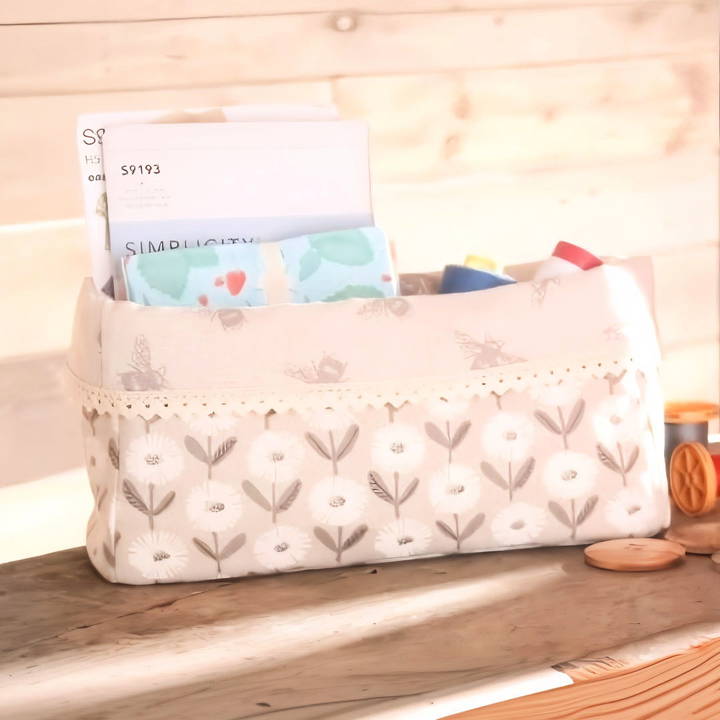
Before starting, it's essential to gather the right materials. For this project, I used canvas fabric for the outer part of the box and a lightweight fleece lining. The outer fabric is sturdy, while the fleece gives it a soft structure. I also added a decorative lace trim at the top for an extra touch.
Here's what I recommend you gather:
- Canvas fabric for the outer shell
- Non-directional fabric for the lining
- Sewing fleece (such as fusible H640 or sew-in fleece)
- Polyester wadding for structure
- 505 adhesive spray or another fabric adhesive
- Sewing machine, thread, scissors, and clips or pins
- Decorative trim like lace (optional)
- Steam iron for pressing
Step by Step Instructions
Make DIY fabric storage boxes with our step-by-step guide! From cutting fabric to adding decorative touches, get tips for success and creative uses!
Cutting the Fabric Pieces
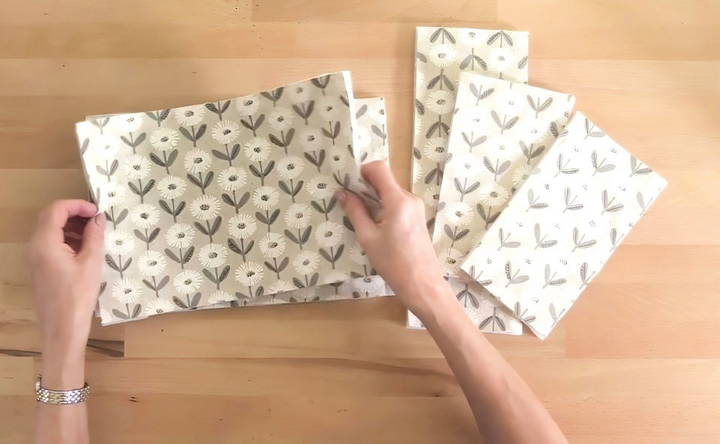
The first step is cutting the fabric to the appropriate sizes. Here's the exact breakdown of what you'll need:
- Two large side pieces: 12 inches wide by 8 inches tall
- Two small side pieces: 8 inches wide by 4.5 inches tall
- One base piece: 12 inches wide by 4.5 inches tall
I fused polyester wadding to the outer fabric pieces using 505 sprays, but you can also use fusible fleece. It gives the fabric structure without making it too thick. However, be mindful of the thickness since it could be tricky to turn the top over later.
For the lining, cut the same size pieces but without any wadding. A non-directional fabric works best for the lining so that when you fold the top over, everything looks neat.
Assembling the Outer Box
The assembly process is quite simple. Start by sewing the outer pieces together. I find it helpful to mark the center points of the base and the sides to ensure everything lines up perfectly. Match the center points of the base piece with the large side pieces and clip them together.
Make sure the fabric is facing the correct direction if you're using a directional pattern. If not, go ahead and sew the large pieces together first, then the smaller pieces, and finally attach the base. Be mindful of your seam allowance (usually around a quarter of an inch).
Once everything is sewn together, you'll have a tube-shaped structure. Sew the base on by following the clips or marks you've made earlier.
Sewing the Lining
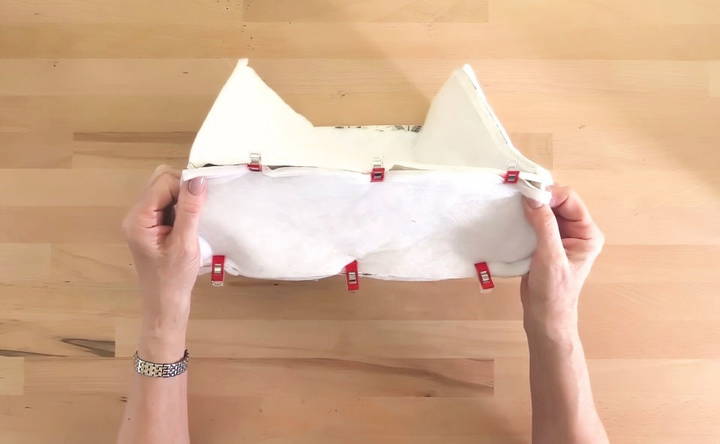
The lining is sewn in a very similar way but with one important difference. You need to leave a small gap at the bottom, about 3 or 4 inches wide, so you can turn the entire box right-side out later. This gap is crucial, so don't forget it!
One little trick I use is to make the lining just a touch smaller by increasing the seam allowance slightly as I sew. This helps the lining fit snugly inside the box and prevents any awkward bunching.
Joining the Lining and Outer Pieces
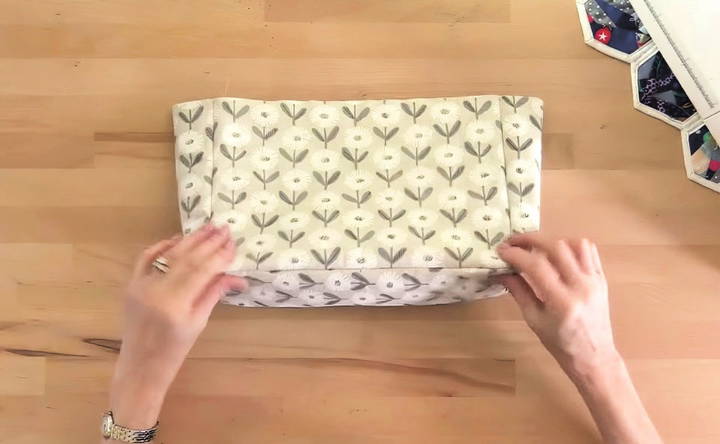
Now comes the fun part—putting it all together! Take the outer piece (which should now resemble a box) and push it inside the lining, making sure the right sides are facing each other. Match up the seams and clip them together to ensure everything is aligned.
Sew around the top edge of the box. This will connect the outer and inner pieces. Then, turn the whole thing right-side out through the gap you left in the lining. Once you've done this, you can hand-stitch the gap closed or use your sewing machine.
Adding Final Touches
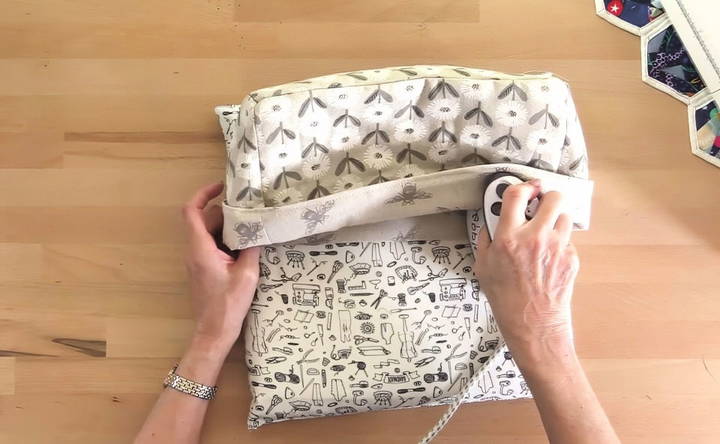
At this point, you've got the basic shape of the box. Now it's time to press the seams to give it a polished look. Use a steam iron to press the edges, especially around the top, to make sure everything is crisp and neat. I like to use a little press spray along the seams to help them hold their shape. You can also use spray starch for this step.
Once the top is pressed, you can fold the top edge over by about 2 inches. Not only does this look nice, but it also gives the box more structure. Press it well so the fold holds its shape.
Top Stitching and Decorative Elements
To secure the top fold and give the box an extra professional finish, you can top-stitch around the top edge. This step is optional but gives a nice clean line and makes the box sturdier.
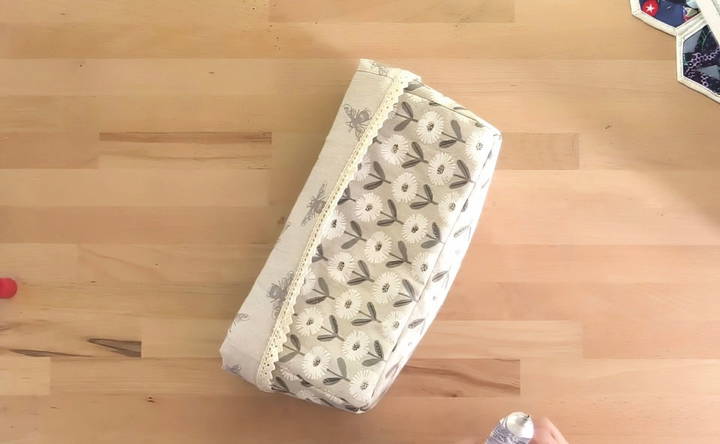
I also added a lace trim around the top for decoration. Instead of sewing it, I used fabric glue to attach it. This works well since the box isn't something you'll need to wash often. If you'd rather avoid glue, you can stitch the trim in place, but I find that gluing provides a clean, seamless look.
Tips for Success
Here are a few tips I've learned through experience that might help you avoid some common mistakes:
- Use non-directional fabric: If you choose a directional print for the lining, one side might end up upside down when you fold the top over. A non-directional fabric avoids this issue.
- Don't over-stuff the box: These fabric boxes are perfect for lightweight items like fabric scraps or sewing notions. If you plan to store something heavier, consider using thicker materials or adding interfacing for extra support.
- Pressing is key: Don't skip the pressing steps. A good press will make the seams crisp and help the box keep its shape.
- Decorations: Feel free to get creative with decorations like lace, buttons, or ribbons. These touches make your storage box one-of-a-kind and more personal.
Ways to Use Your Storage Box
Once your storage box is complete, there are endless ways to use it. I've found them perfect for organizing small fabric scraps, sewing patterns, or even ribbons. If you're into crafting, these boxes are also great for holding yarn, knitting supplies, or other small tools.
The box also works well for decorative purposes. Try using it to hold artificial plants, as a catch-all on your desk, or even as a gift box for a handmade present.
Experiment with Sizes and Materials
The beauty of this project is that once you've mastered the basic technique, you can easily adjust the size of the box to fit your needs. Keep in mind that if you go much larger, the box may become a little floppy. To prevent this, try using heavier-weight fabrics or reinforcing the sides with thicker interfacing.
You can also experiment with different fabrics. I've made these boxes using both cotton and canvas, and they turned out great. Cotton gives the box a softer look, while canvas provides a sturdier structure.
Customization Ideas
Customizing your DIY fabric storage boxes can make them not only functional but also a beautiful addition to your home. Here are some easy and creative ideas to personalize your fabric storage boxes:
Fabric Choices
Choosing the right fabric is the first step in customization. Here are some options:
- Cotton: Durable and easy to clean, perfect for everyday use.
- Linen: Gives a natural, rustic look.
- Velvet: Adds a touch of luxury and softness.
- Canvas: Sturdy and great for heavy-duty storage.
Decorative Elements
Adding decorative elements can make your storage boxes stand out. Consider these ideas:
- Embroidery: Personalize your boxes with embroidered initials or patterns.
- Appliqué: Use fabric scraps to make shapes and designs on your boxes.
- Fabric Paint: Paint unique designs or patterns to match your home decor.
- Trims and Ribbons: Add lace, ribbons, or other trims to the edges for a finished look.
Functional Additions
Enhance the functionality of your storage boxes with these additions:
- Handles: Sew on fabric or leather handles for easy carrying.
- Lids: Add a lid to keep dust out and stack boxes neatly.
- Pockets: Attach pockets inside or outside for extra storage of small items.
Color Coordination
Coordinate the colors of your fabric storage boxes with your room decor:
- Monochromatic: Use different shades of the same color for a cohesive look.
- Contrasting Colors: Choose colors that contrast with your room for a bold statement.
- Patterns: Mix and match different patterns like stripes, polka dots, or florals.
Labeling
Labeling your boxes helps keep things organized:
- Fabric Labels: Sew or glue fabric labels onto the boxes.
- Chalkboard Labels: Attach small chalkboard labels for a reusable option.
- Tag Labels: Use tags tied with string or ribbon for a vintage look.
Seasonal Themes
Customize your boxes for different seasons or holidays:
- Spring: Use pastel colors and floral patterns.
- Summer: Bright colors and beach-themed designs.
- Autumn: Warm tones and leaf patterns.
- Winter: Cool colors and snowflake designs.
By incorporating these customization ideas, you can make fabric storage boxes that are not only practical but also reflect your personal style and creativity.
Maintenance and Care
Proper maintenance and care of your DIY fabric storage boxes ensure they remain functional and attractive for years. Here are some practical tips to help you keep your fabric storage boxes in top condition:
Cleaning Tips
Regular cleaning is essential to maintain the appearance and hygiene of your fabric storage boxes.
- Dusting: Use a soft brush or a vacuum with a brush attachment to remove dust from the surface.
- Spot Cleaning: For small stains, use a mild detergent mixed with water. Dab the stain gently with a clean cloth, then blot with a dry cloth.
- Deep Cleaning: If the fabric is washable, remove the fabric cover and wash it according to the fabric care instructions. Air dry completely before reassembling.
Preventing Damage
Taking preventive measures can help avoid damage to your fabric storage boxes.
- Avoid Overloading: Do not overfill the boxes, as this can cause the fabric to stretch or tear.
- Handle with Care: When moving the boxes, lift them from the bottom to prevent handles from tearing.
- Keep Away from Sharp Objects: Ensure that sharp objects do not come into contact with the fabric to avoid cuts and tears.
Storage Environment
The environment where you store your fabric boxes plays a crucial role in their longevity.
- Dry and Cool: Store the boxes in a dry, cool place to prevent mold and mildew. Avoid damp areas like basements.
- Away from Sunlight: Prolonged exposure to direct sunlight can cause the fabric to fade. Store the boxes in shaded areas or use UV-protective covers.
- Pest Control: Use cedar blocks or lavender sachets inside the boxes to deter pests like moths.
Repair and Upcycling
Even with the best care, fabric storage boxes may show signs of wear over time. Here's how to handle it:
- Minor Repairs: For small tears or loose seams, use a needle and thread to make quick repairs. Fabric glue can also be used for minor fixes.
- Upcycling Ideas: If a box is beyond repair, consider upcycling it. Use the fabric for smaller projects like pouches or patchwork.
Regular Inspection
Regularly inspecting your fabric storage boxes helps catch any issues early.
- Monthly Check: Once a month, check for signs of wear, stains, or pest activity. Address any issues immediately to prevent further damage.
- Seasonal Rotation: Rotate the boxes seasonally to ensure even wear and to refresh the contents.
By following these maintenance and care tips, you can extend the life of your DIY fabric storage boxes and keep them looking their best.
FAQs About DIY Fabric Storage Boxes
Discover answers to common questions about DIY fabric storage boxes. Learn how to make and organize stylish storage solutions easily.
Yes, you can use fabric glue instead of sewing. Simply cut the fabric to size, glue it to the cardboard or plastic canvas, and let it dry completely.
Use a strong base material like cardboard or plastic canvas. Reinforce the sides with additional layers of fabric or interfacing to add extra strength.
Yes, you can make a lid by cutting an additional piece of fabric-covered cardboard to fit the top of the box. Attach it with fabric hinges or Velcro for easy opening and closing.
You can decorate your boxes with fabric paint, iron-on patches, or embroidery. Adding decorative trims or ribbons can also enhance their appearance.
For heavy items, reinforce the base and sides with extra layers of cardboard or plastic canvas. Ensure the handles are securely attached to support the weight.
Final Thoughts
Sewing a fabric storage box is a simple yet rewarding project. It not only helps organize your space but also adds a personal, handmade touch to your home. Whether you use it for practical storage or as a decorative element, this box is both functional and fun to make.
By following the steps outlined here, you'll have your own fabric storage box in no time.


