A trebuchet is a type of medieval siege engine used to launch projectiles at enemy fortifications. It works by using the mechanical advantage of a long lever and counterweight to hurl heavy objects over a significant distance. While it was initially designed for warfare, today building a trebuchet can be a fun and educational project that teaches principles of physics, engineering, and woodworking. This article will guide you through designing and constructing your own trebuchet using common materials and basic woodworking tools.
What Is a Trebuchet?
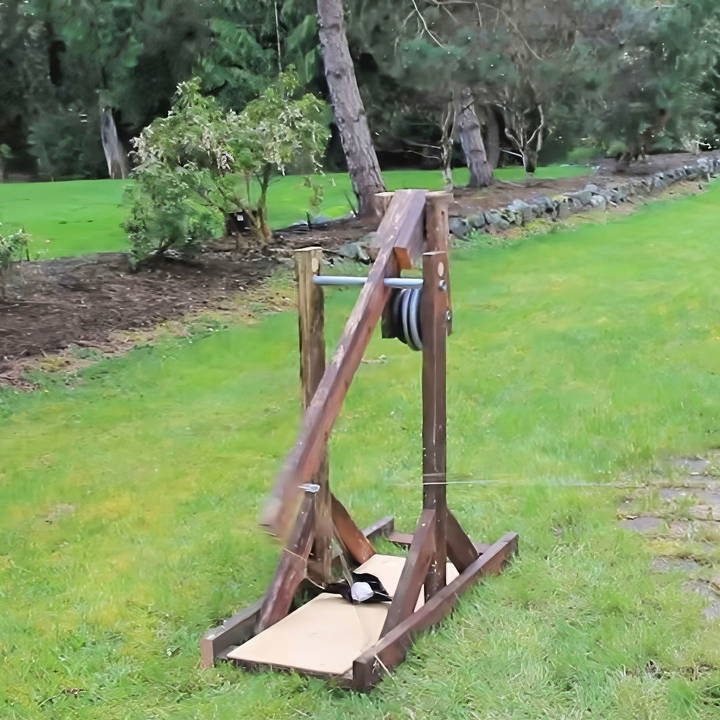
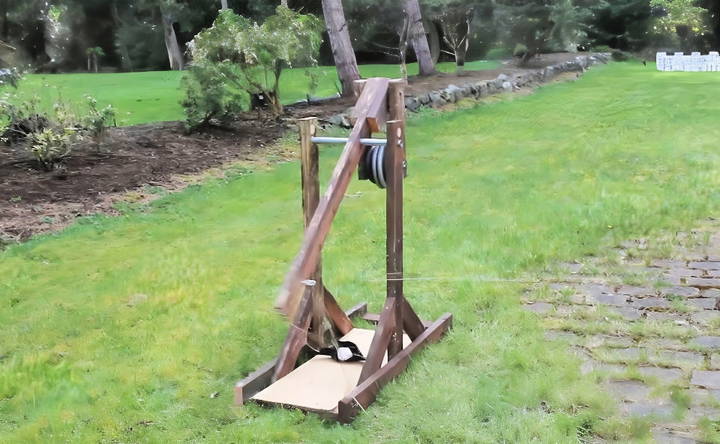
A trebuchet consists of a long arm or beam mounted on a pivot. On one end of the arm, a counterweight is placed to provide the force needed to launch an object. The other end of the arm, which holds the projectile, swings upward when the counterweight falls, launching the object across a great distance. In simple terms, it is a kind of advanced catapult, using gravity to throw the projectile with greater efficiency.
Why Build a Trebuchet?
Building a trebuchet is more than just a fun weekend project. It allows you to learn about:
- Levers and mechanics: The trebuchet is a classic demonstration of the principles of levers and mechanical advantage.
- Projectile motion: Understanding the physics of how objects move when thrown can be visualized perfectly with a trebuchet.
- Problem-solving and creativity: Adjustments to design, weight, and size impact performance, making each build unique and giving you room for experimentation.
In this guide, we will walk through a simple design using scrap wood and common household materials.
Materials Needed
For this trebuchet design, you'll need the following:
- Scrap 2x4 wood: This will form the base, supports, and arm of the trebuchet.
- 3/4-inch steel pipe: Used as the pivot for the trebuchet arm.
- Counterweight: Various weights, such as dumbbells or bricks, can be used to provide the force.
- String or paracord: To form the sling for the projectile.
- Duct tape: Used to build the projectile and reinforce parts of the structure.
- Plywood: A small sheet can be used to smooth the base for better projectile launching.
- Basic tools: Hammer, saw, drill, and an angle grinder with a cutoff wheel for cutting metal pipes.
All of these materials are inexpensive and likely can be sourced from a local hardware store or around your home.
Step by Step Instructions
Learn how to design a trebuchet with step-by-step instructions, from building the base to launching projectiles. Optimize performance safely and effectively.
1. Build the Base Structure
Start by making a solid base to support the trebuchet. The base of this trebuchet design follows a basic "T" shape.
- Cut the wood: Use 2x4 wood pieces to construct the base. Cut two long pieces (about 4 feet in length) for the main body and two shorter pieces (2-3 feet) for the crossbeam.
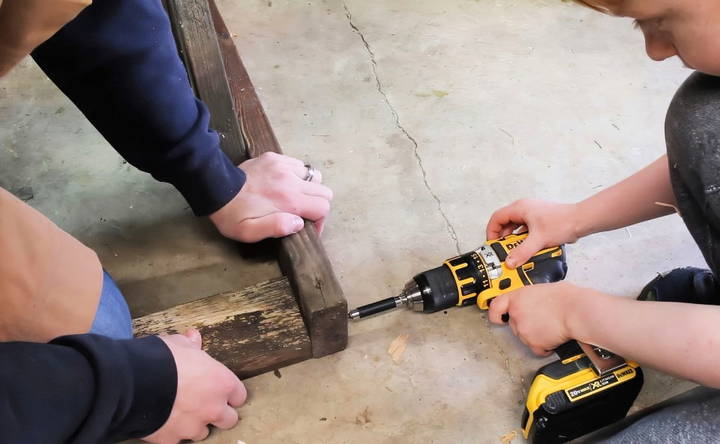
- Assemble the base: Attach the pieces together in a "T" shape, securing them with screws or nails. Add diagonal supports from the crossbeam to the sides to stabilize the structure.
2. Construct the Lever Arm
The lever arm is the most critical part of the trebuchet, as it holds the counterweight and throws the projectile.
- Determine the lever arm length: For this example, a ratio of 3:1 is used. The long side of the arm should be 3 feet, while the short side, where the counterweight is attached, should be 1 foot. Adjust the dimensions depending on the scale of your trebuchet.
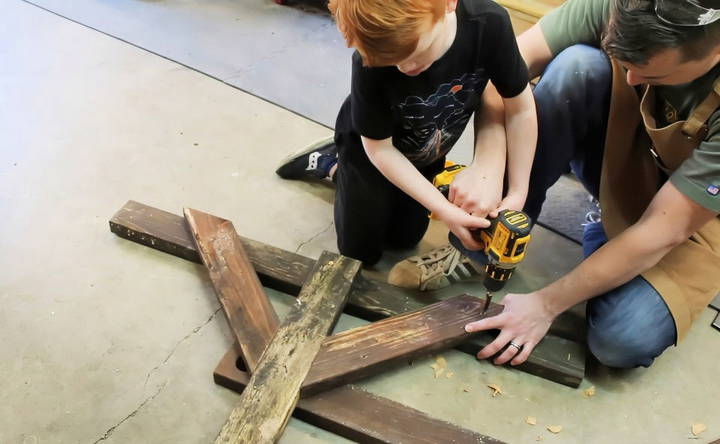
- Cut and assemble the arm: Use a 2x4 for the arm and drill a hole at the pivot point (where the arm will attach to the base). The pivot hole should be large enough to fit the 3/4-inch steel pipe.
3. Add the Pivot Point
The pivot is where the arm will rotate when the trebuchet is launched.
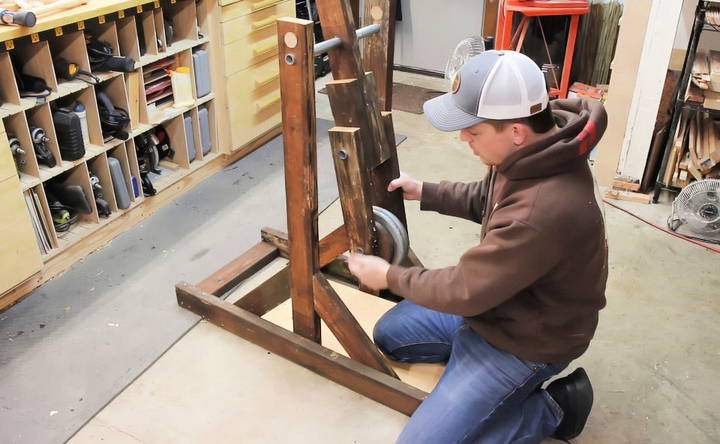
- Install the pivot pipe: Place the 3/4-inch steel pipe across the top of the base, where the arm will attach. The length of the pipe should be just slightly longer than the distance between the sides of the base structure.
- Attach the arm: Slide the arm onto the pivot pipe. Ensure it moves freely and can swing back and forth without much resistance.
4. Attach the Counterweight
The counterweight is crucial as it provides the force needed to launch the projectile.
- Choose your counterweight: You can use anything heavy, like a dumbbell, brick, or bag of rocks. For this build, a combination of 35 pounds of weights is used.
- Secure the counterweight: Attach the weight to the short end of the lever arm, ensuring it's fastened securely so that it won't fall off during operation. You may need to drill a hole to accommodate the attachment or simply tie it in place with strong cord.
5. Build the Sling
The sling holds the projectile and releases it at the right moment for optimal distance.
- Make a sling: Use a piece of duct tape folded onto itself to build a flat, strong surface. Attach a string to either end of the duct tape sling.
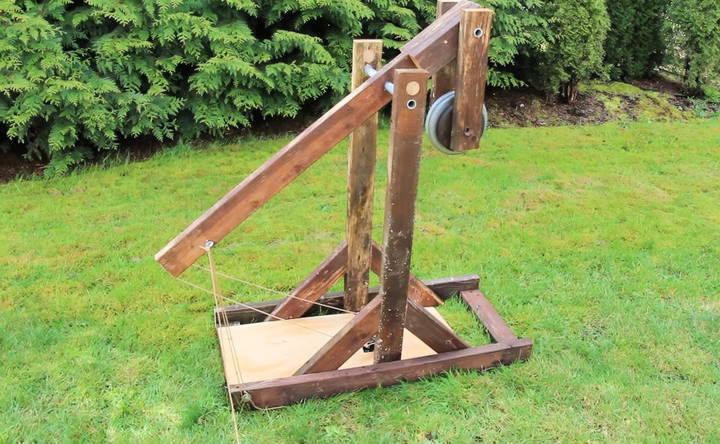
- Attach the sling: One end of the sling should be attached to the long end of the lever arm, while the other end will loop onto a hook at the end of the arm. This hook will release the sling at the peak of the trebuchet's swing, launching the projectile.
6. Prepare the Projectile
Trebuchets can launch a variety of objects, but for simplicity, a ball of rocks wrapped in duct tape works well.
- Wrap the rocks: Use gravel or small stones and wrap them tightly in several layers of duct tape until you have a solid, round ball.
- Ensure a snug fit: Make sure the projectile fits securely in the sling without being too loose or too tight.
Launching the Trebuchet
Once your trebuchet is built, it's time for the fun part—launching! Follow these steps to set up and fire the trebuchet safely.
1. Set the Projectile
- Load the sling: Place the projectile in the sling and make sure the loop end of the sling is securely hooked onto the release pin at the end of the lever arm.
2. Secure the Release Pin
- Use a bent nail or pin: To prevent the arm from releasing prematurely, you'll need a simple release mechanism. A bent nail can work as a pin to hold the lever arm down until you're ready to launch. Attach it to a string for easy release.
3. Fire the Trebuchet
- Pull the pin: Once the projectile is loaded and everyone is safely out of the way, pull the release pin. The counterweight will drop, and the arm will swing, hurling the projectile across the yard.
Adjusting and Optimizing Performance
After a few test launches, you may notice that the trebuchet's performance can be improved. Here are some common adjustments you can make:
- Change the counterweight: Heavier weights generally produce longer throws. Experiment with different weights to see what works best.
- Adjust the sling: The length of the sling and the release point have a significant impact on the trajectory. Adjust the length of the string or the position of the release pin to fine-tune the trebuchet.
- Test different projectiles: You can launch a variety of objects, such as tennis balls, small rocks, or even water balloons. Each object will have a different optimal launch trajectory.
Troubleshooting Common Issues
- Projectile drops too soon: If the sling releases the projectile too early, the release pin may be too long, or the sling might be too loose. Try adjusting the tension in the sling or using a shorter release pin.
- Projectile doesn't launch: If the projectile stays in the sling or doesn't go far, the counterweight might not be heavy enough, or the lever arm might be too short. Experiment with increasing the counterweight or changing the lever arm ratio.
Safety Considerations
While building and launching a trebuchet is fun, it's important to keep safety in mind:
- Keep clear of the launch area: Ensure no one is in the path of the projectile.
- Use sturdy materials: Make sure the wood, weights, and string you use are strong enough to withstand repeated launches.
- Wear safety gear: If using power tools or cutting metal pipes, wear proper safety equipment like goggles and gloves.
Final Thoughts
Building a trebuchet is a rewarding project that blends woodworking, physics, and creativity. Whether you're looking for a fun backyard project or a hands-on educational tool, constructing a trebuchet from simple materials can provide hours of entertainment and learning. By following this guide, you'll be able to build a functional trebuchet capable of launching projectiles across your yard with ease. So gather your tools and materials, and start building today!
FAQs About Trebuchet Design
Explore FAQs about trebuchet design, covering essential tips, construction methods, and optimization techniques for your engineering projects.
To increase efficiency, consider tapering the long part of the arm to reduce its weight, starting at the tip and tapering back two-thirds of the length. Additionally, use longer boards to hold the counterweight, which transfers more energy to the projectile. You can also experiment with adding wheels under the base to increase speed.
To increase range, you can try the following: taper the long arm for reduced mass, add a bar to hold the counterweight farther from the fulcrum, and raise the counterweight to maximize potential energy. Using wheels on the base can also enhance range by adding forward momentum.
If your projectile isn’t launching correctly, try adjusting the sling’s release mechanism. Make sure the sling is tight, and if it flips or fails to release the projectile, you can slightly bend the release pin to adjust the release point. Consider modifying the size or shape of the sling as well.
The base dimensions are 42 inches long, 19 inches wide, and 42 inches tall. The main pivoting arm is 48 inches long. The counterweight arms have holes spaced 12 inches apart, and their length is around 16 inches.
Yes! You can use various heavy objects such as dumbbells, bricks, or even bags filled with rocks. The heavier the counterweight, the farther the trebuchet will launch projectiles. Experiment with different weights to find the best performance.
To keep the arm centered, make sure the pivot point is properly secured and aligned with the base. The arm should rotate smoothly around the steel pipe pivot without shifting. You can use washers or dowels as spacers if needed.
For best results, use spherical or smooth projectiles like balls of duct-taped rocks, small stones, or even tennis balls. Larger objects like pumpkins or watermelons can be used if your trebuchet is built with stronger materials.
Absolutely! Many users have successfully built similar trebuchets for school competitions. It's easy to modify the size and weight of the materials to meet project requirements. If power tools aren't available, hand tools like hand saws and drills with large bits can be used.
Yes. The release point can be fine-tuned by bending the release pin slightly or changing the angle of the washer. If your trebuchet is releasing too early or too late, this adjustment can significantly improve accuracy.
The amount of weight depends on the scale of your trebuchet. A good starting point is around 35 pounds, which works well for medium-sized trebuchets. You can adjust this depending on how far you want to launch your projectiles.


