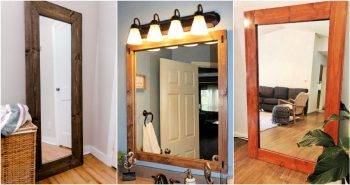
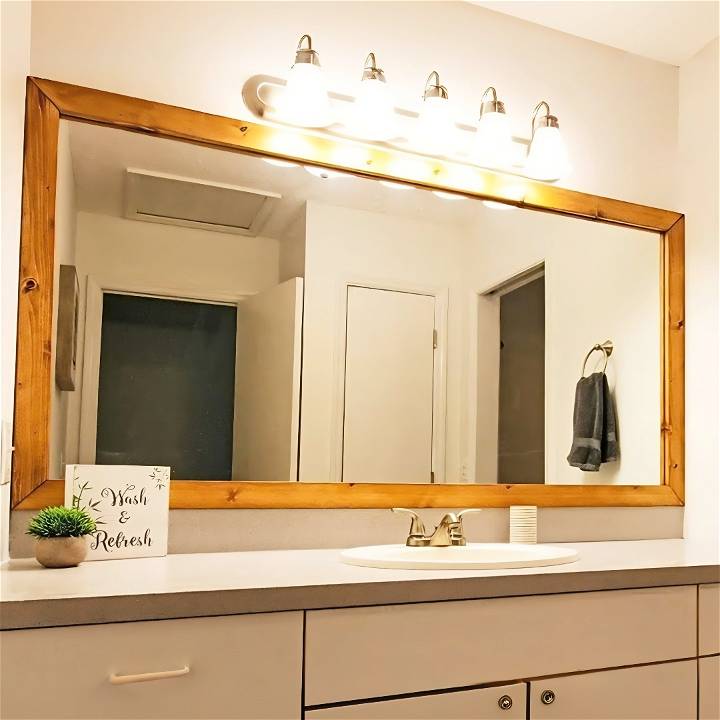
Transforming a space in my home on a tight budget has always been a challenge I’ve enjoyed. Most recently, I took on the project of framing a bathroom mirror, and the results were so impressive and cost-effective that I felt compelled to share the process. Trust me, if you’re looking for an affordable way to add charm to your bathroom, this guide, based on my experience and expertise, will walk you through the process step-by-step.
Materials You’ll Need
Before diving into the steps, let’s talk about what you’ll need:
- 1×3 Pinewood: I chose pinewood for its affordability and versatility. You’ll need enough to go around the perimeter of your mirror. The wood not only adds a natural element to the space but also serves as the sturdy framework for your project.
- Sandpaper (80 and 120 or 240 grit): Smooth wood is crucial for a high-quality finish, hence the need for sandpaper. Starting with 80 grit for the initial sanding and moving up to finer grits ensures a smooth finish.
- Pre-Stain, Stain, Clear Coat: These are essential for protecting the wood and giving it a beautiful finish. Pre-stain helps the wood absorb the stain evenly, which is vital for a consistent look. I chose an Early American stain to complement the light wood aesthetics of my home.
- Rags, Brushes, Painter’s Tape, Wood Glue or Liquid Nails: A rag for staining ensures an even application without leaving excess. Brushes are preferred for applying clear coats for a smooth finish. Painter’s tape helps hold the pieces in place while the adhesive dries, and wood glue or Liquid Nails will secure your frame to the mirror.
Step-by-Step Guide
Learn how to make a DIY mirror frame with our step-by-step guide: measuring, cutting, sanding, staining, sealing, and assembling. Perfect for beginners!
Measuring and Cutting
First, measure the perimeter of your mirror. Add a bit of extra length to ensure your frame fully covers the mirror edges. Cut the pinewood into strips according to your measurements, with 45-degree angles at each end so they fit together like a picture frame. This part might sound technical, but with a simple hand saw or miter saw, it’s quite straightforward.
Sanding and Prepping
Using 80 grit sandpaper, sand each piece of wood until it’s smooth, then follow up with a finer grit for a polished look. Wipe the dust off before moving to the staining process. Trust me, the smoother the wood, the better the stain will apply, and your final product will look professional.
Staining and Sealing
Apply pre-stain and let it sit for 5-10 minutes, then follow up with your chosen stain. I recommend using a rag to apply the stain for an even coat, working the stain into the wood and wiping away excess. After the stain dries, apply a clear coat to protect the wood. This is where a brush comes in handy for a smooth application. Remember to apply at least one coat on the backside of the wood to prevent warping from bathroom humidity.
Assembling the Frame
Once your pieces are dried and ready, lay them out around your mirror to ensure a proper fit. Apply wood glue or Liquid Nails to the back of each wooden strip, positioning them carefully on the mirror. I suggest applying the adhesive to the portion of the wood closest to the wall to prevent any from squeezing out onto the mirror. Secure the frame with painter’s tape until the adhesive dries completely.
Final Touches
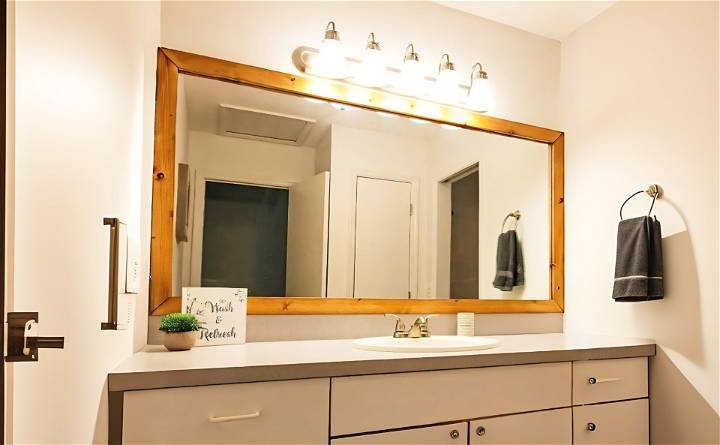
After the glue has set, remove the painter’s tape. At this point, you’ll see a significant transformation in your bathroom. The once plain and unremarkable mirror now adds a touch of warmth and elegance, complementing the room’s aesthetics beautifully.
Creative Design Ideas for Your DIY Mirror Frame
When it comes to creating a unique and eye-catching DIY mirror frame, there are countless design possibilities. Whether you’re a seasoned DIY enthusiast or a beginner, these creative ideas will help you transform a plain mirror into a stylish focal point for any room. Let’s dive in!
1. Mix and Match Materials
- Bold Combinations: Combine different materials to add visual interest. For instance, pair a rustic wooden frame with sleek metal accents or incorporate mirrored tiles alongside painted wood.
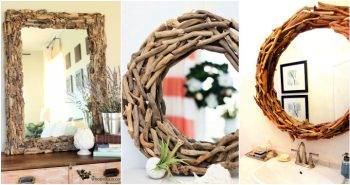
- Unexpected Pairings: Don’t be afraid to mix unexpected materials. Consider using seashells, driftwood, or even repurposed vintage window frames for an eclectic look.
2. Geometric Shapes
- Hexagons and Octagons: Move beyond traditional rectangular frames. Hexagonal and octagonal shapes are trendy and add a modern touch.
- Diamonds and Triangles: Experiment with diamond or triangular frames. These shapes create dynamic patterns and break away from the ordinary.
3. Embrace Minimalism
- Clean Lines: Opt for a minimalist design with clean lines. A slim, unadorned frame can enhance the mirror’s reflective surface.
- Thin Metal Frames: Thin metal frames in gold, silver, or black exude elegance and simplicity. They work well in contemporary and Scandinavian-inspired interiors.
4. Incorporate Natural Elements
- Bamboo and Rattan: Use bamboo or rattan for a tropical or bohemian vibe. These materials add warmth and texture.
- Driftwood: If you love coastal or beachy aesthetics, consider a mirror frame crafted from weathered driftwood. It brings a touch of nature indoors.
5. Painted Patterns and Stencils
- Chalk Paint: Apply chalk paint in soft pastels or bold hues. Distress the edges for a shabby-chic effect.
- Stenciled Designs: Use stencils to create intricate patterns directly on the frame. Floral motifs, geometric shapes, or Moroccan-inspired designs work beautifully.
6. Mirror Mosaics
- Tiny Mirrors: Glue small mirror tiles or broken mirror pieces onto the frame. The reflective surfaces will catch the light and create a dazzling effect.
- Random Arrangement: Arrange the mirror pieces randomly for an artsy, mosaic-like appearance.
7. Vintage Charm
- Antique Frames: Hunt for antique frames at thrift stores or flea markets. Their ornate carvings and aged patina add character.
- Distressed Finishes: Sand down a new frame to distress it. Apply layers of paint and then gently sand again to reveal glimpses of the base color.
Remember, the best mirror frame design is one that resonates with your personal style and complements your space.
Hanging and Mounting Tips for Your DIY Mirror Frame
Once you’ve crafted your beautiful DIY mirror frame, the next step is to securely hang it on the wall. Proper installation ensures that your masterpiece stays in place and adds charm to your space. Let’s dive into the details:
1. Choosing the Right Hardware
- D-Rings: These small metal rings are excellent for hanging lightweight to medium-weight frames. Attach them to the back of your frame using screws or nails.
- Sawtooth Hangers: Ideal for smaller frames, sawtooth hangers have serrated edges that grip the wall. They’re easy to install and work well with lightweight mirrors.
- Mirror Clips: If your mirror has a thin frame or no frame at all, consider using mirror clips. These hold the mirror against the wall without covering its edges.
2. Weight Considerations
- Know Your Mirror’s Weight: Weigh your mirror (including the frame) to determine the appropriate hardware. Most mirrors fall into three weight categories:
- Lightweight: Up to 10 pounds (4.5 kg)
- Medium-weight: 10 to 30 pounds (4.5 to 13.6 kg)
- Heavyweight: Over 30 pounds (13.6 kg)
- Choose Hardware Accordingly:
- Lightweight mirrors can use D-rings or sawtooth hangers.
- Medium-weight mirrors may require heavy-duty picture hooks or wall anchors.
- Heavyweight mirrors need sturdy wall anchors or French cleats.
3. Positioning and Leveling
- Height Placement:
- Hang your mirror at eye level for optimal functionality. The center of the mirror should be approximately 57–60 inches (145–152 cm) above the floor.
- Adjust the height based on the room’s purpose (e.g., higher in a hallway, lower in a living room).
- Centering:
- Measure the width of your mirror and find the center point.
- Mark the wall where the center of the mirror will be.
- Leveling:
- Use a spirit level to ensure your mirror hangs straight. Adjust as needed.
- If your mirror has two hanging points (e.g., D-rings), measure the distance between them accurately.
4. Installation Steps
- Locate Studs:
- Whenever possible, hang your mirror on wall studs for maximum stability.
- Use a stud finder or knock on the wall to find solid areas.
- Mark the Wall:
- Based on your desired height and center point, mark where the hardware will go.
- Install Hardware:
- Screw in D-rings, attach sawtooth hangers, or mount mirror clips.
- Follow the manufacturer’s instructions.
- Hang the Mirror:
- Lift the mirror and hook it onto the installed hardware.
- Double-check the level.
- Admire Your Work!
Remember, proper installation ensures your mirror stays put and enhances your room’s aesthetics. Take your time, measure accurately, and enjoy your beautifully framed mirror!
Conclusion
Adding a frame to your bathroom mirror is not just a $10 project; it’s an affordable way to enhance the overall look and feel of your bathroom. This simple DIY project can dramatically increase your space’s appeal, adding a touch of sophistication without breaking the bank.
Believe me, as a real estate agent, I’ve seen how small changes can significantly impact a home’s value and appeal. This project is a clear example. Not only did it satisfy my DIY cravings, but it also proved to be a practical upgrade for a minimal investment. So, grab your tools and materials, and give your bathroom mirror the makeover it deserves.


