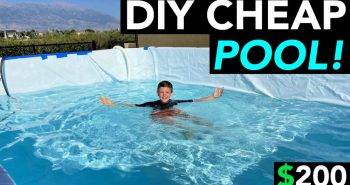
As summer approached and the promise of refreshing pool days beckoned, I faced one significant challenge: our pool water was just too cold to enjoy. Inspired by a DIY solution I’d seen on YouTube, I decided to build a $50 solar heater. My goal was to harness the sun’s power to warm our pool, making it inviting even in the early summer days when the water tended to be chillier. Here’s a step-by-step guide on how I achieved this, ensuring you can replicate it for your pool.
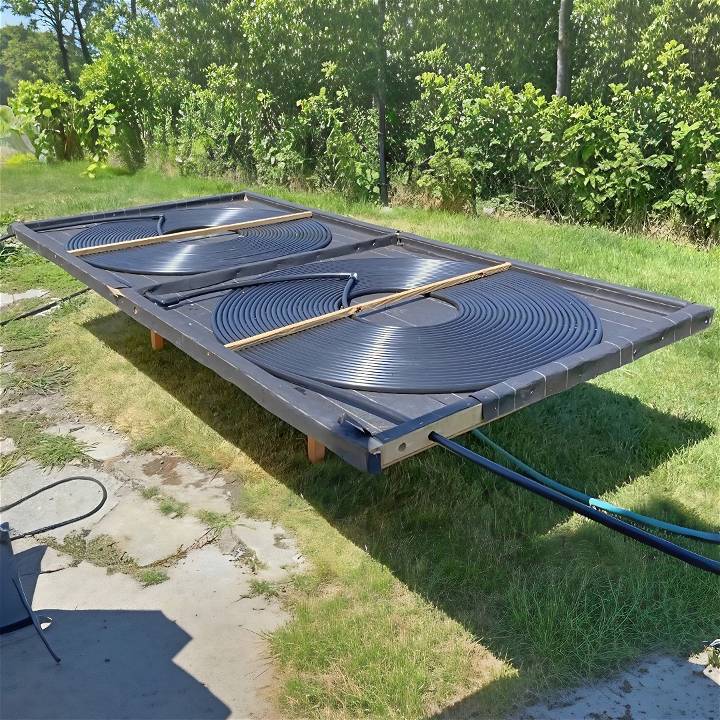
Materials Needed and Their Purpose
- 500 Feet of Black Irrigation Tubing: This serves as the main component where water circulates and warms up under the sun. I used about 400 feet, costing roughly $50.
- Wooden Boards and Quarter Inch Plywood: Used to construct the frame of the heater. The plywood forms the base, whereas the boards build the sides, supporting the structure.
- Tarp Paper (Black): Lining the inside of the frame with this increases heat absorption, significantly contributing to raising the water temperature.
- Plastic Sheeting: Covers the entire setup, trapping the sun’s rays like a greenhouse to maximize heating efficiency.
- Basic Tools: Saw (if you need to cut wood), screws, a drill, and a staple gun for assembly.
Step-by-Step Process
Learn how to build your own pool heater step-by-step with our guide. From building the frame to final assembly, get ready to enjoy a warm pool!
Building the Frame
The first phase involved constructing the frame. I cut the wood to build a shallow box outline, about an inch and a half tall, to hold the coiled tubing. This design ensured the structure wasn’t too heavy and made it easy to maneuver. The quarter-inch plywood was screwed into place as the base, providing a flat surface to secure the tubing and tarp paper.
Adding Heat Absorbing Materials
Next, I lined the inside bottom of the frame with black tarp paper. This layer is crucial as it aids in absorbing heat from the sun, turning the interior of the frame into a mini solar oven. The black color enhances this effect, ensuring no heat is wasted. On a sunny day, touching the tarp paper revealed just how effective this material was at gathering heat.
Laying and Securing the Tubing
The irrigation tubing was then coiled inside the frame, covering the base entirely. I made sure to have two entry points for the water to flow through these coils, designed to maximize exposure to the heated area. Securing the tubing was a bit of a challenge, but with patience, I coiled it tightly and used additional wooden strips screwed into the frame to keep everything flat and in place.
Final Assembly and Installation
After all internal components were secured, I wrapped the frame with plastic sheeting. This step was essential for trapping heat inside, much like a greenhouse. The plastic was stapled around the edges of the wood frame to hold it taut and in place.
Connecting the solar heater to our pool’s pump system was straightforward. I rigged hoses from the pump to the heater’s entry points and then back to the pool, ensuring a continuous flow of water through the newly constructed solar heater.
The Results and Final Thoughts
After running the pump for about 20 minutes, I eagerly measured the temperature difference between the water entering the heater and the water coming back into the pool. The DIY solar heater successfully raised the water temperature by about 12 degrees Fahrenheit, making a notable difference in the pool’s comfort level.
This DIY project was not only a cost-effective solution to warming our pool but also a fulfilling weekend project. The total cost came under $50, providing us with a warmer pool and the satisfaction of a job well done.
Tips for Success
- Ensure proper water flow: Adjusting the water flow can impact heating efficiency. A slower flow allows more time for the water to heat up as it passes through the tubing.
- Angle your heater: Position the solar heater to face the sun directly. This can significantly improve heat absorption.
- Monitor and adjust: Be prepared to make adjustments. Whether it’s adding more tubing, changing the angle of the heater, or tweaking the water flow, small changes can have a big impact on performance.
Building a DIY solar pool heater was a fun project that brought warmth and creativity to our summer. I hope it inspires your own DIY solar project, too.
Quality and Efficiency Considerations for Your DIY Pool Heater
When building a DIY pool heater, ensuring quality and efficiency is crucial for optimal performance and long-term satisfaction. Whether you’re constructing a solar-powered heater or using other energy sources, here are essential considerations to keep in mind:
Select High-Quality Materials
Why Quality Matters
- Using durable and reliable materials ensures that your pool heater will withstand environmental conditions, temperature fluctuations, and chemical exposure.
- High-quality components contribute to better heat transfer and overall efficiency.
Key Components to Focus On
- Heat Exchanger: Invest in a corrosion-resistant heat exchanger. Options include copper, stainless steel, or titanium. Each material has its advantages, so choose based on your budget and local water conditions.
- Pump and Circulation System: Opt for an energy-efficient circulation pump. Proper water flow is essential for effective heat transfer.
- Insulation: Insulate pipes and components to minimize heat loss. Use foam insulation sleeves or wraps.
Efficiency Boosters
- Variable-Speed Pumps: Consider using a variable-speed pump. These pumps adjust their speed based on demand, saving energy compared to fixed-speed pumps.
- Solar Covers: Use a solar cover or blanket to retain heat overnight. It reduces evaporation and heat loss.
2. Sizing and Design
Right-Sizing Your Heater
- Calculate the required heating capacity based on your pool size, desired water temperature, and local climate.
- Oversized heaters waste energy, while undersized ones struggle to maintain the desired temperature.
Design Considerations
- Placement: Install the heater close to the pool equipment to minimize heat loss in the plumbing.
- Orientation: Position solar panels or collectors to maximize sun exposure.
- Flow Rate: Ensure proper water flow through the heater. Consult manufacturer guidelines for optimal flow rates.
3. Energy Sources
Types of Pool Heaters
- Gas Heaters: Efficient and quick to heat, but operational costs can be high. Use natural gas or propane.
- Heat Pumps: Extract heat from the air or ground. They’re energy-efficient but work best in moderate climates.
- Solar Heaters: Utilize solar panels to heat water. Environmentally friendly and cost-effective once installed.
Solar Pool Heaters
- How They Work: Water circulates through solar panels, where it absorbs heat from the sun. A pump then sends the heated water back to the pool.
- Installation Tips:
- Panel Placement: Orient panels southward for maximum sun exposure.
- Sizing: Ensure sufficient panel area relative to your pool size.
- Pump Sizing: Match the pump’s flow rate to the panel’s requirements.
4. Maintenance and Monitoring
Regular Maintenance Tasks
- Clean Filters: Regularly clean or backwash pool filters to maintain efficient water flow.
- Inspect Components: Check for leaks, loose connections, and signs of wear.
- Water Chemistry: Maintain proper water balance to prevent scale buildup and corrosion.
Monitor Performance
- Keep track of temperature changes, energy consumption, and any unusual behavior.
- Address issues promptly to prevent major breakdowns.
Remember, a well-designed and properly maintained pool heater not only extends your swimming season but also enhances your overall pool experience. Prioritize quality, efficiency, and safety for a successful DIY project!
FAQs About DIY Pool Heater
Discover all the answers to your FAQs about DIY pool heaters with our comprehensive guide. Learn how to save money and keep your pool warm all year long.
How effective is a DIY solar pool heater?
A well-designed DIY solar pool heater can significantly increase your pool’s water temperature. However, its effectiveness depends on factors like sunlight exposure, insulation, and the size of the heating system. Expect a moderate temperature rise, especially during sunny days.
Can I use other heat sources for a DIY pool heater?
Certainly! Besides solar, you can explore other heat sources:
- Wood-Burning Heater: Build a firebox near the pool and circulate water through it.
- Heat Exchanger: Use your home’s existing water heater to transfer heat to the pool water.
- Electric Resistance Heater: Install an electric coil in the water circulation system.
How do I maintain my DIY pool heater?
Regular maintenance ensures optimal performance:
- Clean the Tubing: Remove debris and algae from the PEX tubing.
- Check Insulation: Inspect insulation for damage or wear.
- Monitor Pump: Ensure the water pump is functioning correctly.
- Winterize: Drain the system before winter to prevent freezing.
Is a DIY pool heater safe?
When properly designed and maintained, DIY pool heaters are safe. However, follow safety precautions:
- Avoid Overheating: Monitor water temperature to prevent excessive heat.
- Secure Electrical Connections: If using an electric heater, ensure proper wiring.
- Regular Inspections: Check for leaks, especially around connections.
How much does a DIY pool heater cost?
Costs vary based on materials and size. A basic solar pool heater might cost $100–$300 for materials. Adding a solar panel or other features can increase the cost. Consider long-term savings on energy bills when evaluating the investment.
Conclusion:
In conclusion, making a DIY pool heater can be a fun project that saves money and energy. By following these steps and tips, you can enjoy a warm pool all season long without breaking the bank.


