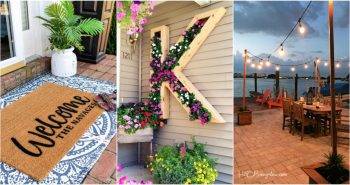
Updating a front door can transform the look and feel of your home, making a welcoming entrance that reflects the style inside. With some creativity and a few budget-friendly materials, you can refresh your front door over a weekend without breaking the bank. I recently decided to give my tired, scuffed-up front door a facelift, aiming to tie it better with the interior decor of my house.
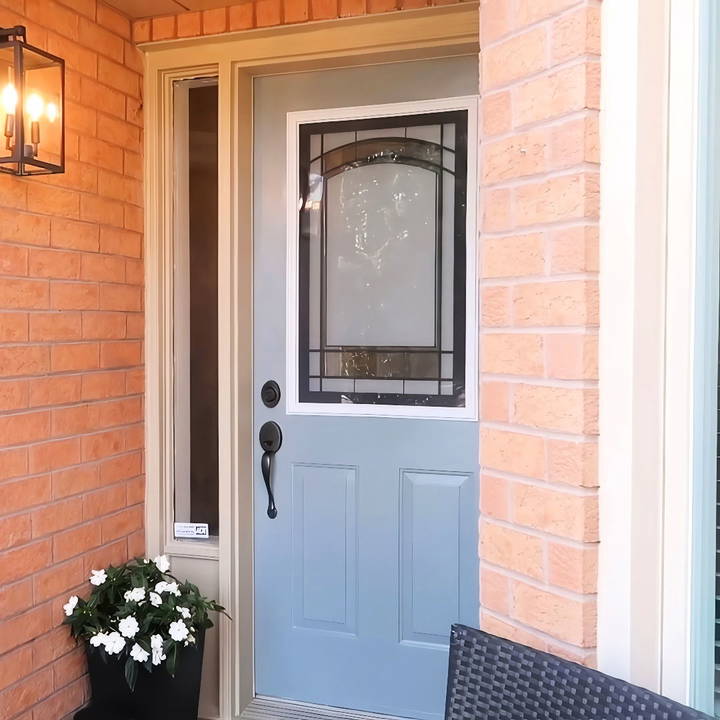
Transform your entryway with our DIY front door makeover guide below.
Step by Step Instructions
Transform your home with our step-by-step instructions for front door makeover. Learn how to paint, update hardware, and replace glass inserts easily!
Step 1: Preparation is Key
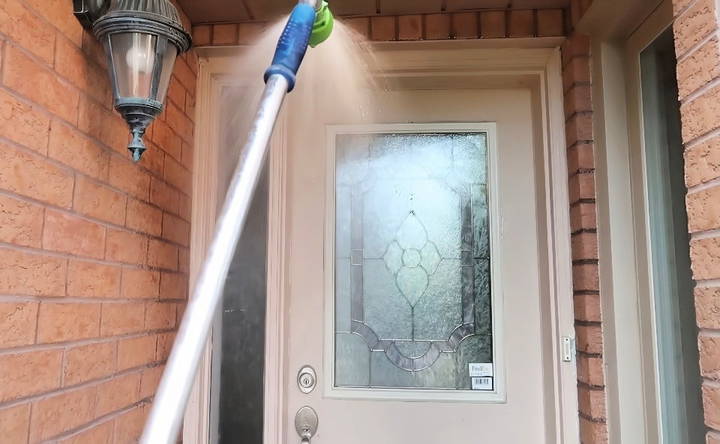
Before diving into any major changes, the first step is always to clean and prep the door. I started by using a garden hose to spray down the door, getting rid of spider webs, dirt, and grime that had built up over time. This is a simple but crucial step—you don't want to paint over dirt or debris.
I also used a multi-surface cleaner to wipe down the door thoroughly. It's a good idea to do this the night before you plan to paint so that everything has time to dry completely by the next day. This is something I learned the hard way—painting on a wet surface can lead to streaks and uneven coverage.
Materials Needed:
- Garden hose
- Multi-surface cleaner
- Soft cloth or sponge
Tip: Make sure you let the door dry overnight for the best results!
Step 2: Decide on a Color Scheme
Choosing the right color scheme is vital for achieving a cohesive look. You can paint both the door and trim the same color or pick different shades for contrast. For my project, I chose to paint the trim a neutral color to match the window trim and opted for a bold, contrasting color for the door itself. This helps make the front door a focal point while maintaining harmony with the overall exterior.
Considerations When Choosing Colors:
- Contrast vs. Cohesion: A single color for both the door and trim gives a more cohesive look, while different colors can add visual interest and contrast.
- Accent Colors: Think about the colors inside your home. I wanted my front door to offer a glimpse of the interior, so I chose a color that matched my interior accents.
Lesson Learned: I initially chose a color that was too light and had to make multiple trips to the store to find the perfect shade. Testing your paint choices on small patches first is crucial.
Step 3: Update the Door Hardware
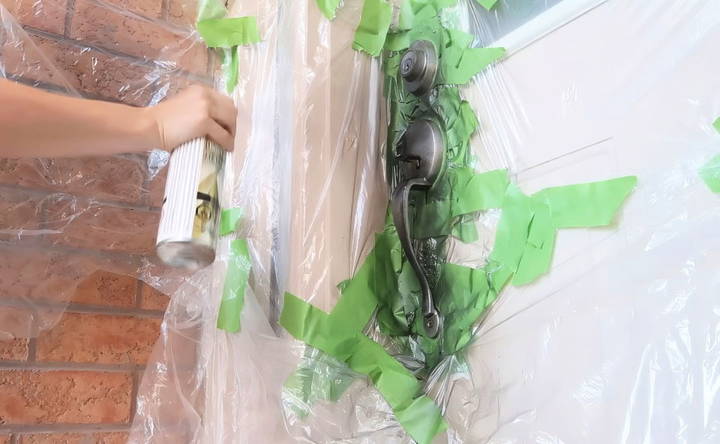
Instead of replacing my door handle, I decided to spray paint it from silver to black to better match the new light fixture and make a more cohesive look. Spray painting is a great way to refresh hardware without the expense of buying new.
How to Spray Paint Door Hardware:
- Prepare the Area: Tape garbage bags or plastic sheets around the handle to protect the door from overspray. You can remove the handle for painting, but I chose not to, as I didn't want to deal with the hassle.
- Sand the Surface: If the handle has a shiny finish, sand it lightly to remove any gloss. This allows the spray paint to adhere better.
- Apply Spray Paint: Use a Rust-Oleum metallic spray paint. I chose oil-rubbed bronze, which has a beautiful black color with a subtle metallic undertone. Spray in light, even coats to avoid drips and ensure full coverage.
- Seal with a Clear Gloss: Once dry, apply a clear gloss spray to protect the paint and make it UV resistant.
Materials Needed:
- Sandpaper
- Rust-Oleum metallic spray paint (oil-rubbed bronze)
- Clear gloss spray
- Plastic sheets or garbage bags
- Painter's tape
Tip: Spray in multiple light coats rather than one heavy coat for a smoother finish.
Step 4: Painting the Trim
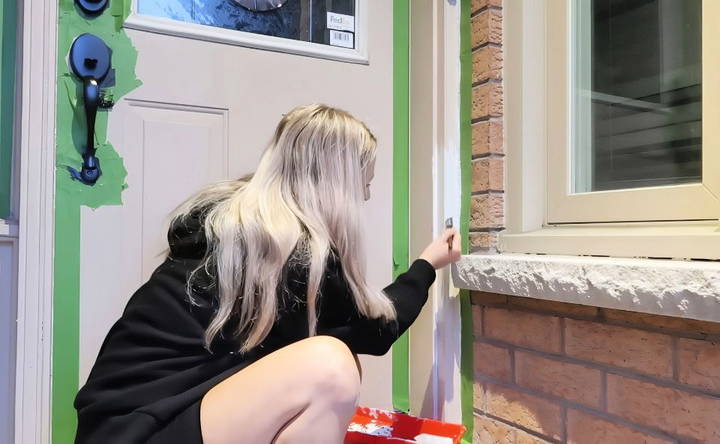
With the hardware drying, I moved on to painting the trim. After a bit of trial and error with colors, I ended up with a color called “Safari Vest”—a perfect match that added just the right amount of contrast.
Steps to Paint Trim:
- Tape the Edges: Use painter's tape to protect areas that you don't want painted.
- Stir the Paint: Always stir your paint thoroughly to ensure the color is consistent.
- Apply Paint: Use a brush for detailed areas and a roller for larger, flat surfaces.
- Remove Tape: Take off the tape before the paint dries completely to avoid peeling.
Materials Needed:
- Painter's tape
- Paint (exterior semi-gloss enamel)
- Paintbrushes and rollers
Lesson Learned: A satin enamel finish worked better for the trim compared to semi-gloss, which was a bit too shiny.
Step 5: Painting the Door
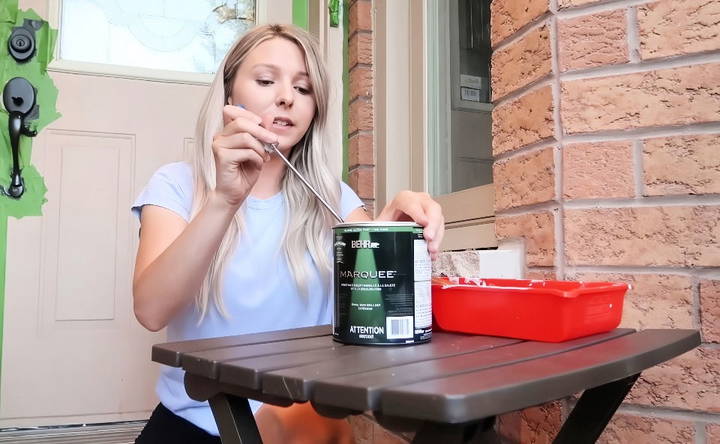
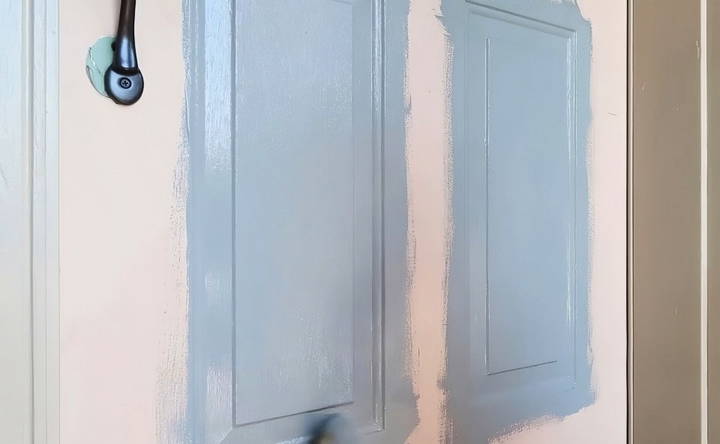
Painting the door was the most exciting part of this makeover. I chose a color called “Juniper Ash,” a dusty teal that perfectly complemented the interior design of my home.
How to Paint a Front Door:
- Start with the Edges: Begin by painting the recessed areas of the door to cover all corners. This prevents the paint from pooling in the crevices.
- Move to the Flat Surfaces: Use a roller for the flat parts of the door to achieve a smooth, even finish.
- Allow to Dry Between Coats: Apply at least two coats for the best coverage.
Materials Needed:
- Behr marquee exterior semi-gloss enamel (color: Juniper Ash)
- Paintbrushes and rollers
Tip: Paint on a cooler day or early in the morning to avoid having the paint dry too quickly or attracting bugs.
Step 6: Final Touches and Adding New Hardware
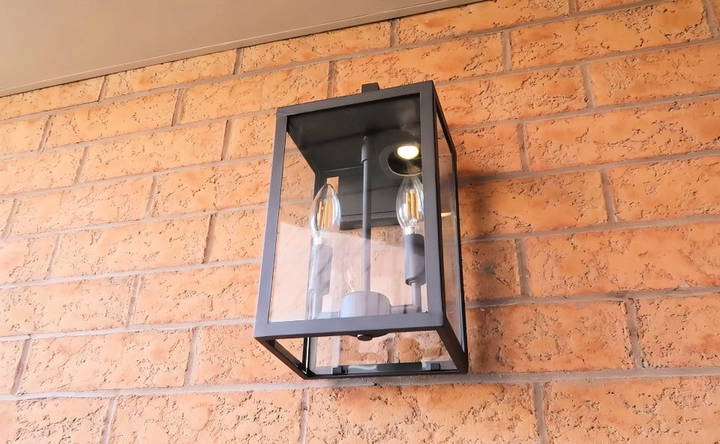
Once the paint had dried, it was time to install a new light fixture. This step was crucial in giving the front entrance a more modern and cohesive look. I opted for a fixture that complemented the new black door handle.
Installing the Light Fixture:
- If you're comfortable with electrical work, you can install the new light yourself. Otherwise, consider asking for help or hiring a professional.
Materials Needed:
- New light fixture
- Screwdriver and other basic tools
Lesson Learned: The new light fixture was a bit tricky to install, but it made a huge difference in the overall look!
Step 7: The Unexpected Change - Replacing the Glass Insert
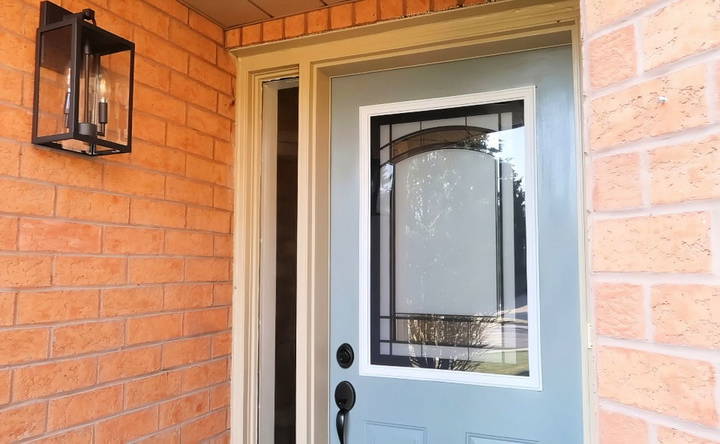
After everything was done, I still wasn't satisfied because the pink glass insert was clashing with the new look. I decided to add another day to the makeover and replace the glass insert with a more modern design that tied together all the elements.
Replacing a Glass Insert:
- Remove Old Insert: Unscrew the existing insert from the inside of the door.
- Install the New Insert: Pop in the new glass piece. This step can be challenging, so measure carefully to ensure a good fit.
Materials Needed:
- New glass insert
- Screwdriver
Tip: Score around the edges of the old glass before removing it to avoid peeling paint or damaging the trim.
Seasonal Decoration Ideas
Decorating your front door according to the season can add charm and warmth to your home. Here are some easy and creative ideas for each season:
Spring
- Floral Wreaths: Use fresh or artificial flowers to make a vibrant wreath. Popular choices include tulips, daisies, and peonies.
- Pastel Colors: Paint your door in soft pastel shades like mint green, baby blue, or light pink. These colors reflect the freshness of spring.
- Garden Accents: Place potted plants or hanging baskets around your door. Choose flowers that bloom in spring, such as daffodils and hyacinths.
Summer
- Nautical Themes: Decorate with items like seashells, starfish, and rope. A navy blue and white color scheme works well.
- Bright Colors: Use bold colors like yellow, orange, and red. These colors can make your door stand out and feel summery.
- Outdoor Lanterns: Hang lanterns or fairy lights around your door. They add a cozy glow for summer evenings.
Fall
- Harvest Wreaths: Make wreaths with autumn leaves, pinecones, and berries. Add a burlap bow for a rustic touch.
- Pumpkins and Gourds: Place pumpkins, gourds, and hay bales around your door. These items are classic fall decorations.
- Warm Colors: Paint your door in warm tones like deep red, burnt orange, or mustard yellow. These colors reflect the fall foliage.
Winter
- Evergreen Wreaths: Use pine branches, holly, and berries to make a festive wreath. Add a red ribbon for a pop of color.
- Holiday Themes: Decorate with items like snowflakes, ornaments, and candy canes. A red and green color scheme is traditional.
- Twinkling Lights: Hang string lights around your door. They make a magical atmosphere during the winter months.
Tips for All Seasons
- Personal Touches: Add personalized signs or monograms to your decorations.
- Weatherproof Materials: Use materials that can withstand the elements, especially if your door is exposed to rain or snow.
- Safety First: Ensure that decorations do not obstruct the door or make tripping hazards.
By following these seasonal decoration ideas, you can keep your front door looking fresh and inviting all year round.
Common Mistakes to Avoid
When undertaking a front door makeover, it's easy to make mistakes that can affect the final result. Here are some common pitfalls and how to avoid them:
Skipping Preparation
- Mistake: Not preparing the door properly before painting or decorating.
- Solution: Clean the door thoroughly to remove dirt and grime. Sand the surface to ensure the paint adheres well. Use a primer to make a smooth base.
Choosing the Wrong Paint
- Mistake: Using interior paint or the wrong type of exterior paint.
- Solution: Always use exterior paint designed to withstand weather conditions. Choose a paint that is suitable for the material of your door, whether it's wood, metal, or fiberglass.
Ignoring Weather Conditions
- Mistake: Painting or decorating in unsuitable weather.
- Solution: Check the weather forecast before starting your project. Avoid painting on very hot, cold, or humid days, as these conditions can affect the paint's drying process.
Neglecting Hardware
- Mistake: Forgetting to update or clean door hardware like handles, locks, and knockers.
- Solution: Clean or replace old hardware to match the new look of your door. Consider modern or stylish options that complement your door's design.
Overlooking Sealants
- Mistake: Not sealing gaps and cracks around the door.
- Solution: Use weatherstripping and caulk to seal any gaps. This not only improves the door's appearance but also enhances energy efficiency by preventing drafts.
Poor Color Choice
- Mistake: Choosing a color that doesn't complement your home's exterior.
- Solution: Test paint samples on your door before committing to a color. Consider the overall color scheme of your home and choose a color that enhances it.
Inadequate Lighting
- Mistake: Not considering the lighting around your front door.
- Solution: Ensure your front door area is well-lit. Add outdoor lighting fixtures if necessary. Good lighting not only highlights your makeover but also improves safety.
Ignoring Safety
- Mistake: Using decorations that obstruct the door or make hazards.
- Solution: Ensure that decorations do not block the door or make tripping hazards. Securely attach all decorations to prevent them from falling.
Rushing the Process
- Mistake: Trying to complete the makeover too quickly.
- Solution: Take your time to do each step properly. Allow adequate drying time for paint and adhesives. Rushing can lead to mistakes and a less polished result.
Not Seeking Inspiration
- Mistake: Not looking for ideas and inspiration before starting.
- Solution: Browse home improvement websites, magazines, and social media for inspiration. Seeing different styles and ideas can help you plan a more cohesive and attractive makeover.
By avoiding these common mistakes, you can ensure your front door makeover is successful and long-lasting. Take your time, plan carefully, and enjoy the process!
FAQs About Front Door Makeovers
Discover the top FAQs about front door makeovers. Learn how to transform your entrance with expert tips and ideas.
A front door makeover can significantly enhance your home’s curb appeal. It’s often the first thing visitors notice, and a fresh, updated door can make a great first impression. Additionally, a new door can improve your home’s energy efficiency and security.
You don’t need to spend a lot to give your front door a new look. Here are some cost-effective ideas:
Paint: A fresh coat of paint can transform your door. Choose a color that complements your home’s exterior.
Hardware: Update the door handle, knocker, and house numbers for a modern touch.
Decor: Add a wreath or seasonal decorations to make your door inviting.
Selecting the right color depends on your home’s style and your personal taste. Here are some tips:
Match your home’s exterior: Choose a color that complements your siding, trim, and roof.
Consider the mood: Bright colors like red or yellow can be welcoming, while darker shades like navy or black can be elegant and sophisticated.
Test samples: Paint small sections of your door with different colors to see how they look at different times of the day.
Enhancing your front door's security is crucial for protecting your home. Here are some tips:
Install a deadbolt: A high-quality deadbolt adds an extra layer of security.
Reinforce the door frame: Use metal plates to strengthen the door frame and prevent forced entry.
Add a peephole or smart doorbell: These allow you to see who is at your door before opening it.
Maintaining your front door is essential to keep it looking fresh and functioning well. Here are some tips:
Regular Cleaning: Wipe down your door with a mild soap and water solution to remove dirt and grime. Avoid harsh chemicals that can damage the finish.
Inspect for Damage: Check for any signs of wear, such as cracks, peeling paint, or rust. Address these issues promptly to prevent further damage.
Repaint or Refinish: Depending on the material, you may need to repaint or refinish your door every few years. This helps protect it from the elements and keeps it looking new.
Lubricate Hardware: Ensure that hinges, locks, and handles are well-lubricated to prevent squeaking and ensure smooth operation.
Conclusion: The Big Reveal
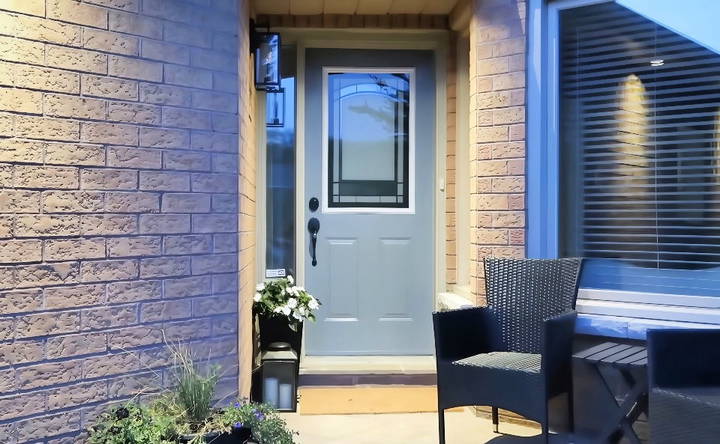
After all these changes, the transformation was stunning. The new colors, spray-painted hardware, updated trim, and modern light fixture brought everything together beautifully. But the crowning touch was replacing the glass insert, which completed the look and made it feel like an entirely new door.
The entire front door makeover was budget-friendly, and each step contributed to a cohesive and stylish front entry that now better reflects the interior of my home. The experience taught me the importance of being patient, testing colors thoroughly, and not being afraid to make last-minute changes to achieve the best results.
So, if your front door looks tired or outdated, consider giving it a fresh look with a few simple steps. It's incredible what a bit of paint, some new hardware, and creative choices can do!
What I Learned:
- Always test colors before committing.
- Spray painting can save a lot of money.
- Be ready to pivot and make changes if something doesn't turn out as expected.


