Making a DIY cloud ceiling has become a popular trend, especially among TikTok users, who are eager to transform their rooms into a dreamy, sky-like oasis. This guide will walk you through the sensational world of cloud ceilings, explaining not only what cloud ceilings are but also why they’ve captured the imaginations of so many. From the allure of drifting off to sleep beneath a softly glowing sky to the visual impact of an ethereal ceiling during daytime, discover the charm and appeal behind this innovative DIY project.
In addition to understanding the basics, you’ll learn about the materials needed and step-by-step instructions to achieve your very own cloud ceiling. Whether integrating RGBIC strip lights for a colorful ambience or opting for a serene white glow, this guide ensures a straightforward approach.
With useful tips for success and troubleshooting common issues, we aim to equip you with everything you need to embark on this creative journey. Get ready to explore the next sections for an illuminating adventure into making your very own TikTok led cloud ceiling.
Understanding Cloud Ceilings
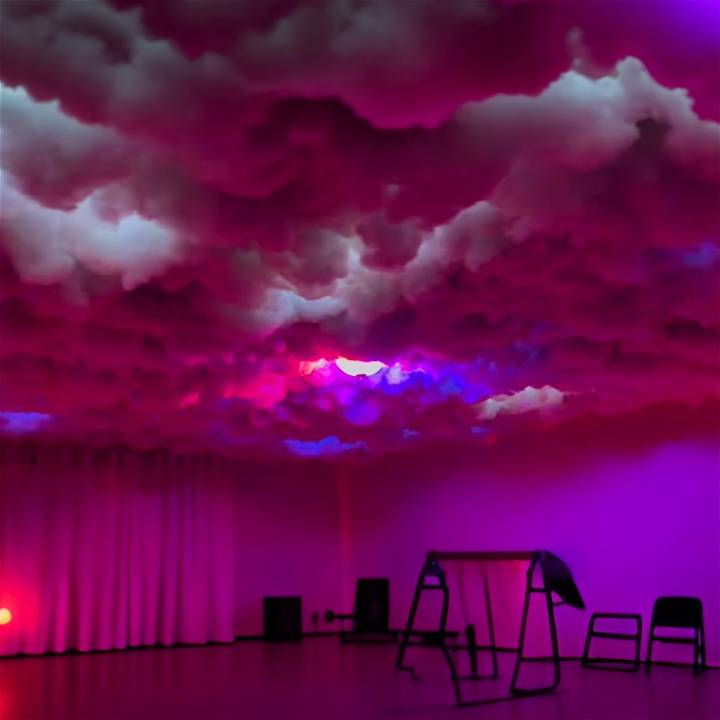
Cloud ceilings are a unique and creative way to add a touch of whimsy to any room. They can transform a plain ceiling into a dreamy skyscape, making an illusion of being under a cloud-filled sky. This section will help you understand what cloud ceilings are, why they have become popular, and the different types you can create.
What are Cloud Ceilings?
Cloud ceilings are a type of interior decoration where materials like polyester stuffing and LED lights are used to make the appearance of clouds on your ceiling. They can be customized to fit any room size and design preference, making them a versatile choice for home decor.
Why are Cloud Ceilings Popular?
Cloud ceilings have gained popularity for several reasons. Firstly, they add a unique aesthetic to any room, making a calming and dreamy atmosphere. Secondly, they are a DIY-friendly project, meaning you can make a stunning visual effect without the need for professional installation. Lastly, with the right materials and safety precautions, cloud ceilings can be both safe and long-lasting.
Types of Cloud Ceilings
There are several types of cloud ceilings you can create, each offering a different visual effect:
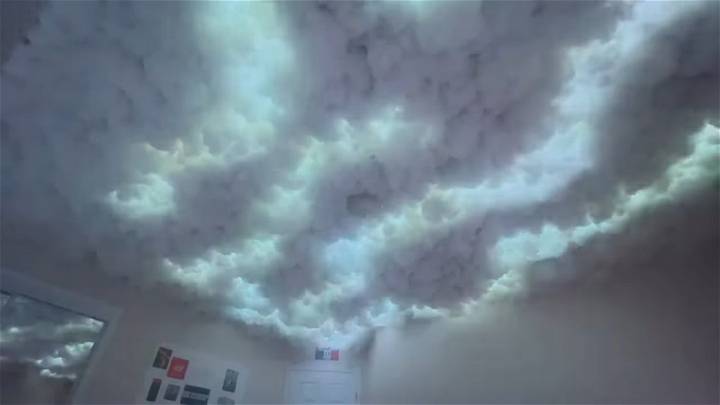
- Cumulus Cloud Ceiling: These are the fluffy, cotton-candy type clouds that we often see on a sunny day. They are perfect for making a light and airy feel in a room.
- Stratus Cloud Ceiling: These clouds are more uniform and flat, making a more subtle and minimalist look.
- Storm Cloud Ceiling: For a more dramatic effect, storm cloud ceilings use darker materials and dynamic lighting to mimic the look of a stormy sky.
The key to a successful cloud ceiling is to plan ahead, choose the right materials, and follow safety guidelines. In the following sections, we’ll delve into these topics in more detail to help you make your own stunning cloud ceiling.
Transforming your room ceiling into a mesmerizing cloud-filled sky can uplift the ambiance dramatically. This detailed guide will walk you through making your very own TikTok Cloud Ceiling, ensuring you end up with a space that not only looks heavenly but also becomes an Instagrammable corner of your home. Let’s dive into the steps you need to follow to bring this dreamy DIY project to life.
Materials Needed:
- RGBIC strip lights (Recommended brand: Govee, for its color capabilities)
- Staple gun (With staples)
- Gorilla hot glue sticks
- Gorilla hot glue gun
- Poster boards
- Polyester filling (for clouds)
Step by Step Instructions
Learn how to make a stunning DIY TikTok cloud ceiling in your room. Follow our step-by-step guide below:
Step 1: Prep Your Ceiling
Begin by stapling the poster boards across your ceiling. This provides a base for attaching your lights and clouds without damaging the actual ceiling. Opt for staples over thumbtacks or duct tape for a more secure hold, and avoid potential adhesive damage from tape in fluctuating temperatures. Remember to check which side of the poster board (glossy or matte) adheres best to your chosen adhesive.
Step 2: Install RGBIC Strip Lights
RGBIC lights allow for multiple colors to be displayed simultaneously, unlike basic RGB lights. Measure and plan out where you want your lights to go, considering how they’ll mimic the linear, diagonal lightning look. Install the lights using the controls provided, making sure to secure any loose ends with the supports included in your strip light package. If the control box is high up, consider using the remote for easy access.
Step 3: Make and Attach Clouds
Using big chunks of polyester filling, make cloud shapes. The key to a luxurious look is the size of the clouds—the bigger, the better. Apply hot glue generously to your cloud chunk and press it against the poster board on the ceiling. Hold each piece in place for about 10 seconds to ensure a firm hold. Take your time with this step to make a fluffy, cloud-filled ceiling.
Step 4: Finishing Touches
Once all your clouds are securely attached and you’re satisfied with how they look, test out your RGBIC lights. Play around with colors and patterns to make the perfect sky-like ambiance. Adjust the settings to match your mood or theme of the space.
Tips for Success:
- Take your time: This project isn’t something you want to rush. Each step requires attention and patience.
- Plan your layout: Before you start, visualize where everything will go to minimize errors.
- Safety first: When working with staples and hot glue, be cautious to avoid injuries.
Troubleshooting Common Issues:
- Lights not sticking well? Make sure you’re applying them to the glossier side of the poster board, as discovered during the sticky test.
- Clouds falling down? You may need to use more hot glue or press the polyester filling against the ceiling longer to ensure it adheres properly.
Video Tutorial
For a step-by-step visual guide on making your DIY TikTok Cloud Ceiling, watch this YouTube video.
It pairs well with this written guide, offering a dynamic and engaging way to understand the process and see the stunning results you can achieve with a bit of creativity and effort.
Transform any room with a TikTok Cloud Ceiling – a dreamy escape that captivates all. Effort well worth it for a beautiful, unique space.
Safety Precautions for DIY Cloud Ceilings
Making a cloud ceiling is a fun and rewarding project, but it’s important to prioritize safety. This section will guide you through the necessary precautions to ensure your DIY cloud ceiling is not only beautiful but also safe.
Fire Safety
The primary safety concern with cloud ceilings is the risk of fire. The materials used in cloud ceilings, particularly the lights and the stuffing, can pose a fire hazard if not properly managed. Here are some tips to mitigate this risk:
- Use LED Lights: LED lights produce less heat than traditional incandescent or halogen bulbs, reducing the risk of fire.
- Avoid Overloading Circuits: Overloading your home’s electrical circuits can lead to overheating and potentially a fire. Ensure the lights used for your cloud ceiling do not exceed the circuit’s capacity.
- Regularly Check Wiring: Regularly inspect the wiring of your lights for any signs of damage or wear. Replace any damaged lights immediately.
Material Safety
The type of stuffing material you use for your clouds can also impact safety. Here are some considerations:
- Use Flame-Retardant Materials: Some stuffing materials are more flammable than others. Opt for materials that are flame-retardant or have a low flammability rating.
- Avoid Using Cotton: Cotton is highly flammable and should be avoided. Polyester stuffing is a safer alternative.
Installation Safety
When installing your cloud ceiling, keep these safety tips in mind:
- Securely Attach Clouds: Ensure your clouds are securely attached to the ceiling to prevent them from falling.
- Use a Stable Ladder: Use a stable ladder when installing your cloud ceiling. Never stand on chairs or other unstable furniture.
Safety should always be your top priority when undertaking a DIY project. By following these precautions, you can make a stunning cloud ceiling that is both safe and enjoyable.
Lighting Options for Cloud Ceilings
Choosing the right lighting for your cloud ceiling can greatly enhance its visual appeal and make the desired atmosphere. This section will guide you through different lighting options and their pros and cons.
LED Lights
LED lights are a popular choice for cloud ceilings due to their energy efficiency and low heat output, which reduces the risk of fire. They are available in a wide range of colors, allowing you to make different moods. For example, warm white LEDs can make a cozy and relaxing atmosphere, while cool white LEDs can make a bright and energetic vibe.
RGB LED Lights
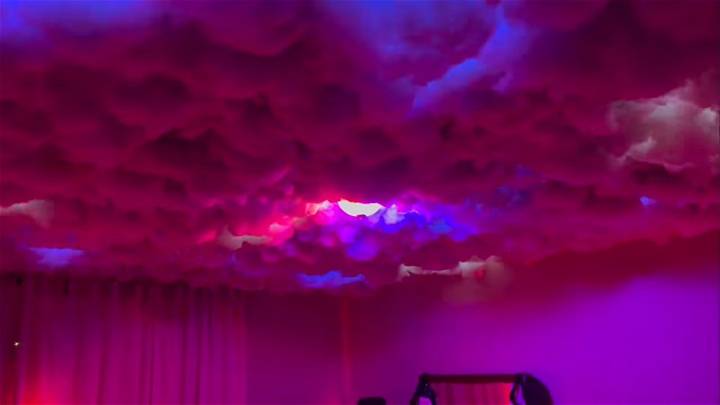
RGB LED lights allow you to change the color of your clouds with a remote control. This gives you the flexibility to alter the mood of the room at any time. For instance, you can switch to a calming blue for a relaxing evening, or a vibrant red for a lively party.
Smart Lights
Smart lights can be controlled with your smartphone or through voice commands using smart home devices. They offer the most flexibility, allowing you to change not only the color but also the brightness and even make light sequences or effects.
Fiber Optic Lights
Fiber optic lights can make a stunning starry sky effect on your cloud ceiling. They are a bit more complex to install, but the effect is truly magical, especially in dark rooms.
Always choose lights that are safe to use with the materials of your cloud ceiling, and ensure they are installed correctly to avoid any electrical issues. With the right lighting, your cloud ceiling can become a beautiful focal point in your room.
Troubleshooting Guide for DIY Cloud Ceilings
Even with the best planning, you may encounter some challenges when making your DIY cloud ceiling. This section provides solutions to common problems that you might face during the project.
Problem: Clouds are Falling Off
If your clouds are not staying attached to the ceiling, it could be due to the adhesive or the method of attachment.
Solution: Make sure you’re using a strong adhesive suitable for the materials and the weight of the clouds. If you’re using hooks or other hardware, ensure they are securely fixed into the ceiling joists.
Problem: Lights are Not Working
If your lights are not working, it could be due to a problem with the wiring or the lights themselves.
Solution: Check all connections and make sure the lights are properly wired. If the lights are still not working, they may be defective and need to be replaced.
Problem: Clouds Look Uneven or Lumpy
If your clouds look uneven or lumpy, it could be due to the way the stuffing is distributed.
Solution: Take time to fluff and spread out the stuffing evenly. You can also add more stuffing to areas that look sparse.
Problem: Clouds are Too Transparent
If your clouds are too transparent and the lights are clearly visible, it could be due to not using enough stuffing.
Solution: Add more stuffing until you achieve the desired level of opacity. Remember, it’s easier to add more stuffing later than to remove excess stuffing.
Remember, patience and persistence are key when making your DIY cloud ceiling. Don’t be discouraged by these challenges. With a little troubleshooting, you can make a beautiful and safe cloud ceiling.
Maintenance and Care for Cloud Ceilings
Maintaining your cloud ceiling is crucial to ensure its longevity and safety. This section provides practical tips on how to care for and maintain your DIY cloud ceiling.
Regular Cleaning
Dust and dirt can accumulate on your cloud ceiling over time, which can affect its appearance and potentially its safety. Here’s how to clean it:
- Use a Feather Duster: A feather duster is gentle enough to clean the clouds without damaging them. Make sure to dust regularly to prevent buildup.
- Avoid Wet Cleaning: Moisture can damage the stuffing material and the lights. Avoid using wet cloths or sprays for cleaning.
Checking the Lights
The lights in your cloud ceiling need regular checks to ensure they are working properly and safely:
- Check for Burnt Out Lights: Regularly check your cloud ceiling for any lights that are not working. Replace them as soon as possible to prevent any electrical issues.
- Inspect the Wiring: Over time, the wiring of the lights can wear out or become damaged. Regularly inspect the wiring and replace it if necessary.
Handling the Clouds
The clouds in your cloud ceiling are delicate and need to be handled with care:
- Avoid Pulling or Tugging: Pulling or tugging at the clouds can cause them to lose their shape or fall from the ceiling. Handle them gently.
- Fluff the Clouds: Over time, the clouds may become compacted. Fluff them up regularly to maintain their cloud-like appearance.
Regular maintenance and care can keep your cloud ceiling looking beautiful and functioning safely for a long time.
FAQs About Cloud Ceilings
This section addresses some common questions about DIY cloud ceilings. It’s designed to provide clear and concise answers to help readers understand and successfully make their own cloud ceilings.
What Materials are Best for Cloud Ceilings?
The most commonly used material for cloud ceilings is polyester stuffing. It’s lightweight, easy to work with, and safe to use. For lighting, LED lights are recommended due to their low heat output and energy efficiency.
How Long Does it Take to Make a Cloud Ceiling?
The time it takes to make a cloud ceiling can vary depending on the size of the room and the complexity of the design. However, most DIY cloud ceiling projects can be completed in a weekend.
Are Cloud Ceilings Safe?
Yes, cloud ceilings are safe when created and maintained properly. It’s important to use flame-retardant materials, avoid overloading electrical circuits, and regularly check the wiring and lights for any signs of damage.
Can I Make a Cloud Ceiling in Any Room?
Yes, cloud ceilings can be created in any room, but they are particularly popular in bedrooms and children’s rooms due to their dreamy and calming effect. However, they may not be suitable for rooms with high humidity, such as bathrooms or kitchens.
Do I Need Special Skills to Make a Cloud Ceiling?
No, making a cloud ceiling does not require any special skills. It’s a DIY-friendly project that involves basic crafting techniques. However, patience and attention to detail can greatly improve the final result.
Can I Use Different Colors for My Cloud Ceiling?
Absolutely! You can use different colored lights to make various effects. For example, blue lights can make a calming nighttime sky effect, while multicolored lights can add a playful touch.
How Do I Clean My Cloud Ceiling?
Cleaning your cloud ceiling should be done carefully to avoid damaging the materials. A feather duster or a vacuum with a brush attachment can be used to gently remove dust and dirt.
What If My Cloud Ceiling Doesn’t Look Right?
Don’t worry! It might take a few tries to get your cloud ceiling to look just the way you want it. Don’t be afraid to rearrange or add more stuffing to achieve the desired effect.
Can I Add Other Elements to My Cloud Ceiling?
Yes, you can get creative with your cloud ceiling. Some people add elements like stars, rainbows, or even small hanging decorations to enhance the cloud effect.
What Should I Do If My Cloud Ceiling Lights Stop Working?
If your lights stop working, first check to see if the bulbs have burned out and need replacing. If the lights still don’t work, there may be an issue with the wiring. In this case, it’s best to consult with a professional electrician to ensure safety.
Every DIY project comes with its own set of challenges and learning experiences. Don’t hesitate to seek help or do further research if you encounter any issues.
Conclusion
Wrapping up, making a DIY cloud ceiling inspired by TikTok trends can transform any room into a magical, dream-like space. With the right materials and following our step-by-step instructions, you can easily install an enchanting led cloud ceiling that will captivate anyone who sees it. Remember to incorporate safety precautions and consider the different lighting options available to enhance the ethereal effect.
Whether troubleshooting common issues or exploring advanced customization, this guide aims to make your cloud ceiling project a glowing success. Welcome the opportunity to add a touch of whimsy to your space with this creative DIY cloud ceiling.


