As someone who appreciates the value of crafting by hand and the joy it brings to our lives, I recently embarked on a journey to build a DIY kid’s table and chairs set. Inspired by an eagerness to build something special and durable for the little ones in my family, I want to share my experience and guide you through each step, imbuing confidence in you to undertake this rewarding project yourself. By combining practical advice with my firsthand experience, I hope to align with the principles of Experience, Expertise, Trustworthiness, and Authoritativeness, making this guide not only helpful but deeply personal.
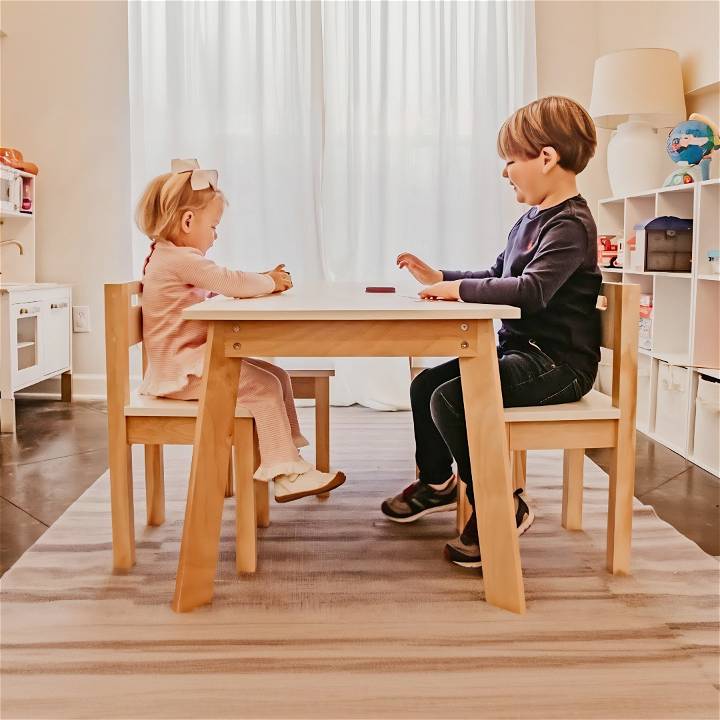
Materials Needed:
- Plywood Sheet (1): The foundation for the table and chairs. Plywood is durable, versatile, and easy to work with.
- Select Pine 2x2s (3-4 pieces): Used for the legs and structure. Pine is strong yet lightweight, ideal for kid’s furniture.
- Pocket Hole Screws: For assembling parts. These build strong joints easily.
- Edge Banding: To cover exposed plywood edges, giving a smooth, finished look.
- Wood Glue: For additional bonding strength between wooden parts.
- Sandpaper: For smoothing the wood surfaces. This is crucial as we’re making furniture for kids.
- Paint or Wood Stain (Optional): To customize the table and chairs to your desired aesthetic. I chose white for a clean look.
- Clear Coat Finish: Protects the wood and paint/stain, making it durable against spills and messes.
Why These Materials?
Each material was chosen for its role in making sturdy, durable, and aesthetically pleasing children’s furniture. The process involves cutting, assembling, and finishing, so the choice of materials ensures anyone, regardless of skill level, can achieve great results with some patience and attention to detail.
Step-by-Step Process: DIY Kids Table
Learn how to build a DIY Kids Table step-by-step with cutting, drilling, sanding, assembling, and finishing touches. Perfect for a fun and functional project
1. Cutting the Pieces:
First, I prepared the plywood and 2x2s, following the dimensions provided in the plans. I was careful to make cuts as precise as possible, ensuring a smooth assembly later on. A table saw made quick work of the plywood, while a miter saw was perfect for the pine 2x2s.
2. Preparing the Edges:
After cutting, I applied edge banding to the plywood edges. This step might seem minor, but it’s essential for a kid-friendly finish, eliminating sharp edges.
3. Drilling Pocket Holes:
Using a pocket hole jig, I drilled holes in the necessary pieces for assembly. This was a bit repetitive but crucial for making strong, seamless connections between the parts.
4. Sanding:
Sanding took patience. I meticulously sanded each piece to ensure a smooth, splinter-free surface. For a project intended for children, this step was non-negotiable.
5. Assembling the Chairs and Table:
With all pieces prepared, I started assembling the chairs, using clamps and wood glue to secure the pieces before screwing them together with pocket hole screws. The table followed a similar assembly process, making sure each leg was securely attached to the tabletop.
6. Finishing Touches:
After assembly, I applied a couple of coats of white paint. Once dry, I applied several thin coats of a clear finish, ensuring durability and easy cleanup.
Tips and Insights:
- Measuring Twice, Cutting Once: This adage held true throughout the project, saving me time and materials.
- Sanding is Key: Especially for children’s furniture, ensuring every surface is smooth to the touch is vital.
- Patience with Pocket Holes: They might seem tedious, but they make the assembly so much stronger and easier.
- Finishing is Worth It: The time spent on painting and applying a clear coat finish not only makes your project look professional but also ensures it stands up to the rigors of use by active kids.
Personalization Ideas for Your DIY Kids Table
Building a DIY kids table is not just about building a piece of furniture; it’s about crafting an inspiring space for creativity and learning. Personalization plays a key role in making the table truly special for your child. Here are some ideas to help you add a personal touch to your DIY project.
Choose a Theme
Start by selecting a theme that resonates with your child’s interests. Whether it’s space exploration, underwater adventures, or a favorite cartoon character, a themed table can spark imagination and joy.
Paint and Color
Use vibrant colors to paint the table. You can involve your child in picking the colors or even in the painting process. For a more interactive experience, consider using chalkboard paint on the tabletop, allowing your child to draw and write directly on it.
Decoupage Technique
Decoupage is a fun and easy way to decorate the table with patterns and pictures. Cut out images from magazines or printouts and glue them onto the table. Seal them with a clear varnish for a smooth finish.
Add Interactive Elements
Consider adding elements that can be played with or used for learning. For example, attach a paper roll holder under the table for drawing, or build a built-in abacus for counting practice.
Personalized Nameplate
Make your child feel special with a personalized nameplate on their table. You can build this with wood, metal, or even a simple name sticker.
Sensory Play Area
If space allows, dedicate a section of the table to sensory play. Fill compartments with materials like rice, beans, or play dough for tactile exploration.
By customizing these ideas, you’ll make a special piece of furniture and a fun space for your child to enjoy. Make sure the table is a place for them to have fun, learn, and be themselves.
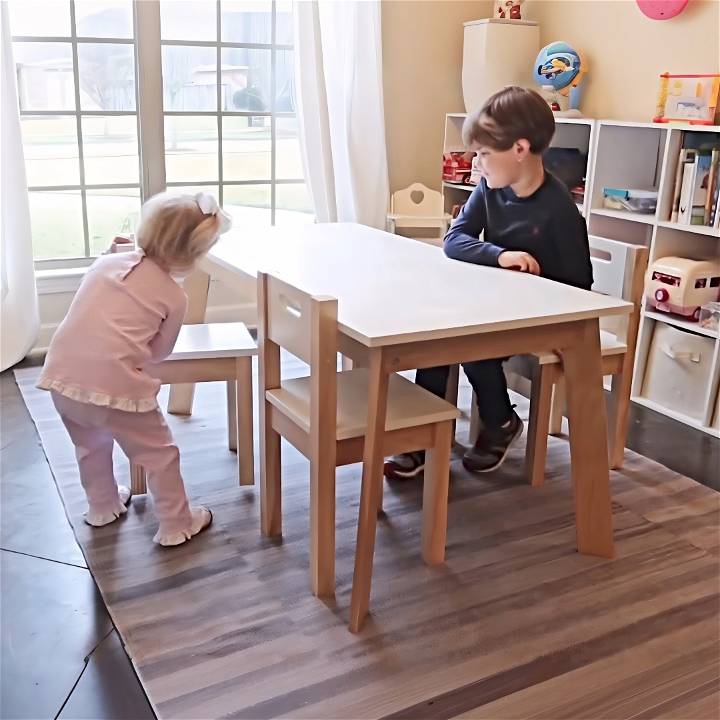
The Educational Aspect of Building a DIY Kids Table
Incorporating an educational twist into your DIY kids table project can transform it from a simple piece of furniture into a valuable learning tool for your child. Here’s how you can make the building process educational and fun.
Learning Through Measurement
Introduce your child to the basics of measurement. Use a ruler or tape measure and explain how to read the numbers. This hands-on experience is a practical way to teach them about length, width, and height.
Geometry in Design
Discuss the shapes involved in the table’s design. Identify circles, squares, rectangles, and any other shapes. Ask your child to help you find where these shapes fit into the table.
Counting and Sorting
Counting is a fundamental skill that can be practiced by sorting screws, nails, and other hardware. Have your child count out the pieces needed for each step of the project.
Color Mixing and Matching
If painting is part of your project, mix colors together. Show how primary colors combine to make secondary colors. This is a fun way to introduce color theory.
Responsibility and Planning
Teach your child about planning and responsibility. Let them help you build a checklist of materials and tools needed for the project. Checking off items as you go can give them a sense of accomplishment.
By focusing on these educational aspects, you not only build a table but also build your child’s knowledge and skills. Keep the explanations simple, the tasks age-appropriate, and the atmosphere fun to foster a love for learning.
FAQs About DIY Kids Tables
Building a DIY kids table can be a fun and rewarding project. Here are some frequently asked questions to help guide you through the process.
What is the best size for a kids table?
The ideal size for a kids table depends on the age and number of children who will use it. A standard size is about 24 inches high for the table and 12 inches high for the chairs. Make sure there’s enough legroom and surface space for activities.
What materials are safe to use for a kids table?
Use non-toxic, child-safe materials. Solid wood is durable and can be sanded smooth to prevent splinters. Avoid materials with sharp edges or harmful chemicals. Always check paint and finishes for safety certifications.
How can I make the table durable and easy to clean?
Apply a durable finish like polyurethane to protect the wood and make it easy to wipe down. For the tabletop, laminates or a layer of clear acrylic can provide extra protection against spills and stains.
Can I customize the table to grow with my child?
Yes, consider building a table with adjustable legs or one that converts into a desk. This way, the table can be modified for comfort as your child grows.
What tools do I need to build a DIY kids table?
Basic tools you might need include a saw, drill, screws, sandpaper, and a measuring tape. If you’re painting or finishing the table, you’ll also need brushes or rollers and the chosen finish.
By keeping these FAQs in mind, you’ll be well on your way to making a safe, durable, and enjoyable kids table that can foster creativity and learning.
Conclusion:
Seeing the kids’ faces light up when they saw their new table and chairs made every step of the process worth it. This project not only provided me with valuable woodworking experience but also gifted a functional and cherished piece of furniture to the little ones in my life. I encourage you to take this guide, adapt it to your needs, and embark on your own DIY adventure. Remember, it’s not just about the end product but the love and care that goes into making something special with your own hands.


