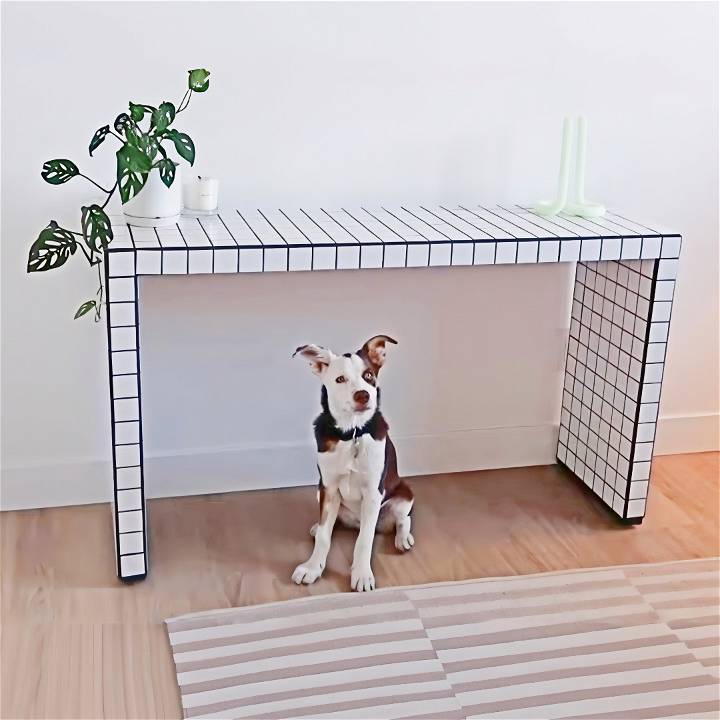
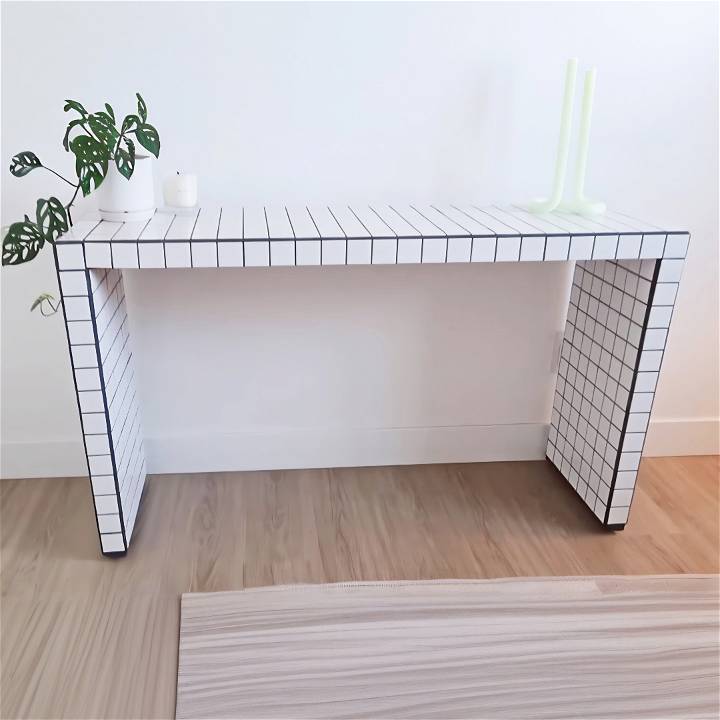
Making a unique piece of furniture by yourself can often feel like a daunting task, but I recently embarked on a DIY project to build a tile table, and the results were simply amazing. In this tutorial, I’ll walk you through the entire process, step by step, sharing valuable insights and practical advice based on my experience. Whether you’re a seasoned DIY enthusiast or a beginner, you’ll find this guide incredibly helpful. So, let’s dive in!
Materials Needed and Why
Before starting, it’s crucial to gather all the necessary materials. Here’s what you’ll need:
- Tile adhesive: Acts as the glue that binds the tiles to the table. Opt for a one-gallon bucket to avoid running out.
- Grout: Fills the gaps between tiles. I chose non-sanded grout for a grittier texture, but sanded grout gives a smoother finish.
- Float and Sponge: Essential for applying the grout and wiping away excess.
- Adhesive spreader and trowel: For evenly spreading adhesive and achieving the right texture.
- 2×2 inch tiles: Measure your table to determine the quantity needed. Purchase from a reputable store to get a good deal.
- Bucket: For mixing the grout.
- Razor blade, warm water, and vinegar: For cleaning and finishing touches.
Getting Started: Preparation is Key
First, lay down an old blanket or cardboard to protect your floor. Organize your workspace and materials for easy access. I learned the hard way that preparation can save a lot of time and headaches.
Step by Step Instructions
Build a DIY tile table with step-by-step instructions and tips for a perfect finish. Learn about the materials needed and why preparation is key for a successful project.
Step 1: Planning and Cutting Tiles
Measure your table and plan the layout of your tiles. If necessary, cut tiles to fit the edges or specific designs you have in mind. Remember the saying, “Measure twice, cut once.” This step ensures that you won’t have any unpleasant surprises later on.
Step 2: Applying Adhesive and Laying Tiles
Apply a thin layer of tile adhesive using the spreader. Be careful not to lay it on too thick to avoid lumps. Place your tiles onto the adhesive gently without pressing too hard, allowing room for adjustments. I learned that patience in this step pays off in a smoother and more professional-looking finish.
Step 3: Grouting
Once the adhesive has dried (ideally overnight), mix your grout to a peanut butter consistency. Fill the gaps between tiles using a float, holding it at a 45-degree angle. Wipe any excess grout off with a sponge and warm water. This step was crucial for achieving a clean look. Be prepared to change the water frequently to avoid grout haze.
Tips for a Perfect Finish
- Corners and Edges: Pay extra attention to corners and edges when grouting. They are pivotal in achieving a crisp, professional look.
- Cleaning: After grouting, clean the entire surface with a blend of warm water and vinegar. This step is essential for removing any grout haze and making your table shine.
Price Breakdown and Savings
DIYing this table saved me a significant amount of money. Here is a quick breakdown:
- Furniture Base: $30
- Materials (Adhesive, grout, tiles, etc.): $112
- Total Cost: $142
Compared to a $2,000 designer piece, I saved over $1,800! Plus, the sense of accomplishment was priceless.
Decorating and Styling Your DIY Tile Table
Building a DIY tile table is not just about assembling and grouting; it’s about infusing your personality into a piece of furniture that stands out in your home. Here’s how to decorate and style your tile table to make it a focal point of admiration.
Choosing Your Style
- Reflect Your Personality: Your tile table should be a reflection of you. Are you vibrant and colorful, or do you prefer muted, earthy tones? Choose tiles that represent your style.
- Mix and Match: Don’t be afraid to mix patterns and colors. A bold, geometric design can become a conversation starter.
- Keep It Classic: For a timeless look, stick to monochromatic tiles. They blend seamlessly with any decor and exude elegance.
Adding Decorative Elements
- Plants: Greenery brings life to any space. A small potted plant or a vase with fresh flowers can add a touch of nature to your table.
- Books: Stack a few of your favorite books for an intellectual touch. They invite guests to peek into your interests.
- Coasters: While tile tables are durable, coasters add a functional decorative element. Choose coasters that complement your table’s design.
Lighting
- Ambient Lighting: Place your table near a light source to highlight its beauty. Soft, ambient lighting can enhance the tile’s color and texture.
- Candles: For evening ambiance, add a few candles. They build a warm, inviting glow that dances across the tiled surface.
Maintenance Tips
- Easy Cleaning: Tile tables are low maintenance. Wipe spills with a damp cloth, and they’re as good as new.
- Regular Care: Clean the grout lines occasionally to keep your table looking pristine. A simple grout cleaner does the trick.
By following these tips, your DIY tile table will not only be a testament to your crafting skills but also a cherished piece that enhances your living space. Enjoy the process and the result!
DIY Tile Table FAQs
Get answers to your DIY tile table questions with our comprehensive FAQs. Learn how to build a stunning tile table for your home.
What materials do I need to build a DIY tile table?
To start your DIY tile table project, you’ll need a table base (which can be new or used), ceramic tiles, tile adhesive, tile grout, sanded caulk, tile spacers, grout sealer, a tile cutter or tile saw, and a wet saw (optional, but recommended for precise cuts). Additionally, have a paintbrush, tape measure, pencil, ruler, level, and a clean cloth on hand.
Can I use any table as a base for my tile table?
Yes, you can use any sturdy and flat table base, whether it’s an old piece you have at home or a new one you’ve purchased. The key is to ensure it’s clean, free of debris, and sanded down to help the adhesive bond better.
How do I prepare the table base for tiling?
First, clean the table base thoroughly and sand it to build a surface that the tile adhesive can adhere to effectively. If the table base has a previous finish or paint, remove it before sanding.
How long does it take for the tile adhesive and grout to set?
After applying the tile adhesive, you should allow it to set for at least 24 hours before placing the tiles. Once you’ve applied the grout between the tiles, it typically takes about 48 to 72 hours to dry completely. It’s important to avoid any contact with water during this time.
Can I customize the design of my tile table?
Absolutely! You can get creative with the color combinations and tile patterns. Plan your layout before you start to ensure a cohesive design. If you’re feeling adventurous, you can even paint the table base after completing the tile work to match your decor or give it a unique look.
Final Thoughts
This project taught me a lot, not just about tiling, but also about patience and attention to detail. The final product was not just a table; it was a testimony to what you can achieve with a bit of hard work and creativity. If you’re looking to undertake this project, remember to enjoy the process. Every step, from planning to the finishing touches, is an opportunity to learn and build something truly unique.


